DIY Candy Crate | Project Using Black Electrical Tape
The project today is for the granddaughters. The DIY Candy Crate makes me smile and I bet it makes them smile too. The supplies for the project are all new…….and best of all….inexpensive.
I like to do projects every now and then that don’t involve junk or reclaimed objects. I know some of you guys may not have a junk stash to work with. New is good too.
Note: This post may contain affiliate links. If you click a link and choose to make a purchase from the partnership site, the price will be the same but will share some commission.

DIY Candy Crate
I decorated the mini wood crate with a mummy design for Halloween and the decorations can be changed with the seasons/holidays. Reuse and Recycle! The crate is holding a mason jar filled with my favorite Halloween treat…..candy corn and salted peanuts. Ever had this?

How To Make a DIY Candy Crate
Before starting on a project I like to gather the supplies I need to complete the project. That way if I’m missing something I can find a substitute in the workshop or I can run to the store and get what I need. Most projects don’t take long to complete and once I’m on a roll I don’t like to stop.
Project Supplies:
Mini Wood Crate (similar)
Black Electrical Tape
Adhesive Wiggly/Googly Eyes
White Spray Paint

Step 1. Spray paint the wood crate.
I applied several coats of paint allowing the paint to dry in between coats.

Step 2. Apply the black electrical tape
You can make any design on the crate. It took me about 1 minute to make my design. You just want it to look mummy like.
Step 3. Stick on the googly eyes.

The googly eyes are adhesive so no hot glue or anything. I placed pairs of eyes on the electrical tape and just on the white paint too. The googly eyes are all different sizes. Have fun with it.
Step 4. Add a mason jar of candy or candy bars to the DIY candy crate.
I filled a mason jar with my favorite Halloween treat of candy corn and salted nuts. Taste just like a Payday candy bar. Have you had this treat? Yum.

On the opposite side of the crate I added a set of googly eyes and a strip of electrical tape for the mouth…..ghost or goblin.

The crate would also look cute painted orange and decorated as a pumpkin. A handle would look cute too. Now I”m on the hunt for a handle.
Take a tour of my past Fall/Halloween projects by clicking the photos or the pink text links below.
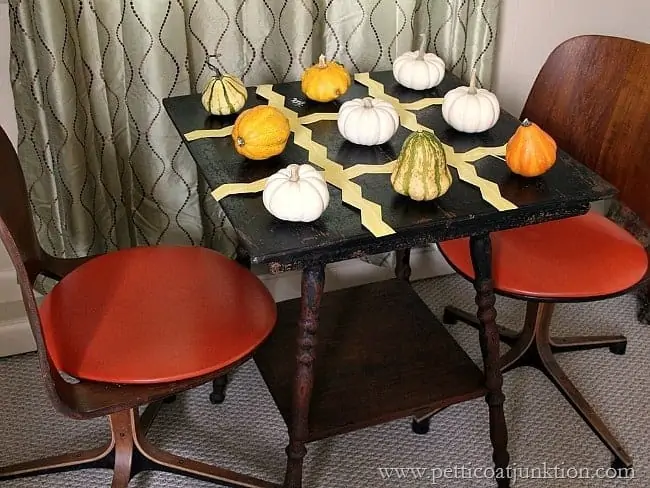
Pumpkin Tic Tac Toe Table

Vintage Frame and Googly Eyed Treats
I hope you enjoyed the tour. I’ll see you next week! Kathy

Author: Kathy Owen
Kathy Owen is the founder of the home decor blog Petticoat Junktion where she shares tutorials on painting furniture and upcycling thrifty finds into unique home décor. Her DIY projects have been featured on the Home Depot Blog, Plaid Crafts, Behr Designer Series, and in numerous magazines. Kathy’s newest website is HappyHomeDIY.com
Thanks!
This is so adorable! I have one of these mini crates, so I need to decorate it for the seasons!
Very cute and original idea! I hope you’ll share your craft with us at #thecraftycorner link party this week. Have a good day!
Really cute Kathy – love it!