How To Decoupage Flower Pots With Home Address
It’s easy to decoupage flower pots with home address numbers using fabric or paper. This address sign idea is great for a number of reasons. Display the flower pot on your front porch, deck, patio, or anywhere on your lawn.
This is a fun and creative way to display your home address on your front porch or elsewhere on your property so it can be seen from the street. The painted and decoupaged flower pot is fabulous looking and easy to customize to your decor. We all know it’s important to display your address in a prominent place so emergency vehicles, delivery drivers, and of course, friends can find you.

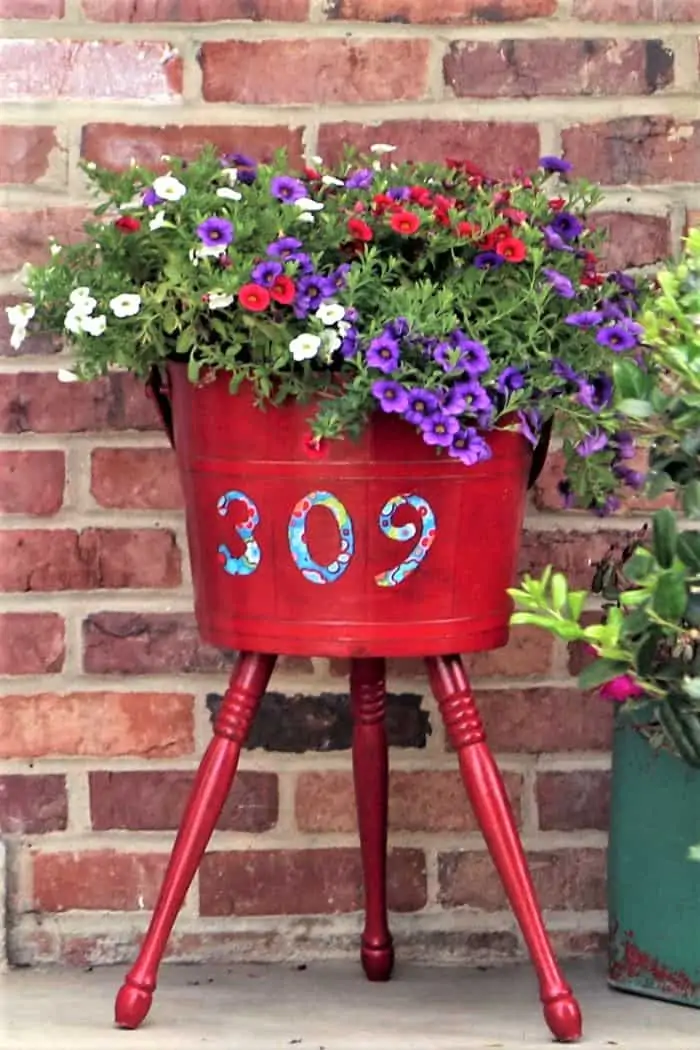
The decoupaged numbers on the red planter are a nice contrast and can be seen from the street. The project isn’t a bit difficult, just a little time-consuming considering the drying time for the paint and the Mod Podge. You will love how decorative it is and also budget-friendly. The planter is a vintage bucket-style table made to hold sewing supplies.
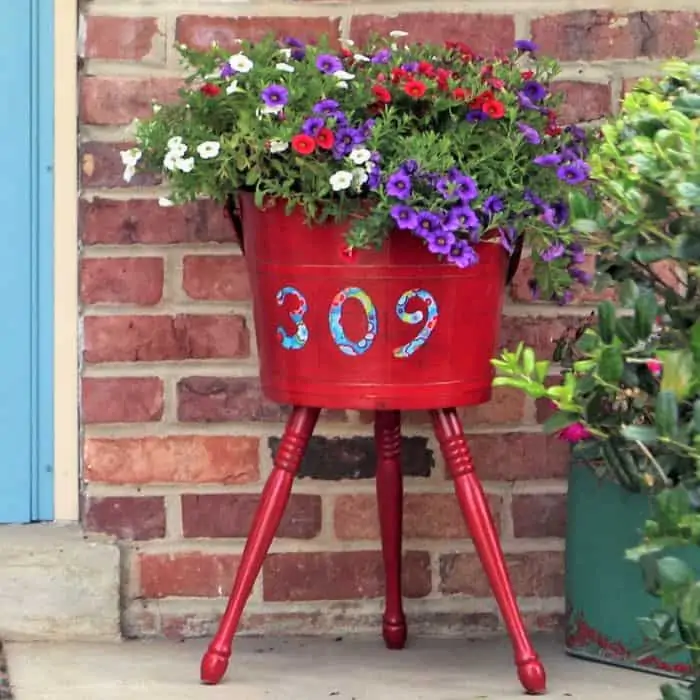
I painted the flower planter a bold red and sealed it with Mod Podge Outdoor Formula to protect it from the weather. The paint is Delta Ceramcoat, and the color is regal red. Don’t you just love blue and red together? Since our front door is blue, I selected the red for an over-the-top wow factor. Adding the address numbers was a stroke of genius. Patting myself on the back.

source: flickr
My inspiration for the project is this flower tower I spotted on Pinterest. I loved the tower but found the bucket table and decided to use it instead. The home address on the flower pot was my main purpose for the project.

I found the bucket table at my local flea market/antique shop. It was a good buy at $12. My grandmother had one of these, and she sewed and quilted all the time. I have several of her quilts and I am so proud to have them. I miss my grandmother. It’s true. You wish you had spent more time and shared more things with your loved ones after they are gone.

Now for the nitty-gritty. Once the table was all cleaned up with Simple Green I turned it upside down and started painting from the bottom up.

I brushed on two coats of paint. Once the paint was dry I distressed the table all over using a sanding block. Do you see all the dull rubbed areas where I distressed the paint? That goes away when the piece is sealed.

Instead of using wax, I sealed the paint with Mod Podge Furniture Gloss . For years I did not realize you could use Mod Podge as a sealer. I sure wasted a lot of money on cans of sealing products.

I didn’t want just plain old stenciled numbers on the flower container. The beautiful floral print fabric with red, turquoise, and yellow flowers was in my stash. Why not use it to make the address numbers? To make the numbers, I turned the fabric to the back side, flipped the number stencils over, and outlined them with a pencil. Cutting them out was hard because the fabric is so soft and flexible. You could also do the decoupaged numbers using paper. Something with body like scrapbook paper.

I applied Mod Podge For Fabric to the numbers and adhered them to the table/planter. Did you know about the fabric formula from Mod Podge? There is also an antiquing formula, a glitter formula, a paper formula, and …..that’s all I can name off the top of my head. Who knew there were so many kinds of Mod Podge?

After the numbers dried I brushed a coat of the Mod Podge for Fabric over them. Once all of the Mod Podge was dry, I covered the numbers with….

Mod Podge Outdoor…..yet another formula. This one can be used to protect projects in a covered or sheltered outdoor area. It is not waterproof. That works fine because my address planter will be sitting on my covered front porch.

I applied three coats of the outdoor formula allowing each coat to dry before applying the next coat.

Waiting on paint, Mod Podge, glue, or whatever to dry is the most time-consuming part of any of my makeovers. I try to work on other things during the wait. For this project, I went to the store and found the pretty red, white, and blue flowers for the pot. Makes the waiting easier and also keeps me from rushing the project.
Pretty. The furniture gloss formula really makes the red paint pop, and the outdoor Mod Podge formula protects the planter from the weather.

The red address planter adds curb appeal and has our street address. Having your street address prominently displayed is a good idea. You want Publishers Clearing House to be able to find you.
You must see my flag project since the Fourth is coming up soon. I made a video for you ………..
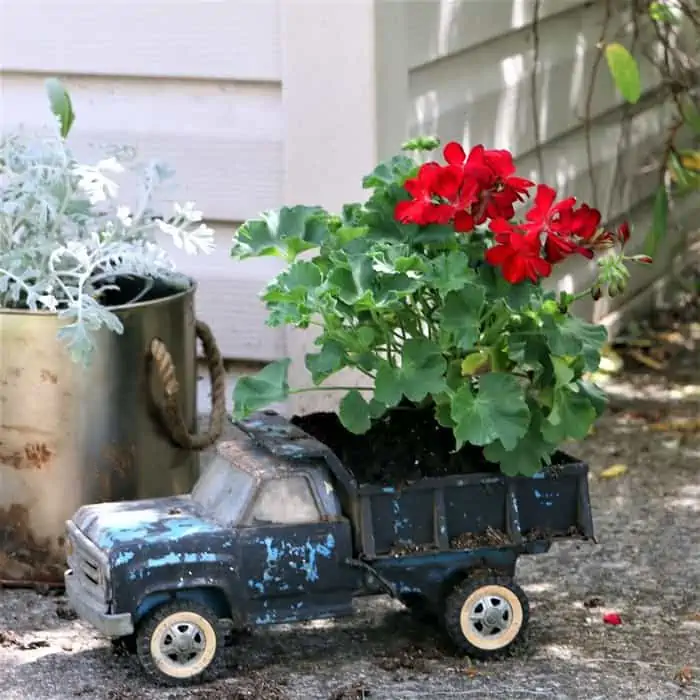
What do you think of my toy truck planter above?? If you like unique ideas, you will love my junky finds turned into flower planters here…..Upcycled Flower Pot Ideas: Mop Bucket | Tree Stand | Toy Truck | Juice Strainer

You can see my reflection in the glass door in the photo above.

How To Decoupage Flower Pots And Display Home Address
Any questions or comments, just leave a note below. As always, thanks for being here, Kathy
Disclosure: I partnered with Plaid Crafts on this post. All words, project ideas and photographs are 100% my own.

Author: Kathy Owen
Kathy Owen is the founder of the home decor blog Petticoat Junktion where she shares tutorials on painting furniture and upcycling thrifty finds into unique home décor. Her DIY projects have been featured on the Home Depot Blog, Plaid Crafts, Behr Designer Series, and in numerous magazines. Kathy’s newest website is HappyHomeDIY.com