DIY Bingo Game Table
The Bingo Game Table project was such fun. I love the colors, the design….everything. It’s one of those days when I’m smiling and patting myself on the back.

Nothing prettier than red, white, and blue. This table has been through so many changes, you wouldn’t believe it. I came across the Bingo Stencil from Old Sign Stencils. The owner and designer of Old Sign Stencils is Donna from Funky Junk Interiors. Bet you’ve heard of her. I’m a big fan.
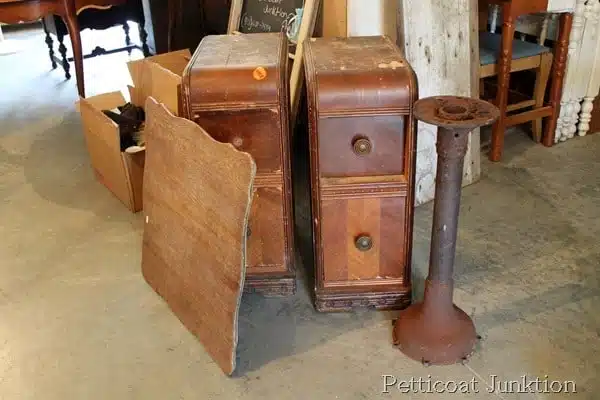
The table started like this back in 2013. Two reclaimed parts came together to make a unique little table. The wood piece to the left just happened to be a tabletop at one time. The rusty iron thing on the right is a car part. The JTS attached the car thingy to the reclaimed table top. It took about 10 minutes for him to put the two pieces together.

I paid $11 for both parts. The car part looks all rusty but the rust doesn’t come off on your hands. I applied two coats of clear wax anyway, just in case.
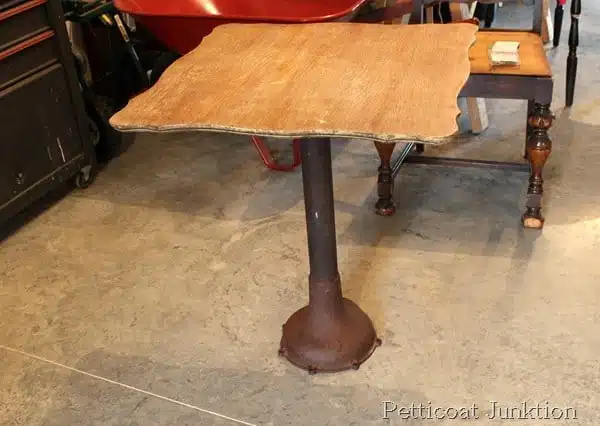
What do you do with a rusty car part besides making a table? It’s pretty darn awesome.
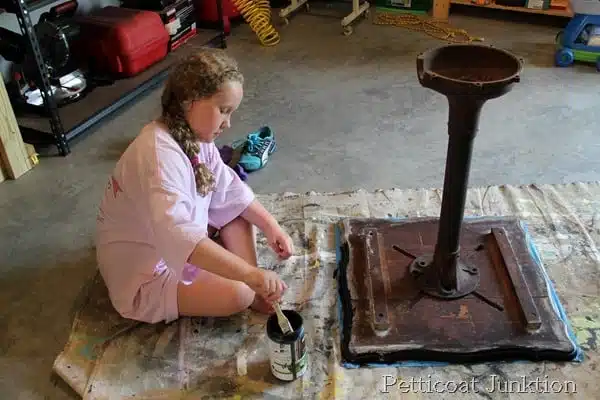
Back when we put the table together, our oldest granddaughter, Tenley, claimed it for herself. She painted the tabletop purple. Tenley moved up to a bigger table in the workshop a year ago, and I claimed the purple table as extra workspace. I made a mess of it with paint drops and spills, Mod Podge, etc.
I finally painted the table this pebble color about a month ago (photo above), thinking I would sell it in my booth. Well, I made a mess of it again.

Moving on to the bingo game table project. I painted the table a beautiful blue. I have no idea what the color is. The quart of paint was on the oops shelf at Home Depot, and the price was $2. Win-Win.

Then I stenciled the Bingo design in red and white. I dressed that little table right up.

The bingo game table would be perfect in a den or maybe a man cave. I’m going to take you through the whole process of stenciling and distressing the table.

The stencil from Old Sign Stencils and is a layered stencil….meaning it has two parts. Don’t let that make you nervous.

I taped the first part of the stencil to the table using Frog Tape painter’s tape. I eye-balled, centering it on the table. No perfection here. Do you see the two triangle-shaped cutouts at the top of the stencil? Those are register marks. I used a pencil and marked the location of the triangles on the table. Those marks come in handy later.

I applied Beyond Paint in off-white to the first stencil layer. I don’t think using paint made specifically for stenciling is necessary. It just costs more. You can find all of my stenciling tips here.
The most important tip is to use a very, very dry paint brush….meaning wipe most of the paint from the brush before you stencil. That’s why you see the shop towel to the side there where I’m stenciling.

One layer done. You can see that I didn’t worry about getting a solid white layer of paint on the numbers. That’s because I’m going to distress the painted stencil design, and there is no reason to use extra paint and do extra work when the paint is just coming back off.

Now it’s time to add the second layer, which includes the “Bingo” and “Free Space”. This is where I aligned the triangles on the second layer with the pencil marks I made on the table from the first stencil. It makes it easy to keep everything lined up.

I decided on the pretty Imperial Red acrylic paint color I used to paint Rudolph’s nose for the second “Bingo” layer.

The JTS took a few pictures for me. He walked into the workshop at just the right time. You guys should see me holding a camera in one hand and a paint brush, or drill, or sander, in the other—the life of a DIY blogger.

He got this shot of me pulling the stencil up. Removing the stencil before the paint dries from the project is important. If not, you might remove some of the paint with the stencil.

How pretty is that! If you like the straight regimented look, then this is perfect. If not, you can distress the stencil like I did.

I used 150 grit flexible 3M sandpaper and lightly distressed the whole stencil.

Then I heavily distressed the edges of the table and some of the inner areas too.

This is how the table looked after being distressed. The paint is a little hazy in the distressed areas. Let me show you how to fix that.

I applied a coat of Howard’s wax in golden oak to slightly age the paint and stencil. The wax also takes care of the hazy look. You can use neutral/clear wax instead of colored wax if you don’t like the aged look.

The distressing on the stencil is very light, or what I call light. It does give another depth to the stencil when everything is perfect looking. Perfectly imperfect is better.

And that’s the whole process. A lot of steps but a really quick technique. I didn’t time the stencil process but I would say it took less than an hour, including drying time. The thin layers of stenciled paint dry really fast. You can also speed up the drying time by using a hair dryer.
If you liked this project, you should see the jewelry box I stenciled with tile designs here. That’s it! Thanks for being here and have a great day, Kathy

Author: Kathy Owen
Kathy Owen is the founder of the home decor blog Petticoat Junktion where she shares tutorials on painting furniture and upcycling thrifty finds into unique home décor. Her DIY projects have been featured on the Home Depot Blog, Plaid Crafts, Behr Designer Series, and in numerous magazines. Kathy’s newest website is HappyHomeDIY.com
Thank you for sharing. Pinned and shared. Have a lovely week. I hope to see you at next week’s party too! Please stay safe and healthy. Come party with us at Over The Moon! Catapult your content Over The Moon!
Thanks Gwen
That’s awesome!
I love it! Our family has the tradition of playing Bingo every Christmas, so this table looks pretty special to me!
Love how the table turned out!
i love upcycling anything, especially old car parts! i once made a lamp but that’s been years! your table turned out really cute – good job!
Love it. And it took me back to my 4 aunts playing bingo at the armory 2x a week in the 70s.