How To Use Mod Podge On Fabric Tutorial
You can use Mod Podge on fabric, paper, wood, plastic, ceramics, terra cotta, and almost anything! I love using fabric on furniture, and Fabric Mod Podge makes it easy. Mod Podge dries clear and is permanent. My favorite thing to decoupage or Mod Podge is furniture, but the decoupage process is the same for home decor, etc.
There are so many formulas of Mod Podge and most of them are interchangeable, meaning you can use regular Mod Podge for fabric or paper or whatever. I’ve also heard Mod Podge pronounced as Modge Podge. Whatever works!
Mod Podge Is Similar To White Craft Glue And Is A Sealer
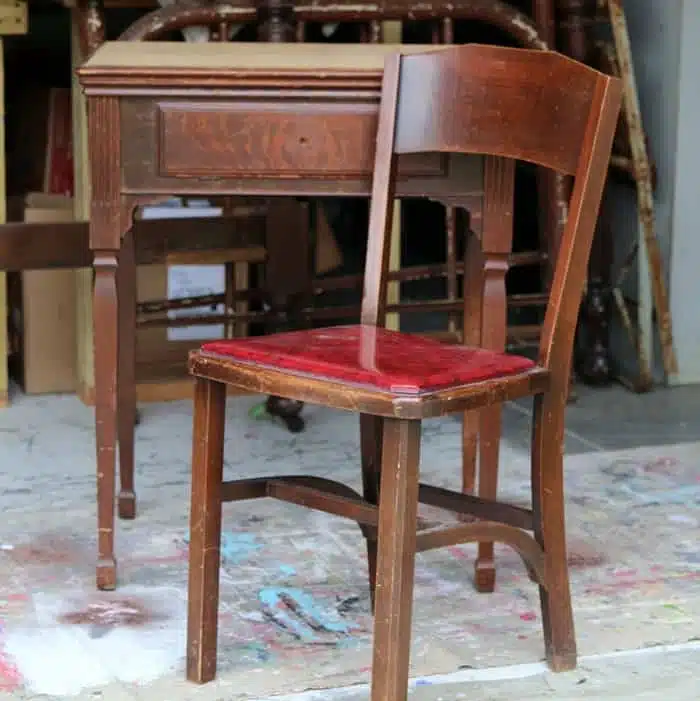
Remember the $2.50 sewing machine I bought at auction? The makeover is complete. I transformed the piece into a desk and added a matching chair. I used Mod Podge ® and bold floral fabric to cover the messed-up top of the cabinet.
First, I will show you how I decoupaged the fabric to the top of the sewing table, and then I will show you how I prepped and painted the cabinet. Backward, but that’s me.
Mod Podge or Decoupage Fabric To Furniture

The fabric is a remnant I bought a while ago. It was $2.67. You never know when a good find will come in handy. I try to ensure the remnant is large enough to cover one chair seat.

The first thing I do when using fabric in a decoupage project is to wash and dry the fabric, then coat it with Fabric Mod Podge. This is the perfect answer to the problem of frayed fabric ends.
I used my Mod Podge brush to apply a heavy coat of Fabric Mod Podge to the fabric on the top side. (It probably doesn’t matter what side you Mod Podge.)
I let the fabric dry thoroughly, then cut it to the size of the sewing cabinet top. You can see the cut edge of the fabric in the top right bottom photo. No fraying. Fabric Mod Podge is also great for fabric-to-fabric decoupage. It is permanent when cured, and the items can be washed by hand.
Hard Coat Mod Podge
I pulled the Hard Coat Mod Podge formula from my product stash. The Hard Coat formula is great to use on surfaces that will be handled frequently or in high-traffic areas, like bookshelves and furniture.

I first brushed a heavy coat of the Hard Coat on the top of the cabinet and then brushed a heavy coat on the back of the fabric. I find it’s best to cover both surfaces with the Mod Podge before putting them together. More Mod Podge is better than too little.
I worked any bubbles out using the Brayer tool. The fabric will be wet for a while. The drying time for the Mod Podge depends on temperature and humidity. The fabric dried to the top with no bubbles. Doing the happy dance.

After the Mod Podge dried thoroughly, I applied three coats of Hard Coat Mod Podge over the fabric to seal and protect it from damage. The Mod Podge needs to dry thoroughly between coats. I waited overnight to reapply.

The front of the cabinet folds down to reveal a small storage area. It’s just big enough for pencils, pens, and maybe a few small pieces of chocolate.

The Hard Coat Mod Podge cleans up easily when wet with soap and water. It can be sanded to a smooth finish, but I didn’t sand it. The finish has a slight texture but nothing dramatic.
Thanks to Fabric Mod Podge, the fabric edges are clean and straight, too. What young girl wouldn’t love this desk and chair? You could also use Mod Podge Glitter to add a little sparkle.
How To Repair And Paint A Sewing Cabinet

The sewing machine cabinet had a lot of issues. I removed the machine myself. The JTS is always helping me, and I gave him a break on this one because he wasn’t feeling well. I peeled off the veneer on the top of the cabinet because it was mostly loose anyway.

The JTS screwed the foldup top of the cabinet to the base so it would not open. Now, it’s just a desktop instead of an opening for the sewing machine.
The top was rough where the veneer was removed. I used the electric sander to smooth it out. You can see all the dust from the sanding on the top edges.
Next, I found some white paint in my stash. Still trying to use the paint I have on hand. The only paint I buy these days is the oops paint at local hardware stores when I find a good color.

The paint I chose for the project is Delta Ceramcoat Chalk/Matte, color White Lace. As you can see in this photo, one coat of paint wasn’t enough.

I didn’t notice until I started painting the cabinet that there was a big hole where I removed some of the working sewing machine parts.
I had the JTS cut a piece of board to fill the hole, but I forgot to get a photo before I took it to the shop to sell. I’ll try to get a photo if the cabinet isn’t sold. I like to be thorough in my photo stories.

I lightly distressed the paint by hand using flexible 150 grit sandpaper. I think you are supposed to wax this paint, but I didn’t, and it’s fine.

The last order of business for the table was to add a pull. The front of the cabinet had a small drawer area that flipped down, but the knob was missing
. When I tried to put a knob in the hole, I found the hole didn’t go all the way through the wood. That’s not a problem. I just grabbed the drill and finished up the hole.

I found this knob at Hobby Lobby, and as you can see, it matches the fabric I used to cover the chair seat and decoupage the top of the cabinet.

That’s the paint stuff for the sewing machine cabinet, and I shared the decoupage tutorial at the beginning of the post.

I bought this chair, or the JTS did it at auction. I can’t remember, but I’m sure it cost less than $5. Removing the seat is easy; flip the chair upside down and remove the screws to the seat.

I wanted a nice contrast to the cabinet, so I chose black paint for the chair. The paint is FolkArt Home Décor Chalk, which covers in one coat. Nice.

I distressed the paint by hand using flexible sandpaper and sanding the paint very lightly.

I did wax the chair because a black chalk finish or matte paint is bad for showing chalky white fingerprints and other things when you don’t wax it. The wax I used is also FolkArt Home Décor.

You guys have seen me cover a chair seat a bunch of times. If you need a tutorial, you can find it here….How To Re-cover A Chair Seat.

Only thing left to do is put the seat back on the chair.

Now you have all the details on the sewing cabinet makeover. I forgot to mention that I bought my fabric remnant at Hobby Lobby.

The difference between the before and after is like night and day. Maybe you don’t have anything to be painted or Mod Podged! What about the makeover? Do you guys like it? Did I inspire you to decoupage something?
The supplies for this project can be found on Amazon; click the pink links below:
Hard Coat Mod Podge
Fabric Mod Podge
Mod Podge Tool Kit
Professional Decoupage Tool Kit
Disclosure: This post is sponsored by Plaid Crafts as part of the Plaid Creators program. All words, project ideas, and photographs are 100% my own.

Author: Kathy Owen
Kathy Owen is the founder of the home decor blog Petticoat Junktion where she shares tutorials on painting furniture and upcycling thrifty finds into unique home décor. Her DIY projects have been featured on the Home Depot Blog, Plaid Crafts, Behr Designer Series, and in numerous magazines. Kathy’s newest website is HappyHomeDIY.com
Prayers from New Mexico for your dad, and condolences to all on the loss of your mom. Your dad is a lucky man to have his “girls” taking care of him. God bless.
Hi Kathy,
I am sorry for the loss your family has endured together, and the further difficulties that you are weathering. Eight years ago I was in the same place. You should know that there will come a time when you look back with gratitude that your family was one that could be made even stronger together by these shared weeks. Sad times are still part of the important times in the life of a family.
I always enjoy your posts. Thanks for keeping it real. By doing so you encourage others (me) to believe in themselves and dive into a new project with confidence.
You are amazing, Kathy. Sincere prayers for you and yours. Stay strong
This post came at a perfect time! I have been working on an old silverware chest and it is taking me forevvver! I finally got to lining the inside and wasn’t sure about how to stick the fabric to the wood. Well, girlfriend you made my day! Mod Podge is the bomb!! I am finishing up with the lining and it looks great. Thanks for such a good tutorial. Prayers for you and your family on the loss of your mother and that your father continues to get well and strong. I’m so sorry your holidays were met with such sadness. Blessings for a healthy and happy 2021!
Hi Kathy,
I was so saddened to hear of the loss of your mom. My condolences to you and your family.
I’ve also been really worried about your dad’s health and have been wondering how he’s doing. I was so glad to hear that he’s out of the hospital. I think it’s great that you and your siblings are taking care of him. Definitely the best choice for him.
I always enjoy reading about your painting adventures. Very inspiring!
Take care,
Denise
I am sorry you lost your Mom and that your Dad has been ill. Sending prayers for continued healing.
Did you notice the name on the fabric? “GET HAPPY”.
No wonder this project made you happy.
I never knew there was a Mod Podge for fabric! I always thought there was only one kind – I learned something new. My sympathy for the loss of your Mom. You are wise in keeping your Dad out of any traditional rehab centers now. We have lost so many friends that have contracted the virus inside of a rehab facility. I’ll keep you and your family in my prayers.
Hi Kathy,
So sorry to hear about your mom and the difficulties your father is having. Good for you to be able to take care of him with your siblings. It is a great deal of work. But so worth it and you will have no regrets. I enjoy your posts and your joy from the projects. Thank you for sharing.