$2 Wood Chair Back Becomes A Shabby Chic Wreath
How to make a shabby chic wreath using a reclaimed chair back and a small grapevine wreath.
I found an antique chair back and the white paint was really chipping off. Thinking outside of the box the shabby chic wreath idea was born.

Shabby Chic Wreath
Today is Thrift Store Decor Day and I looked at the before photos of all the projects. There are some really neat finds and I’m excited to see how they were transformed. But first let me show you how I put the shabby chic wreath together.

This is the chair part I bought for $2. When I first spotted it the wreath idea spring to mind.

The JTS wasn’t home when I started on the wreath and I grabbed the saw I use with the miter box to cut the chair apart. It was slow going.

The JTS showed up and asked why I wasn’t using my small battery powered circular saw. Well, because I always forget about it.

It took me about 30 seconds to cut both of the legs off of the chair back using the circular saw.

The white paint was really chipping off and I applied a coat of clear wax to the chair.

I first used a brush to apply the wax but moved on to my usual lint free cloth. You can see how the paint was coming off as I rubbed the wax on the chair. I was hoping all of the paint didn’t come off. It didn’t. Once the wax dried I buffed it with a clean lint free rag.

Next I went to find this small grapevine wreath or maybe I should say partial grapevine wreath.

The wreath has featured flowers, starfish, birds, ribbons, and more, and hung in just about every room of the house.

I used a piece of jute to tie the wreath to the chair back. Now to find a flower.

The artificial hydrangeas were in a plastic bag in my flower stash. The flowers were once in a vase type display.

I bought the vase of flowers at a yard sale in Pensacola years ago. It was $1. I always liked it and brought it home to Tennessee when we moved back. It’s decorated every room of the house at one time or another. Do you guys have things like that, things you just love for some unexplained reason?

I picked out a couple of the blooms and a leaf to add to the grapevine wreath.

I learned the hard way to use a popsicle stick or something similar when working with hot glue. I have no fingerprints because of hot glue projects. I could do something illegal and they would never catch up with me.

Last thing to do…..hot glue the flowers to the wreath.

The right combination of junk treasures make the perfect shabby chic wreath!

The wreath looks nice hanging against our front door. The looseness and almost coming apart look of the grapevines is what I like most about the little wreath.

One more look at that chippy paint. The wax helped with the chipping problem but I don’t think I would hang the wreath in the house. The paint may chip more and I’m pretty sure it’s lead based paint.

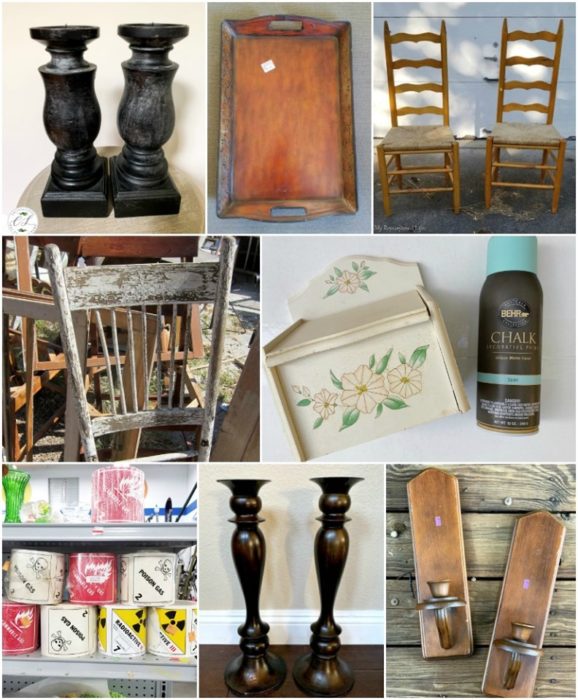
What do you guys think of the small wreath hanging on the antique chair back? Leave a note for me and head out on the tour. Just click the pink text links below the “before makeovers” photo collage……
DIY Rustic Candle Holders Our Southern Home
Buffalo Check Fall Tray Domestically Speaking
Ladder Back Chair Makeover My Repurposed Life
Shabby Chic Wreath – Petticoat Junktion (you are here)
Recipe Box Makeover Refresh Restyle
Creepy Halloween Craft with Hazard Labels Sadie Seasongoods
How to Create a Driftwood Finish Uncommon Slice of Suburbia
Copper Wall Sconce House of Hawthornes
As always, thanks for being here and have a great day, Kathy
Visit the Petticoat Junktion Amazon page here to find the products used in this project.

Author: Kathy Owen
Kathy Owen is the founder of the home decor blog Petticoat Junktion where she shares tutorials on painting furniture and upcycling thrifty finds into unique home décor. Her DIY projects have been featured on the Home Depot Blog, Plaid Crafts, Behr Designer Series, and in numerous magazines. Kathy’s newest website is HappyHomeDIY.com
I love this!! It’s so cute and unique!
I love the idea! I will be on the look out for chair pieces, I had wanted one to make a shelf with but I love this idea too!
I absolutely love this wreath! The grape vine wreath you used is so endearing!
I love unconventional things things used for “wreathes.” I have wild grapevines in my yard that are very invasive and I’ve made a few lopsided wreathes over the years! My local Wal-Mart used to sell their fallen off flower heads for $1 a bag–I’ve made a few interesting wreathes, too! I am slowly becoming more fond of the chippy look; I think “stablizing” the chippiness was a great idea.
Love it!
So cute and clever.
I love this! Gosh, you can’t beat that patina – what a steal!!
Thanks Patricia
Thanks Angela
Repurpose is my middle name….or it should be
Thanks JoAnn
Yes, I hate using a table saw or a big circular saw but I love this one. Thanks Gail
Thanks Pam
You are so right. Why didn’t I think of that. I need to turn the chair upside down. Watch for new photos next week!
yep, you need a chair. Thanks Debbie
Thanks Suzee
Thanks for the Mod Podge idea. I have tons of Mod Podge and never thought to use it. I would def use the matte!
Thanks Kristin
Yes, it would! Thanks Christy!
Kathy,
You are so very creative! I absolutely love this idea. Would be cute on our potting shed!
I love how you are always thinking outside the box, this is perfect!
Love this charming look! I’ve gotten things that are VERY chippy, used matt Mod podge to seal it, then went from there. I’ve also used a matt spray sealer on a box that was flaking off before my eyes! Wanted to salvage the look and just couldn’t even touch it. It saved it.
This look is right up my wheelhouse! You are so clever.
This is just so cool! Something to look for … the chair back! I love how you think!
Kathy, this is amazing!! I love it and now I want one!! I really need a chair 🙂
Pinned for later, I’m on the hunt!
I really like this idea! I think it would look even better with the chair back piece turned upside down!
I would have never in a million years thought of making a wreath out of a chair!!! Fantastic idea and it looks cute too!
Kathy,
The chippy chair and the partial grapevine wreath are perfect together.
I have that little saw. I’ve never been a fan of circular saws until I got that one. It’s so user friendly!
pinning!
gail
I love this – love anything with chippy paint. The grapevine wreath is perfect for this!!
I love your cleaver, creative ideas. It cracks me up the way you hunt around your house and repurpose items that you’ve used in past displays. 🙂
Absolutely love this. The chair back is so visually interesting to me from an architectural stand point. Good job!
I really like this??