DIY Coastal Beach Decor: Cork Board With Seashell Push Pins
As an Amazon Associate, I earn from qualifying purchases.
Save your beach memories with this coastal-style cork board and DIY seashell push pins.

This project offers two for one: Use seashells gathered on your beach vacation to make push pins for the DIY cork board, then pin those vacation photos to the cork board!
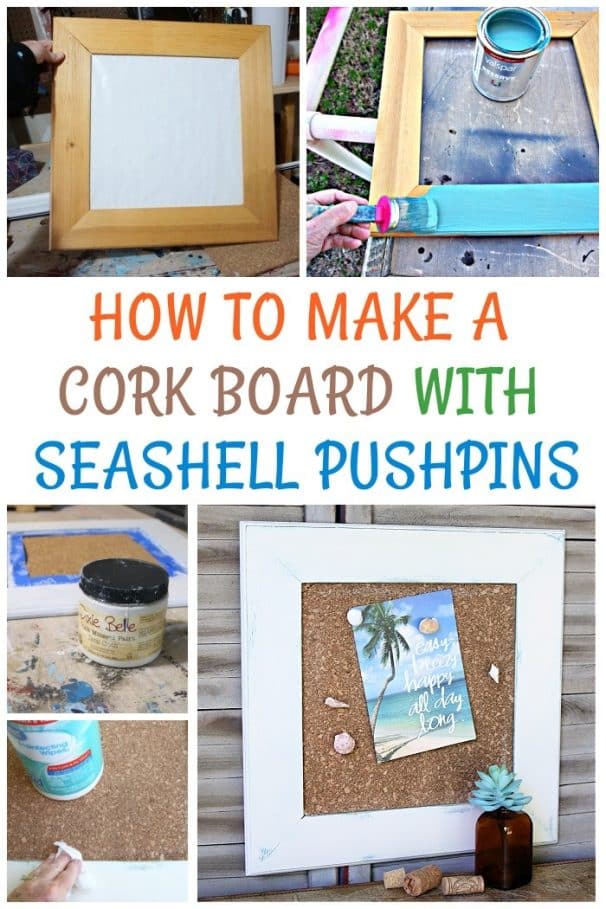
I bought the wood frame with the “framed white paper” at the thrift store. I don’t remember the price but I’m sure it was less than $5. I bought the piece because it had a lot of potential. It was basically a blank canvas.

I used a flat-tip screwdriver to remove the paperboard from the frame. It’s pretty easy to bend those little metal thingies up, no need to remove them.

Then, I painted the wood frame with Valspar paint, the color Lost Atlantis. I know; I’ve been using that color a lot around here. It says beach to me. Later on in the project, I had a change of heart about the color of this project.

The flat corkboard panels are an earlier thrift store purchase. If it is a good deal, I never pass up anything useful for crafting.
The corkboard happened to be the perfect size for the wood frame. That doesn’t happen very often. I inserted it into the frame opening along with the original paperboard and bent those metal strips back down to hold it all in place.

Next, I hot-glued jewelry pieces to brass tacks

Then I put it all together but….I didn’t love it. The cork board and DIY tacks weren’t bad, just boring.

So, my next plan was to paint over the turquoise paint with an off-white color and then distress the white paint. I used the Drop Cloth color from Dixie Belle. I did not remove the cork panel to paint the frame white, I just applied painter’s tape to save the cork!!
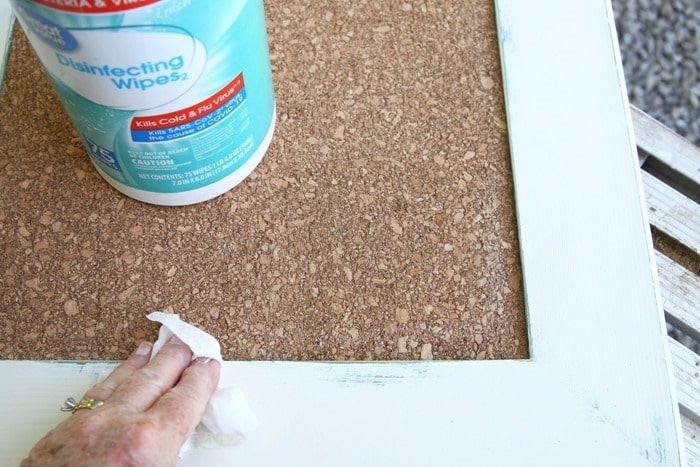
Before the white paint had time to cure properly, I used a wet disinfectant wipe to distress the white paint so that the turquoise color could be seen.

This time, I decided to use push pins instead of tacks. The push pins are taller, which works better with the odd-shaped seashells.

I hot-glued the seashells to the push pins. Once the hot glue was dry, I applied JB Super Weld Glue over the hot-glued area for extra bonding. Pulling and pushing on the push pins could possibly cause the seashells to pop off. I don’t think that will happen now.

And, ta-dah! This is much better. As you can see I didn’t go overboard with the distressing.

I happened to have this sweet card I received on one of my birthdays, and it was just the right piece to “seashell pin” to the beach-style corkboard. Do you save greeting cards? Most of the time, I do, but they sure pile up.

Another look at the distressed area. Sometimes, when wet distressing paint, it is hard to remove the paint. If this is the case, I rub the wet wipe over the painted area several times, wait a couple of minutes, and then distress. This makes it easier to remove the top layer of paint.

Those seashell pushpins are cute. I’m so glad I changed my plan for the wood frame, even though it took more time and effort.

What do you think? Which version of the cork board do you like best? Thanks for being here, Kathy