Dry Brush Painting Technique For Furniture
As an Amazon Associate, I earn from qualifying purchases.
Have you tried dry brush painting? The technique is so easy and so fast you won’t believe it. I have photos and a video showing the technique I used on this project.

Dry Brush Painting Technique / Outdoor Furniture
It’s Furniture Fixer Upper day and the links to all of the makeovers are at the bottom of this post. You’ll want to visit everyone…..I do……idea central.


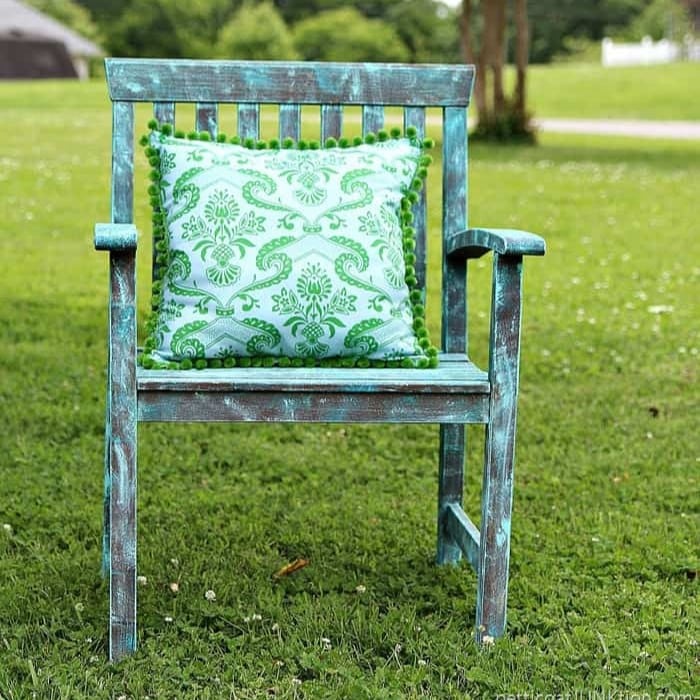
First let me tell you about my chair. This is the chair I bought at my favorite junk shop a few months ago. The hubby made a few repairs on the chair when I brought it home.
I took the chair to my booth and listed it for $24. I even had a sale one time and no one wanted it. I can’t figure that out. I like the chair myself. It’s hard to see in this photo but the back slats are curved. Really cool….and the chair is REAL wood. That’s hard to come by. Anyway, I decided to bring it home and use it myself. No sense in a perfectly good chair going to waste.

For this project I selected two pretty FolkArt Coastal paint colors, Ocean and Sea Mist.

I use a very dry paint brush and apply the paint by lightly brushing the paint across the slats and then up and down the slats. Or you could do the reverse. The only rule for dry brush painting is the “very dry brush” rule.

I applied the darker Ocean color first.

Then I applied the lighter Sea Mist using the same technique. To make the project easier I put a bit of the paint onto a piece of heavy cardboard then dip the brush in the paint and wipe the brush dry (dry brush).

The whole process from painting, to staging the photo, to taking the photos took a couple of hours. The paint dries really, really, fast. I mean, there isn’t much there to start with.
The video shows the dry brush painting process. It’s much better if you can actually see the brush action instead of me trying to explain it.
Dry Brush Paint Technique – Very Short Video Tutorial

The pillow came from a local thrift/flea/antique store.

See the nicely curved slat on the back.

The Sea Mist is a pretty light green but it almost looks white against the darker Ocean blue.

After dry brushing I “mushed” a bit of paint here and there. Don’t be afraid to experiment with paint. That’s the fun part.

Dry Brush Painting Technique for Furniture
Time to visit my fixer upper friends. Click the pink text links below the photo collage.

1. Confessions Of A Serial Diy’er
2. Girl In The Garage
3. Prodigal Pieces
4. The Interior Frugalista
5. Just The Woods
Try dry brushing some furniture or accessories and let me know how it turns out.
Have a great weekend and Memorial Day. I’ll see you next week.
It seems like it would be a difficult technique, but if you follow the “very dry brush” rule it really is pretty hard to mess up. The video makes it so much more helpful for people to see how easy it is too! The chair turned out great:) Thanks for sharing at the Home Matters Link Party. #HomeMattersParty
I love the look that dry brushing gives! Thanks for sharing your technique at Merry Monday!
The chair has such character. After you did the dry brush technique it really brings out the lines of it.
I really love those colors.
The paint is FolkArt coastal. I would call it more of a chalk paint. I don’t think it matters what type you use as long as it is for outdoors if you are painting an outdoor piece. Any paint works for dry-brushing.
I’m not good with wood, lol. I don’t know if it’s teak or what!
Hum…it seems to work for me?
Thank you! Maybe just an off-white for your table set??
I have a wooden patio table and chairs that are very weathered and I was thinking of painting them. They used to be stained to look like redwood, but most of that is worn off. I think the dry-brushing technique is exactly what I need to do to spruce them up. Not sure what colors to use, though. My house is sided with grey siding so I’d want a color that looked good with that as they are on the deck on the back of the house. Can’t wait to try your technique.
Great post and tutorial–very timely for me!
I like to use dry brushing to highlight beautiful details and for a bit of texture. I love the colors you chose for this Kathy!
Kathy, the link for #5 seems to be taking me to the wrong place. Can you check on that, please ? I’d love to see this chest of drawers. Thank you!
This chair has so much more character now. I bet it would sell quickly if you put it back in your shop. Love the dry brushing! XO
It looks great and those curved backs are very comfortable.
Is the wood teak??
Great job Kathy and I have just the project to try this out on but I have a question. the paint you used, is it latex or acrylic? Can I use either for an outdoor piece using this dry brush technique?
Dry brushing is one of my favorite paint techniques because a) it’s so easy b) it drys so fast and c) because, like your chair, it can completely transform a piece. That wood chair is singing now! Nice pillow score too, Kathy! Pinned to a couple of my boards.
I love dry brushing!! It’s so effective in making texture and you rocked it, Kathy. Sharing!