Concrete Goose Makeover: How To Paint Lawn Statues
As an Amazon Associate, I earn from qualifying purchases.
Did you know you can paint concrete lawn and garden statues? Or, in the case of this concrete goose, re-paint the statue?
Sunlight will fade and rain will wash the paint from concrete or plaster lawn ornaments over time. I found out it’s easy to repaint them. The concrete goose never looked better, and I have a bonus concrete cactus project I painted using watercolors!
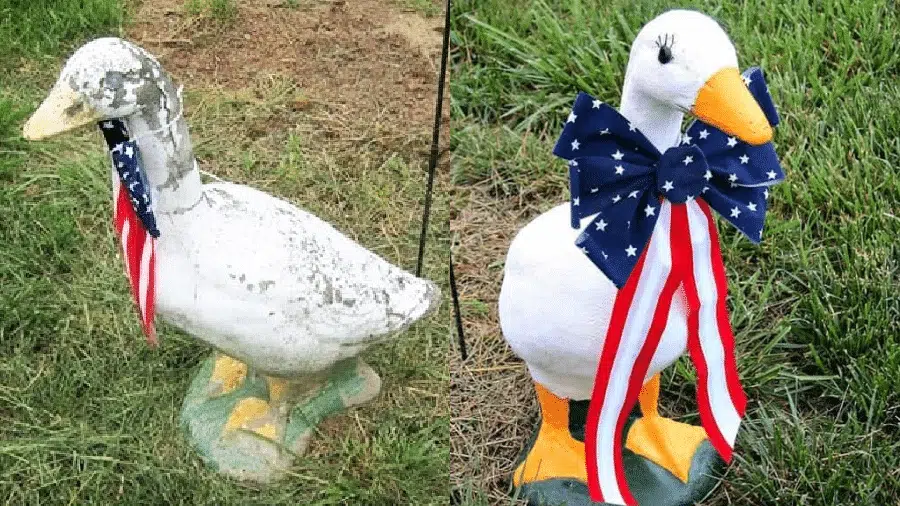
This is my first time painting a concrete statue. My neighbor, Evelyn, had this vintage concrete goose statue that’s been in her yard for as long as I can remember. As you can see, it was in dire need of a makeover.
She told me she was probably just going to have to get rid of it. Nope, not on my watch. I like seeing that goose from my workshop door, and I know she would miss it.
I told Evelyn I would try to paint the goose but for her not to have high expectations. After all, I’m not a decorative painter or artist.
Although we’ve been neighbors for close to 30 years, I’ve just gotten to know her really well over the past 3 or 4 years.
Evelyn’s husband was killed in the Vietnam War, and she never remarried. She is super funny and smart and tells the most amazing stories. She keeps me laughing.
We have a lunch date once a week, but sometimes she doesn’t feel up to going out. She gets around great for an 80-year-old and is always running here and there, shopping and visiting with friends. I think it’s great.
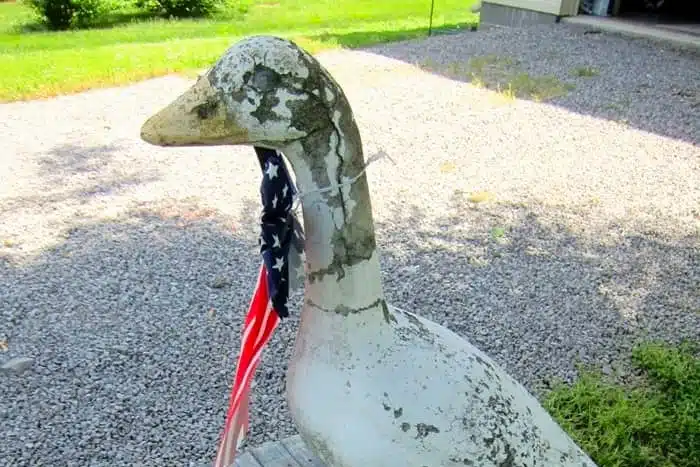
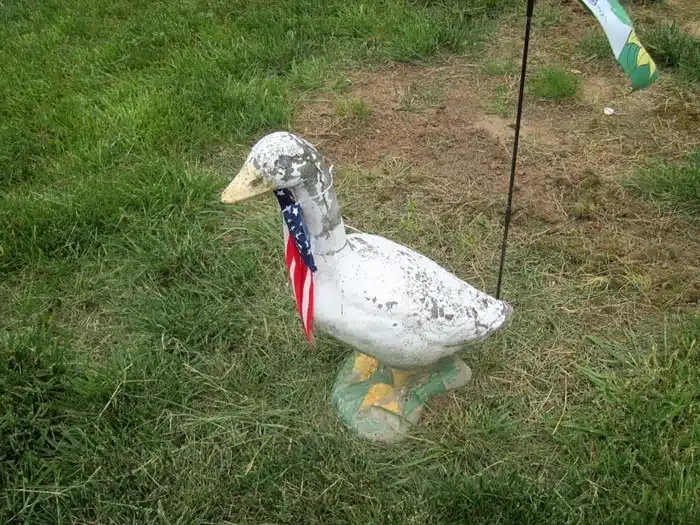
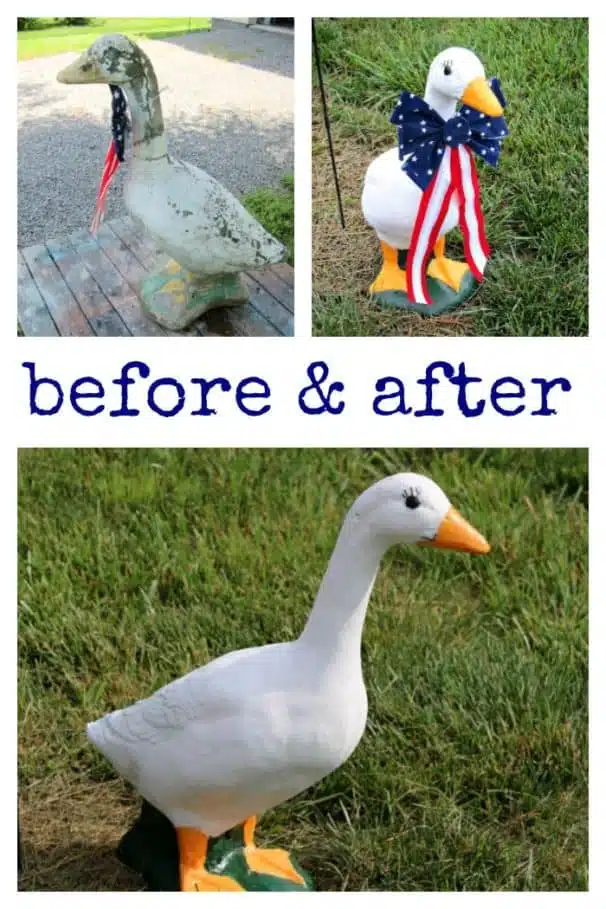
Anyway, this is how the poor goose looked before I started her makeover. And I say her because I noticed barely there, faded, painted-on eyelashes. I don’t have any idea how old this poor thing is but she has obviously been standing outside for a while.
How To Paint Concrete Garden Statues
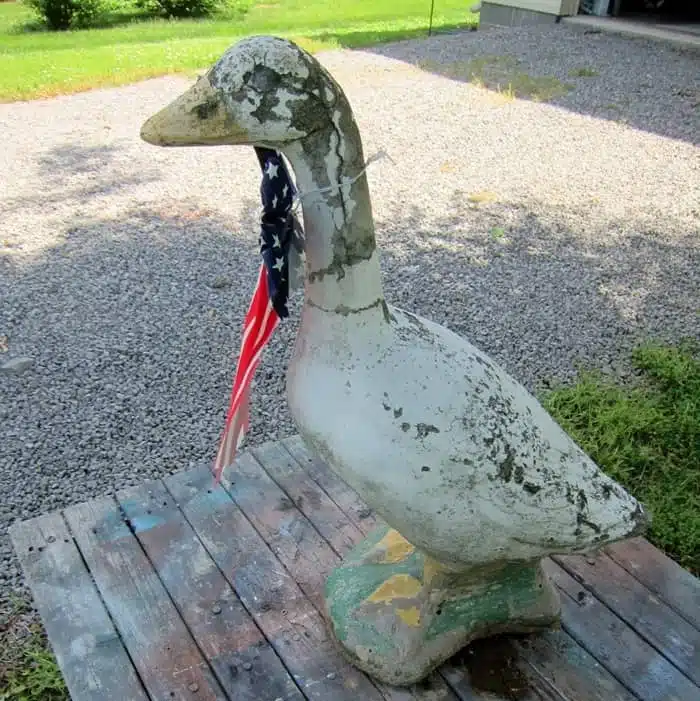
You can see how sad she looks in the close-up photo above. There are lots of cracks and places where the cement/concrete has broken down. Bits and pieces are broken off of the tail and base.
I was really beginning to wonder if I could bring this little goose back to life. Can you see those eyelashes I mentioned earlier? Sometimes it’s the simplest things that turn an item into a conversation piece.
Clean The Concrete Goose Statue
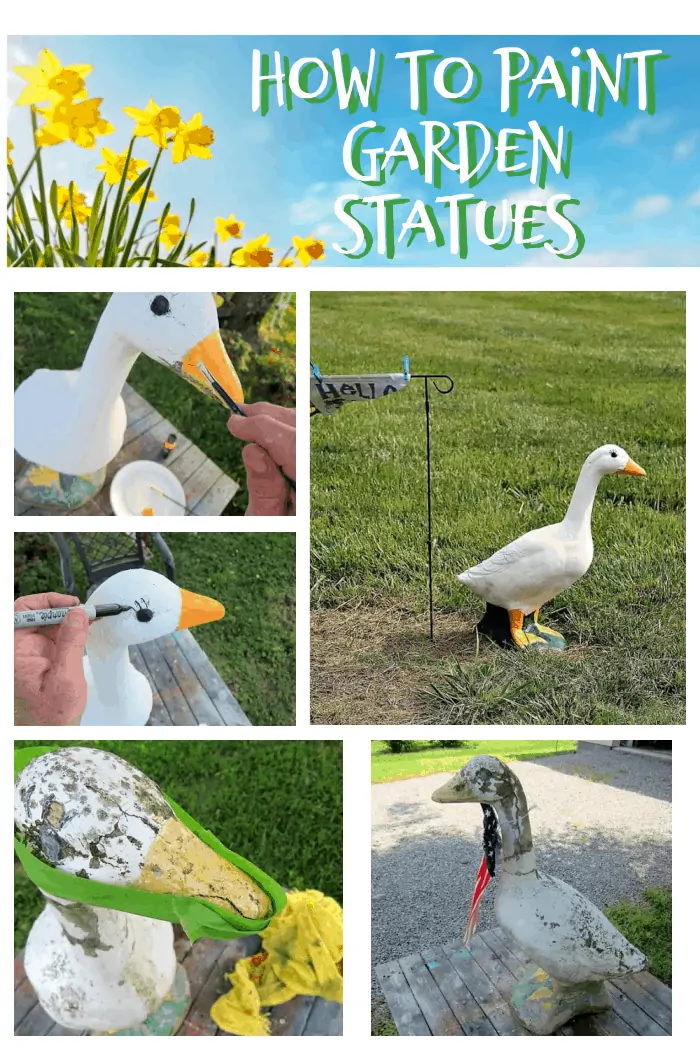
I first cleaned the concrete goose with Simple Green. I scrubbed and scrubbed but couldn’t get off some of the gunk/spots. I figured I could paint over the dirt, so no worries.
When cleaning the bill (is that the proper term?), I noticed several pieces were loose, almost loose enough to fall off.
Make Repairs To The Statue
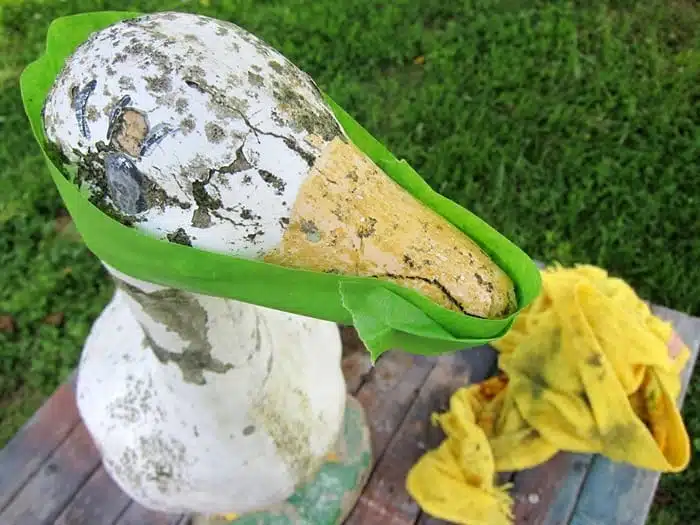
I grabbed some Gorilla Glue for the cracks and filled the holes and cracks the best I could trying not to knock off more of the cement. Then, I wrapped the bill and head with painter’s tape until the glue dried. It seemed to work. Remember, where there’s a will, there’s a way.
You guys have to remember I’m just wingin’ it (no pun intended) because I’ve never painted a garden statue. I was definitely going to give the little goose my best though.
Use The Right Paint
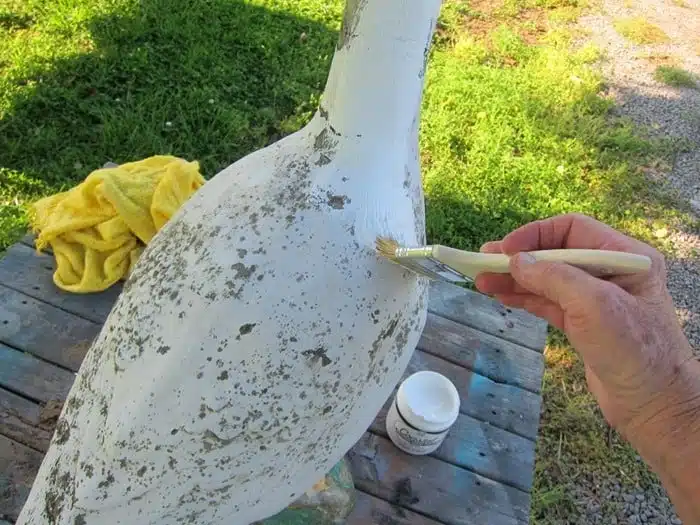
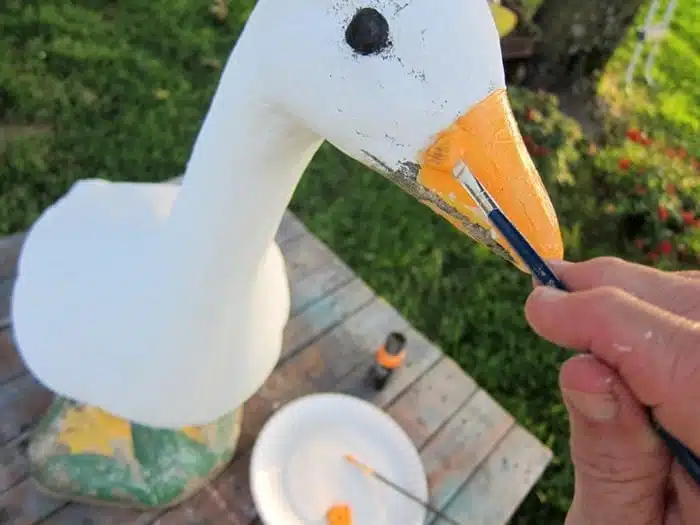
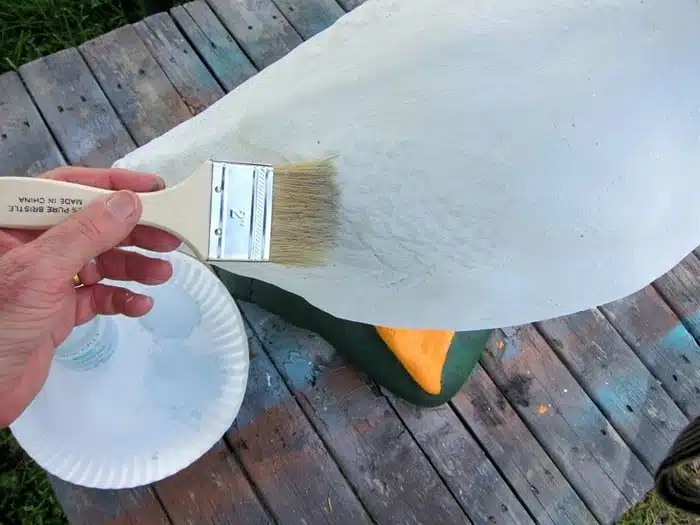
It’s a good thing there was enough original paint on the goose that I could kind of figure out where the paint lines were. I used FolkArt Coastal Textured Paint for the body of the goose.
The paint is for indoor/outdoor projects. Since this little girl spends all her time out in the sun, outdoor paint is a must.
That was the only outdoor paint I had in the colors I needed so the rest of the paint is acrylic paint from the small bottles like you get at the craft store. These are also multi-surface outdoor paints so we will see how well they work. I found the perfect color in my sash for the bill.
Paint The Concrete Statue
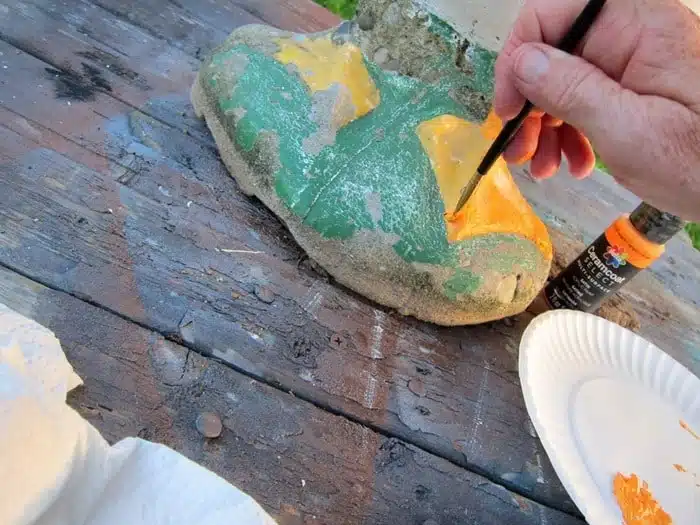
The webbed feet are the same orange color as the bill. I used a variety of different size brushes and I didn’t use tape for straight lines or anything. The goose was a little rough so I didn’t think it would be a big deal if the paint wasn’t perfect.
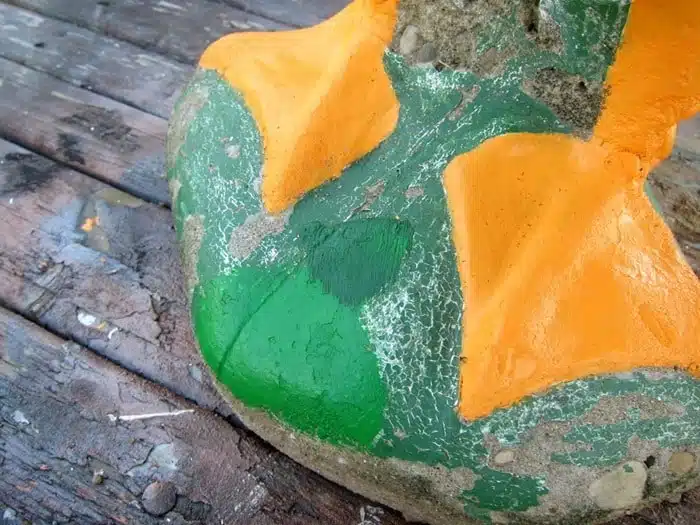
I didn’t have the right shade of green for the “grass” so I added black to a bit of green acrylic paint to make it darker. You can see the difference in the paint colors in the picture above. My first choice of green paint was too bright and glaring.
The special mix of green paint was just right. When I don’t have a certain color even when working on a furniture project I mix colors together until I get the shade I like.
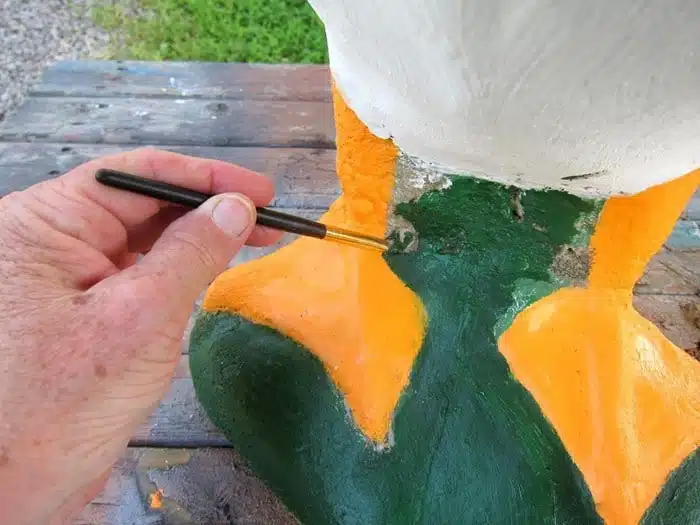
I tried to get the paint into all the nooks and crannies where the cement had broken off or cracked. A small paint brush worked best for these hard-to-reach areas.
Add Layers of Paint
The goose’s body color was too uniform, and the feathers blended in, so I dry-brushed a bit of very pale, silvery blue paint over the feather details.
A bit of contrast adds depth and dimension to paint projects, and that’s what the blue paint does for the feathers.
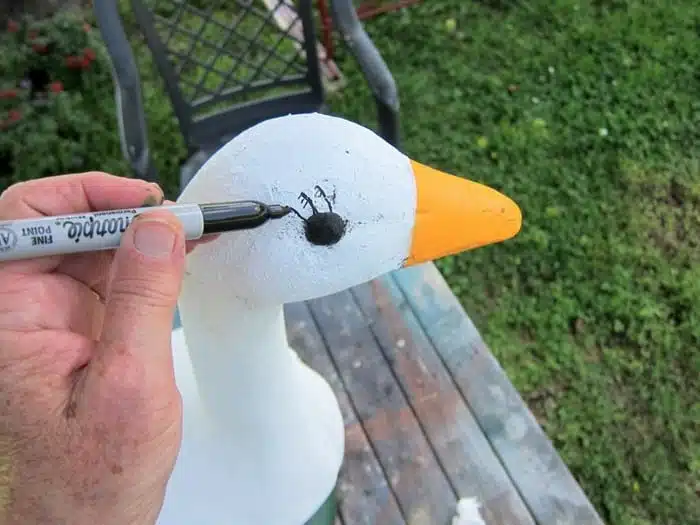
I painted the eyes black with Beyond Paint in Licorice and added the eyelashes with a black Permanent Sharpie. Whatever works right?
Apply an Outdoor Sealer
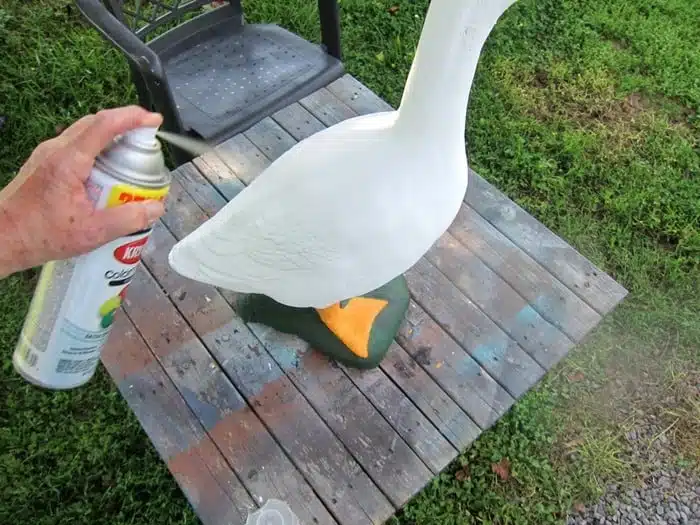
I’m not sure all that paint is going to stay on even though I sprayed several coats of Krylon Sealer on the finished Goose.
Return The Goose To Its Home
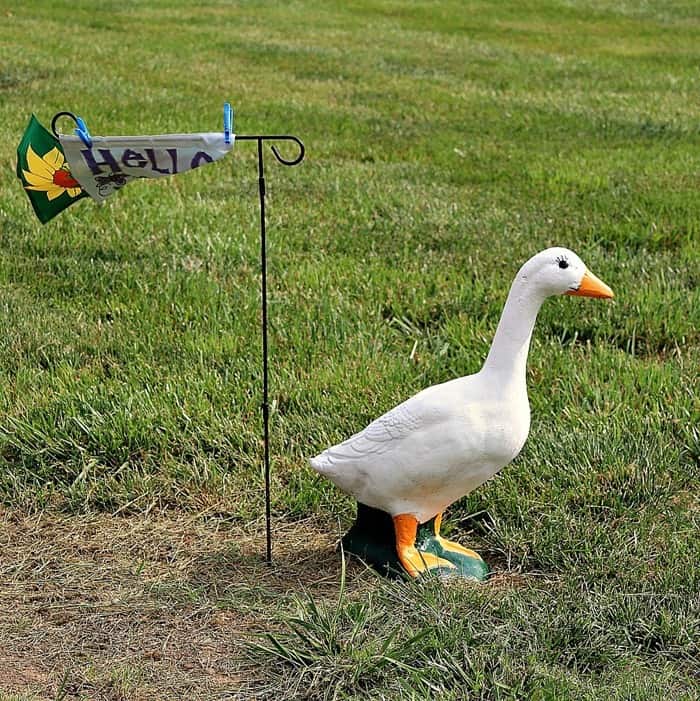
Isn’t she cute? I’m glad I could do this for Evelyn, and she was so happy. She lives right next door to us, and I see this goose every day if I look out the workshop’s garage door or if I’m working on a project outside.
Evelyn is always telling me stories about her family, the old days, and the history of the area we live in. She is one smart and well-informed lady on so many subjects. Funny too. One of the stories she told me was about aliens landing in Hopkinsville, Kentucky in 1955.
Now, Hopkinsville is right up the highway from us and is where my favorite junk shop is located. She started telling me that story, and she had me in stitches. After that, I had to Google about aliens in Hopkinsville, and sure enough, the story she told me is true.
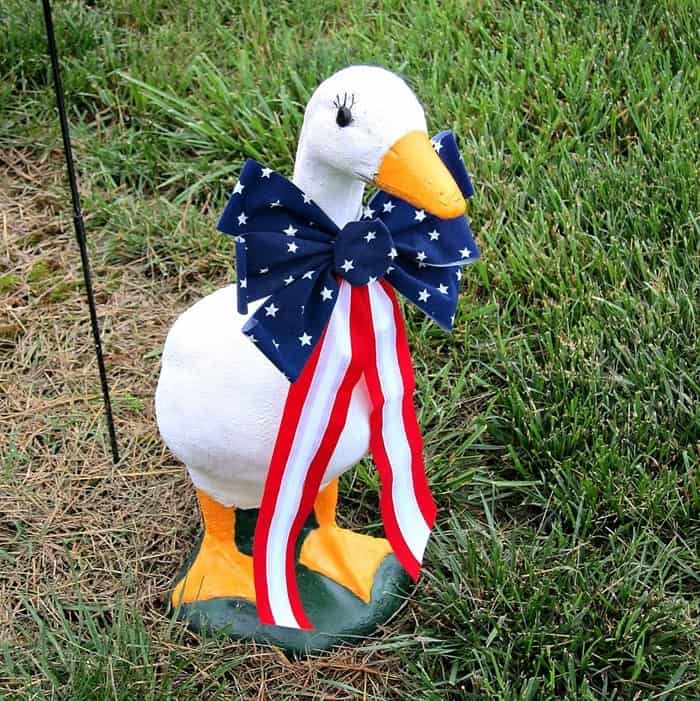
I took this photo a couple of days after we returned the goose to its home. You can see it has a patriotic bow now. I was checking to see if the paint was holding up after a couple of days of rain. So far so good.
Paint a Concrete Cactus Statue
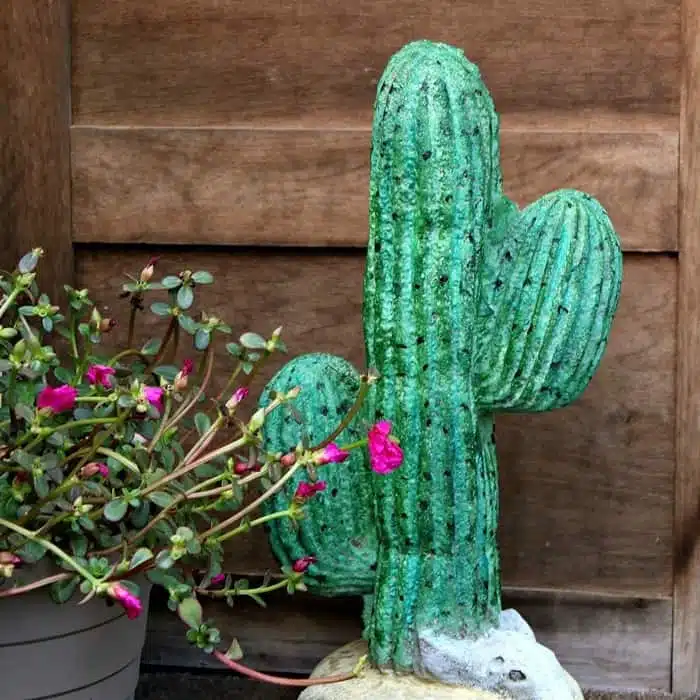
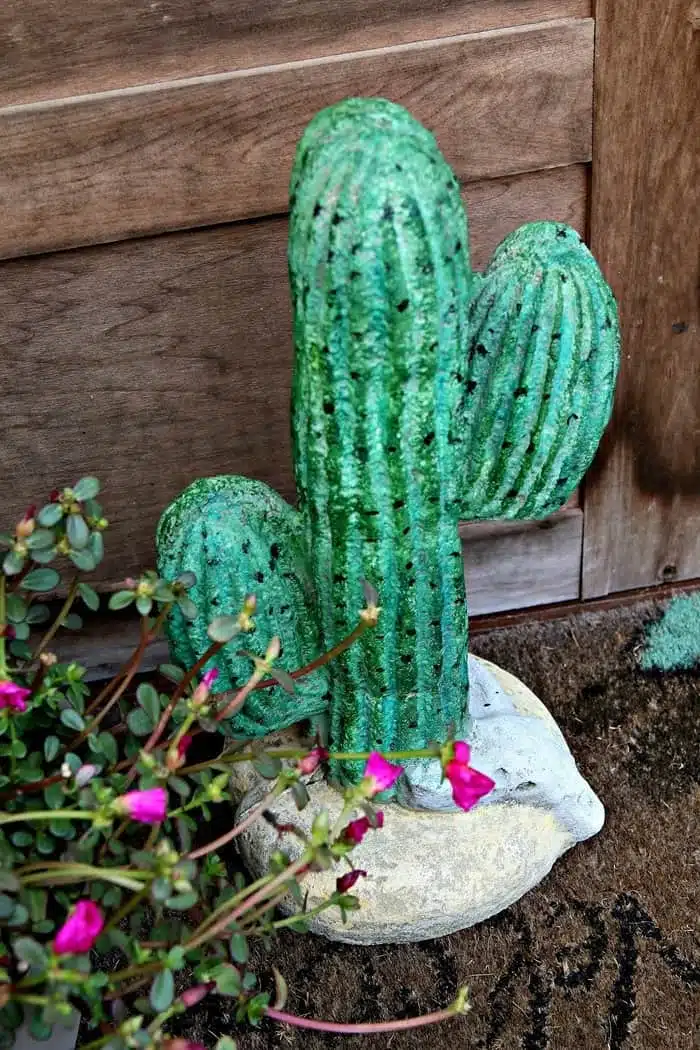
Next up. Painting a concrete cactus statue! After painting the neighbor’s garden goose I was ready to try another lawn statue project. The results were awesome if I do say so myself.
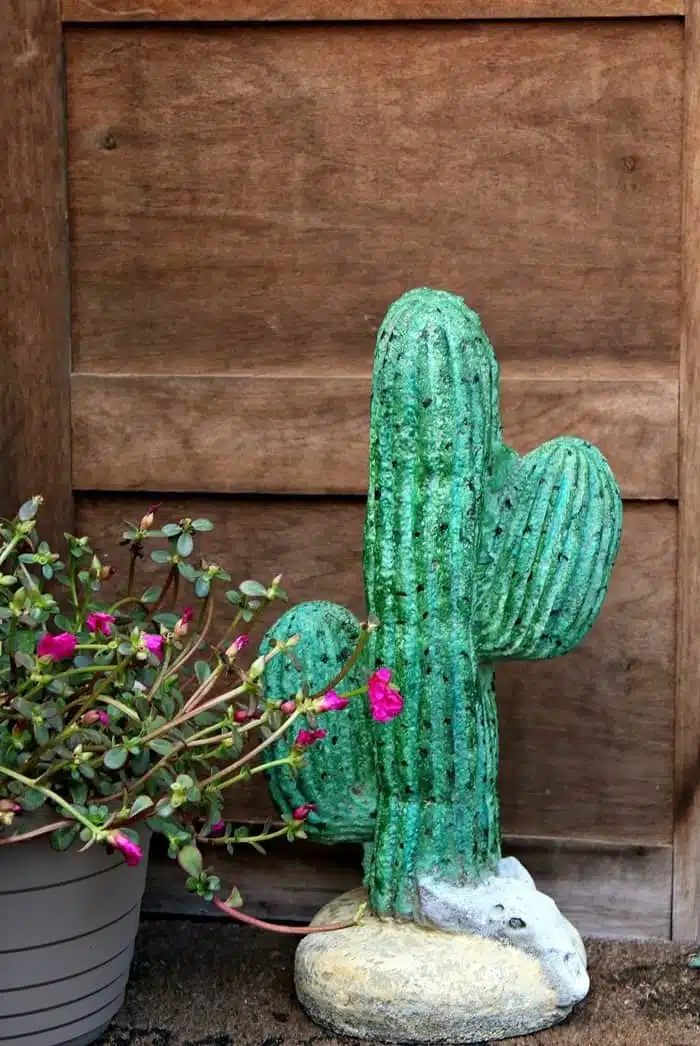
The cactus is just the cutest thing ever now. The secret to this look is using several paint colors to keep the painted cactus from looking flat or one-dimensional. The whole paint job took less than three hours including downtime……..watching the paint dry. Maybe I should show you how the cactus looked before I painted it then you’ll understand why I’m tickled pink.
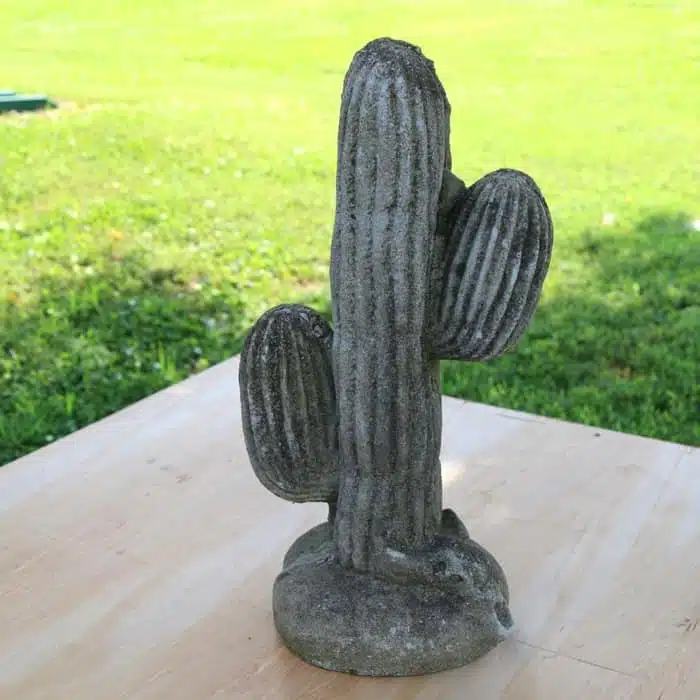
I picked up the concrete cactus at my favorite junk shop for $5. It was plain old rough concrete, no paint, no nothing, so it was a blank slate. I didn’t notice the steer skull at the base until I got it home. I think this cactus belongs in Texas.
Choose The Paint Colors
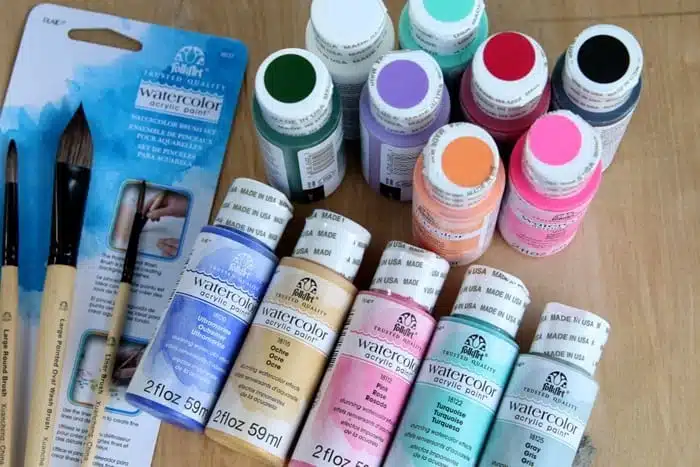
The paint I used for the project is FolkArt ® Watercolor Acrylic Paint™. The watercolor paint can be used on outdoor items as well as indoor stuff. Perfect for the cactus. I only think of watercolors for paper. What about you?
Paint the Statue
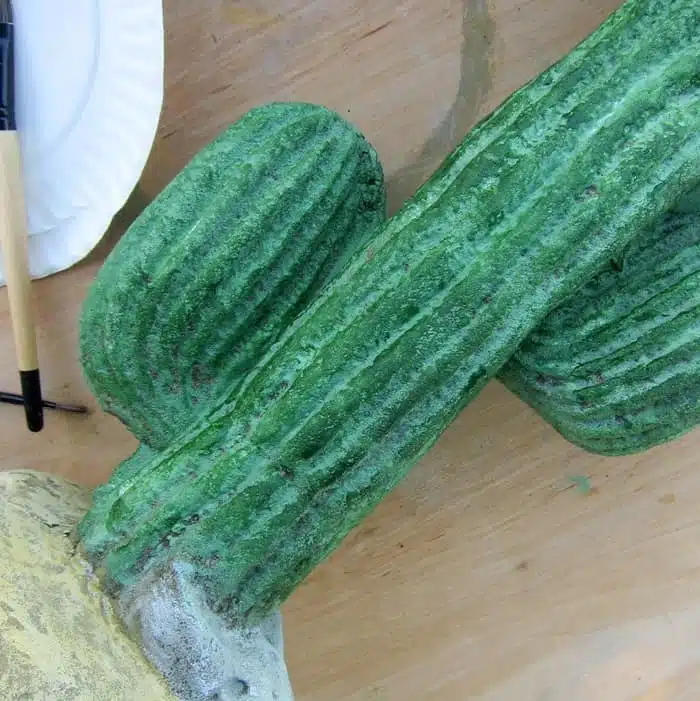
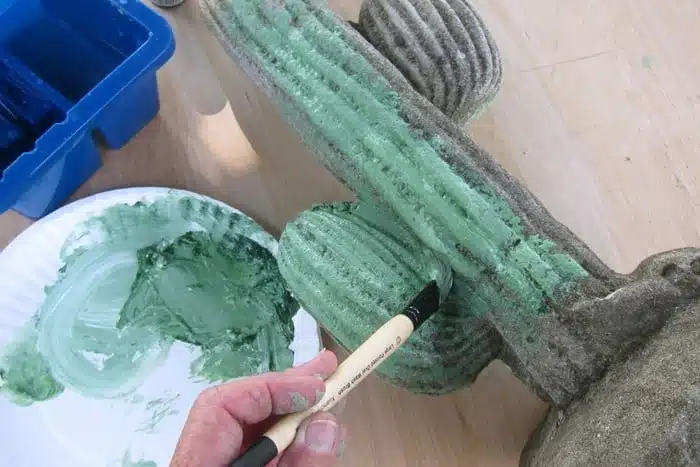
The first step was to give the cactus an all-over paint finish. I mixed the white and sap-green watercolors together to make a pale green and brushed the paint all over the cactus. I dipped the watercolor brush in water to spread the paint on the cactus. The bold concentrated colors spread easily. I didn’t even use half of the 2 oz. bottle of sap green and the color is going to show up again in the makeover.
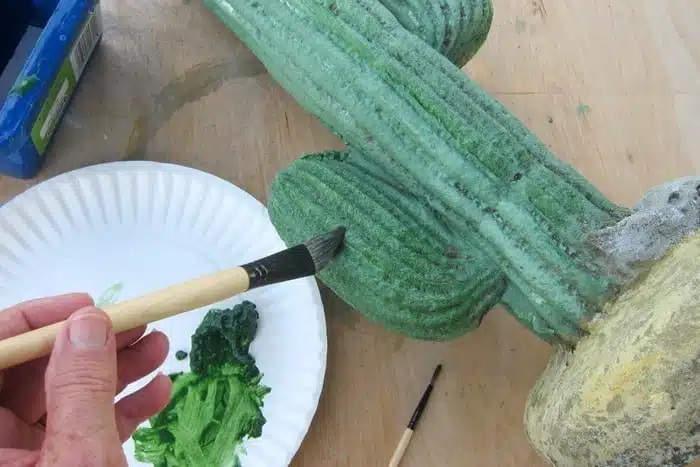
The next step after the first coat of paint was dry was to brush over the ridges of the cactus with sap green watercolor. I used the largest brush from the FolkArt® Watercolor Brush Set to paint the cactus.
Apply Layers of Paint
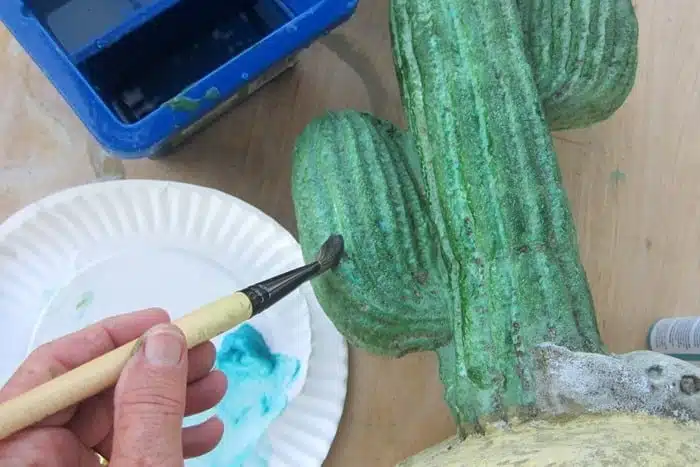
The third step is painting the grooves of the cactus using turquoise watercolor. I thinned the paint by dipping the watercolor brush in water and mixing it with the paint on a paper plate. The thinned turquoise paint is more of a wash and is a good contrast to the pale green color and the sap green color.
Paint the Cactus Spines
We have one more step: adding those little prickly things, which I learned are called spines. We didn’t have many cacti where I grew up in Arkansas.
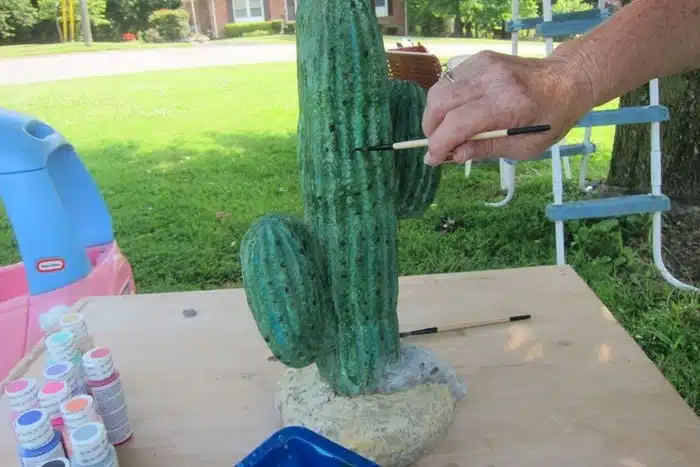
I used the smallest watercolor brush and dabbed black watercolor paint here and there on the ridges of the cactus. You might notice a kid’s car in the background of this photo. Miss Sofi was kind enough to take this photo of me adding the spines.
See why I’m tickled with the paint job? Doing the happy dance. I painted the steer skull with a mixture of white and gray watercolors and I painted the sand or dirt with a mixture of white and ochre watercolors.
Paint Garden Statues With Watercolors Made For Outdoor Use
Do you love this little cactus as much as I do?? I always thought watercolors were just for canvas art but my thinking has changed. I’ve used the watercolors on wood and fabric and now concrete. The colors are bold and almost have a luminescence to them. I feel more watercolor projects coming on.
Take a look at some of my recycled creations by clicking the link below the pho
Creations made with upcycled jewelry and vintage hardware.
Leave a note if you have time and as always, thanks for being here, Kathy



Great Job I repainted my duck but instead of painting the eyes ( cause I’m not a good artist) I used the craft moveable eyes
Great job. I think the paint you are using are Acrylics which are liquid, small bottle, and yes water soulable. Water colores are not liquid or for outside. You did a great job . Thanks for the info.
You’re welcome
Thank you for all the awesome tips. Have a great day.
These are great! I love to revamp old things but haven’t done an outdoor project yet. Came here looking for inspiration to repaint my husband’s concrete jacket-o-lanters before next month. His birthday is on Halloween so it’s a big deal around here, before we married he kept them visible in the yard yr round. I went with it a couple yrs then talked him into doing just Sept through November. That way they would be “more special” 😉😁
Thanks for your advice. I believe I already have some colors I can mix and get this done before Sept 1st. Thanks so much!
That is hilarious! Thanks for sharing the story. Now I’ve had my laugh for the day.
Excellent salvage!
Funny story; Years ago one of my sons invited a friend over to play. I gave the dad directions to our house with the large visible marker of a blue spruce next to our driveway. Later I got a call from him saying “I’ve driven up and down the street and don’t see a Blue Goose anywhere! Hahaha!
My mother found a cement goose and painted it blue for me so now I Do have a blue goose by my mailbox . 🙂
I want the goose AND the cactus! Love the eyelashes!
I have 4 geese. Love them but in bad shape. I never figure I could paint them. But with your help. I going to try One has busted nose. Thank so much.
I just used a deep orange color. It’s so nice of you to do that for your Mother In Law!
Looks great, I’m getting ready to do one tomorrow and Saturday for my mother in law for mother’s day. I bought paints today but I’m not sure what color to use for the beak and feet. Any suggestions?
Great job on the goose! She looks so cute with her patriotic bow.
Kathy, the goose looks stupendous! You did a great job cleaning it up and repainting her! Love the fact that you sealed the paint, and the red/white/lue bow can be changed for any holiday! I bet your neighbor baked you a cake!
Great job! I have numerous plastic flamingos that faded after years in the sun. Used spray paint, for plastics, and I now have a rainbow of birds. The blue heron is my favorite. I also did two birds black for Halloween. Also, glued on GOOGLY eyes!
Love the goose makeover! What an amazing person you are, to help her like that. 🙂
Also, Hopkinsville is full of crazy “paranormal” stuff. Not only just the aliens, but Edgar Casey is from there as well.
There is also a small cemetery on Ft. Campbell that has 5 German POW’s buried, one who was shot trying to escape. Also, Jimi Hendrix was stationed there before he was kicked out of the Army.
King Arthur’s round table park is really cool and weird too.
Then all the Jefferson Davies stuff is about 10-15 from there as well (birthplace, mile marker 0, etc…).
Kentucky is FULL of crazy stuff. I love my home state!
Good idea that helped a Vietnam soldier’s widow. Bravo! Looks so nice now.
Hi. Although I’m not a fan of the goose itself, I want to thank you for being a good person and friend to a neighbor. Simple gestures of helping a neighbor go along way in helping our country, which is struggling in how to treat other human beings. God bless you Kathy.
It was a great idea to us Gorilla Glue on the beak and tape it like that. He (she?) looks so cute now.
The goose needs costumes now. I remember seeing them with seasonal outfits. Too funny.
You are a magician. Great job!
I remember buying my concrete goose on a trip to Nashville around 1988. It was never painted or dressed up, but it did fall apart about 2 years ago, sadly. I moved that poor goose to about 6 different houses so she was probably not always treated well! Thanks for the goose story, you did a great job!
Hey, you have another option in restoration/re-purposing…the goose looks like the trip to re-hab was a great option!
I want it!!!
Beautiful job on the goose Kathy! And super great you get to see it every day. 🙂
Funny story about the little green men. 🙂
Well done!
Well done Kath! She’s beautiful again.