Decorate Kitchen Cabinets With Adhesive Drawer Liner
As an Amazon Associate, I earn from qualifying purchases.
I used adhesive drawer liner to update my kitchen cabinets. I’ve been thinking about ways to add a little color to the back wall of my cabinets without making a change that would be permanent. I found the perfect solution…..adhesive drawer liner. See how the adhesive drawer liner updates kitchen cabinets in just a few simple steps. You might want to give this a try!
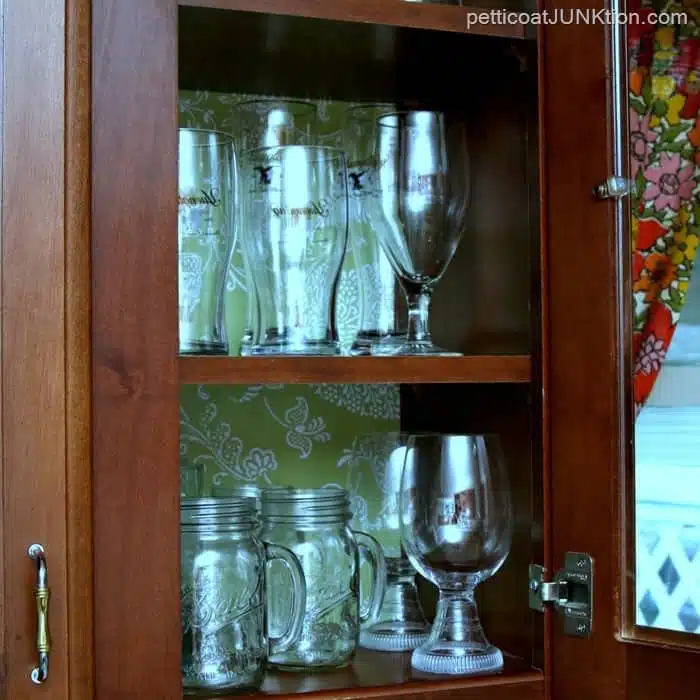
I’ve ran across several articles where foam core board has been used to add color or a pretty design to the back wall of cabinets. The foam board is cut to fit the back wall of the cabinet then wrapped with fabric or paper. The wrapped board is fitted into the cabinet and can be taken out if you get tired of the look. Well, that sounded like a lot of trouble to me and I don’t think the cabinet shelves would fit in the cabinet once the foam board was added to the back. There is just a tiny bit of room between the shelves and the wall of my cabinet.
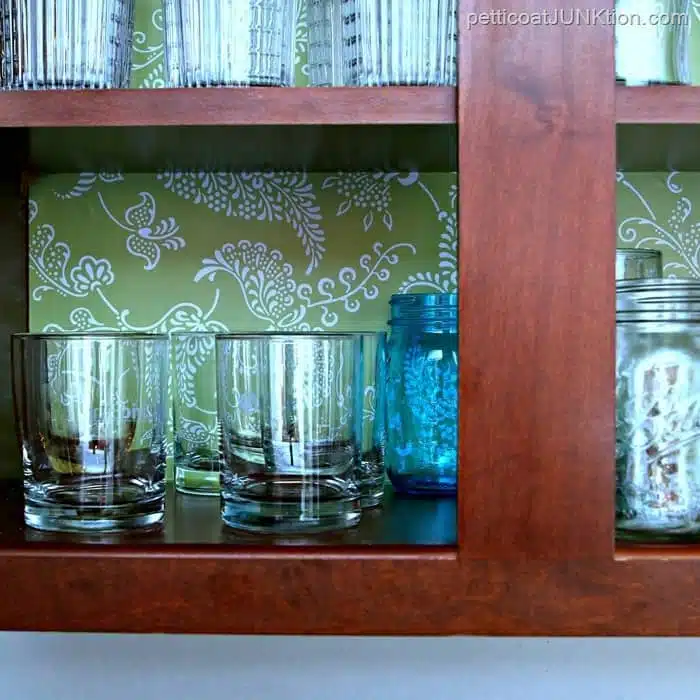
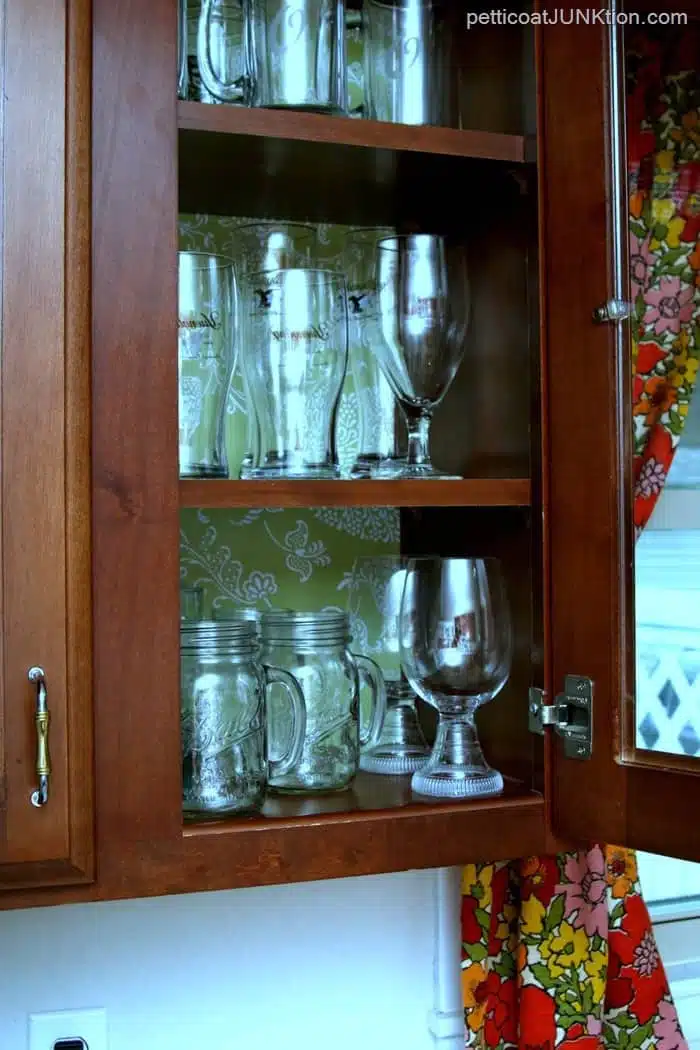
My idea with the adhesive drawer liner is much better. I found the pretty green and white drawer liner at the Dollar Tree. I bought 3 rolls ($3). I wasn’t sure how I was going to use it I just knew it would fit some DIY sometime. The color and design kind-of matches my kitchen style so I used it to cover the back wall of my kitchen cabinet with the glass doors. This cabinet is where we keep the drinking glasses.
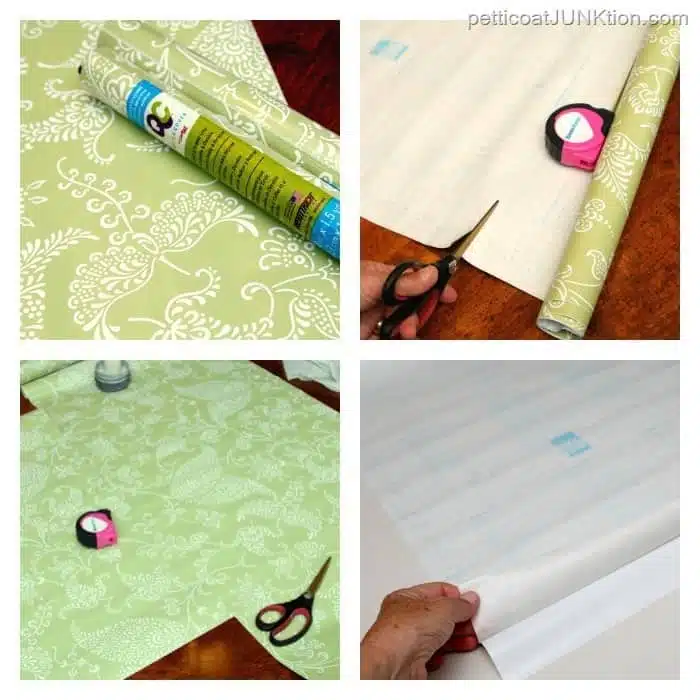
I’ve debated about putting adhesive paper on the glass doors or taking the glass out and adding punched metal panels or something similar but haven’t committed to any of that yet. Anyway, let’s get on with this project. I measured the back wall of the cabinet and cut the first length of drawer liner. I needed to cut two drawer liner strips for the cabinet and I needed to line up the design before cutting the second strip of paper.
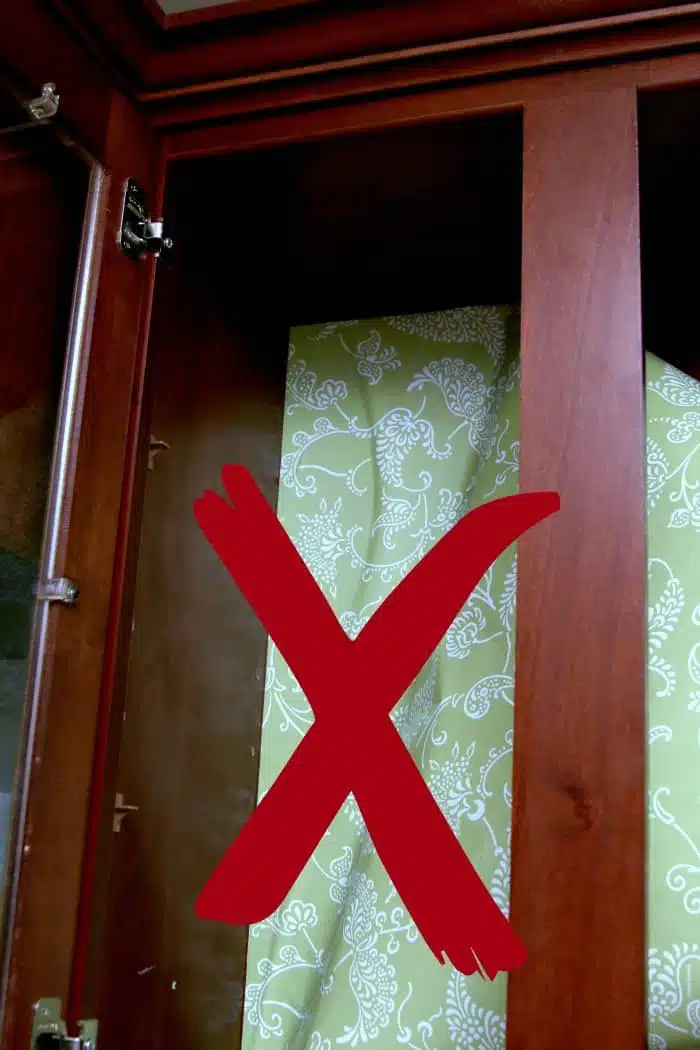
I had to open another package of liner to get the design to match. If you’ve ever hung wallpaper, hanging the drawer liner on the cabinet wall is the same process. I removed the shelves from the cabinet and got ready to cover the back wall with the pretty liner. My plan was to peel about a fourth of the adhesive back from the drawer liner then line up the drawer liner to the very top of the cabinet, starting on the left, and then roll the liner down to the bottom of the cabinet. Well, let me tell you, that didn’t work.
I was standing with one foot on the ladder , one foot on the countertop, head and arms and strip of adhesive paper inside the cabinet…..recipe for disaster. I could see this was going to be more difficult than I thought. Miss Sofi was the only one at home with me at the time. I was hoping not to fall and cause serious injury to myself. The JTS would be really upset with me.
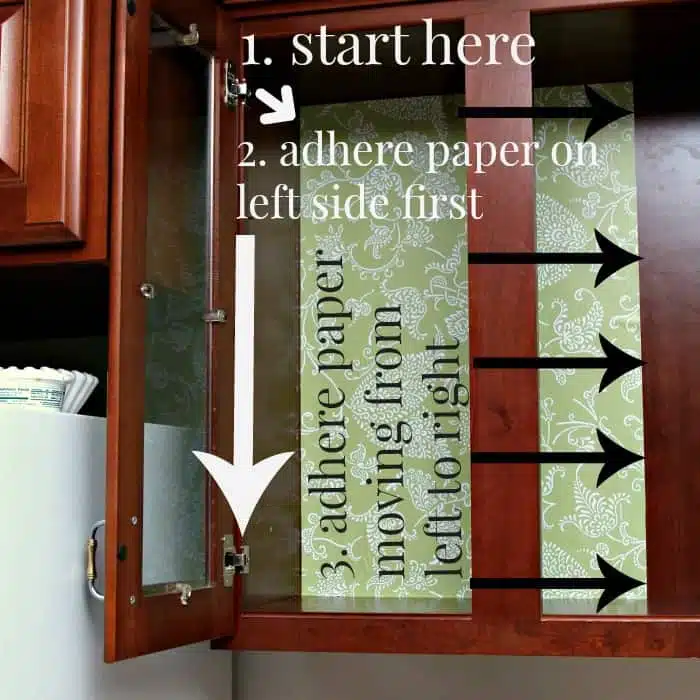
I tried several times to line up the paper this way……taking breaks……and saying a few bad words in between attempts. I finally changed plans. I peeled the adhesive back away from the left side of the liner and lined it up to the left side of the cabinet wall and worked it to the right. Worked like a charm on the second attempt.
It’s really hard to explain and even harder for me to try to get photos of me while doing this. I tried to explain in the photo above. The paper will and did stick to itself but it peels apart easily and is still sticky to adhere to the cabinet. Next job was to apply the second strip of paper. I lined up the seams and it wasn’t hard at all. I didn’t get the design lined up exactly but it looks pretty good.
I didn’t do too badly. The liner doesn’t make the statement I wanted it to but when I open the cabinet doors to grab a glass it makes me smile. I thought about taking the glass doors off completely but the board in the middle kind of messes up the look. So the doors are still on.
Thanks to Nancy for the comment below and the reminder. I meant to address this issue when writing the post but forgot so adding it later………. I think the paper would pop and look much better if the cabinets were white. I don’t plan to paint the cabinets. It’s hard to make that move even though we had the cabinets installed about 20 years ago during a kitchen remodel. Once painted it can’t be undone.
Now, you have to see the beautiful Tropical Adhesive Drawer Liner I used on a furniture makeover. It is so pretty. The green and blue design just makes you smile. See it here….Painted Furniture | Tropical Flowers | Green And Blue
The green and white design looks good with my homemade barkcloth curtains. You guys know how much I love color.
Want to know how to paint fake wood furniture? See my video below….
[adthrive-in-post-video-player video-id=”CwCn18JL” upload-date=”2017-11-29T16:58:39.000Z” name=”How To Paint Problem Furniture” description=”special technique, paint,painting,gray,distressed, layering paint,aged, antiqued”]
Sooooo, what do you think? Love it, hate it, want to try it? The adhesive back paper would look great on the back wall of bookshelves or wall shelves and even on furniture. The ideas are endless. Do you have any ideas for me? I have a whole roll of paper and two partial rolls of paper leftover.
Thanks for being here and have a great weekend, Kathy



Thanks for the tip Stormee!
Kathy, As always your ideas are an inspiration to all. I love how you decide what you want and figure out a way to achieve it!!!
If you decide to work with adhesive back paper again you might think about using a wallpaper smoothing tool. It looks like a very wide putty knife. It is great for getting a smooth bubble free surface with a lot less swearing. LOL I use it when I am lining drawers or shelves with self adhesive paper.
Stormee
great tips Kathy! I like the new look.
gail
ps pinned
Your comments are always so sweet Ivory. Thanks you!
I don’t know where you can buy individual panels at a reasonable price. You are right about them costing a fortune. If I run across a good site I’ll let you know.
I think this looks really good and I like it a lot.
I do have a question you may be able to answer. Where can I buy single sheets of self-adhesive wallpaper that won’t cost me a fortune? It seems when I search on line, I can only find rolls and not individual sheets. Thanks for your help.
I love this post, and the beautiful design and color.
Yes, but the Mod Podge would make it more permanent. I was looking for something I could change out easily when I got tired of it.
I really like the idea. Wondering if it could be done using a pretty non-adhesive backed paper and Mod Podge?
Thanks for sharing your story Becky. Using adhesive paper does take a little patience, hahahhaha.
I think this is a brilliant idea!
You are soooo right about struggling with that paper. I used some on hubby’s grandfather’s HUGE desk we have. It had been refinished at some point and the desktop was covered with wood grained laminate. I did it all by myself, with multiple screams, bad words, etc. It looks ok, but has some wrinkles and air bubbles that I couldn’t flatten.
Oh well, at least some of them are covered by my desk clutter!!!
Yours looks great, and I don’t think it would look bad if you removed the doors.
You are so right Nancy. I actually meant to address that in the post. Thanks for the reminder. I think if the cabinets were white the paper would be better showcased.
Just a thought! Maybe, paint just the shelves the white color in the design…not the background green.. oh, another thought…..replace. With glass shelves…love the idea…