How To Distress Furniture Using Baby Wipes
As an Amazon Associate, I earn from qualifying purchases.
There are two main reasons to wet distress painted furniture.
- Wet distressing paint is cleaner and less messy than using sandpaper for distressing.
- Wet distressing paint preserves the original stained finish underneath the paint, unlike sandpaper distressing, which can remove it down to raw wood.
Let me show you what I mean by wet distressing paint and protecting the stained finish.
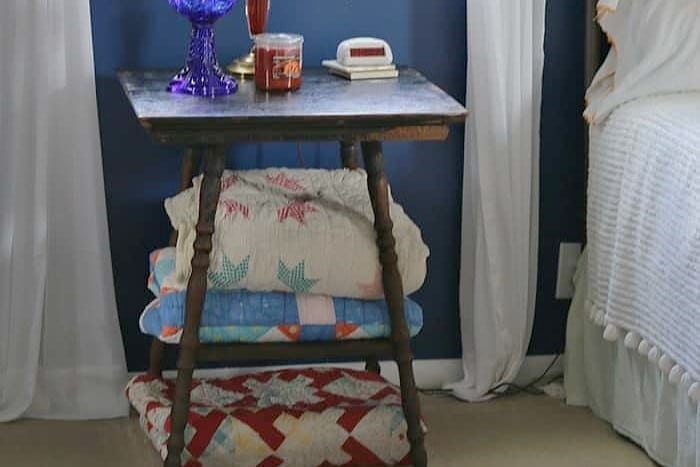
I bought this table at my favorite junk shop in Kentucky. The finish was too dark I thought it was time to lighten it. I opted to paint the table since the finish was in rough condition. The top had several rough areas and splotches of white paint.

I lightly sanded the tabletop and applied my favorite Glidden Gripper Primer tinted gray. This gave me a solid color base for the top coat. I like to have the primer tinted gray because gray paint is much easier to cover than white paint.
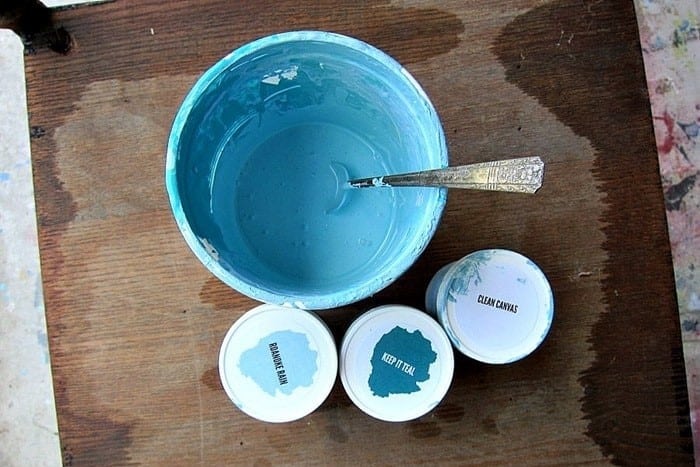
I’m still trying to use all my leftover paint before buying more. I mixed three Black Dog Salvage Furniture Paint colors to make a beachy blue color.
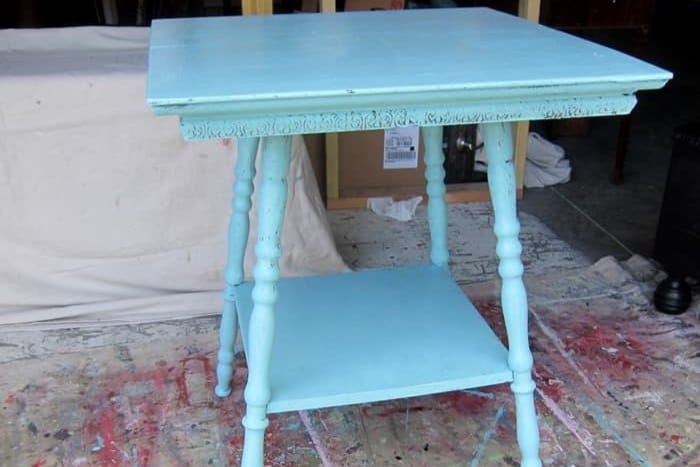
The blue was a beautiful color, but the overall look was just ho-hum. I knew there were some pretty details along the top edge of the tabletop so I decided to distress the paint.

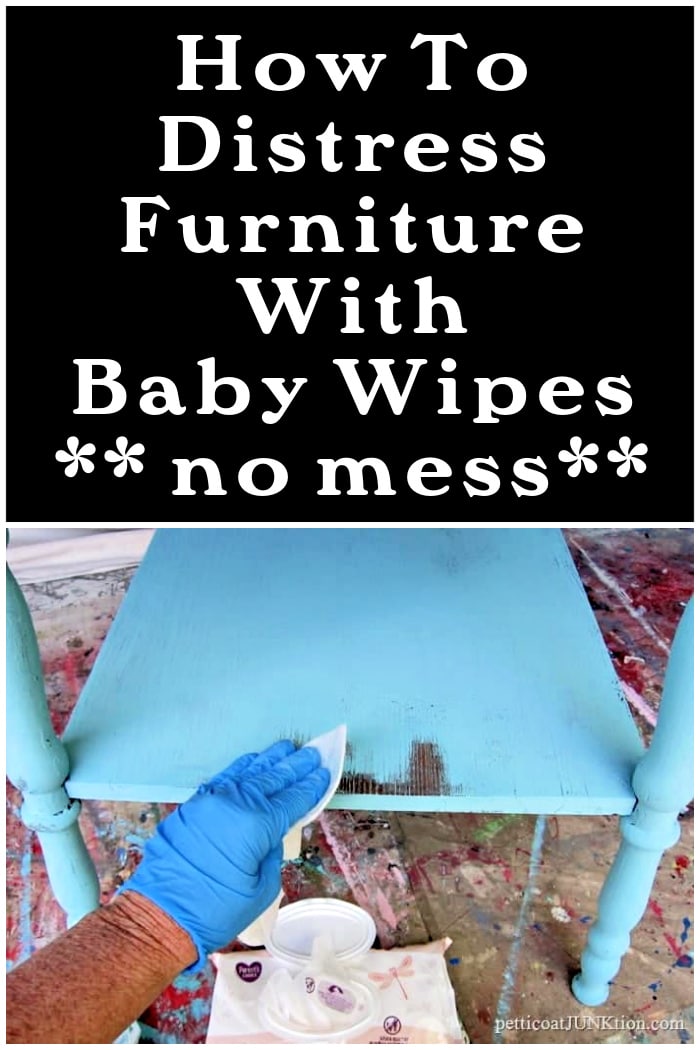
I grabbed a pack of baby wipes and rubbed the paint off of the raised details on the apron of the tabletop. When I wiped the paint off, the blue color that transferred to the wipes during the wet distress process left a light layer of blue paint on the already distressed area.

Once I had completely distressed an area, I wiped over it again with a fresh wipe to remove the leftover blue film. I didn’t have to grab a new wipe every time; I just used an area of the baby wipe that didn’t have blue paint on it.
My other concern with the baby wipes was waiting too long after the paint dried. You want the finish to be dry but JUST dry.
I had Miss Sofi and her friend from across the street at the house, and I got distracted. The paint dried a little longer than I would have liked and was adhered pretty well. That means I had to rub harder!
If the paint has cured well then run the wet baby wipe……or any kind of wet wipe over the area several times to dampen the paint and wait a minute or so for the paint to loosen up. The paint should rub off easier using this technique.

The table’s original finish had crackled spots, and the paint settled in those pitted areas—and those areas look so good distressed.

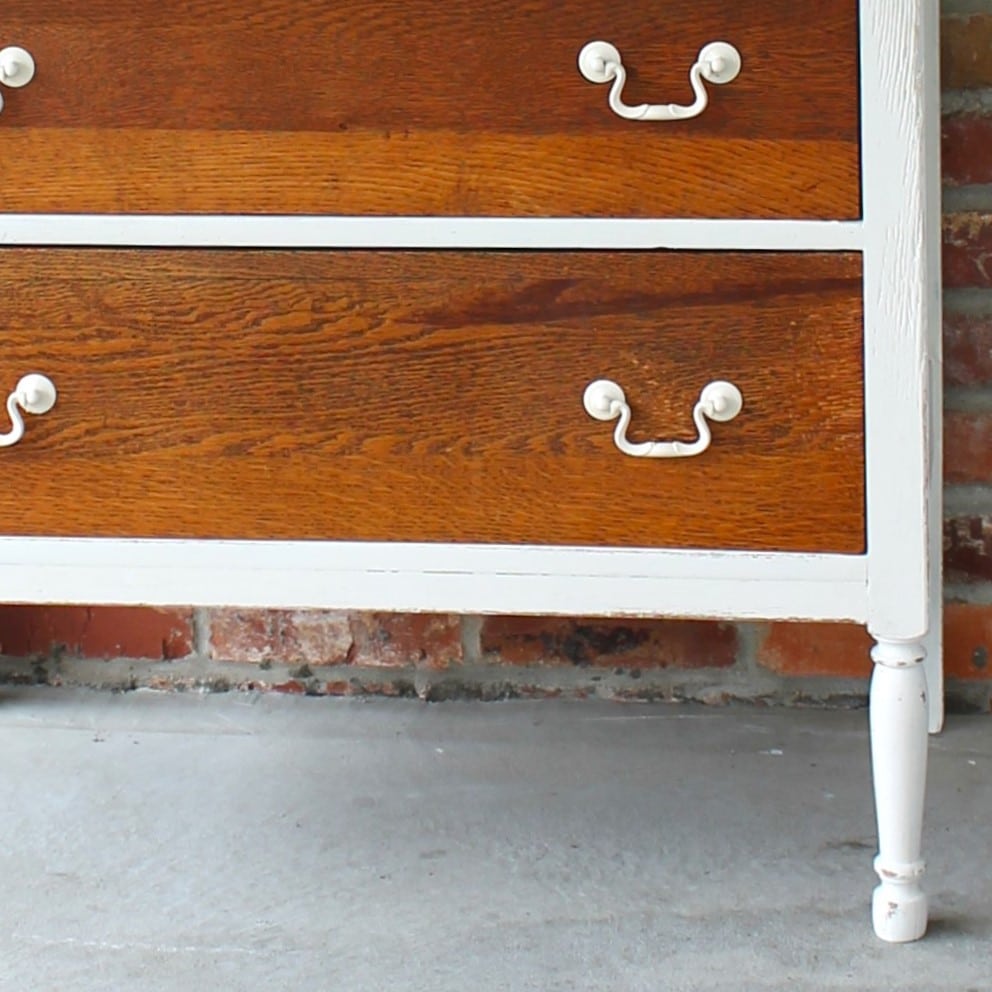
The photo above shows how the table looks after being painted and distressed with baby wipes. You can see the original dark stained finish where I used the baby wipes to remove the paint over the finish.
It seems weird to paint something and then remove the color, but the look is trendy and the distressing gives depth to any painted furniture.
That’s all it was to the process. If you want to distress painted furniture using baby wipes, it is a good idea to work on a practice board before starting your project. Just paint a board of any type, wait for the paint to dry, and go to work.

We discussed this earlier in the post…..when you distress furniture with sandpaper, you often sand it down to bare wood because the sandpaper is rough, and the bare wood looks raw and unfinished. It’s always nice to showcase the original stained finish using baby wipes and the wet distress technique.
I used an inexpensive brand of baby wipes from Walmart. Although I haven’t tested other wipes, I don’t think what kind you use matters.
I’m not sure what it is about the wipes that remove the paint, but I know they work better than using a thin towel dampened with water.
More project ideas for you…..
18 Latex Painted Furniture Makeovers Distressed And Antiqued To Look Old
Easy DIY Drop Cloth Home Decor Ideas
13 Ideas For Painting Silver Plate Serving Pieces
13 Ways To Make Your Guest Room Welcoming
Would you like to see how to layer paint using Vaseline? I’ve got the tutorial for you here….Vaseline Paint Layering Technique For Furniture.
Painting furniture isn’t hard or time-consuming. You can paint a piece of furniture and have it back in place in one day. Really. Maybe you could start on an easy project. Look around your house and pick out a piece to paint.
As always, thanks for being here, Kathy

I have 2 of these tables ,one is very dark and I am going to paint it a sage greenish color for my bedroom ! Thanks for the post cuz it’s really hard for me to paint wood. Now I will use dark woods that don’t show grains.
No I did not seal it. If you need to seal a piece I would recommend Varathane.
Did you seal the table with wax, something else or nothing at all??
I will keep a good thought for your family.
This distressing technique seems like a good one, but I do not like the waste aspect of it. I think it would be ok on a small piece, though.
Prayers from New Mexico for dad and your family! Hoping for a happy and healthy holiday ahead!
I will keep you and your family in my prayers for a speedy recovery!
Praying your Dad gets better and that you manage to be safe, Enjoy your videos.
Keeping you and your family in my prayers for a speed recovery. I love how this little table turned out and I especially like the blue! Hoping for a wonderful, healthy Christmas for all of you!??
So sorry to hear about your Dad. Wishing him a speedy recovery with additional wishes that you and your sister do not contract the virus also. Prayers for you and your family in these trying times.
So sorry to hear of your coronavirus problems Kathy and I wish you and your family well and a speedy recovery. I will light a candle for you all and hope that by Christmas you will all be in good health once more.
Praying for you and your family and thank you for your dedication of keeping your site up and running. I so love your videos!