How To Weather Furniture: Painted Sideboard Coastal Or Nantucket Style?
As an Amazon Associate, I earn from qualifying purchases.
How to weather furniture so it looks old but in a good way.
When looking at this gray sideboard with a weathered finish I think of the Atlantic coast and Nantucket or Cape Cod. Don’t ask me why because I’ve never been to either place. You guys might have another take on the look and I would love to hear it.

The condition of this piece determined the makeover. The veneer was all ragged and there were deep dings and scratches in the top. You guys know I would rather work with serious flaws than try to correct them. Too time consuming. So there will be some distressed paint happening.
The JTS and I made a few repairs and cleaned up the sideboard before starting the paint job. I ran into more repair issues during the painting. If you missed the post with all the prep work you can see it here.
How To Weather Furniture And Paint
This weathering technique can be used on any painted piece of furniture or home decor accessory and on any paint color. You can even weather already painted furniture from the store! Keep all that in mind while reading the tutorial.
Prime Furniture Before Painting
Once I had the paint technique planned out I decided to use white primer instead of my usual gray. I wanted to whitewash or dry brush white paint over the gray paint. White paint under the distressed gray paint should be perfect.
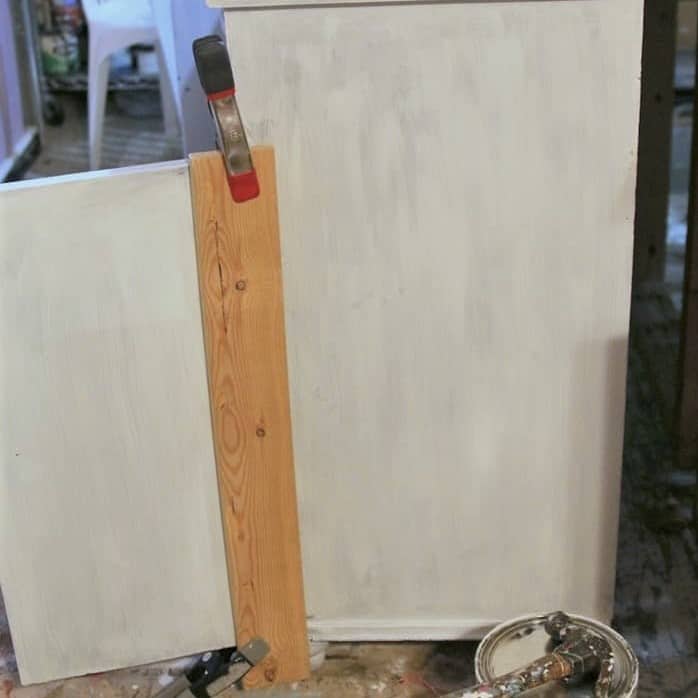
When applying the primer I noticed the veneer was loose on the right cabinet door. I put wood glue under the veneer and clamped it down to dry.

Select Paint Color For The Perfect Weathered Finish
The paint for the sideboard is an oops paint I picked up at Home Depot a few months ago. The paint is Behr Paint and Primer all-in-one and the price was $2.10 for a quart. Can’t beat the price. I liked the gray because it has a hint of brown. Gray can sometimes be too cool or have too much of a blue undertone for me.

Time To Apply The Paint
I applied two coats of white primer and two coats of paint. (It’s Furniture Fixer Upper Tour Day. My tour buddies have some real beauties for us. Links at the bottom of the post.)

Select The Hardware Or Drawer Pulls and Knobs
Next step was to decide about the hardware. The original hardware was really frufru with lots of curlicue details.

I went through my hardware stash and found some less ornate pulls. I think they will go with the new paint and the new look better than the original hardware.
Spray Paint Hardware

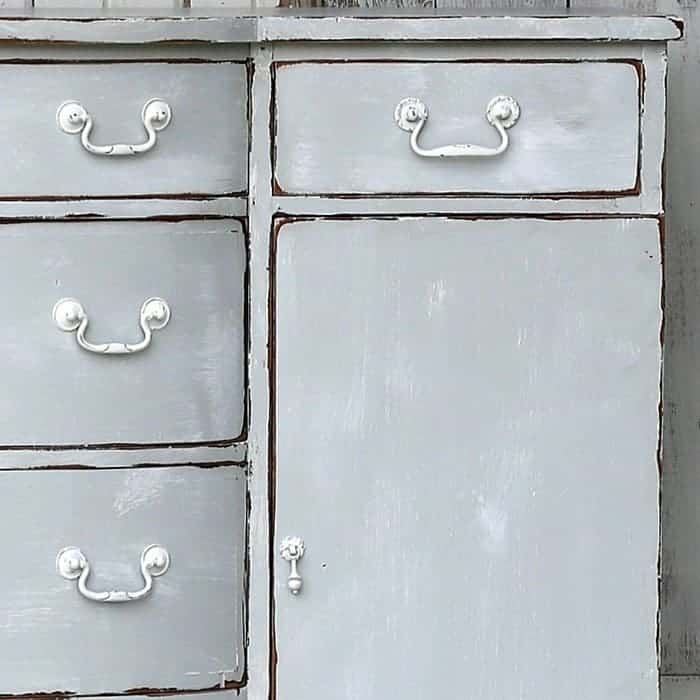
I spray painted them white with Krylon ColorWorks Maintenance Choice Flat White. The JTS bought a case (6) of the paint for $3 at an auction. You can’t beat that price. It’s good paint too, sprays evenly and dries fast.

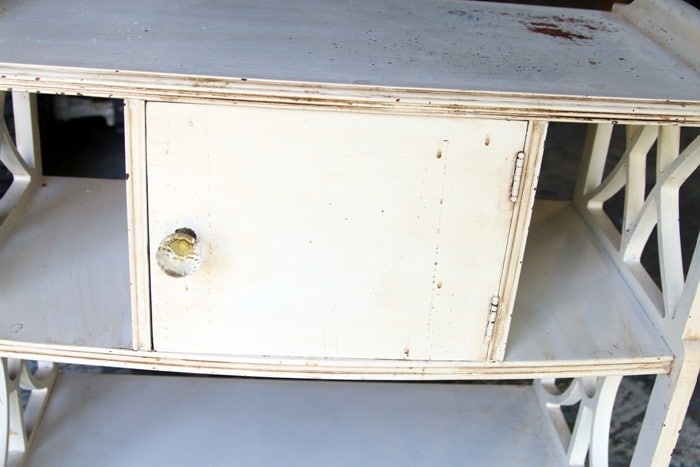
The photo above shows how the sideboard looked after fresh paint and white hardware. You guys know that look is way to simple and clean for me.

Make Adjustments to Paint or Furniture Now
Before I could move on with the project I had to do something with the left side cabinet door. It was sticking at the top and wouldn’t close and it was scraping along one side on the bottom of the door. When working on your project check the drawers, cabinets, pulls, etc. as you go through the makeover process to be sure everything is working right and in good shape.

I used my power sander to sand the top of the door so it would close easily. Then I sanded the bottom left side of the door. Next I touched up the paint where I sanded it all off. Now the door closes smoothly and doesn’t scrape the paint.
Dry-Brush or Whitewash to Weather Paint

Instead of whitewashing the sideboard I dry brushed white paint over the whole surface, in specific areas, but just a bit. To do this I watered white paint by half then poured it onto a paper plate. The best technique for dry brushing is to dip the brush tips in the paint then wipe almost all the paint off on a paper towel or piece of wood or whatever before applying the paint to your surface.
The Paint Brush Makes A Difference

I usually use a small brush when dry brushing but on this piece I decided it made more sense to use a large brush. The reason? It’s important to keep your brush strokes nice and straight moving with the grain of the wood. The wide brush is heavier and thicker and it’s much easier to paint straight lines. I dry brushed the white paint on until I was happy with the look. Not too much white and not too little.

Distress The Weathered Paint
Bet you thought the paint was weathered enough. Nope. Time to distress the paint. You want to be sure and do the dry brushing before sanding. If you distress the paint first you have to be careful not to dry brush white paint on the distressed wood areas. That just wouldn’t look right.

And that’s it. The paint technique sounds like more work than it is. The prep and furniture repairs took longer than the painting, dry brushing, and distressing.
Why call it Weathered Coastal or Nantucket Style?…..
When I think of the Atlantic coast I think breezy, cold, and turbulent. Maybe it’s the color, or maybe it’s the dark wood where the paint is distressed, or maybe it’s something else that makes me think of the coast. I do love the gray paint color with a hint of brown. It’s my new favorite color. I need to have more of it mixed up.

I distressed the drawer pulls by hand using 3M flexible sandpaper. They just didn’t look right all perfectly white against the weathered and distressed paint.

Wax The Paint
I applied a coat of Howard’s Wax in Neutral to the sideboard. It adds a bit of sheen and gives a finished look to the distressed areas. Forgot to get photos of that step.

This is definitely a big transformation. The sideboard was all beat up and the worse for wear. Even though the new look is rustic and weathered it also has a fresh clean look.

I distressed some of the damaged areas on the top and just let the white primer shine through in other areas. I dry brushed white paint on the top too.

Loving the new look although I know it’s not everyone’s cup of tea. That’s okay. I wish you guys could see it in person. The photos don’t do it justice.

Don’t forget to leave a note telling me what you think about the finish and what you would call the style or type of finish.
Now it’s time for the Furniture Fixer Upper Tour. Just click the text links below the “before makeovers” photo collage……

Petticoat Junktion ( You are here)
Girl in the Garage
Confessions of a Serial DIYer
Interior Frugalista
Just The Woods
Salvaged Inspirations
As always, thanks for being here and have a great day, Kathy

Oh no! I think it’s just horrible what you have done. Sorry. To each their own I guess. I love your other work too, just not my style. this time.
Thank you Bobby
Thank you Sheila
Wonderful!! Thank you for sharing your magic!
I don’t know precisely what Nantucket style is being in the UK but it is such a pretty name I would christen this piece Nantucket either way. I love the way all the dark straight lines in it have become wavy – takes away any hardness and makes this piece look like an old friend.
I love love love it!! Think it’s my favorite of what I’ve seen you do. If I lived where you are I would probably buy it! Like someone else said “soft and elegant”. I also like the name you coined, Coastal Nantucket. Great job Kathy! Beautiful!
Kathy this piece is so much prettier now. Kind of a casual elegance, less stuffy. Fabulous! xo
love the look, reminds me of walking through the wooded trails here in Southeastern, NC. Thanks so much for sharing.
I think it’s pretty, and your “style name” is right on, in my book… although I’ve never been out east either, haha! ?
Nice look. I also liked it before the distressing!
Thanks Wendy. You’re comment made my day!
Thank you! That’s just what I was thinking.
Sounds like the perfect paint finish for you. You need to paint that oak buffet!!
Yes I love it. Wish I had a buffet to do but actually I do. It is stained oak and is just blah so I might get up the nerve to paint it this color as it will be going to Atlantic literally that’s the name of the place I plan on retiring.
Kathy, it looks amazing! As someone who lives along the Massachusetts coast I think coastal Nantucket fits perfectly.
thanks, Kathy….I love how well you explain each step of your reno projects…it makes it so easy to follow and your photos are great! this is a cool piece and the “after” turned out great…thanks for sharing, as always.
Love this color and for $2.10 omgosshh! And I also like using a larger brush for dry brushing too. Its helpful when you’ve had too many coffees and have the jitters..lol. 😉
Love how it turned out and the color! The can of paint didn’t give the name of the color on it by chance? I agree with you, so many gray’s are too blue:(
Oh my goodness! This is gorgeous!! I love it! ? You did a fabulous job painting and distressing it. Thank you for sharing all the steps. ❣️
oh Kathy this is so pretty! I love the softness of the color and the distressing! xoxo
Well, it’s totally my cup of tea – now that baby has some personality!
Thanks Christy and the stencil idea is great. I just took the piece to the shop. If it doesn’t sell I may do a stencil!
You know I’m a big fan of distressing so I love it! I would add a damask stencil in white to the center of each door panel and distress that too! You are so right though, it is always something, right? It’s rare to get a furniture makeover that goes smoothly from start to finish! Love it, my friend! XOXO
I love it! I could totally see a stencil on this piece. Love it!
I love it so much!! Fantastic!
Love it!