Furniture Makeover With Adhesive Drawer Liner
As an Amazon Associate, I earn from qualifying purchases.
Hey, it’s Furniture Fixer Upper Day! Learn how to use an adhesive drawer liner to decorate painted furniture.
Also, I used the wet distress method to showcase the layer of green paint underneath the blue. There is a video tutorial later in the post showing exactly how I did the wet distressing.

My furniture makeover features an adhesive drawer liner with a fun tropical flower design and blue and green paint. Another one of my projects went through a lot of plan changes, only to come back to the original plan.
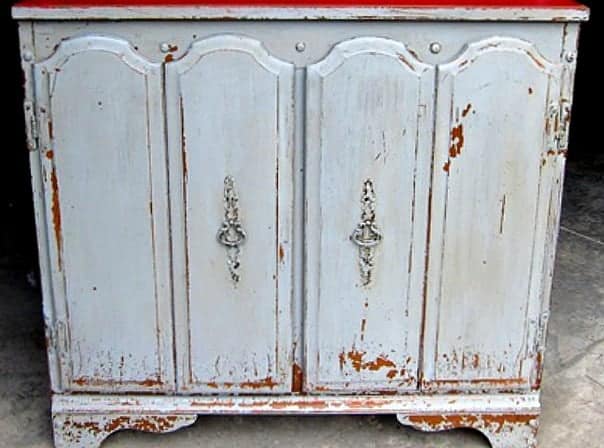
The image above shows how the wardrobe looked before painting. I can’t even remember where I bought it or what the price was. The piece has been sitting in the workshop for a long time.

As you can see the mirror is missing from the wardrobe. The JTS cut a piece of Luan to use in place of the mirror. That’s where the adhesive drawer paper comes in.

Before cleaning my furniture pieces, I check all the drawers and the furniture’s casing to see if anything needs repair.
More often than not, there is something to fix, and it is best to make the repairs before cleaning the furniture. I shot a few nails in the side using my Ryobi Brad Nailer, and that’s all it took.

I’ve been wanting to paint a piece of furniture a bold green color and decided this was the piece. I picked a color and had it mixed in the new Behr Scuff Defense paint.
The color is Basil Pesto and I think the color chip is from PPG. I’ll double-check and correct the info here if I need to.

The plan was to paint a layer of green paint then paint a layer of turquoise paint over the green then distress the top layer of paint heavily.
I chose those colors to match the drawer liner paper. Well, it had been a while since I looked at the paper, and imagine my surprise when I pulled it out: the greens were a muted color, and the turquoise was not turquoise but a dark baby blue.
The Behr paint was mixed in a semi-gloss sheen just because I wanted a change. I decided maybe not to do the two-layer paint color and found white drawer knobs for the wardrobe.
I wasn’t feeling that look at all so on to a new plan. The problem with layering paint colors is to make sure the two colors don’t fight each other.
What I mean by this is it’s best not to have two bold colors like the bold green and then a bold blue paint layered because the two strong colors will not complement each other. The finished look is likely to be glaring!

Of course, I didn’t have the perfect color blue so I pulled out paints and started mixing. I don’t know why professional painters say this is wrong, hahaha. I mix all kinds of sheens, paint types, and brands.
In the photo above you can see all the paint colors I mixed together. I started with the semi-gloss off-white and added the two blue colors and just kept mixing.
I first had the paint too dark so I added more white. Next, I noticed the color looked dull and muted, not a cool shade.
Do you know what color I mixed with the blue to give a cooler shade? Yep, pink and then a bit of red because the light pink wasn’t working.

It took a while but I finally got a color I was happy with. The color ended up being a medium baby blue, not too bright and bold. The color matched the blue in the drawer liner really well considering the paper had various shades of blue.

When I got to this point with the wardrobe painted blue I liked the color and decided to not layer the paint.

I went on a 4-day trip to a blog conference and when I returned, I changed my mind once again. On to the distressing…..wet distressing using Simple Green and sandpaper.
This is where the video really comes in handy, because you can see exactly what I did. Keep in mind that the paint had been curing for several days. The longer paint cures, the harder it is to remove.
For this process, I had to spray the Simple Green onto the paint and let it sit for about half a minute. Next, I wiped it all off with a rag then I grabbed the sandpaper and started distressing it by hand.
It worked pretty well, but removing that top layer of paint was really difficult, even in small bits. I kept thinking about how big the wardrobe was and I pulled out my power sander to see if it would work or would remove both layers of paint. Thank goodness it worked great.

With all the distressing done it was time to replace the drawer pulls. I ordered the pretty blue ones from Amazon. The pack of 12 was $16. Not bad, and the knobs are so pretty.

The wardrobe had those two cabinet doors with places for keys but the keys were gone. Maybe I could just add knobs to those holes?

Worked out great. I didn’t have to do any drilling or hole filling. Below is the video of how I wet-distressed the paint….
How To Wet Distress Paint For A Layered Paint Finish

Last part of the project was covering the luan board the JTS cut to fill the mirror hole. It’s easy to apply the paper when you don’t have to worry about working around corners and angles. I stuck the paper to the board and used a razor tool to trim off the excess.
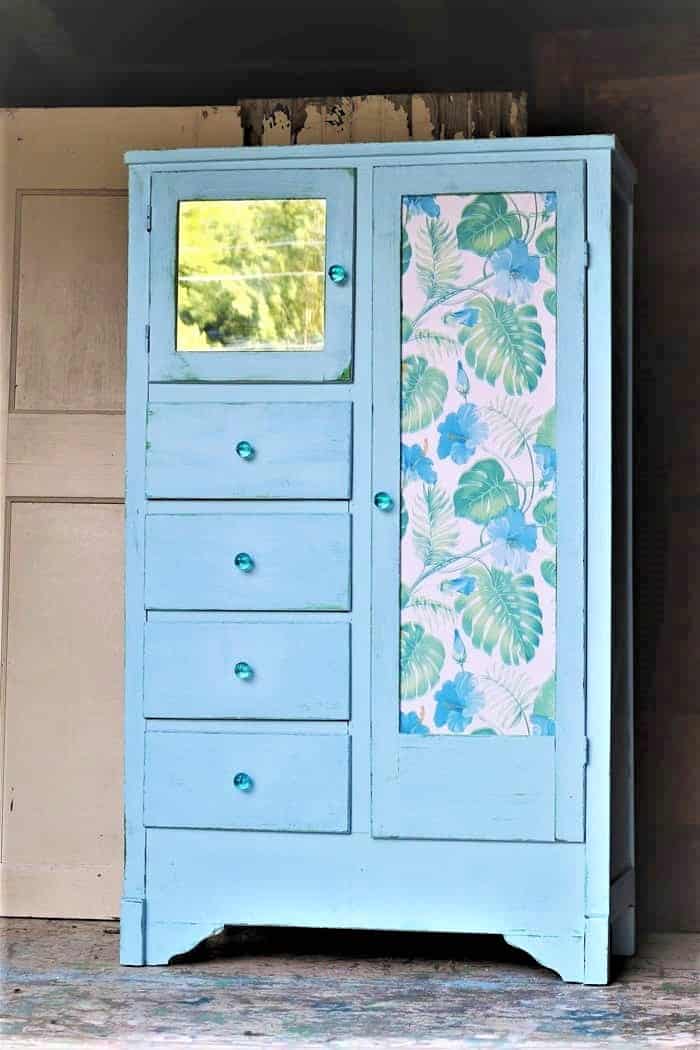
The board fit perfectly into the mirror space and all I had to do was use a heavy duty stapler and put several staples in the backside of the door panel. Easy. So, what do you guys think about the makeover? I’m not going to lie. I love it.
")
It is definitely different than anything I’ve done recently. I still plan to use the bold green on a piece and not cover it up. I may mix a bit or white paint with it though. The layered paint look on this piece is subtle and it doesn’t show up very well in the photos but it’s there.

The vinyl paper is listed on my Amazon page also and after looking at it on Amazon again I notice a difference in the design on the paper I got and the paper online. You might notice the floral design on the wardrobe has a blurred or 3-dimensional look around the leaves. This is not what it looks like on Amazon. I guess it’s okay but not as sharp looking.
Okay, leave a note if you have the time then head out on the Furniture Fixer Upper Tour. The blog links are below the “before” makeover photo collage…..

Painting Over High Gloss Furniture – Salvaged Inspirations
Farmhouse Hutch Makeover – Confessions of a Serial DIY’er
Stencil Furniture With Chalk Paint – Girl In The Garage
Paint Furniture With Tropical Vibe – Petticoat Junktion (you are here)
As always, thanks for being here, Kathy

There is a photo in the post that shows where I just added the knob and a bolt. The end of the screw for the knob was small so I added a bolt to the screw so it was large and wouldn’t slip threw the keyhole. Hope this helps. Take a look at the photo.
I would love to know what you used to attach the knob where the lock keyhole is. I have one just like this and I glued a knob to that area but it did not stay. Thanks
Fun pretty color ! Thanks for sharing.
I absolutely love it! Such a fun piece to have in your home.
That turned out beautifully! Gives me and idea for the one I have!
I can not find what you said about painting hinges. I love reading you posts. How do you keep up with all that you do?
Thank you
Yes, I have!! I think the piece was covered with a coat or two so I just added water to the tiny bit that was left and brushed it over the whole piece. Worked out okay. Good Question! If I mix up a color I just love I will take a sample to the store to have it made for me!
Thanks Christy.
I always use Simple Green full strength. You could probably use other cleaners or maybe just water!
You can’t go wrong with white. I love white furniture especially if it has a bit of distressing, lol.
Thanks Cheryl!
Thank you Barbara
Thanks Jen!
This is so fun, Kathy! Love the blue color you mixed. 🙂
I love it! The paper insert blends beautifully with the paint. And the knobs are perfect…really sets it off! Great job! Love watching your videos….
Kathy, I love it!
I have almost this same amoire cabinet that I’m refinishing right now. Except the mirror on the long side is intact and where you have the little mirror I have wood on that door. I sanded it down and i’m painting it white to go into my bedrooom.
When you wet distress paint with simple green and sandpaper, do you use the simple green full strength or is it diluted?
How pretty did this turn out?? I have to say that I was in love with the original green paint too!! XOXO
Have you ever mixed paint for a project and ran out before it was finished…how in the world do you mix up another batch..exactly the same..lol….love the cabinet
Great Job! I love the color.
Kathy,
The cabinet is beautiful. Love the blue paint and the coordinating paper. Great choice!
Your paint mix with that decorative paper looks amazing Kathy! XOXO