How To Decoupage Furniture With Paper And Mod Podge
As an Amazon Associate, I earn from qualifying purchases.
In this tutorial, I will show you how to decoupage furniture with paper. Have you tried to decoupage paper on anything?
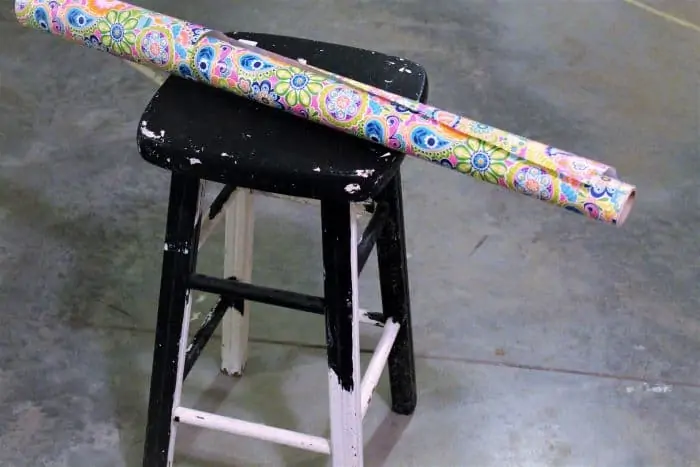
This is a small bar stool painted turquoise, with the legs wrapped in paper using Mod Podge. Of course, I have to be a bit different, and the legs of the barstool have varying lengths of paper covering them. Be sure to let me know what you think of the project.
This stool has been sitting on my fireplace hearth, holding magazines and a Ball jar full of seashells. It was part of my Summer décor.
I found the stool at My Favorite Junk Shop, and I really liked the paint job….really! I like the way the white and black paint are uneven on the legs.
That’s where I came up with the idea for the decoupage legs. There are all these decoupaged napkin projects on the Web, but I’m missing something somewhere.
I once tried to decoupage with paper napkins, and that did not go well at all. I used Hobby Lobby wrapping paper for this project, and it was much easier to work with.
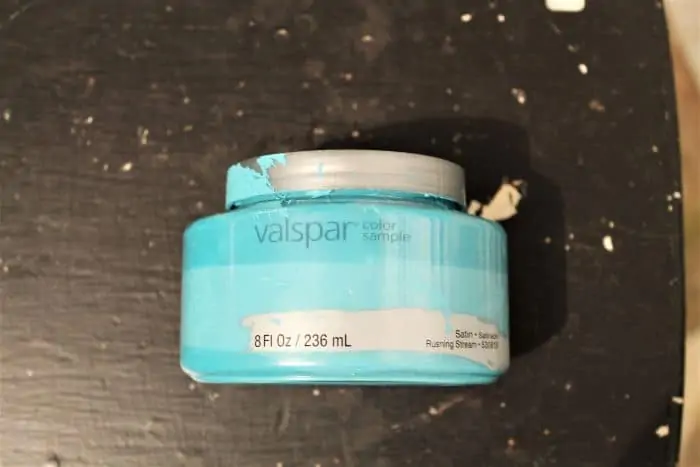
The Valspar paint sample in Rushing Stream was my pick for this project. Such a fun color. I love these inexpensive paint samples—just the right size for several small projects.
I probably used a third of the jar. I’ve found that turquoise fits into just about any color scheme. The bright multi-color wrapping paper, not so much.

The original paint looked oil-based, so I applied a coat of Glidden Gripper Primer to start the project. Glidden Gripper tinted gray is my go-to primer (update: it is now PPG Gripper).

I waited overnight for the paint to dry. I didn’t want the paint to peel off when applying the damp mod podged paper.

I cut strips of wrapping paper and brushed Mod Podge onto them. Yes, the project did get a little hairy while working around the legs and rungs.

Actually, I kind of went nuts trying to work around all the corners, bends, and curves. Holding the paper, I cut angles around the rungs, then wrapped it around the legs. They don’t call it wrapping paper for nothing.
I filled in spots with bits of paper where the paint was exposed…where I didn’t want it to be….good thing the paper is a really busy print.

The top of the paper on each leg has a torn edge. I thought that looked cooler than a cut edge. I let the Mod Podge dry, then used spray-on clear Polyacrylic as a sealer. I could have used Mod Podge as a sealer, but at this point, I was tired of Mod Podge finger tips.

The torn paper edges, angled rather than straight across, are just quirky enough to look good. You don’t have to make everything look perfect or go by the book.
Don’t be afraid to try a simple project if you’re a new DIYer. As far as I’m concerned, there are no rules. Do the project your way, in your style, and don’t be afraid to change the plan midstream or redo it. I’ve been there and will be again and again as long as I continue working on projects.

I distressed the stool seat so the black paint would show through. I think it works because of the dark blue in the paper.

Do you have some pretty wrapping paper or……. I just had a thought…..maybe an old newspaper. If the paper was aged just right and the furniture piece was really old, I bet newspaper decoupage would be cool.
Anyway, ready to try a decoupage project? I have several projects using fabric and one where I used an invitation card! See more Mod Podge projects here…..Petticoat Junktion Decoupage Projects.
That’s it. What do you think? Have a great day. Kathy
I like the fact you did not totally cover the stool in paper and that you distressed the top edges. Have several items of furniture I would like to try this on. Thank you for sharing.
I love the idea and think something similar would be terrific for a little girl’s room – maybe a table and chairs or a rocking chair.
Sheila.
This is so cute! The torn paper edges was a great idea. The little cart beside it is too cute, reminds me of one I have but don’t really like. Mod Podge may be just the thing for it!!
This turned out really cute!
Fun, fun project ! Now l know what to do with my roll of colourful wrapping paper. Thanks, Kathy.
I have this old smallish table in my basement that I didn’t know what to do with it. The top is kind of rough. I was going to paint the whole thing & then sell it, but the idea of another boring painted table didn’t float my boat. Now I know what I can do with it – I will Modge Podge the table top! I love the turquoise color you used. Your stool has a young modern fresh look which is very appealing. Great job!
This is so pretty!
I love it! Well done, Kathy ? I love that pattern on the paper so much. ✌?
WOW your stool is absolutely GORGEOUS! You did an amazing job!
Thank you! Come back again!
Visiting from TT&J link up.
I LOVE this take on the dipped legs such a fun bright print! super cute!
What a great idea-love your stool.
With school and working on projects, where do you find time to do anything else, let alone polish your cute little tootsies with blue polish?
How is school doing? What does your hubs do while you’re at school? Hope he’s taking good care of himself.
Love your stool, you just might start a new trend. I’ve got 4stools out in yard waiting to be rescued. Someday.
Have you done any fall decorating? I’m not quite ready yet. Will be busy cutting out leaves from fall colored paper. Take care ok? Happy week
Very nice!
every DAY I look forward to reading what project you are working on….you are so talented! Been buying up furniture pieces to work on when I finally get to retire…and now I wish I could just retire earlier! you are such an inspiration. Thanks.
LOVE!!!!!! Now to find a cheap stool…
LOVE what you did with the stool, gives it a really fresh, updated look! It still has a rustic feel with the aging though and just love the finished project!!!
I love the way your stool looks. You are so creative.
How fun! What a neat idea!
sometimes you be crazy…that’s what i love about your stuff…i think you will be starting a new trend here this is so dang cute love it xx
So in love with your stool redo Kathy! The color & that fun pattern is right up my alley!
I’m not very fond of dipped legs but I LOVE what you did with the paper. Now I’m looking around for something I can do with paper. Thanks for the idea.
I have now an idea of what to to do with my boring stool! thanks!!!
from katoomba-australia