How to Paint A Coastal Style Table With Stenciled Nautical Designs
As an Amazon Associate, I earn from qualifying purchases.
This painted coastal style table with stenciled nautical designs has a long, detailed story. The project went through many plan changes, but everything came out okay in the end. In fact, it’s better than I envisioned.

I found the table at my favorite junk shop. The junk shop is about the only place I can find reasonably priced furniture, and the table was only $10. The style is really unique.
![]()
Today, our Furniture Fixer Upper Tour features five unique pieces, so be sure to visit all the blogs. Now, for the coastal furniture tutorial.
")
You might have noticed that the table top has a few issues. The main problem is in the middle, where the wood separated and someone tried to glue it back together. That area is raised, and sanding will not flatten it out without sanding deeply into the wood.
My first plan was to glue cork to the top. I like trying new things, and it sounded like a good idea at the time.
")
To adhere the cork to the table top I brushed a solid layer of glue over the top.

Then, I turned the table upside down and weighted it down with everything I could find. You might wonder why I didn’t cut the cork to size before gluing it to the tabletop.
Cork, especially thin cork, has a tendency to split easily, and I was afraid the cork would tear when I tried to cut it into a circle.

Well, I still had that problem once the glue dried, and I was ready to trim the cork around the table. When I took my straight edge blade to the cork, it began to tear.
So, I cut the cork around the table top, leaving an extra one inch all the way around. Then, I used a sander to “cut” the cork to the edge of the table, and it worked perfectly.

Next, I sealed the cork with Mod Podge. Did you know Mod Podge can be used as a sealer? Works great.
My original plan was to paint the base of the table and leave the cork top as is, but after looking at the table, I didn’t think I could make it work.
Moving on to plan two: a nautical-style table with light blue paint and a distressed cork top. Let’s see what happens.
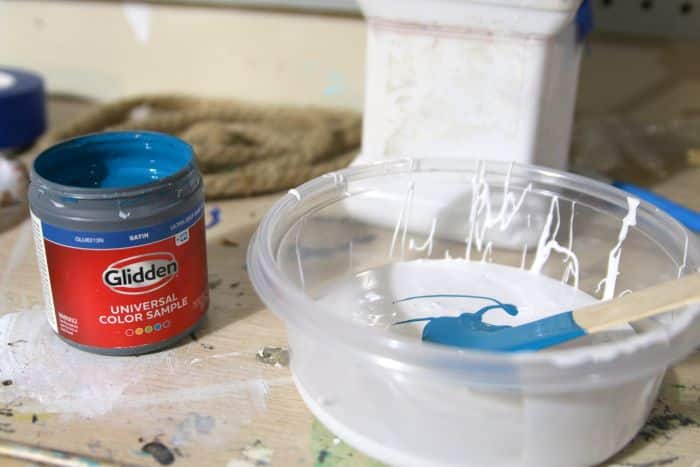
I didn’t have a light blue paint, so I mixed an oops sample paint with white paint to make light blue.
")
Then I painted the table. With the new plan, it would not have been necessary to cover the table top with cork, but I wasn’t about to remove it at this point.

After the first coat of paint, I decided the blue was too light and added more blue paint to the mix. You can see in the photo above where I tested the darker color.

After two coats of paint, the first step in the makeover was finished.
")
I went through my supply of stencils and pulled out all the ones with a nautical or beach theme.

Then, I pulled red and white paint colors……..and later, blue.
")
I placed the first stencil, a compass rose design, in the middle of the table top and stenciled the directions in red and the compass rose body in white.
")
The white did not show up well on the blue paint.
")
So, I grabbed a dark blue paint color and stenciled over the white.
")
The design was still a little light so I went over it again with blue paint. Then, I dabbed red paint over the center circle of the compass to draw the red colors together.
")
I selected a sailboat for the top left side of the table, or in this case, the northwest corner, lol. If you have never stenciled, I have a great tutorial here….Stenciling Tutorial Using Multiple Colors: Tips From A Pro
")
I went around the table, adding nautical designs in a kind of random pattern. The white sand dollar was just too light. I tried to wipe it off later but the paint had dried really well. I later stenciled a small fish over one side of the sand dollar.
")
As you can see, I used various nautical-themed stencils and just selected the ones I thought would work together or were the right size. Notice also that there is only a little bit of paint in the bowls. You don’t use much paint at all when stenciling.
Remember I mentioned that the table had a long story? Throughout this project, I kept thinking how much I disliked the look every time I changed the plan or added a design.
Once all the stenciling was done, the table looked too perfect, and not in a good way. It looked like a beginner project for a six-year-old.
I’m not blasting six-year-olds at all! But when you get to be 70, you realize that sometimes things are better if they aren’t perfectly colored or painted.
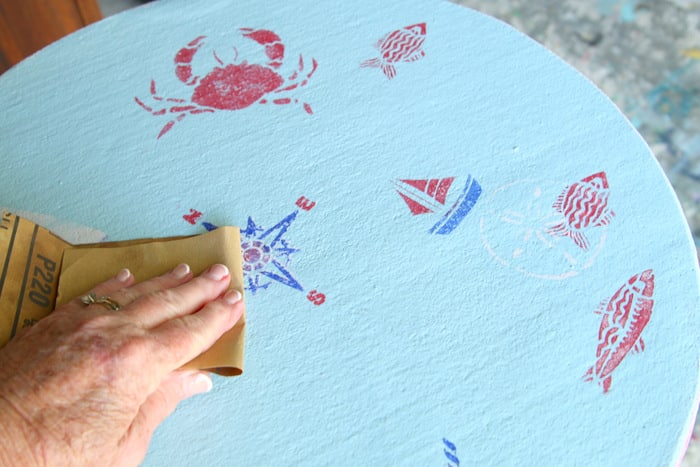
Of course, I distressed everything. I ran sandpaper all over the top of the table, then moved on to the legs.
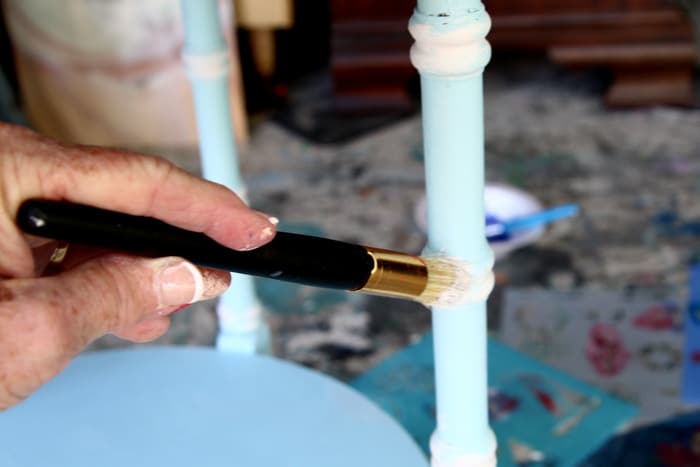
I brushed white paint on the raised details of the legs, and it took me about 2 minutes. Perfectly imperfect is best. The details on the legs remind me of bamboo stalks.
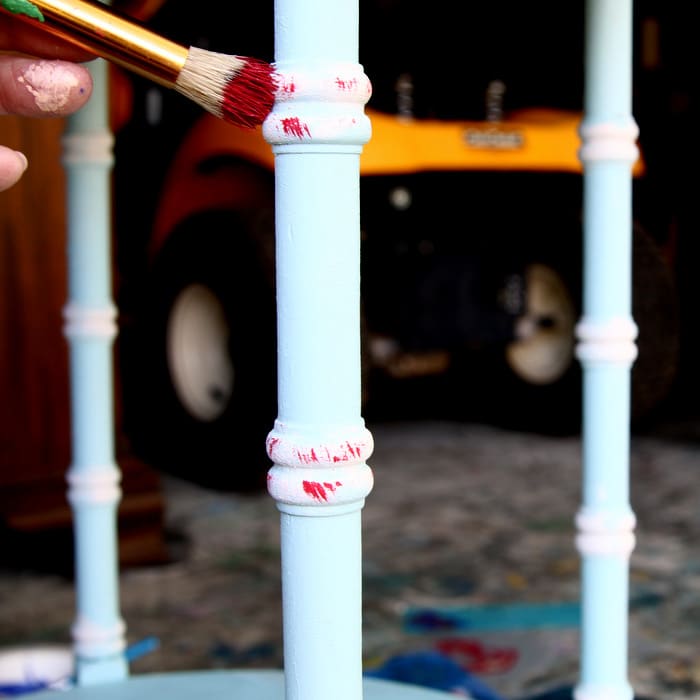
I brushed a bit of red paint over the white paint. Then I distressed the paint on the legs. There are no photos of some of these processes because I was changing my plan as I went and trying things to see what worked and just didn’t think about the photos.

I also brushed white and red paint around the table top sides and distressed it.
I also did some heavy distressing on the bottom of the table top apron. After this last bit of work when I stood back to look at the table, I was finally happy.

In fact, I actually love this little table. Too bad I don’t have a house or a room with coastal themed decor.

My favorite part is the bamboo-looking legs. At the bottom, you can see where I brushed red paint on the corners of the legs and distressed them, too.

The table has a whimsical look but also looks soft and worn.

Please let me know what you think of the table. If you don’t like it, that’s okay; just be considerate in your comments.
Now it’s time to take the Furniture Fixer Upper Tour. Just click the text links below the “before’ makeovers photo collage…….
Furniture Fixer Upper Tour:
Piano Bench Makeover – Confessions of a Serial DIY’er
Curbside Magazine Table Makeover – Salvaged Inspirations
Antique Dresser with Triple Mirror – My Repurposed Life
Paint Furniture Without Sanding – A Ray Of Sunlight
Coastal Style Table DIY – Petticoat Junktion (you are here)

YouTube short video of the coastal table here.
Have a great day, and thanks for being here, Kathy
Thank you Maria! I couldn’t figure out where I was going either!!
Couldn’t figure out WHERE you were going with the cork and then, VOILA’ … once again, you pulled off the cutest lil table!!! I LOVE it!
Well done for the constant plan changes leading to a great result (it’s so easy to give up on a project when things don’t turn out how you imagined)
Such a nice change, very refreshing!
Beautiful! The distressing was perfect/not perfect. 😉 I would love that table in my coastal decorated home. You are very talented!
Cute! I love the distressing too. That made all the difference! This would be perfect in a little beach house. 🙂
The cork to cover the damage – brilliant! And I don’t know if I would have been brave enough to distress with RED but you pulled it off… it looks so ‘nautical’ good!⚓️😃 Pinned XOXO
Kathy,
I think the table is sweet! I do like it so much better after the distressing. I’m not sure I would have had the patience to keep going, but I’m happy you did!
Pinned
gail
I think It turned out cute . The distressing with the red here and there made the difference.
I think it is so fun now! The distressing is just what it needed! XOXO