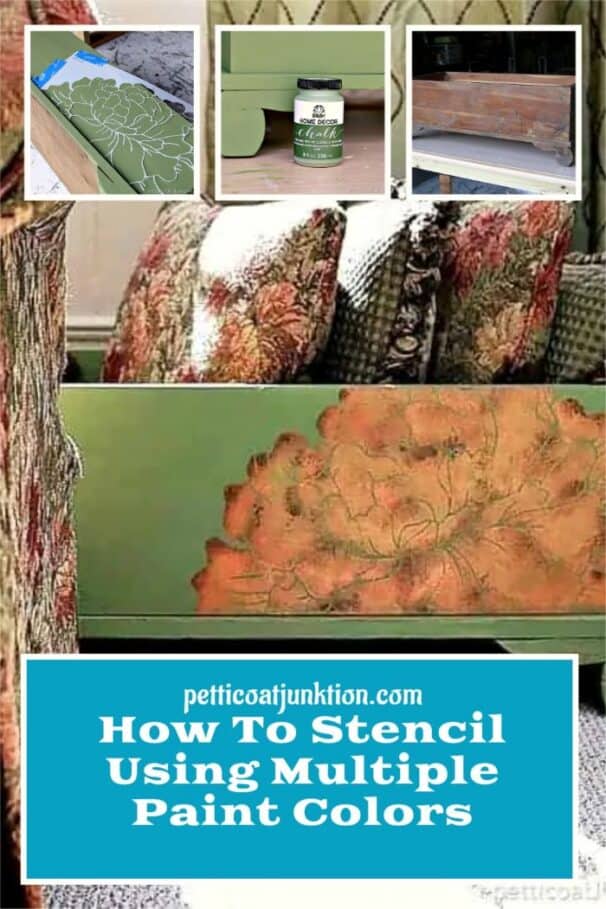
How To Stencil Like A Pro Using Multiple Colors | Step by Step Tutorial
As an Amazon Associate, I earn from qualifying purchases.
This is a complete step-by-step stenciling tutorial. Discover how to create a professional-looking design by stenciling with multiple paint colors or stencil a simple design using one color.
The special stencil technique I’m sharing today is used to create an unbelievably beautiful stenciled design. I learned this technique a few years ago in my trial-and-error painting days.
Step-by-Step Stencil Tutorial Using Multiple Paint Colors

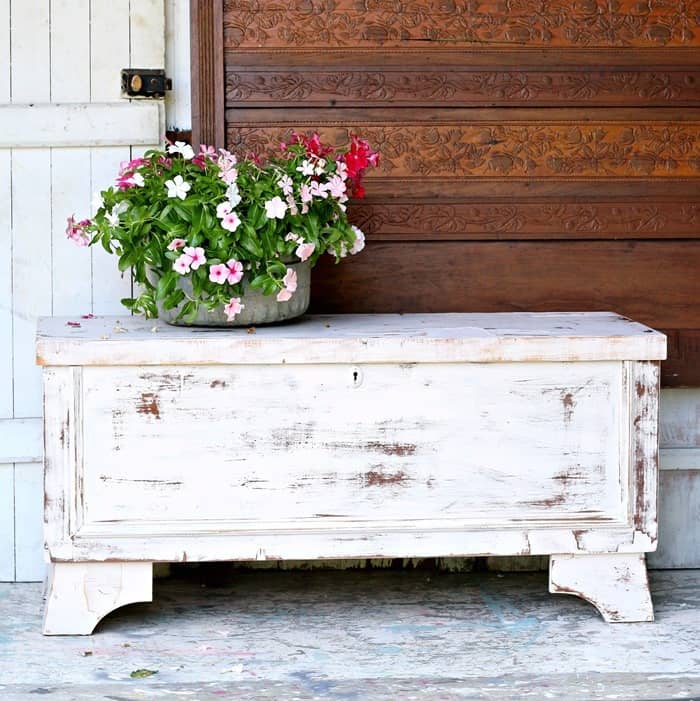
The cedar chest was a thrifty find from my favorite junk shop. It was topless and a little beat up, but for $7, who’s complaining, of course? It’s perfect for painting.
Paint the Furniture or Decor Accessory

The color I chose for the cedar chest is Spanish Moss in FolkArt Home Decor Chalk. I love the chalky, ultra-matte look. The FolkArt Home Decor Chalk Brush is one of my favorite tools. It holds a lot of paint; one coat of chalk paint usually does the trick.
Stenciling furniture gives it a designer look, and you can also stencil any home decor accessory, so think about the decor you have that needs a little love.
My color scheme and furniture style may not be yours, but please keep in mind that when reading the tutorial, you can choose a stencil, paint colors, and furniture that fit your personality. This technique will work for you.

The chalk paint levels out nicely too so no brush marks. You can apply wax over the paint but it’s not necessary.
How to Stencil Anything

1. Select The Stencil
Your stenciled design should complement the furniture or decor accessory, and the proper scale is important. Please do not use a large design, such as the one I selected here, on a small wood chest.
On a small piece of furniture or a small wooden chest, you would want to use flowers of a much smaller scale than the stencil I chose here.
The FolkArt Home Decor Peony Stencil is just gorgeous, and I knew the perfect color combo to take it over the top. This large wall/furniture stencil will look impressive on the side of the chest and is the ideal choice for using multiple paint colors on the stencil.
NUMBER ONE STENCILING TIP: This is a one-piece stencil. You don’t need to buy a multi-layer stencil to use multiple paint colors in your design.

2. Place The Stencil
I don’t want you guys to freak out or anything, but I cut the stencil into two pieces. I know….but it’s okay. I still have both parts! To achieve the best effect, I needed to position the stencil correctly, and bending the stencil would be a problem, so I cut it! Some of you may have a workaround, but this worked best for me.
I am not much for centering stuff or making things look symmetrical. That’s why I placed the floral stencil on one end of the front of the chest. I taped down the outer edges of the stencil with painter’s tape.
3. Choose the Paint

Our den is decorated in the deep, rich colors of Fall, so I chose the colors for the stencil to match my decor. You guys know how much I love color. The bolder, the better. There is no farmhouse style here.
Now comes the really cool part. Metallic Paint. The shinier the better I say. I selected three FolkArt Acrylic Metallic paint colors; Solid Bronze, Copper, and Antique Gold for the project.
STENCILING TIP: It is not necessary to use special stencil paints to stencil!
4. Select the Right Stencil Brushes
The most important supply is your brush. Using the proper stencil brushes will make your project go smoothly. The brush should be stiff but pliable. I like Folkart or Plaid brand stencil brushes.
You will need multiple brushes in various sizes when using a large stencil and multiple colors.
[amazon box =”B003HR6RDW”]
5. Prepare The Paints

Before starting the stenciling, I pour my paint onto a paper plate. It’s challenging to get the stencil brush down into the paint bottle, so this works great. It doesn’t take much paint at all to stencil a design, so don’t waste your paint.
6. Dip The Stencil Brush Into The Paint.
Be sure to choose the right size stencil brush. Brushes come in a wide variety of widths, and the choice of brush will depend on the size of the cutout details in the design. Dip your brush into the paint, just covering the brush tips with a good amount of paint.
7. Wipe Excess Paint From The Brush
The secret to stenciling is using a dry paint brush. To do so, you must wipe excess paint from the brush onto a paper towel or paper plate. You keep wiping the paint off until the brush is almost dry.
If you have a small amount of paint, you might think you can’t see the color once it’s stenciled, but that’s not true. Using the dry brush technique will prevent ugly blobs of paint from getting under your stencil.
STENCILING TIP: You must use a very dry brush for the best stenciling results.

8. Stencil The Design Using Multiple Paint Colors
The first color I stenciled with is Solid Bronze. Sometimes I will swirl the stencil brush but with the highly detailed large stencil, pouncing worked best. I didn’t cover the stenciled area completely with the stencil paint.
Remember, we have three metallic paint colors for the job. I couldn’t tape down the edges of the stencil, so I held them in place with my free hand. I don’t usually use stencil adhesive, but you certainly can.
STENCILING TIP: When using multiple paint colors you can use colors that are very similar in nature that will blend well together or colors that are a strong contrast to each other for a bold look.
9. Add Depth To The Stencil
Once the first color was dry, I applied the second color, Antique Gold. Don’t try to paint all areas of the stencil evenly. Using a random color pattern will look more realistic. Just apply the antique gold color willy-nilly.

I applied copper-colored paint as the finishing touch for the stencil. Or so I thought.
10. Achieve the Perfect Stencil Design
Once the paint was dry and I stepped back to look at my work, I knew it needed something else. The metallic colors were beautiful, but the flower didn’t seem to have the depth I was looking for.

I went back to my acrylic paint drawer and pulled out a dark acrylic paint called Burnt Umber and poured a little bit onto the paper plate.
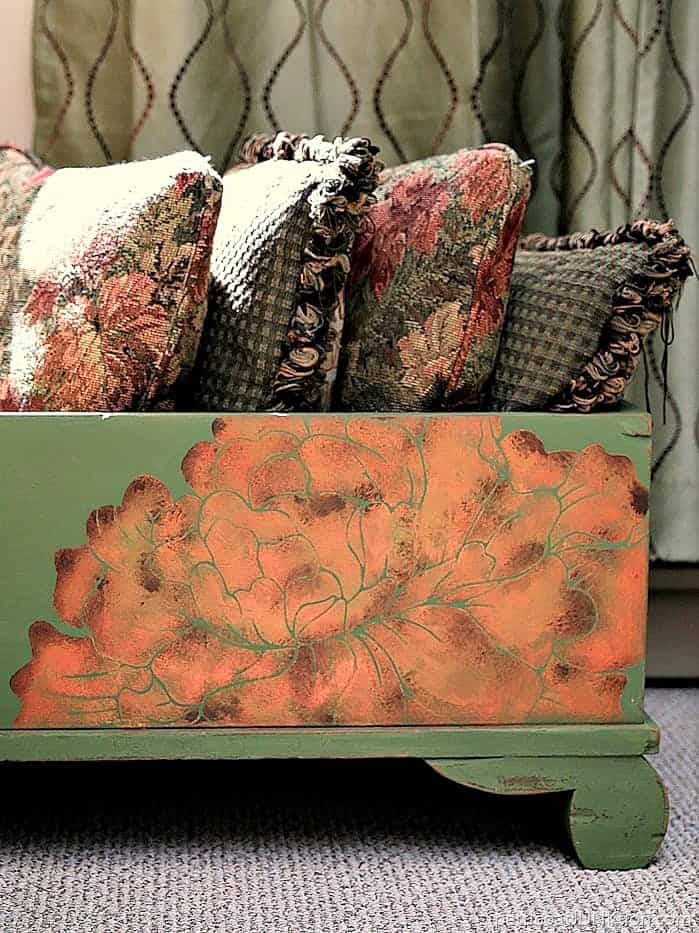
I stenciled the paint along the outer edge of the flower and a few other areas. Again, I am using a random pattern with the paint.

And the pretty peony turned out just like I envisioned. The peony stencil is such a lovely design. I can see it on a white wall stenciled in metallic silver. Wouldn’t that be dramatic?
Some stencils require two or three sheets to achieve this effect, but if you learn this technique, you only need one stencil.
STENCILING TIP: layering paint colors gives a stenciled design depth and character.

I painted the cedar chest so I would have a place to store my pillows. The colors of the stencil are so pretty against the leaf print of the pillows and the recliner.
I decided against using a sealer or wax over the paint. I like the contrast of the metallics against the matte chalk. The stencil took about 30 minutes to complete. Really. What’s your favorite part of the project?
Do you think this stenciling tutorial will help you with your next project? Leave a note for me please and thanks for being here, Kathy
“This post first appeared on Petticoat Junktion in October of 2016. It has been updated with more tips and tricks. Reposted for those of you who have questions about the proper way to stencil.”

I would wait 24 hours but it usually isn’t a problem. I don’t use sticky stencils normally.
How long do you wait after the base coat paint before you stencil? I don’t want to mess up the new paint by sticking a stencil on to it.
I came upon your page to see how to add a personal touch to my furniture. What you have done is truly beautiful. You have turned furniture into art which has inspired me to go ahead and try to do the same. The depth and colour choices are perfect.
Kathy, I’m a beginner crafter. So take what I say as minimal. When I first looked at the finished product I gasped. It is an eye illusion. I could see 3-D with the green hanging over the orange. Beautiful.
I think I love this stencil and plan to do it on something soon! Most impressive
Loretta c.
wow….that is beautiful…
That turned out amazing! I freaked about cutting the stencil LOL but I understand why you did it.
Oh Kathy, the trunk is beautiful. I love the contrasts between the green and metallic color. Just beautiful!