DIY Christmas Wrapping Paper & Christmas Gift Tags
As an Amazon Associate, I earn from qualifying purchases.
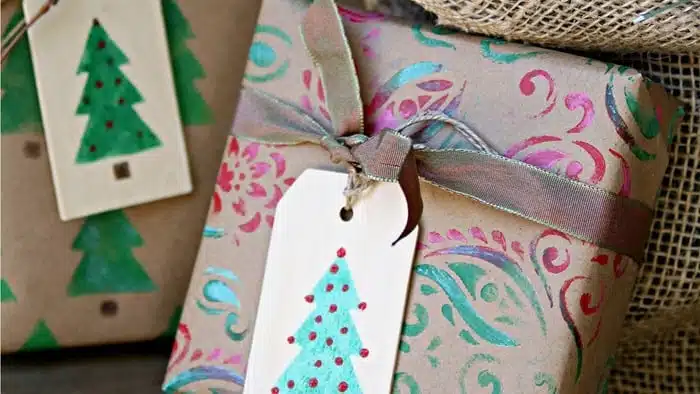
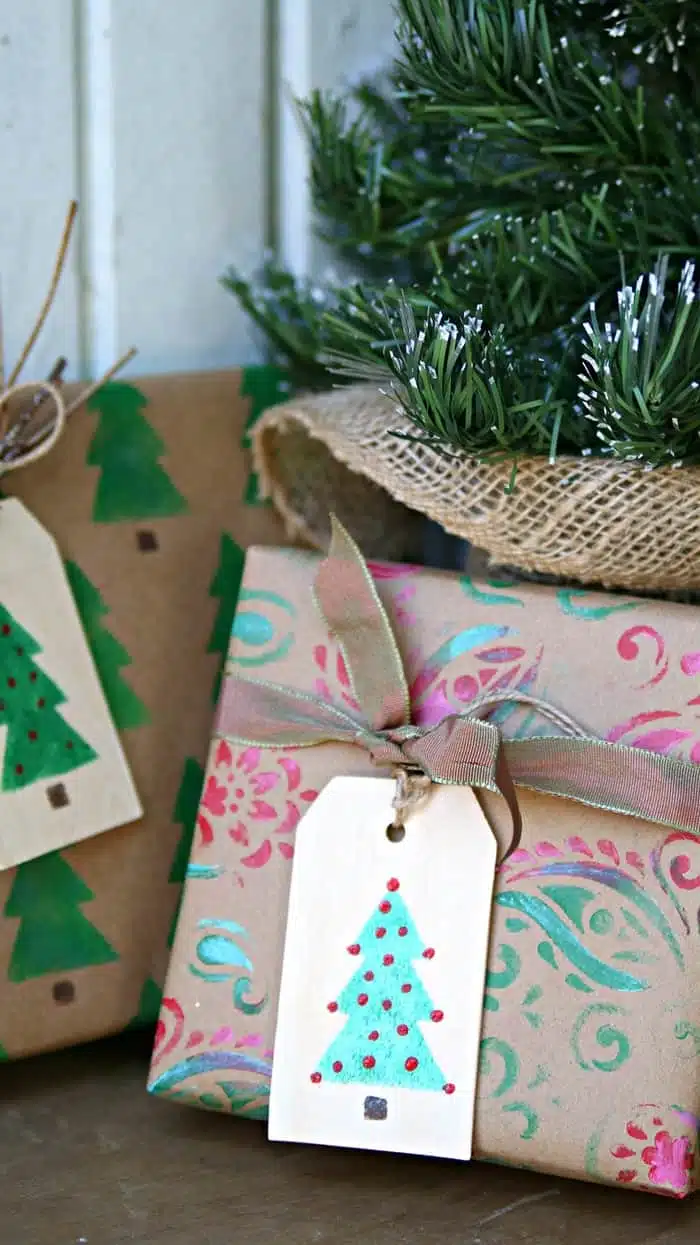
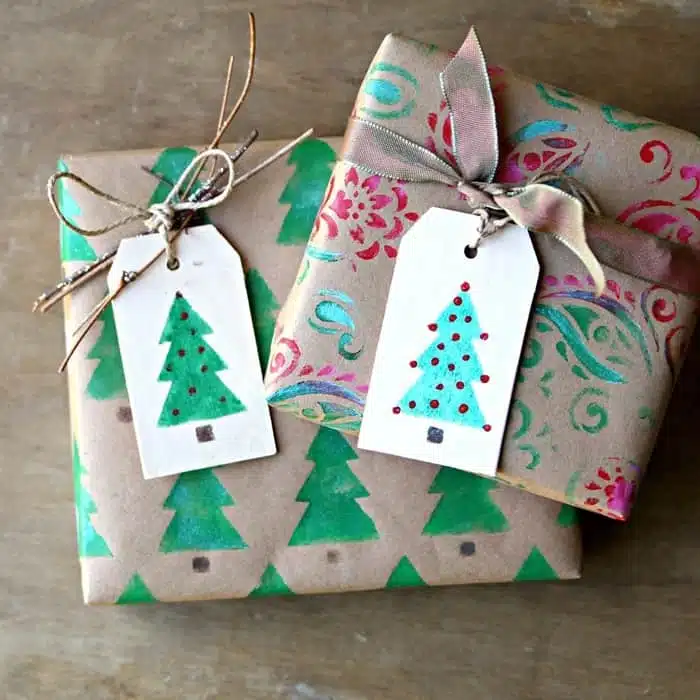
Create special DIY Christmas wrapping paper and it might just be the best part of the gift. You can make Christmas gift tags that do double duty as ornaments.
Hang the gift tags on the tree once the gifts are opened. How cool is that. And the Christmas wrapping paper…..just wait until you see it.
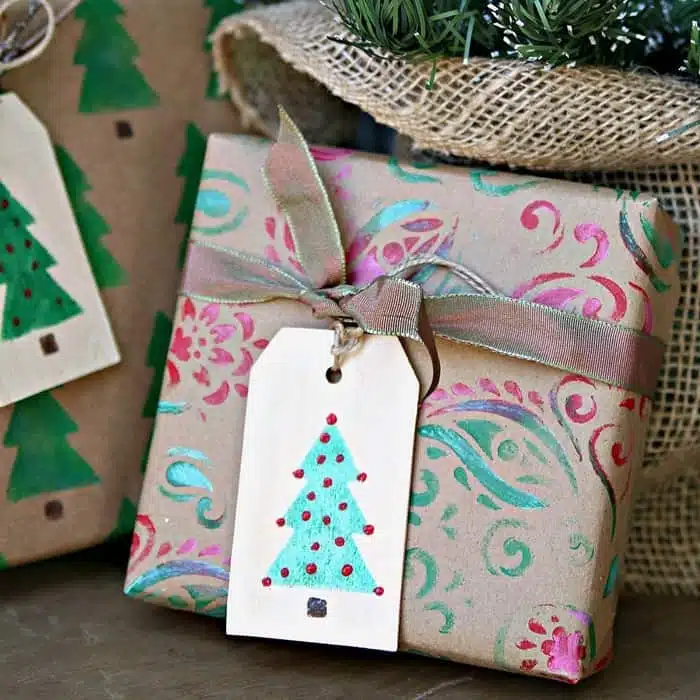
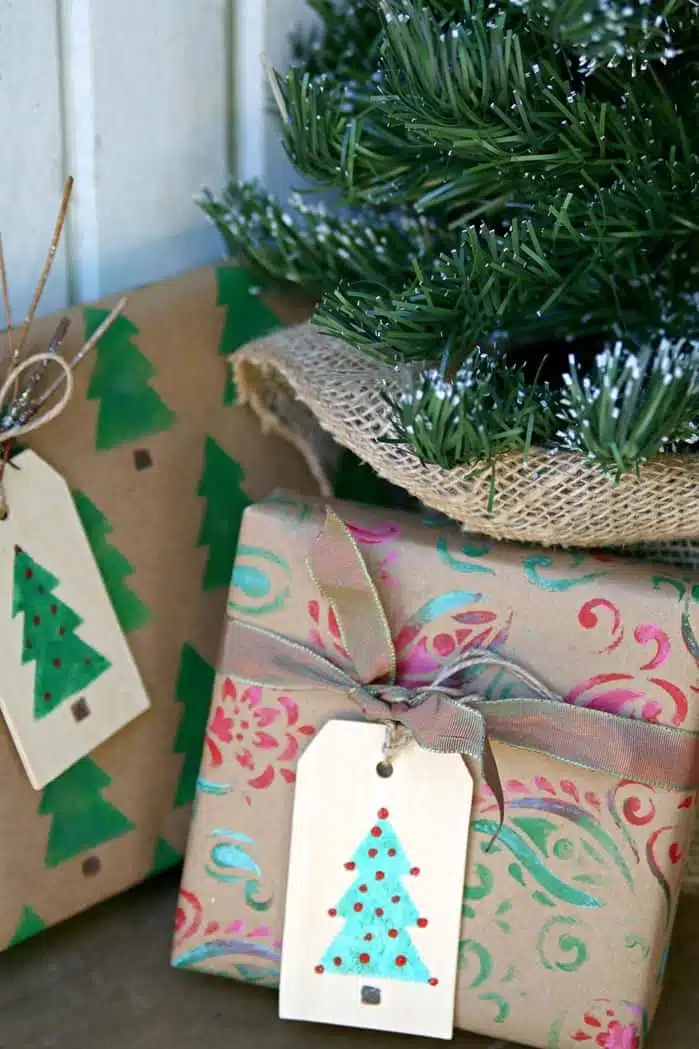
How pretty is that paper. The paisley print wrapping paper is to die for and the stenciled Christmas tree gift wrap is just right for the “I’ll stick with traditional colors” guy.
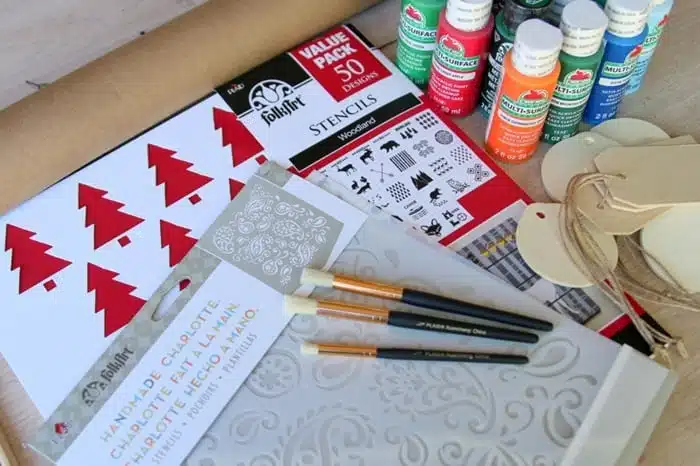
The paisley stencil is by Handmade Charlotte for FolkArt. I love her designs.
The paints, stencils, and brushes I used are made by Plaid Crafts.
The trees are just the cutest and I’m sharing how to stencil those first, then the pretty paisley paper, and ending with the tree gift tags. I have a super secret technique for the gift tag.
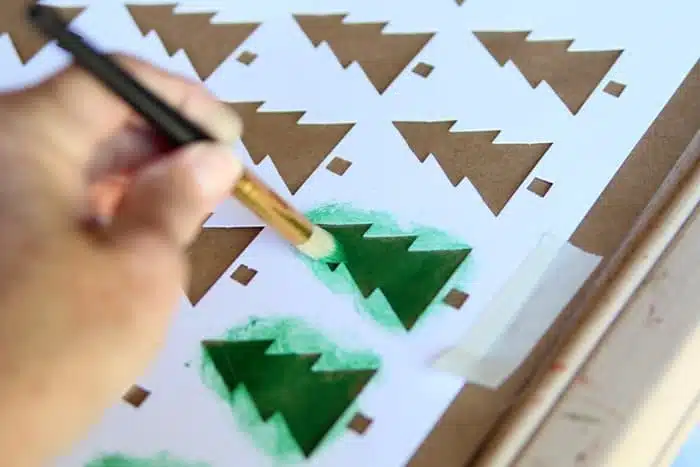
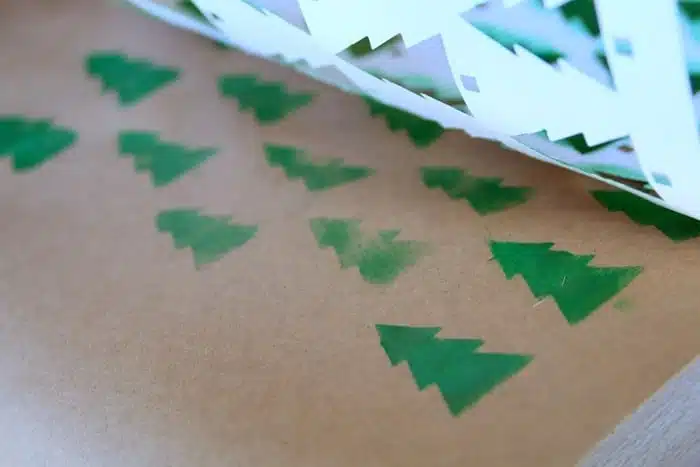
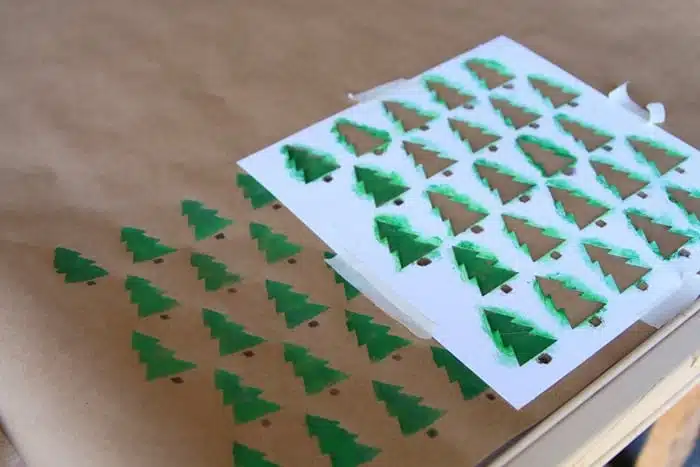
I lined up the stencil with the edge of the brown Kraft paper and used stencil tape to hold the stencil in place. Then I started stenciling.
guys already know to use a dry brush when stenciling. That’s my number one stenciling tip.
I used two shades of green from the Apple Barrel ® Multi-Surface Satin Acrylic Paint 16 Color Set and FolkArt Metallic Christmas Green for the trees. I used the darker green Mountain Forest color first.
As you can see I didn’t cover all the trees completely with the first color. I added layers of color waiting for each color to dry before going to the next color.
This gives the stencil character and dimension. Beats using only one color for sure.
The tree stumps are Chocolate Sprinkles (brown) from the same paint kit. I moved the stencil along as I painted using the last row of trees as markers.
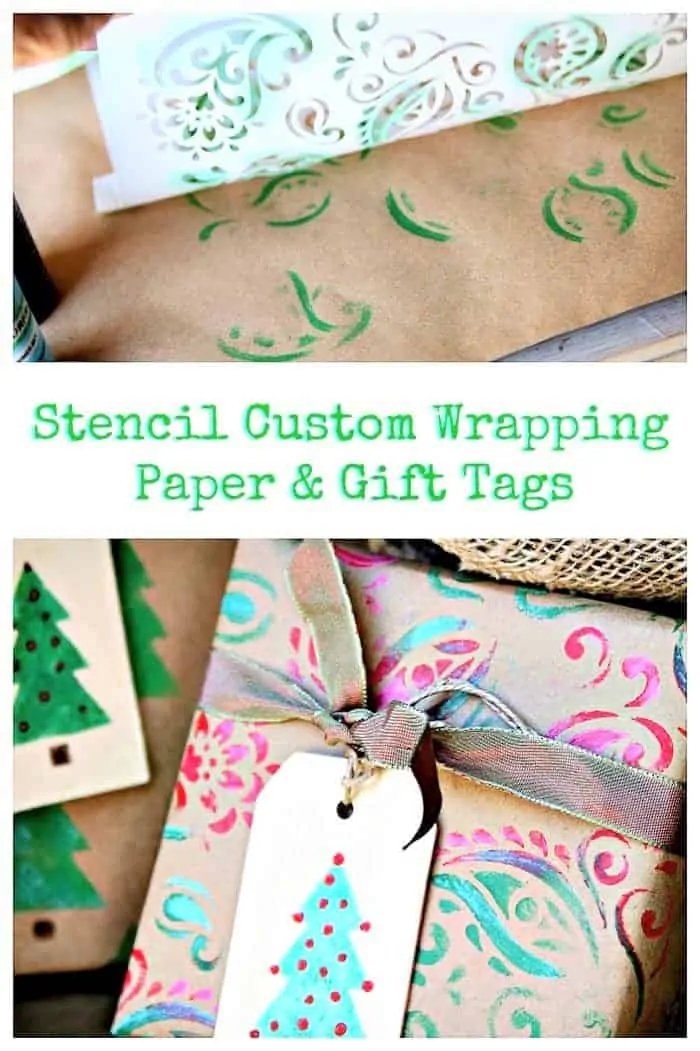
Now we’re going to use the pretty paisley stencil.
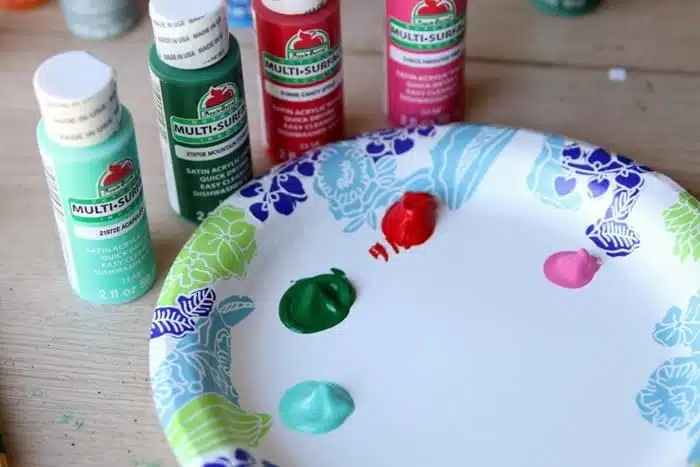
I selected four colors for the paisley print and poured them on a paper plate. As you can see it doesn’t take much paint for a stencil project. The four colors are Acapulco, Mountain Forest, Candy Apple, and Paradise Pink.
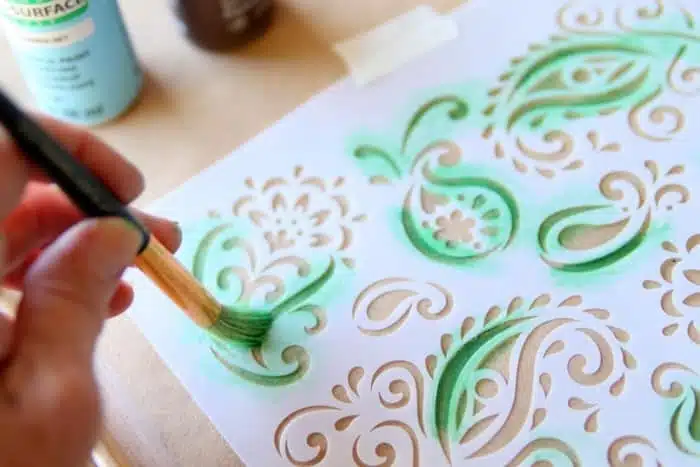
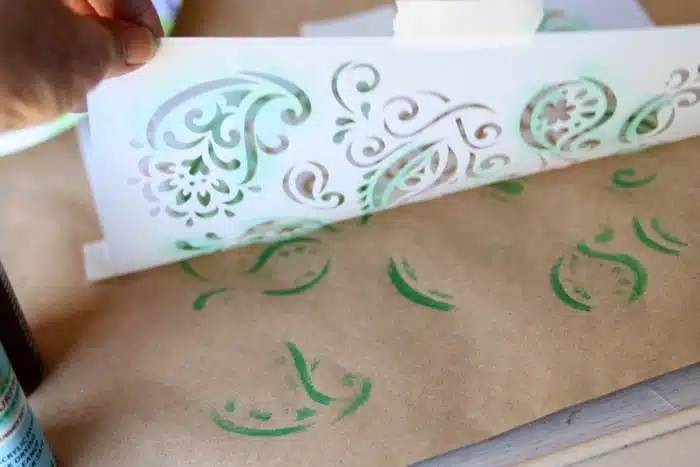
I started with Mountain Forest and just painted parts of the stencil.
See, just bits and pieces here and there. This is one of those perfectly imperfect projects.
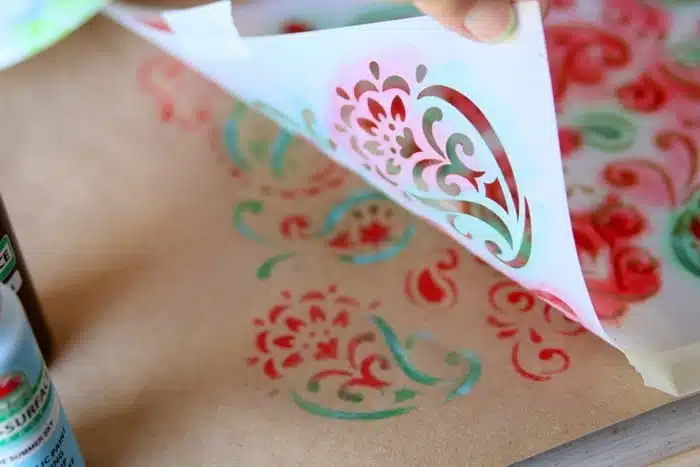
Next I painted parts of the stencil Candy Apple (red). After that was dry I used Acapulco over the green just hit or miss. You don’t want to cover the green completely. And I painted with Paradise Pink over the red, also hit or miss.
Using the four colors gives the stenciled design character and depth. No flat monotone stenciling for me.
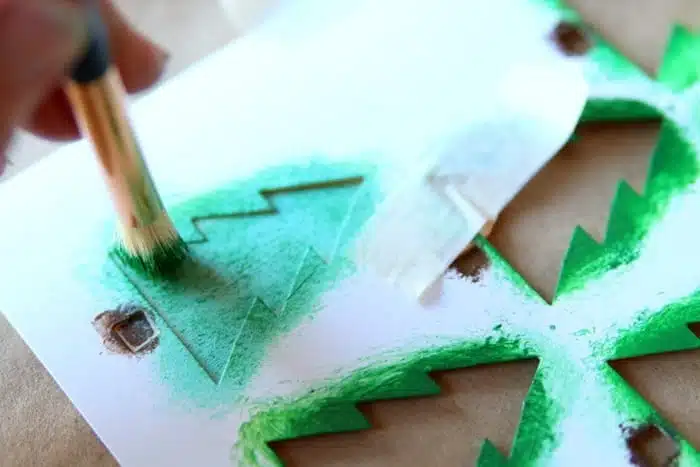
Time to stencil the gift tag. I used the tree stencil and placed one tree in the middle of the gift tag. I used Acapulco (turquoise) to stencil the tree.
Then……getting to the fun part…..after the Acapulco paint dried I used the Mountain Forest Green and just dabbed the stencil bristles straight down on the tree.
Can you see how it left little bits of green color on the turquoise? The layered look is so much better than looking at one flat paint color.
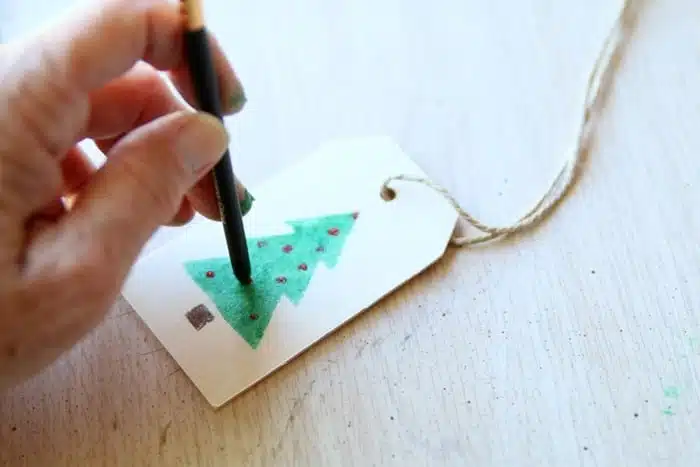
Once the stenciled tree was completely dry I used the tip end of the stencil brush and dipped it into the Candy Apple paint.
I then touched the tip to the tree adding red ornaments in various places. Ta-Dah! New technique.
And remember. After the gift is opened the Christmas gift tags make cute keepsake ornaments for the tree. Win-Win.
See the complete tutorial (me in person, easy to understand) I recorded on Facebook live here….
The paisley stencil is perfect for year round use. I can see the stencil on white wrapping paper done in various shades of silver, silver metallic maybe.
That would be a nice look for shower or wedding paper. You could always stencil a swirl on the gift tag, no tree needed. I used wood gift tags for this project but the manila paper one’s would work too.
See another of my special DIY gift wrap projects here…Kraft Paper Gift Wrap.
DIY Christmas Wrapping Paper And Christmas Gift Tags
How about customizing your own wrapping paper. Maybe go with a theme or customize each paper to fit the gift recipient? Which was your favorite design, the trees or the paisley print?
Thanks for being here and have a great weekend, Kathy
disclosure: This post is sponsored by Plaid Enterprises. All project ideas and photography are my own. Gift card giveaway courtesy of Plaid Enterprises.

This is a gem of an idea. So doable and beautiful!
Thank you Tracey!
Thank you for doing this. I appreciate your blog so much
Fun ideas! I’ve used Plaid products in the past (mostly to do stained glass on a very unprivate window) and I’m sure I will have a hard time deciding which products to choose. DIY here I come!
Love the purple drawer pulls! So cute.
Your stenciled wrapping paper is beautiful!!
SUCH A FUN WAY TO USE PLAIN BROWN WRAPPING PAPER!!!! COULD GET THE YOUNGER CHILDREN INVOLVED IN DOING SOME DECORATING GIFT PAPER AT CHURCH TO GIVE TO OTHERS!
I REALLY LOVE YOUR DRESSER WITH THE LITTLE FLOWERS ON THE TOP DRAWER!!! IT IS SO SWEET LOOKING AND WOULD BE VERY EASY TO DO FOR A LITTLE GIRL’S ROOM!
YOU ALWAYS HAVE SUCH INTERESTING IDEAS!!!
Fabulous dresser and fun wrapping paper. Very creative!
Number one: I love the dresser – I would have never guessed that the crackle finish was not intentional.
Number two: I love Plaid paint – I swear I have it in almost every color they make – wonder how many that is? I just finished a picture frame that I painted in shades of green, grey, brown to look rustic as we are re-doing the front part of our house in a rustic country look. I hope we can get is looking halfway decent before Thanksgiving as we are expecting 7 people. I better get going – love your blog.
I LOVE your dresser make over!!! And please believe me when I say/tell you this SHOUTING FROM THE MOUNTAIN TOPS I would use this dresser in my own bedroom (heehee)…. if I were to win the $200 PLAID gift card omgoodness it’s sooooo hard to choose from which set I’d choose from!!!!! Because there are so many I would totally be like a kid turned a loose inside Toys “R” US WITHOUT ADULT SUPERVISION….LOL… Thanks Kathy for the opportunity enter for this WONDERFUL PRIZE….;)
Kathy, I think because I really need the practice, I’d get some of their stencils. And paint of course! If we need to purchase a kit, then I’ll find something I can stencil. Something easy!
Such a fun and creative idea. Thanks for sharing and the giveaway! Long time ago I made my own wrapping paper. This would be fun to do again with better materials than I used.
Fun way to make some special wrapping paper! Would look so pretty under the tree.
I would choose a gift tag kit 🙂
when my boys were little we made our own wrapping paper, so much fun and great memories
Now I love your more grown up version, will have to make my wrapping paper again
I love seeing all of your ideas. Sometimes I get brave and try my own. You’re an inspiration!
I love The personalization of diy wrapping paper. Too cute!
Kathy, I really love the paisley paper and colors! Thank you for the opportunity to enter the giveaway.
I love painting wrapping paper and these stencils are precious!!
Paisley and ombré are two of my favorite things!
I put all of my presents in gift bags since I hate to wrap.
Using the stencils would be a good way to embellish
my gift bags (I usually use kraft or white bags).
Would be faster and easier than stamping.
thanks for the idea.
What a fabulous and great idea to use stencil personalizing the wrapping paper.
Love the tag, too 🙂 Thank you for the inspiration and tutorial!
Would like to stencil some brown paper for gift wrap. Thanks for sharing some great ideas ! ! !
Wow, there are so many fun things to do with Plaid.
I am an art teacher and I can already think of tons of cool things I could do!
Thank you for sharing your projects – which just may be the kit I would buy!
I love your fun creative idea. Will be using it. Thank you so much for sharing this lovely project
I love the paisley design on the wrapping paper, Kathy. When I first saw it I tho’t you had used some metallic paint on it. But you didn’t, right? It just has that look in the first photo and I think it would be fun to experiment with doing that. The little tree tags are cute, too. I really have to do some practice stenciling. I just don’t have it down yet. But I will and then I can make some of the cool wrapping paper. I am envisioning white paper with silver paisley design since those are my usual colors for my tree and other Christmas decor.
Thanks, great tutorial!
I’ve never thought of stenciling paper before but I love it! So cute. Thanks for posting. Grinned and Pinned!
I love this! So classy and unique. Now, if I just had the time…
Kathy,
What a great idea. Make your own wrapping paper and actually the Kraft paper with such pretty stenciling fits every decor. That is unique! You have so much talent. Thanks for sharing.
This is such a fun idea and your designs and colors are so pretty, Kathy! Thanks for showing us your tips. Have a great weekend!