How To Repaint A Wood Wall Clock To Match Your Decor Style
As an Amazon Associate, I earn from qualifying purchases.
Learn how to repaint a wood wall clock to match your modern decor. This easy DIY tutorial covers disassembly, spray painting shiny gold hardware, and a ‘wet distressing’ technique for a beautiful vintage finish.
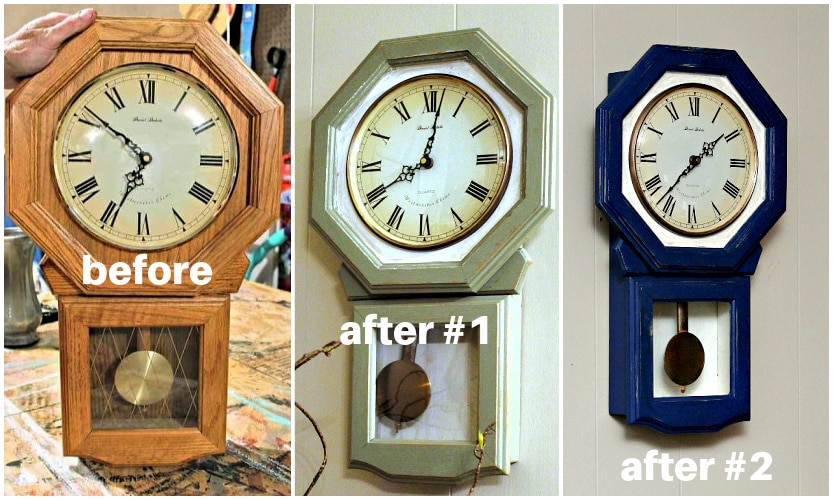
The best thing that ever happened to this orange-toned wood clock was a paint makeover. I painted it several years ago to match our decor, and since I’ve updated our family room, it’s time to repaint the clock.

This is the clock after the first paint makeover. I painted the wood around the clock face and the interior chime area with Caldwell Clay/Chalk Paint color, Vintage White. Do they still make CeCe Caldwell paint? The body of the clock was painted with Beyond Paint, color Sage.
At the time, it matched our warm earth-toned color scheme, but I totally revamped the furniture and decor several months ago, and the color scheme is very different. The new color scheme consists of various shades of blue, magenta, and peach. But it’s not the ’90s blue-and-peach color scheme. I need to do a full room reveal. Maybe next week!

Before I forget, today is Trashy Treasures Tuesday, one of my favorite days of the month. Links to all of the trashy treasures are below my tutorial.

The wall clock was a Christmas gift from my parents about 40 years ago. It is a Daniel Dakota Pendulum Wall Clock with Westminster Chime, Quartz Movement, and was manufactured from 1980 to 1989.
When I redecorated the family room, I took the clock down and was planning to sell it in my booth. The clock’s style has never been my favorite, and I wanted to get something with a more modern vibe.
Anyway, you know how it is when you have a certain habit….like looking up at the clock to see what time it is? The clock hung on the wall where we could both see it from our favorite seats in the room.
We both continued to look up at the empty spot on the wall to check the time. It’s hard to break a 40-year habit. Since I hadn’t made it to my booth with the clock, I decided to repaint it to fit the new decor. Now I love it!
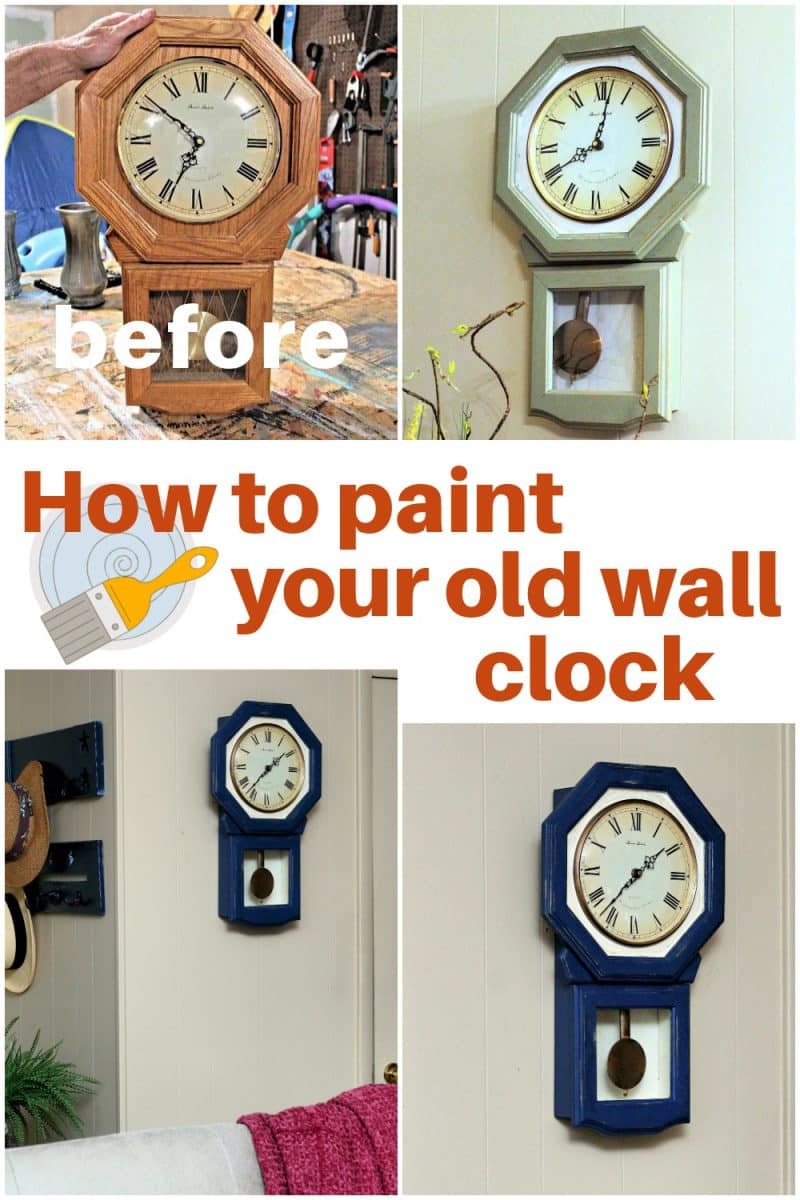
DIY: How to Repaint a Wood Wall Clock
If you have an old pendulum clock that doesn’t fit your modern decor, don’t get rid of it! A simple paint makeover can give it a whole new life.
Supplies Needed:
Paint: Martha Stewart Home Decor Paint (Navy) or your favorite furniture paint.
Accent Paint: Rustoleum Metallic Spray Paint (Antique Brass).
Cleaning/Distressing: Simple Green and a lint-free rag (old sheets work great).
Finishing: Dark Wax (like Liberon Black Bison in Walnut).
Tools: Small flat-tip screwdriver or chisel, painters’ tape, small paint scraper, and a paintbrush.

To fully explain how to paint or repaint this wall clock, I am sharing a few details from the first makeover. The above photo shows how the clock looked before the makeover.

Disassemble the Clock
Remove the glass cover, trim, and the back panel. If the back of your clock is held together with staples (like mine), a flat-tip screwdriver works perfectly to pry them out.

Choose the Paint Colors
Since this was my first clock makeover, I wasn’t sure what colors to use, so I just kind of winged it. The plan was to paint the clock in two contrasting colors. I first painted the inset area around the clock face in taupe, and after looking at it for a few days, I opted for a vintage white instead.
Paint the Details
To tone down shiny gold details, lightly spray the pendulum and glass rim with Antique Brass metallic spray paint.

Protect the glass from paint overspray with painters’ tape and paper or plastic wrap.

Rustoleum spray paint is a great product! My favorite Spring and Summer color is Rust-Oleum Heirloom Satin White.
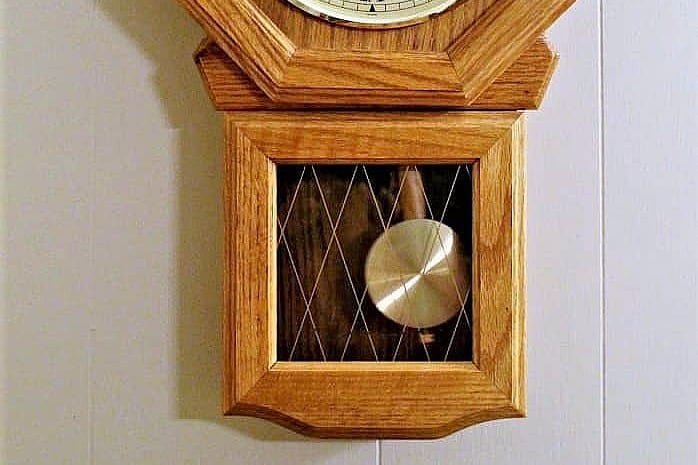
Remove the Gold Design on the Glass
Use a razor blade or a paint scraper on the gold diamond design and scrape until it comes off. Truly an easy job, and I do not have a photo of this step, sorry. I used this same process to remove a decorative “love” design on a glass container upcycle.
You see these gold-diamond designs on vintage furniture (china cabinets), clocks (!), home decor assesories and other items made from the mid to late 1900’s. If you don’t like the design, get rid of it!

Paint the Casing
Clean the wood surfaces and apply your base color. For this makeover, I used a deep navy to match my new family room decor.
Repainting the clock was a lot easier than painting it the first time. I didn’t take it apart and only painted the clock’s casing. I was still good with the white and antique brass colors.

Blue was my color choice to match the family room decor. Now I just had to see what colors were in my stash.

I didn’t care for the Valspar color. It was a little too bright and turquoisy.

Next, I found this Martha Stewart home decor paint in navy on my paint shelf.

That’s the one! This color was a deep, rich navy.
")
I turned the clock face down and started painting the backside. Some areas will never be seen, but I usually paint them anyway.
")
The glass area over the pendant was small, and it’s difficult to tape off small enclosed areas with painter’s tape. I thought I would be smart and use a straight edge to protect the glass. That didn’t work.
Pro Tip: Don’t worry about taping off the glass if the area is small; you can clean it later!

So I just painted the wood around the glass and didn’t protect the glass from the paint. You can see paint on the glass all the way around the square.

Clean the Glass
To remove the paint, spray a rag with Simple Green and use a chisel or straight edge to gently push the damp cloth over the paint. It should lift right off.

If the paint has cured, it may take several swipes over the area to remove it.

Wet Distress the Paint
For a vintage or aged look, spray a rag with household cleaner and wipe away paint on the edges and high points of the clock. This “wet distressing” technique is cleaner than sanding! Depending on how well the paint has cured, it may take several swipes over the paint.

Add Character with Dark Wax
Apply a thin layer of dark wax over the distressed areas to age the raw wood and the paint. Once dry, buff it with a clean rag for a soft sheen.

Reassemble the Clock
Put the clock face and pendulum back together, hang the clock back in place, and enjoy your “new” custom decor!
Now the hubby and I are not looking up at an empty spot on the wall, and we always know what time it is (except when the battery runs down). When the battery starts to run down, the chimes make a slow, dragging sound, almost like when your car battery is dead or about to die. It’s pretty funny.

I like the way the clock looks now, which is a good thing because I couldn’t find a new clock on Amazon that made me happy.

I smudged just a bit of dark wax around the white paint to soften it. Not so glaring white now. The navy paint color works well with my new decor.

Do you have an old piece of decor you’re afraid to paint? Let’s talk about it in the comments! It’s time to take the Trashy Treasures Tuesday Tour, and I’m heading out now. Just click the links below the “before makeover” photo collage…..

Trashy Treasures Tuesday:
Flatware Box Update – Confessions of a Serial DIY’er
Glass Top Nesting Tables Update – Artsy Chicks Rule
Thrifted Blanket Box Makeover – Salvaged Inspirations
How To Paint An Old Wall Clock – Petticoat Junktion (you are here)

As always, thanks for being here, Kathy
Love the new color, Kathy! And I have a wall clock that I’ve had forever and painted twice too! xo
Love the new color Kathy! It still feels vintage with a spunky vibe!
This is my favorite update! I love the blue and I know just what you mean about the habit of looking at the same spot to check the time. I moved a clock that hung in our kitchen for years and ended up having to move it back lol! XOXO