How To Cover Up Ugly Furniture Scratches And Dings
As an Amazon Associate, I earn from qualifying purchases.
Cover Up Ugly Furniture Scratches With Stain Markers
Do you use touch up stain markers at your house? When I want to cover up ugly furniture scratches I grab the stain markers. They work surprisingly well. There is a little trick I do that helps blend the marker with the original finish.
I used a stain marker in combination with Howard’s Feed n Wax to repair and revive the finish on two pieces of furniture I bought at auction. No painting going on around here today.

This small nightstand/table looks so much better after a clean up and finish revival.

Cover Up Furniture Scratches Using Stain Markers
Do you like the Art Deco style nightstand? I think it’s pretty cool. I paid $12 for the nightstand at an auction. My first thought was to paint it but the wood was so pretty I decided to try to revive the finish. It had a ton of scratches though.

I first tried just using Howard’s Feed N Wax on that group of scratches on the nightstand shelf but it didn’t cover the scratches or revive them at all. On to plan B.

I pulled out my Minwax stain marker and went to town. The marker color was walnut and It worked the best for this piece. I have a cherry marker but it didn’t match the finish at all, very red. The stain markers usually don’t match the furniture finish exactly but I found a trick that helps blend the color with the original finish.

I apply the stain marker to the scratch, let it set for just a few seconds, then wipe a rag over the scratch. This helps blend the touch up color with the original finish. You may have to play around with this a little depending on how fast the stain dries, how big the scratch, etc.

Once I had the worst of the scratches covered with the stain marker I went over the whole nightstand with Howard’s Feed n Wax. My bottle of wax was almost empty. I ordered two bottles. after I finished these projects. I go through a lot of it.
I think the stain marker is good for life. Seriously, I can’ tell you how many years I’ve had this marker and how many projects I’ve used it on. I took the nightstand to my booth to sell and it sold right away. Yay!

Project number two is a keeper for me. The vintage wood shoe shine box roped me in right after I spotted it on the auction floor. You can see it’s in pretty rough shape.

I used the same method on this piece as I did on the nightstand.

How To Cover Up Ugly Furniture Scratches
There was a lot of scratches and places where the wood was chipped off. I wasn’t sure how well the marker would work on the big areas. I applied the stain and then rubbed it into the wood and blended it into the surrounding area with my lint free rag.

The inside was very dusty and I cleaned it with Simple Green.

I didn’t notice until the cleaning process but there was a long break in the wood along the apron (?). Elmer’s wood glue works good for this type of repair. I worked the wood glue into the break using a thin wood skewer. A toothpick works great for this too.

Next I clamped the break and wiped up the wood glue that seeped out when the clamp was tightened. Clumps of dried wood glue aren’t pretty.

A few of the screws on the lid were loose and just needed a bit of tightening. Luckily none of the screw holes were stripped out. There is an iron shoe rest screwed to the inside of the lid.

I found a shoe shine box almost identical to this one on eBay. The listing was closed and the asking price was $95. I paid $27.50 for mine plus 10% auction fees. The inside of the one on eBay was painted blue. I really wanted to keep the shoe shine box but not sure where it fits in our house. Right now it’s sitting in the spare bedroom.
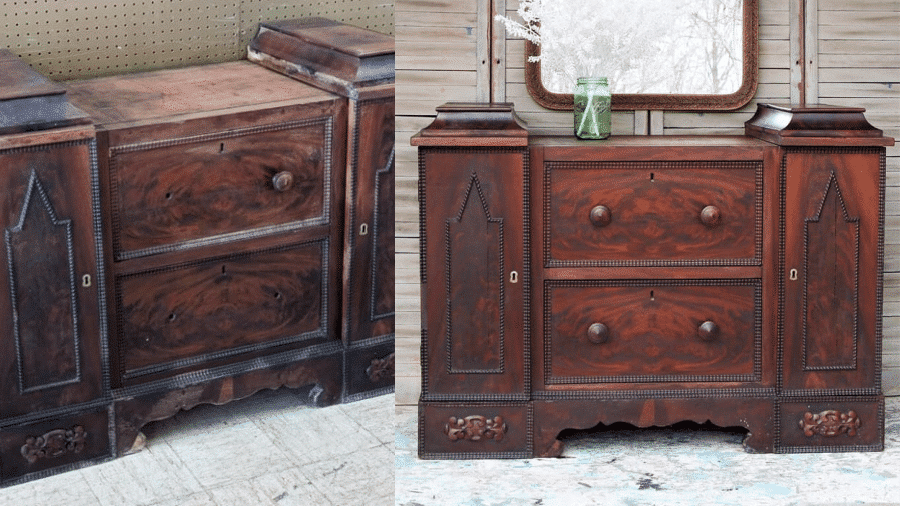
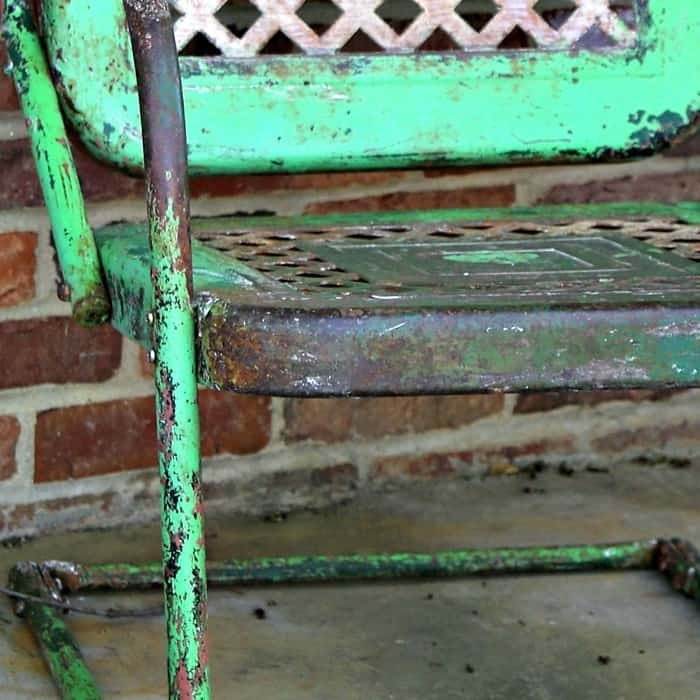
Next I have an antique piece I bought at the Nashville Flea Market.

It was sure a sad looking piece. I did love the white chippy paint on the doors and just thought I would try my best to clean the piece and refresh the finish. I’ll tell you what all I did.

The paint was chipping heavily in places. I love that green. Wish there was more of it left. The drawers were all gunky. The first thing I did was take a putty knife and scrape off the loose paint inside and out.
Then I vacuumed the dresser inside and out and also the garage floor. I used Simple Green and cleaned the dresser all over. More of the paint chipped off and I used the putty knife again to remove the pieces that loosened when the paint got wet. Vacuum one more time…..clean one more time.

The top drawer was a mess with some kind of paper stuck to it. I peeled the loose paper from the drawer bottom then wet the remaining paper and it came right up. The white paint underneath had crackled and the green paint was showing through. It looked great.

Does anyone know what the small black bumps are? I have no idea but have ran across them before. I scraped most of the black stuff off with the putty knife then cleaned the drawer with Simple Green and Howard’s cleaning solution.

The last step in the process was to use Howard’s Feed-n-Wax.

The small sample bottle was almost empty. I had to remove the top and shake out what I could to finish the job.

The wheel on the front right seemed to be more worn than the others and needed a little work. The JTS (hubby, aka Junktion Technical Specialist) popped the wheel out of the metal part up in the wood and added a washer before popping it back in place. Now the dresser isn’t quite as wobbly.

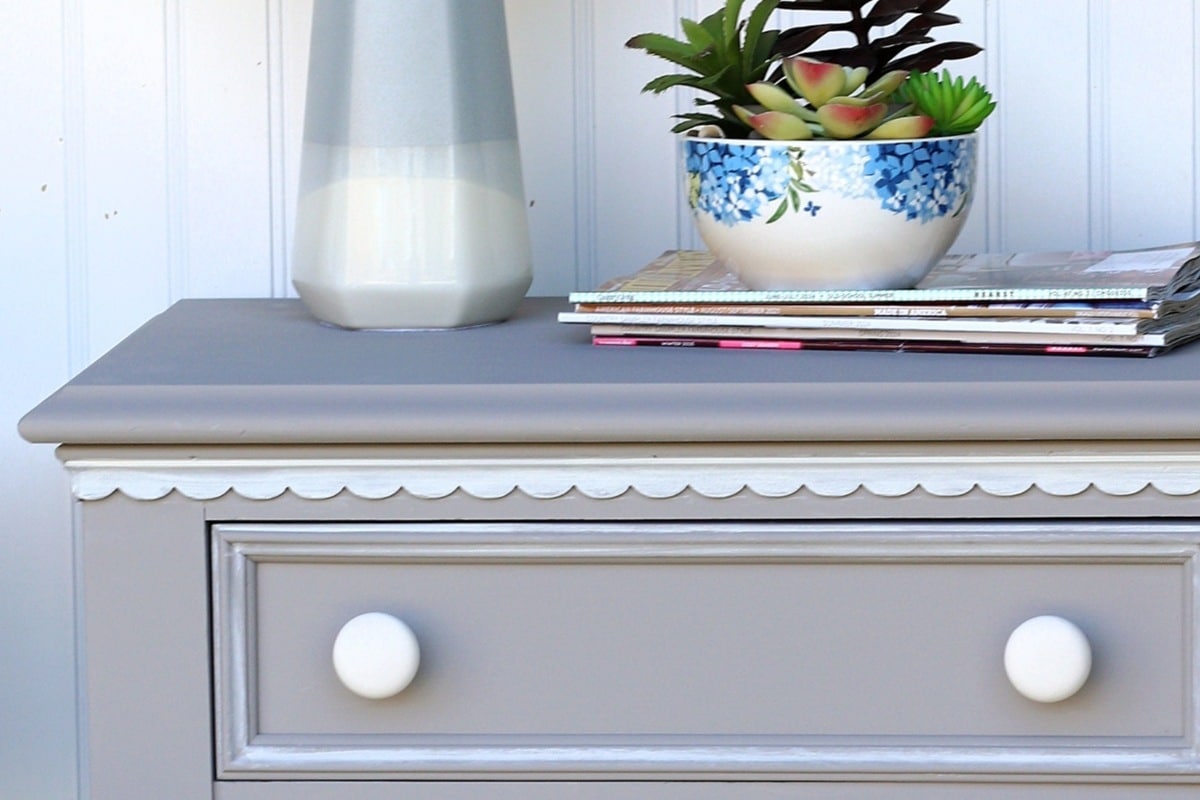
Love that crackling in the drawer bottom.

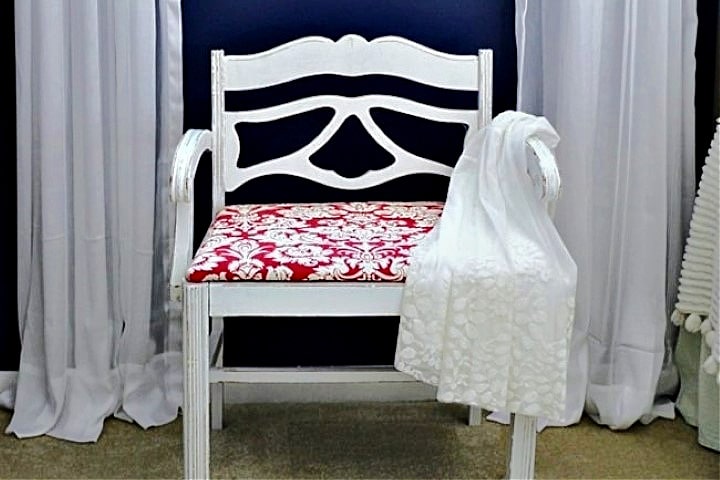
I found all the off-white wood knobs in my stash. They add a touch of whimsy to the dresser. Most of the original glass knobs were broken. I love antique glass knobs but they don’t make much of a showing. The door doesn’t close all the way either. The only options were to shave some of the wood from the door or remove all the chippy paint. Didn’t know if either of those options would work so I left the door as is.

My thoughts when cleaning up the dresser……I loved the chippy paint….I don’t know how to refinish furniture. I love how the little shabby dresser looks now but someone can also take it and bring it back to it’s former glory if they wish to. It’s now on display in my booth at the shop. I hope it goes to a good home.
Have a great day and thanks for being here, Kathy
I always enjoy your posts. I learn a lot from you. Thanks for all the great tips.
Gotta get some of that feed-n-wax. I love what you did here. Thanks again for never disappointing
Thank you Kat! You can spruce up that furniture yourself. Don’t wait on hubby.
Thank you Stormee. I look forward to your comments!
Thank you Mjade. Old furniture is the best 🙂
Thanks Karen, right back at ya!
Thanks Susan!
Thanks Debbie. You are so right. The Old English is great too.
I think you will love the Howard’s. Let me know.
Great tip for using the stain markers. I have also found that just using the markers never did the trick. Will have to get some Howard’s and try the combo. Some pieces should just be restored and not painted….
I love “old” and the best cover up I use around the house is Old English liquid scratch cover. There is a blend for dark wood and another for light wood. I use it on a cotton ball and away I go. A little goes a long way.
I always look forward to your posts! I learn a lot of new tricks! Oh, and I LOVE the hair ?
I love the feed n wax. I have used it many times myself. The shoeshine box is so cute. So is your cut and color. Its good to see you again! I hope you have a happy, creative day.
Karen
Hi kathy,I also look forward to your posts. Have used lots of your tips. Also lots of older furniture here. I feel sturdy furniture was made years ago!!love your new hair cut thanks for all your wisdom have a great end of summer mgj
I look forward to your emails each week. You always have such good ideas and solutions to problems.
two neat pieces! wish you were close by, I’d love to work with you and learn from you. I have lots of antique pieces, and furniture that has scrapes/scratches from our last long distance move…husband keeps saying he will fix those scrapes/scratches, but….over year now, not done yet, probably wont be.
thanks for the info on those color pens, the colored crayons dont do it. and never thought about putting a “wax” on to blend further. I will get some and work on them myself! so there…..lol
thanks Kathy, for great ideas, you make it all look so easy! cant wait for more