How To Refresh And Restore Antique Furniture Without Refinishing
As an Amazon Associate, I earn from qualifying purchases.
Refreshing antique furniture and restoring the original finish can sometimes be a simple process. Depending on the age and condition of the furniture it may not need to have a total restoration. Beautiful antique furniture adds character and charm to your home.
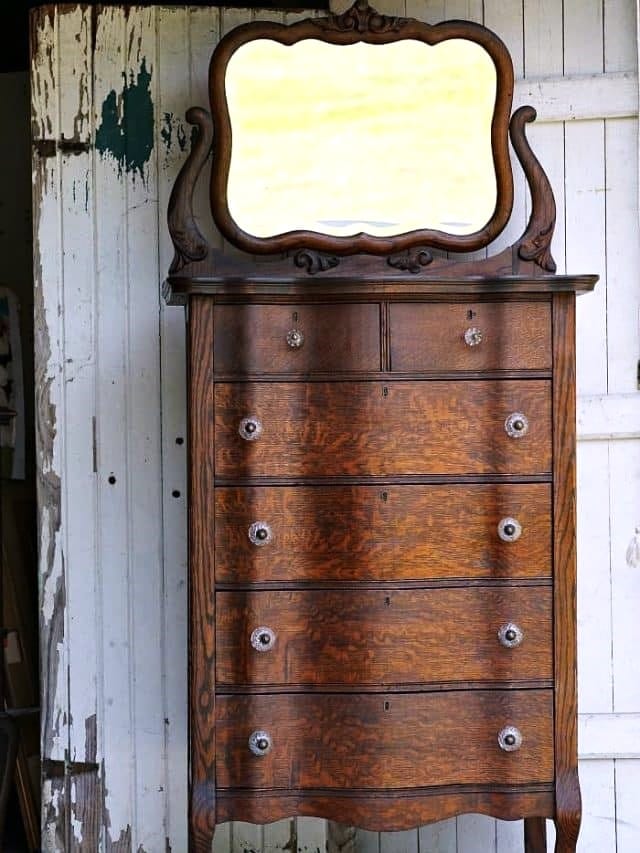
You can easily refresh and restore antique furniture if the original stained finish isn’t too scuffed or marred. The project piece I refreshed today had been stored away for quite a while. It was dingy, dirty, and dinged up just a bit.
As much as I love painting furniture, I enjoyed every minute of bringing this vintage oak chest of drawers back to life. It is stunning now.

How To Refresh And Restore Antique Furniture
I’ll show you how I cleaned the chest inside and out using wax, stain markers, WD-40, wood glue, and more to bring it back to life. It did not have to be stripped and refinished which is a time consuming process often requiring a professional.
Consider the history of the furniture
The oak chest belongs to a friend of mine. She inherited it from her grandmother. Don’t you know it brings back sweet memories of her grandmother every time she looks at the piece? I happened to know the grandmother, and she was a very dear lady.

Inspect the furniture
The chest has been sitting in a garage for a number of years. It’s kind of a mess but nothing a bit of cleanup and a few minor repairs won’t fix. There was no mold or mildew, which is always a good thing.
Assess damages
The veneer was peeling up in places, and the original drawer pulls were loose and had rubbed big circles in the veneer around the screw holes. I wasn’t sure if I could take care of those damaged areas around the drawer pulls but I was going to work hard at it.

The chest was dirty and dusty, and there were spider eggs, lint, and cobwebs in the drawers and the dresser casing. Sticky contact paper covered all the drawer bottoms.

Make a plan for the furniture refresh
I decided the best action plan was to make all the repairs before cleaning the chest. The first order of business was to remove the contact paper/drawer liner. Most of it pulled up easily. For the really sticky stuff, I used a paint scraper very gently.
Make needed repairs
Once I removed the paper, I noticed one of the drawer bottoms had slipped out of the grooves in the front of the drawer. I gently hammered the drawer bottom into the grooves again by lifting the bottom with one hand (level with the grooves) and hammering the back of it into place with the other hand.
After the drawer bottom was fitted back into the grooves, I used a nail gun to attach it to the drawer back. The bottom of the drawer will no longer be slipping out of the grooves and out the back of the drawer.

Several of the drawers had loose veneer. At one time, a few repairs were made to the veneer, and there were just a couple of tiny spots where the veneer was missing- hardly noticeable.
Having the proper tools helps
I used a small wood pick/thingie to slip the wood glue between the veneer and the drawer front and was really gentle with the veneer because I didn’t want it to crack or break. I used clamps to hold the veneer tight to the drawer until the glue dried.

I removed a few nails where prior drawer repairs had been made. Then I had to remove a couple of nails where I missed the side of the drawer when shooting the nails to hold the drawer bottom in place. At least I fessed up to it.
Clean the furniture
Once I made all the repairs, I used a shop vac to get the worst of the dirt. Next, I wiped down the inside of the chest and the drawers with Simple Green.
Yes, making all the repairs and cleaning the chest is time-consuming, but you don’t want to move furniture into your home unless it is in good condition.
I dusted the drawer fronts and the outside of the chest with a dry rag. I used no water or cleaning solution on the veneer or the stained wood.

Refresh the stained furniture finish
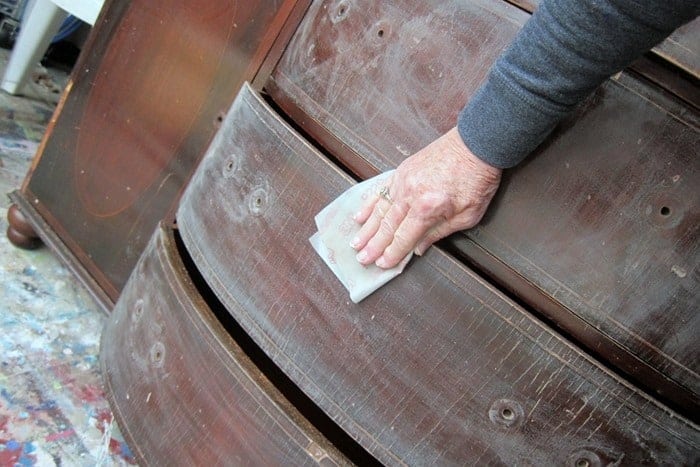
Now comes the fun part: making the chest of drawers pretty again. See the dramatic difference between the two drawers in the photo above? The bottom drawer has been wiped down with Howard’s Feed-N-Wax, and the top one hasn’t been touched up yet.
Cover minor scratches
I used a couple of stain pens to cover the scratches and the worn area around the knob screw hole. The pens are like magic. That’s all it took to make the finish shine.

The stain pens were two different brands and two different colors. One was dark walnut, and the other was dark cherry. I used them together. When using stain pens, I always dot the stain on the wood, then wait just a bit and rub it off.
The raw and dull areas of the finish should pick up the stain, and the scratched-up area will blend with the surrounding stained finish.
How to refresh every inch of the furniture
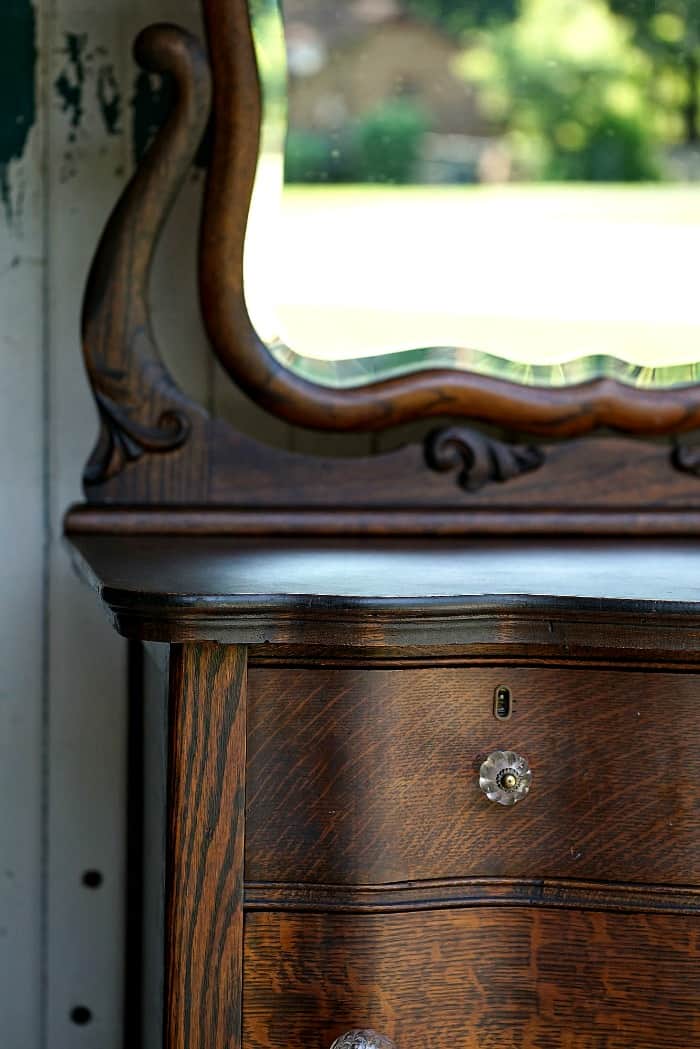
I used a small stencil brush to push the Feed-N-Wax into the corners, any tight spaces, and around the wood applique on the mirror and mirror holder.
I discovered this trick a few projects ago. The bristles of stencil brushes are firm, and they work well for mushing staining solutions, cleaning products, etc., into tight places.
A rag wrapped around a flat-tip screwdriver is great for getting into little grooves like those on the feet. I cleaned the casters/wheels with Simple Green and sprayed them with WD40 when dry.

Eliminate musty odors
To freshen the drawers, I sprayed the inside with Febreze and let them air out for a few days. The Febreze eliminated the musty odor, and the smell of the Febreze dissipated after a few days. Febreze doesn’t just mask odors. It gets rid of them.

Refresh and Repair the Mirror
The last piece of the puzzle is the mirror. I cleaned the mirror and then used a heavy-duty stapler to re-attach the back of the mirror in the areas where the nails were missing.
Re-attach the back cover
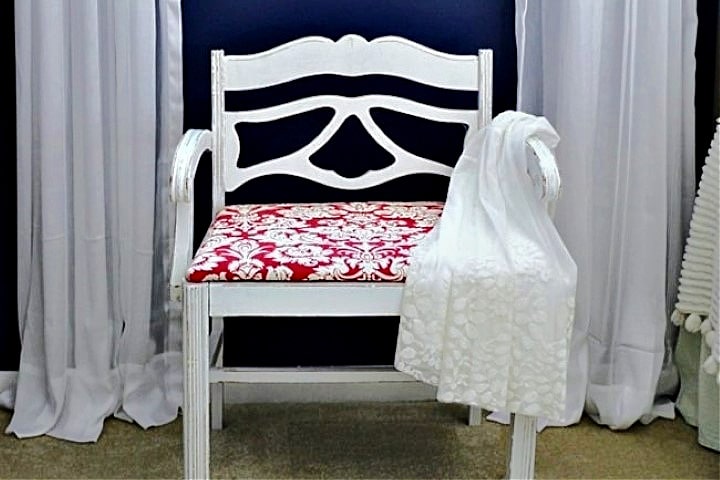
Stapling was so much easier than nailing the backing into place. You should have a heavy-duty stapler in your tool drawer because it comes in handy for all kinds of projects, including re-covering chair seats.

Attach the mirror to the chest
I attached the mirror holder to the chest then the JTS and I fitted the mirror to the holder using the original hardware. Sorry, no free hands to take photos of that piece of the puzzle. The metal attachments on the mirror and holder needed a couple of minor adjustments to make the mirror hang straight. Easy enough to do but works better with 4 hands.
Clean the mirror
I used a mix of vinegar and water on a lint free rag to clean the mirror. Then I dried it completely with a paper towel.

Isn’t the wood gorgeous? I really wasn’t sure I could refresh the finish to its original condition but I needn’t have worried. The finish is beautiful. I like oak wood but prefer darker stained oak over golden yellow.

Selecting the proper furniture knobs for replacement
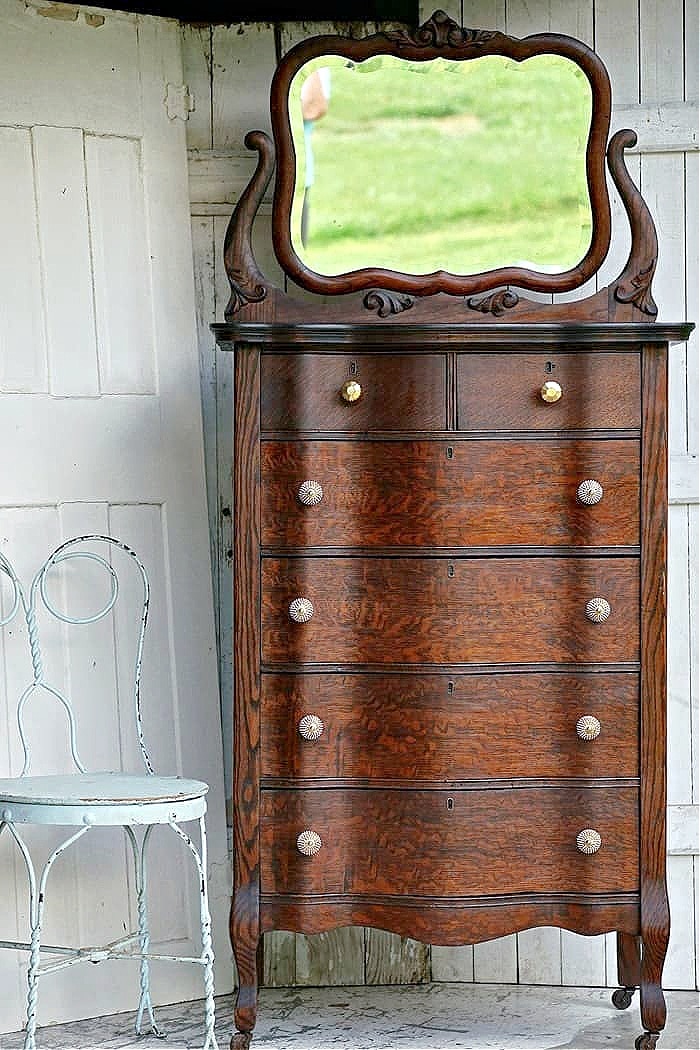
You guys might recognize those knobs. The ones on the top drawers are new, and I used the others on the wardrobe in our den. I couldn’t find any knobs that worked well with the chest, so I put the glittery gold ones on. The owner of the chest was out of town and not available to select new knobs when I was finishing up the makeover.

Try several types of knobs
She came by the workshop yesterday with these. Aren’t they lovely? They really fit the style and the time period of the chest. I believe she got them at Hobby Lobby.
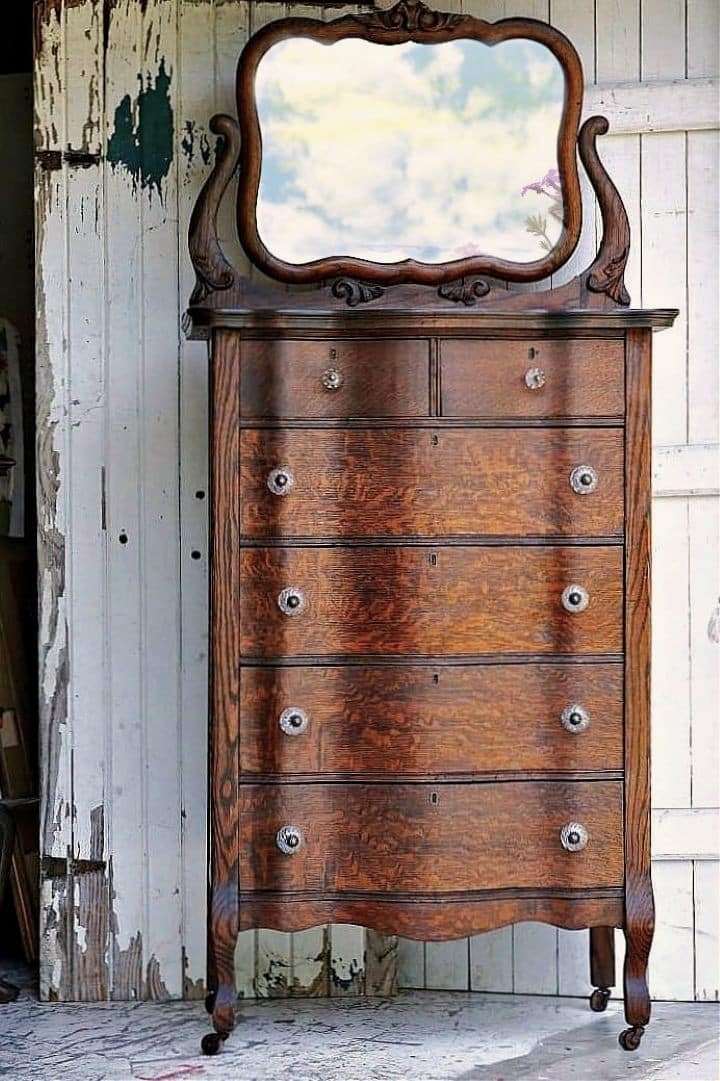
The chest was made by the Showers Brothers Company in Bloomington, Indiana. I think it was manufactured in the 1930s but I’m not sure.
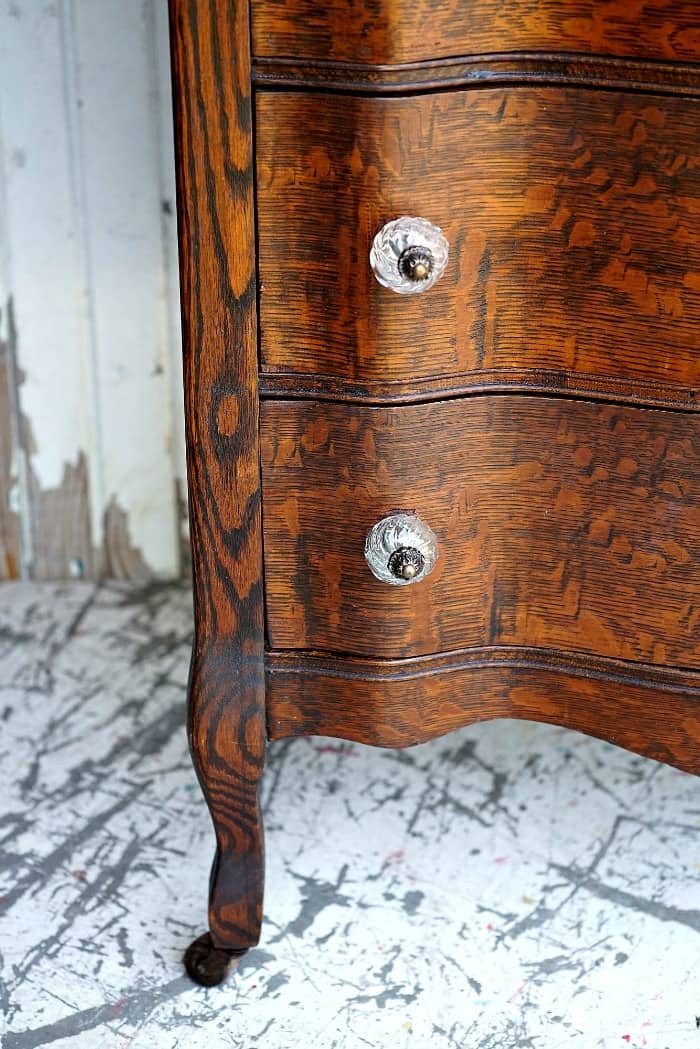
A close look at those curvy feet and beautiful wood. It’s always nice to have wheels or casters on furniture.
One more close-up look at the knobs and the curved edge of the chest top. On furniture of this age, oftentimes the top has water rings or scars from years of use, but not this piece. It was well taken care of. If you need help with water stains, there is a good tutorial here at This Old House.
I’m so pleased with this restoration…..and there is no paint involved! You can find another piece I restored and it is from the 1800s here…. Saving Antique Furniture From The Paint Brush
I always prefer to save the original look of antique or vintage furniture if I can. This vintage porcelain top table is one of my favorite saves. Did you know you can wet sand the porcelain top and remove the worst scratches and imperfections? Watch my video below….
See the project here….How To Clean A Porcelain Enamel Table Top
What do you guys think? Leave me a note if you have the time, and as always, thanks for being here, Kathy

Thank you so much!
Been restoring antique furniture for 40+years
You did a great job!! just love seeing all the original wood grains
and your choice of glass knobs were the icing on the cake.
Hi Donna Jo, I am sorry but I have no answer for the burn hole! And yes use a good gel stain on the table.
I have a large dining table and it needs to be refurbished. There is a burn hole in top small but needs fixing. How would you tackle this? My son stripped the top so I think I need to re-stain?
Thank you Donna
Just the thought of moving makes me shutter. Take your time and take care. Kathy
Thanks do much for your inspiring info about restoring salvageable furniture. We just moved & knowing what products work is very helpful right now. We have lots to do, as you can imagine!
I love that you preserved this beauty. My grandfather was a cabinet maker by trade, born in the late 1800s, I have many treasures, some from Europe too as my other grandparents immigrated in the early 1920s. The pieces I have don’t have nails, tongue and groove perfection. I’m just happy to own so much family history. Keep preserving, I love your photos.
Great job! I prefer restoration as opposed to painting just because I love the look and history of wood pieces. I am starting out on a venture of revamping antique wood pieces that I can get for cheap. Would love to make some money on them but I foresee a real problem of wanting to part with them after I have restored them! Any advice?
I am so impressed that you did not paint this. It turned out so pretty. The knobs, well, not so much but they look good also.
I have this same dresser. I bought some of the Howard’s and it made it shine. Like the glass knobs I have the original wood ones
Kathy, you did a beautiful job! What a gorgeous piece of furniture.
It’s gorgeous. Really great work.
Beautiful restoration. I can’t wait to start on my dining room set, though I may end up removing the old stain. I’ll probably oil and wax after restoration. I hope mine turns out as nice as this chest. I also received a nail gun for my bday. Yahoo! I have a great husband.
Thanks for the reminder Sandra. I added the link to the post and I’ll add it here….. https://petticoatjunktion.com/furniture/porcelain-enamel-table/
Kathy, it’s a beautiful reconditioning! ALSO: there is no link to take us to the porcelain top table re-do! Can you help? Thanks much, Sandra
Love it! You did an excellent job. Beautiful!
I love that you didn’t paint the chest but chose to clean and restore. It turned out beautiful. The mirror is gorgeous! Thanks for sharing.
I love that you didnt paint it. I cringe when i see a beautiful piece of furniture in good condition that was needlessly painted. It is great that you took the time to save this. It has so much character!
beautiful!
Lovely piece. So glad you had the expertise to save her.
Wow it looks great!
Great job!
You really worked your magic on this piece, Kathy! Remarkable transformation – just beautiful!
Good job. It looks great.
Although I’m not a fan of unpainted furniture lol..this is such a beautiful piece…
Awesome job. That is beautiful. Love the glass knobs.
This is absolutely beautiful! I love to paint furniture as well but every now and then run across a piece that I just can’t bear to paint but decide to restore the wood finish on. I have not tried the Howards but will certainly be heading out to get some in the next couple of days. Thanks Kathy!
I learned about Howard’s from you and I now use it on all my old family pieces. And the wood trim in my new house had been terribly treated by the former owners and their dogs. I tried Murphy’s Oil Soap – no help, But the Howard’s fixed it right up! And no one paid me to say this….
This is a stunning piece!!! Love that you went natural. I can’t believe it was made by the Showers Brothers in Bloomington, IN that is where I work…of course not as a furniture company anymore but my office is housed in the building. Very neat history, thank you!!!
Laura
Bloomington
Wonderful restoration. I’ve painted quite a few pieces of furniture, but lately have really been drawn to antiques with the original wood. I think it’s nice to mix things up — painted along with unpainted pieces like this. It’s a beauty.
I LOVE it! You did a beautiful job with the wood… it’s so gorgeous! Great call too as there are so many who’d slap a coat of paint on it and cover up the grain of this beautiful wood. I don’t much care for painting the pieces unless it’s too far gone to do anything else. Thanks for sharing with us!
Such gorgeous work, and a labor of love! It will last for several more generations I’m sure. Bravo, Kathy! xo
As the daughter (current owner) of this piece, I could not be happier with how it turned out! Kathy did a wonderful job with this and I am so grateful! This was my dresser as a child, which once belonged to my grandmother, and now I can continue to pass it down. Thank you for this beauty!!!
shut the front door Kathy! This is gorgeous!
Spectacular!!!!
Love that you restored this beautiful wood piece … so very nice … love painted pieces but not everything needs painted to be beautiful … wonderful work 🙂
Kathy, you did such a beautiful job restoring this gorgeous piece! I love seeing old, dry wood come back to life with a proper cleaning and wood feeding! Love this!
Oh wow, what a gorgeous restoration, Kathy! I can’t believe how good the wood looks now. The knobs you added are pretty but the glass ones your friend brought over are even more perfect. She must’ve been so pleased when she saw her chest of drawers 🙂
Beautiful! Glad you didn’t paint it. The glass knobs are perfect!! Love it!Jackie C
I’m getting so accustomed to seeing painted furniture, that I didn’t realize the photo was an “After!” The wood is just beautfiul and the care you took with it is so obvious. Those glass knobs add the perfect touch for the next generation to enjoy this lovely piece.
It looks beautiful Kathy! Did you have an easy way of getting the old contact paper off or is it the old hard way? Also, hope to get to the Nashville Flea market this year, not sure when.
Wow ! This is why I refinish furniture . The wood and veneer are just beautiful. You can never get this look from IKEA . As my Dad used to say…..The old stuff is the best. You did a great job..I hope your clients daughter appreciates this treasure.