Peel And Stick Decal Furniture Makeover For A Rock Star
As an Amazon Associate, I earn from qualifying purchases.
Peel-and-stick decals or transfers are a big thing for walls. These are specially made sticky rub-on transfers and peel-and-stick decals. The decal I used on this chest of drawers is peel-and-stick and probably not meant for furniture, but you know me. I’m a rebel.
The decal I used for this piece may not be your personal style, but hopefully, this project will inspire you to find a decal or transfer you love. With these decor pieces, you can decorate walls, doors, furniture, flower boxes, and more.

What do you do when you have a plain white slate? You can do just about anything. This is what the project piece for today looked like when I spotted it at my favorite junk shop .
The price was great, although I can’t remember exactly what it was. I knew when I purchased the chest that I would just leave it painted white and do something about the knobs and maybe distress the paint a little.
Then I got to thinking about decals, stencils, or maybe metallic spray paint on the drawers. I decided to look around for inspiration at one of the craft/hobby stores.

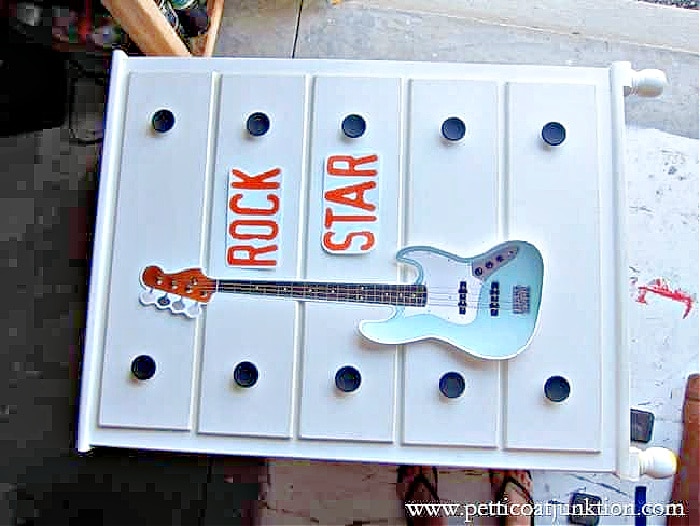
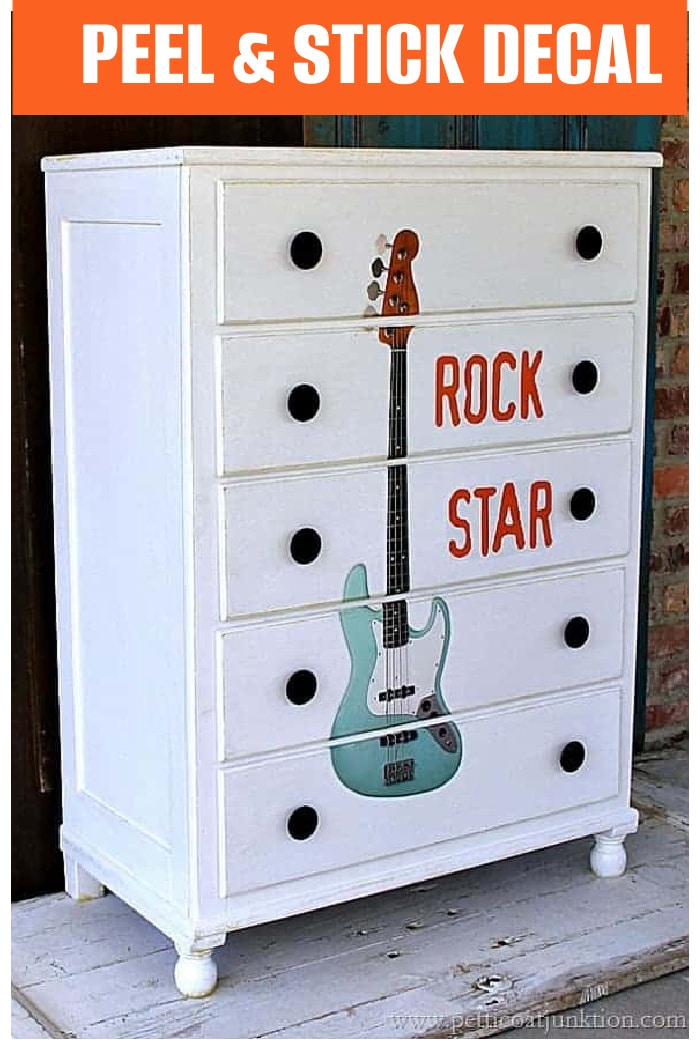
I found the peel-and-stick décor decal at Hobby Lobby. The decals were all on sale for 66% off, and this one was less than $10. I liked the colors and the coolness. Perfect for a teenager’s bedroom.

I spray painted the hardware first so it could dry. I removed all of the shiny brass knobs and gave them a coat of flat black spray paint.
I used flat black because I didn’t want shiny knobs to take the focus off of the “Rock Star.” Shiny hardware would compete with the decal for attention. The spray paint is the $1 kind from Walmart.
I cleaned the chest with Simple Green and distressed the edges of the drawers and the chest casing. Underneath the white paint is yellow paint, peeking through just a little.
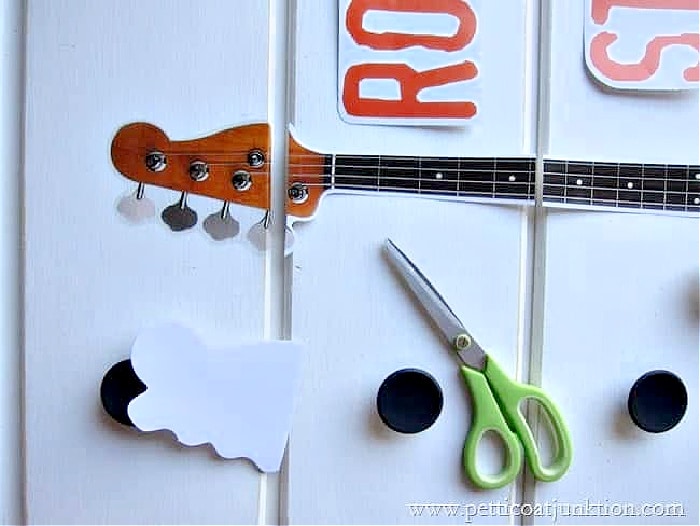
I positioned the decals the way I thought looked best. Next, I cut the guitar decal so it would fit only on the drawer fronts, not any of the decal on the casing.
I stuck the decals on and they worked great except on the edges where I curved the decal over the top and bottom of each drawer. The decal adhered fine on the flat surface but not over the curved edges of the drawer front.
I dabbed glue to the decal’s top and bottom edges so they would lay down on the curved drawer edges.

And that was that. How perfect is the chest now?? I love it. patting myself on the back.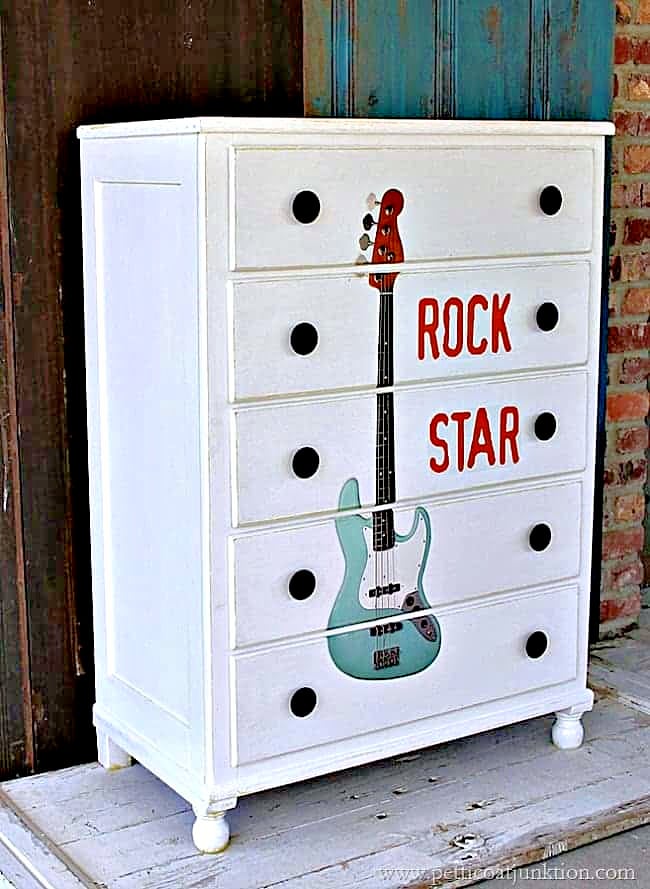
I usually stencil a design when I want to add a bit of flair to a piece, but I like this decal thing a lot.
I have a step-by-step tutorial showing how to add depth and dimension to a stencil design and it’s so easy. The finished design doesn’t look flat or blah. The technique doesn’t require layered stencils; you can get the look with any. Find the tutorial here….How To Stencil Like A Pro | Layering Paint Colors
Kathy, you should pat yourself on the back…that turned out great!! I’m beginning to look into using peel and stick decorations, too. Thanks for sharing!!
That turned out so cute. You have a knack for turning something from drab to fab! Love it!
That’s really cute! Good idea, good job!!
LOVE it!!!
Looks nice Kathy .