How to Whitewash Furniture: Step-By-Step Guide With Tips and Project Ideas
As an Amazon Associate, I earn from qualifying purchases.
Would you love to give an old piece of furniture a softer, lighter, more custom look? Learning how to whitewash furniture and home decor accessories is an easy way to add depth, character, and a beautifully layered finish without making the piece look heavily painted.
In this step-by-step guide, I’m sharing everything you need to know about whitewashing furniture, including the best supplies, how to prep your piece, the whitewash paint ratio I use, how to whitewash painted furniture and raw or stained wood, and tips for getting the exact look you want. I’m also linking to my whitewashing project tutorials so you can see the technique in action on real furniture makeovers.
What Is Whitewashing Furniture?
Whitewashing furniture is a simple painting technique that uses paint thinned with water to create a soft, translucent finish. Instead of covering the surface with solid color, the diluted paint is brushed on and wiped back off. This lets some of the wood grain, base paint color, or surface texture show through. You have to love that! This is my favorite special paint technique!

A whitewashed finish has depth and movement instead of looking flat. It can brighten dark furniture, soften bold paint colors, and add age and character to plain pieces.
The beauty of whitewashing is its flexibility. It works on both painted furniture and bare wood. On painted furniture, it gives you a layered look with extra dimension. On raw or stained wood, it creates that soft, weathered finish that works especially well for farmhouse, cottage, and coastal styles.
Why Whitewash Furniture?
There are a lot of reasons to use this technique, but the biggest one is the look. Whitewashing creates a unique finish without completely hiding the original character of the piece.
If you have ever painted a piece of furniture and thought it needed “something else,” whitewashing may be the answer. Use a wash to tone down a strong paint color, highlight details, and make a newer paint finish look subtler and more worn.
I also like whitewashing because it is forgiving. You are not aiming for a perfect, solid finish. You guys know my motto is “perfectly imperfect!” The variation in how the wash is applied is part of the charm. It is a great technique for beginners and for thrifted furniture pieces that may already have a little wear and personality.
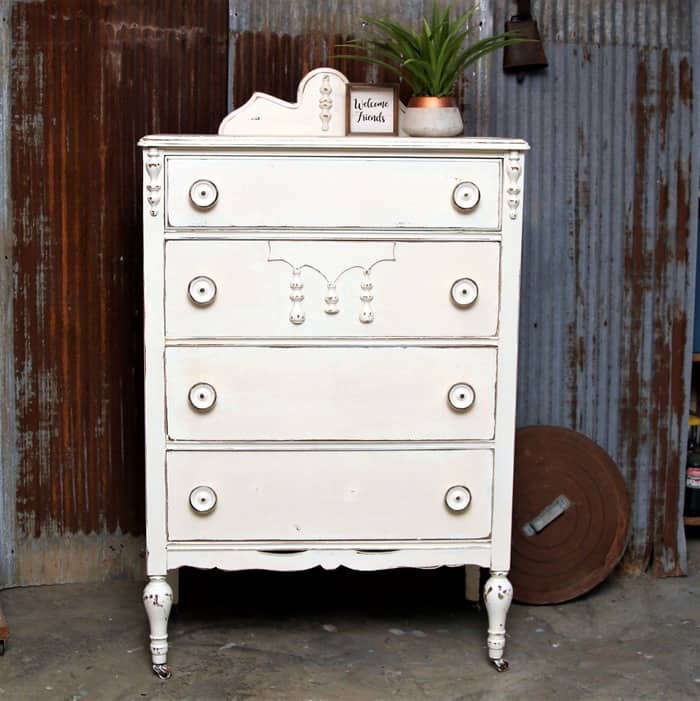
Best Types of Furniture for Whitewashing
One of the nice things about whitewashing is that it works on so many kinds of furniture. You do not need a special piece to use this technique.
Whitewashing works especially well on:
- tables and desks
- dressers and nightstands
- side tables and accent tables
- chairs and benches
- bed frames and headboards
- furniture with carved details, trim, grooves, or turned legs
- unfinished wood furniture
- painted furniture that needs extra depth
Detailed furniture with appliques, turned legs, and scrollwork looks especially good whitewashed. And believe it or not, when the thinned paint settles into furniture imperfections like dents, dings, and scratches, it just adds more charm.
This technique can be used on decorative accessories, too. Think about old barnwood totes and picture frames.
Best Paint for Whitewashing Furniture
The best paint for whitewashing furniture is usually a water-based paint that mixes easily and gives you enough open time to work before it dries. I most often use latex or chalk-style paint for whitewashing.

Bright white will give you a cleaner, fresher look, but off-white usually gives a softer finish. If you want an aged or farmhouse feel, off-white is often the better choice.
Keep in mind that different paint brands vary in thickness. Some paints are much heavier than others, so the amount of water you add may need to be adjusted a little. That is why I always recommend mixing a small batch first and doing a test before starting on the whole piece.
If you are wondering whether you can use chalk paint to whitewash furniture, the answer is yes. If you want to use latex paint, yes, that works too. The key is getting the consistency right for the look you want.
Supplies Needed to Whitewash Furniture
You do not need a long list of fancy products to whitewash furniture. Most of the supplies are things you probably already use for furniture painting.
Here’s what I recommend:
- your furniture piece
- base paint, if you are painting the piece first
- white or off-white paint for the wash
- water
- a measuring cup or a small container for mixing
- paintbrushes in different sizes
- lint-free rags
- sanding block or electric sander
- sandpaper
- cleaner for prep
- drop cloth
- optional topcoat
A small brush is helpful if your furniture has trim, grooves, or carved details. Lint-free rags work best for wiping back the wash without leaving fuzz behind on the finish.
How to Prep Furniture Before Whitewashing
Good prep makes every furniture finish better, and whitewashing is no exception. Even though the technique is soft and forgiving, the surface still needs to be clean and ready.
Start by cleaning the furniture well to remove dust, grease, and grime. If the piece has a flaky old finish, rough spots, or scratches that need smoothing, sand those areas before you begin. Make any needed repairs, tighten hardware, and fill in any serious damage if necessary.
If you are whitewashing painted furniture, make sure the base coat is fully dry before adding the wash. If you are working with raw wood, sand it smooth and remove all dust so the wash goes on evenly.
For stained wood, test the surface in a small area to see if the whitewash will soak into the wood. Heavily sealed wood will not soak up the whitewash. If the test is successful, just clean the surface well and let it dry before applying the wash.
Do you need primer? Sometimes yes, sometimes no. If the piece has stain bleed, slick surfaces, or other problem areas, use primer first. If the surface is already in good shape and you are working over a sound painted finish or unfinished wood, primer may not be necessary.
Mixing The Whitewash: How Much Water to Add to Paint
One of the most common questions about whitewashing furniture is how much water to mix with the paint. A good starting point is 3 parts water to 1 part paint.
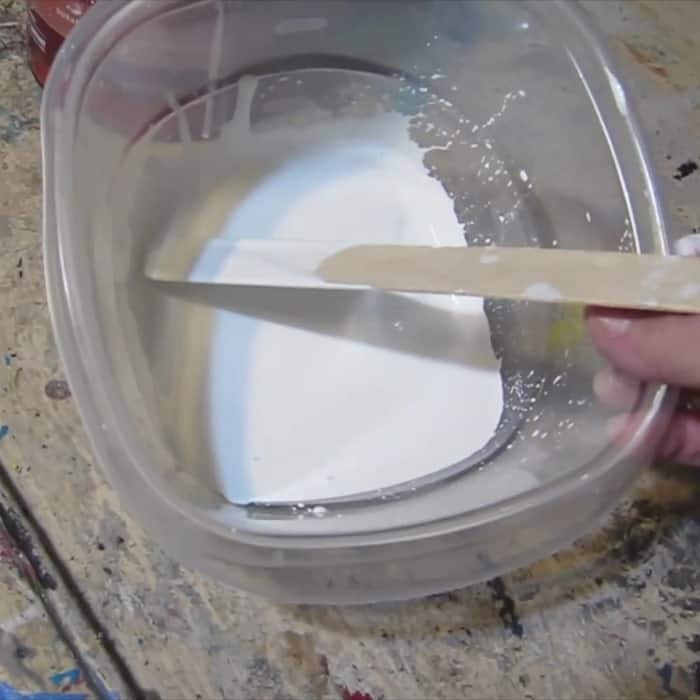
That ratio works well for many furniture projects, but it is not a strict rule. Some paints are thicker and need a little more water. Some are thinner and need less. The final ratio also depends on how visible you want the whitewash to be.
If your mixture is too thick, it may drag across the surface and leave too much solid color behind. If it is too thin, it may be so faint that you hardly see the effect. The best thing you can do is test the mixture on a sample board, the back of the piece, or another hidden area.
Start light. You can always add another coat or use a slightly stronger mix for more coverage.
How to Whitewash Furniture
Whitewashing painted furniture is one of my favorite ways to add interest to a painted finish. It gives the piece that extra layer of softness and keeps it from looking too flat or one-dimensional.
Step 1: Prep the painted furniture
Clean the piece and lightly sand if needed. If you are starting with a fresh-painted base coat, make sure the paint is dry before moving on to the whitewash.
Step 2: Apply the base coat if needed
If the furniture is not already painted and you want the color to show through the whitewash, paint the piece first. Let it dry completely.
Step 3: Mix the whitewash
Combine your white or off-white paint with water. I like to start with the 3-to-1 water-to-paint ratio and adjust from there if needed.
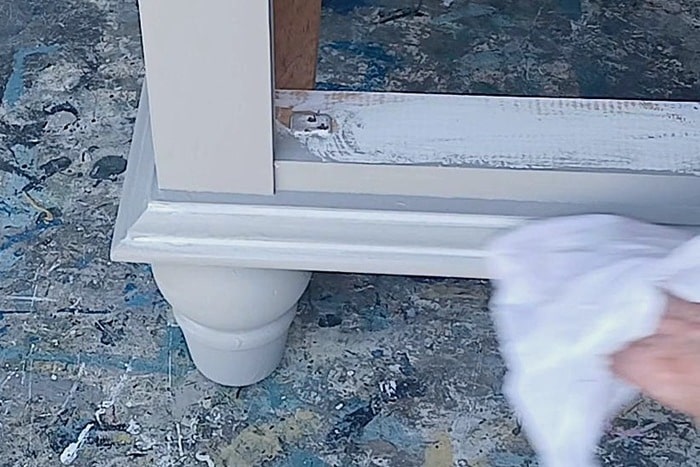
Step 4: Apply the whitewash in small sections
Brush the whitewash onto the furniture a section at a time. Do not try to do the whole piece at once because the wash can dry before you have a chance to wipe it back.
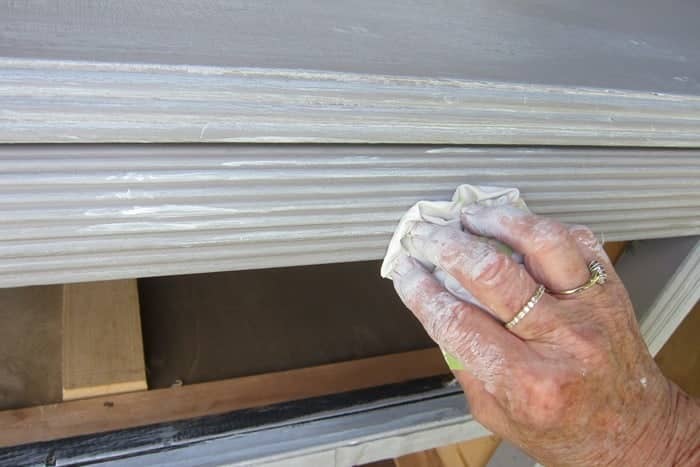
Step 5: Wipe back the excess
Use a damp, lint-free rag to wipe away some of the wash. How much you remove will control the final look. Wipe more for a subtle finish and less for a stronger whitewashed effect.
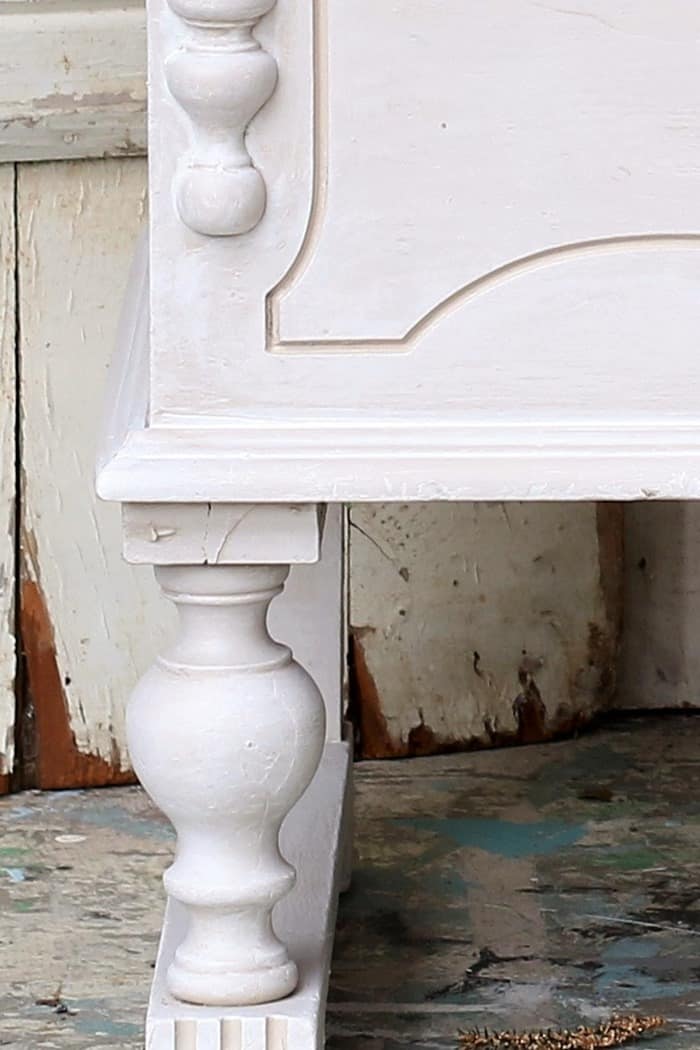
Step 6: Work the wash into the details
If the piece has grooves, trim, turned legs, or carved sections, use a smaller brush to push the wash into those areas. Then wipe lightly so the whitewash stays in the details and adds depth.
Stand back every so often and look at the piece from a distance. This helps you see whether the finish is even and whether you want more whitewash in certain spots.
How to Whitewash Raw Or Stained Wood Furniture
Whitewashing wood gives a beautiful, soft, natural look, but it behaves differently from painted furniture. Bare wood usually absorbs the mixture faster, which means you need to work with that in mind.
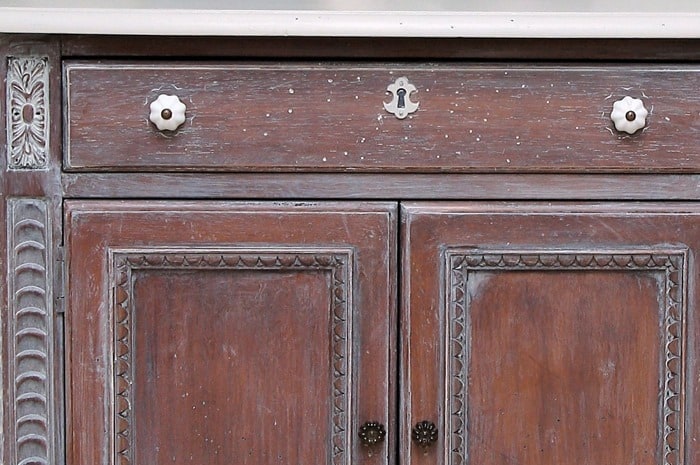
Always test first on unfinished wood. Some woods absorb the whitewash quickly and deeply, while others allow more time for wiping and adjusting. Pine in particular can take the wash unevenly if you are not careful, so a test area is important.
Test sealed, stained finishes beforehand, as they may not take whitewash if the piece has a heavy layer of sealer.
Apply the whitewash with a brush and wipe back as needed, just as you would on painted furniture. The difference is that raw wood may not let you remove the wash, as it begins to soak in. That is why it is best to work in small sections and keep your technique consistent.
If you like the final look, you can leave it as is or seal it with a topcoat for extra protection.
How to Get Different Whitewashed Looks
One of the best things about whitewashing furniture is how easy it is to customize.
For a light and subtle finish, use a thinner mixture and wipe most of it back. This is great when you want just a hint of softness.
For a rustic whitewashed look, use a little less water or wipe back less of the wash so more white stays on the surface. Let some variation show.

For a heavy whitewash finish, build the color slowly with more than one light coat instead of trying to get the look all at once.
For a soft, modern finish, keep the application smooth and even, and use a soft white instead of a stark, bright white.
For an aged farmhouse look, let more whitewash settle into details, corners, grooves, and trim. That extra contrast adds character.
The final look always comes down to three things: the paint color, the thickness of the wash, and how much you wipe away.
Common Whitewashing Mistakes to Avoid
Whitewashing is simple, but a few things can trip you up. A mixture that is too thick can leave heavy streaks and too much solid paint. A mixture that is too thin may barely show up.
Another common mistake is skipping the test area. Even if you have whitewashed furniture before, each coat of paint and each surface behaves a little differently.
Working over too large an area at one time can also cause problems. If the wash starts drying before you wipe it back, the finish may look uneven.
Using the wrong rag can leave lint in the finish, and using a brush that is too large for detailed furniture can make the project harder than it needs to be.
And finally, do not rush. Whitewashing looks best when you build it slowly and adjust as you go.
Do You Need to Seal Whitewashed Furniture?
Not every whitewashed furniture piece needs to be sealed, but many benefit from a protective topcoat, especially tables, desks, and other high-use pieces.
If the furniture will get a lot of wear, a topcoat is a good idea. If it is mostly decorative, you may decide the finish is fine without one.
Choose a topcoat that fits the look you want. A matte or flat finish usually works best if you want to keep the soft whitewashed appearance. If you use a topcoat with more sheen, it can change the look a bit.
Always test first if you are worried that the topcoat may deepen or slightly alter the finish.
Frequently Asked Questions About Whitewashing Furniture
What is the best paint ratio for whitewashing furniture?
A good starting ratio is 3 parts water to 1 part paint, but you may need to adjust it depending on your paint’s thickness and the look you want. Sometimes, 2 parts water to 1 part paint works better.
Can you whitewash over painted furniture?
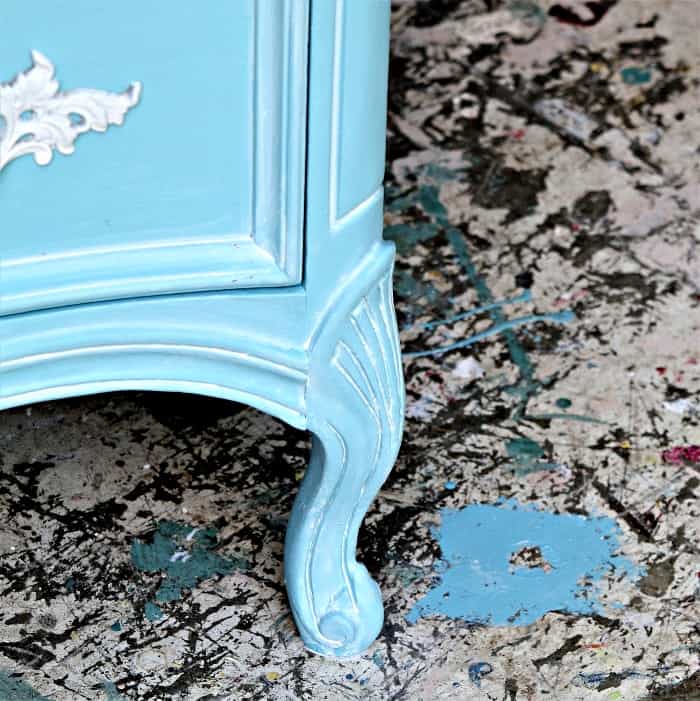
Yes, absolutely. I love to whitewash over paint, dark and light colors both. Whitewashing over painted furniture is a great way to add depth, soften the base color, and highlight details.
Can you whitewash dark-stained wood furniture?
Whitewashing over stained wood is possible depending on the piece. If the wood is heavily sealed, the whitewash will not penetrate the finish. You should test a small area on any stained wood furniture to see how the wood soaks up the wash.
The final look will vary depending on how dark the wood is and how much whitewash you apply. Always test first.
Can you use chalk paint to whitewash furniture?
Yes. Chalk-style paint works well for whitewashing because it mixes easily with water and gives a soft finish. But chalk paint will grab onto the whitewash easily, so work in small areas.
What color paint is best for whitewashing?
For the wash, white and off-white are the most common choices. Off-white usually gives a softer and more natural look. For the furniture color, just about any color can be whitewashed!
Should whitewashed furniture be sealed?
It depends on how the piece will be used. High-traffic furniture often benefits from a topcoat.
Can you whitewash furniture without stripping it?
Yes. In many cases, you can whitewash painted furniture or clean unfinished wood without completely stripping the piece.
Whitewashed Furniture Project Ideas
If you are the kind of person who likes to see the technique on real furniture before jumping in, be sure to check out my whitewashing project tutorials. I’ve used this finish on a variety of furniture pieces, and each one shows a slightly different look and application.
Whitewashed tables
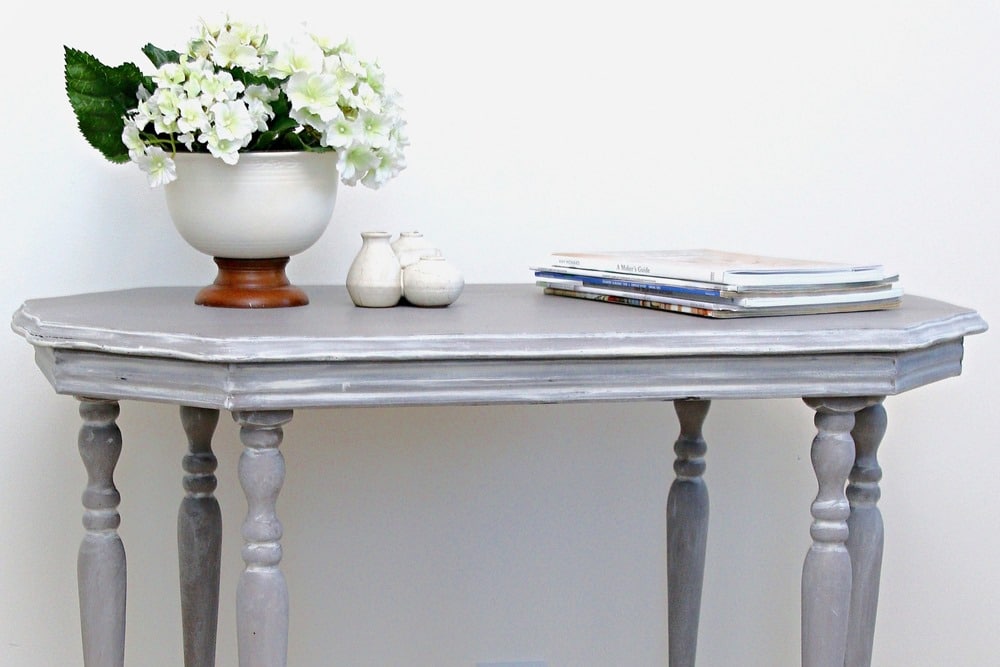
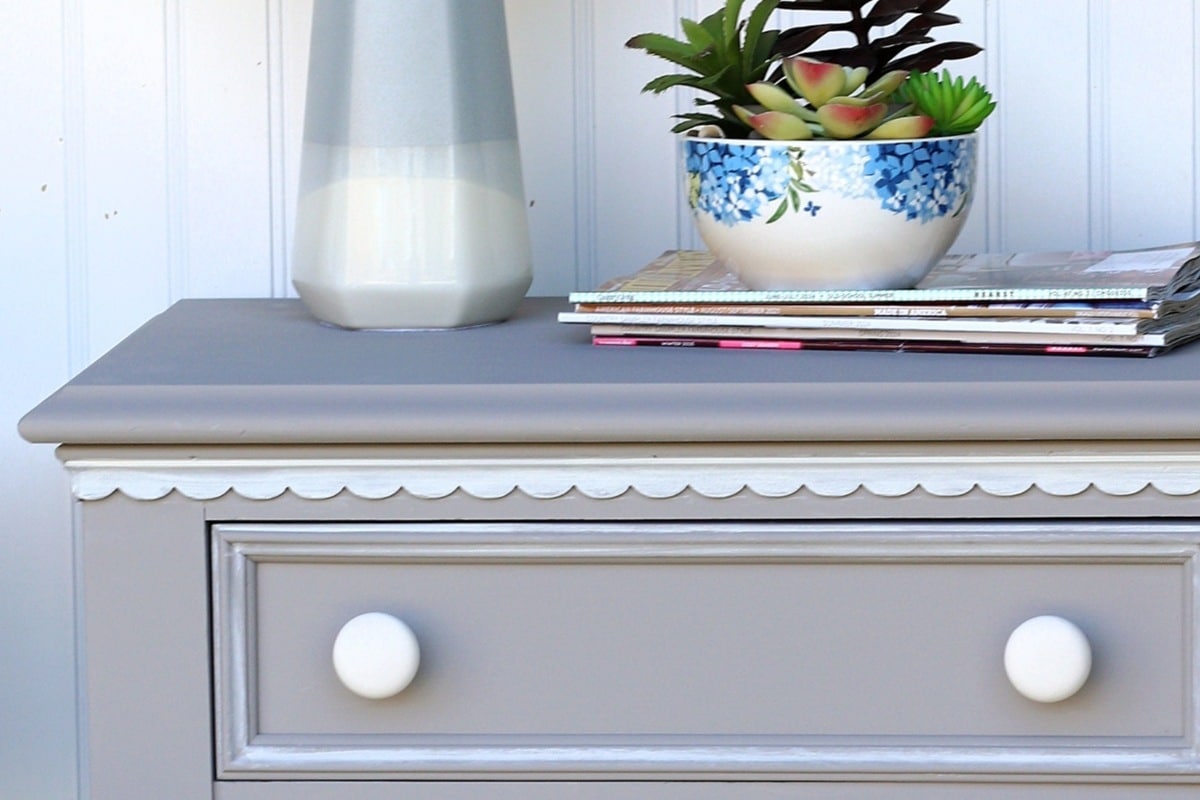
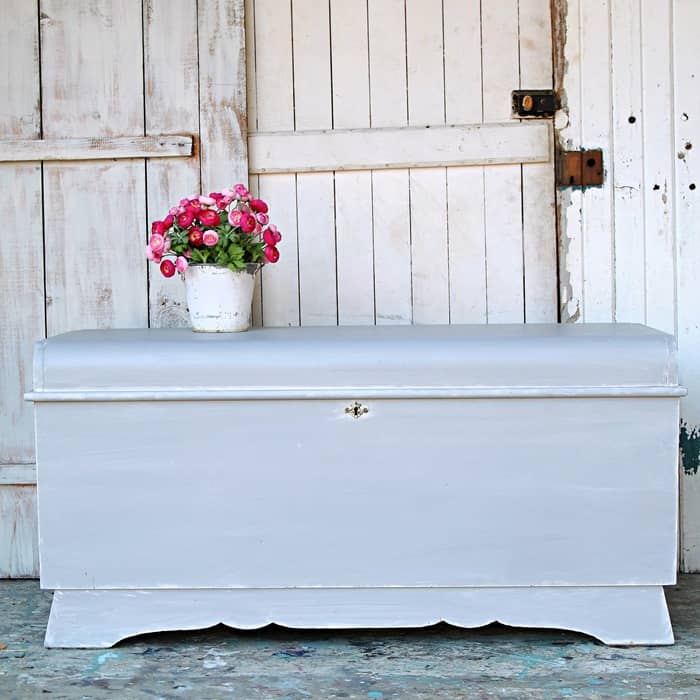
I really enjoyed painting this table and giving it a whitewashed finish. The original finish was very dark, and the paint and wash gave it a light, fresh look. See the whitewashed table .
TIP: Always keep a dampened rag and a bowl of water handy. If you apply the whitewash too heavily, you can always wipe it back with the damp rag until you get the look you want.
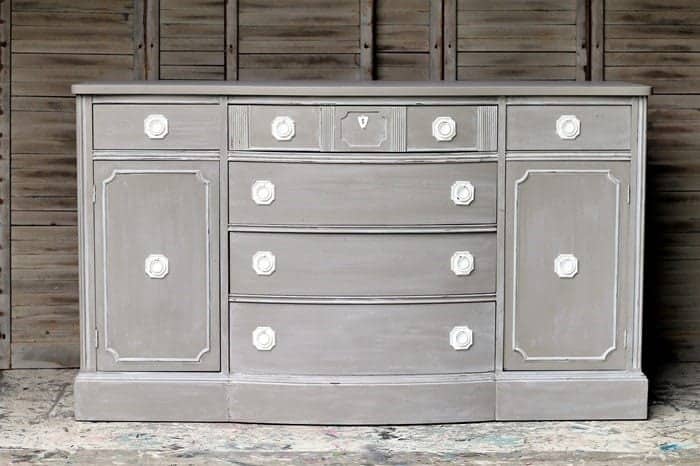
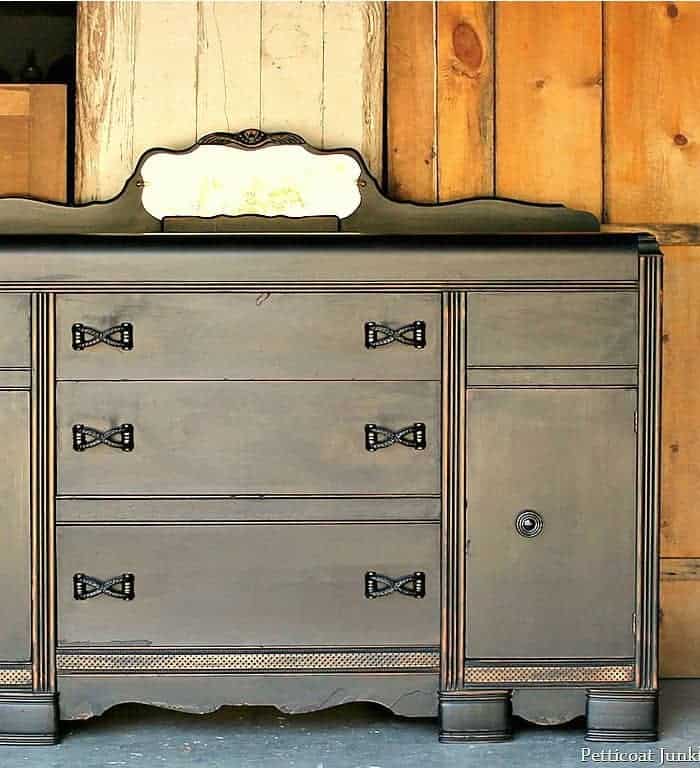
Whitewashed Large Furniture
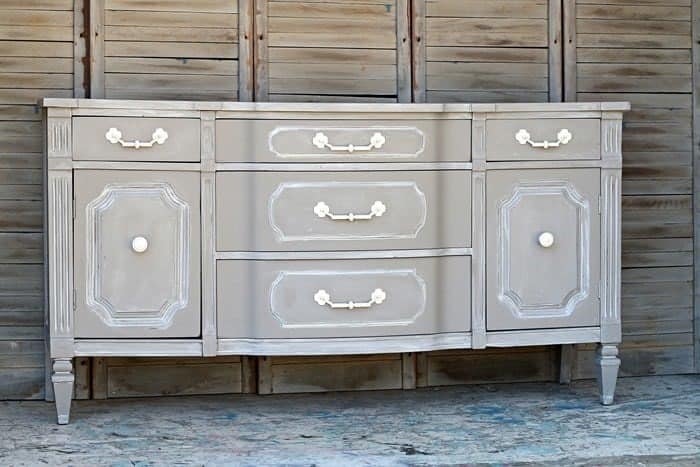
I used a small paintbrush to paint the details on the large sideboard. That includes all the corners and the grooves on the sides of the piece. See this whitewashed sideboard.
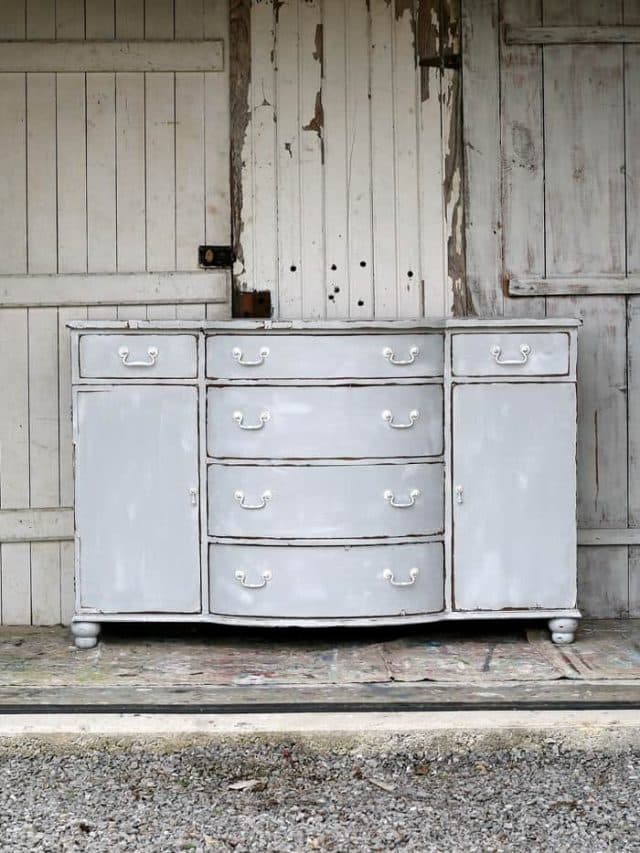
Go overboard with the whitewash for a weathered Nantucket type feel. See the whitewashed weathered buffet.
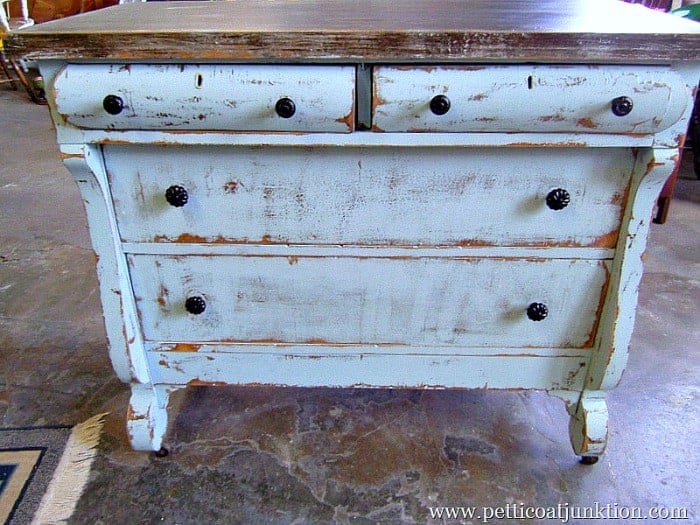
Whitewashed wood projects
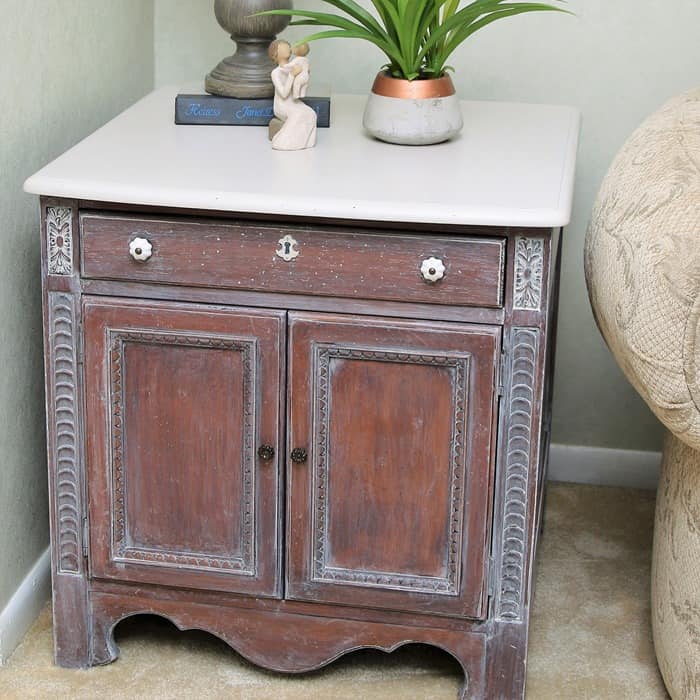
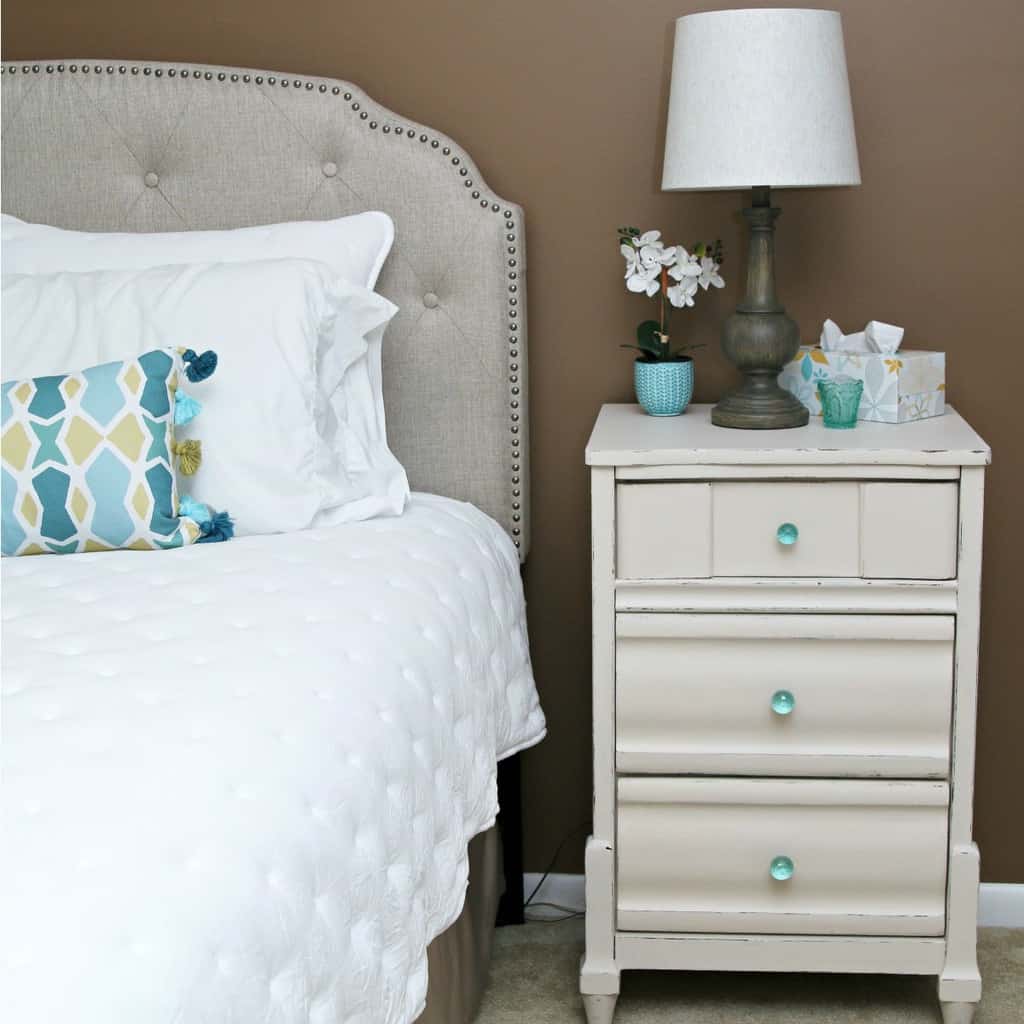
Older furniture sometimes looks outdated, and a whitewashed finish can freshen and lighten the stained wood. I was gifted this piece of furniture, and I absolutely loved all the details. Perfect for whitewashing. See the side table whitewash project.
TIP: Don’t try for perfection. Two detailed areas are not going to pick up the whitewash in exactly the same way, and you are not going to wipe back the whitewash in exactly the same way. But, trust me, it will look good.
Whitewashed Cedar Chests – Light and Dark Paint
Whitewash Over Painted Cedar ChestWhen whitewashing a freshly painted piece, be sure to let the paint cure for a day or two. Since the whitewash is, well, wet, the application may cause some of your paint to wipe off. If this happens, just apply a coat of paint over the spot and wait for it to cure. See the pretty whitewashed cedar chest makeover.
TIP: When working with paint, remind yourself that if you mess up or make a mistake, just repaint or whatever works in that instance. I’ve done this many, many times! If the color is wrong, paint it again in a different color.
Tips For the Best Whitewashing Results
If you are new to whitewashing furniture, the best advice I can give you is to start light. It is much easier to add more whitewash than to remove it once the finish dries.
Always test your mixture first, work in small sections, and step back now and then to look at the piece as a whole. Sometimes the finish looks different from across the room than it does when you are right up on it.
Consider the furniture type. A sleek, modern table may need only a soft wash, while a vintage piece with carved details may look best with more whitewash left in the grooves and on the detailed trim.
You Can Whitewash Furniture
Whitewashing furniture is a simple technique, but it can completely change the look of a piece. Whether you are working with painted furniture or stained or raw wood, the key is to start with the right prep, test your paint-and-water ratio, and build the finish slowly until it looks just right.
What I love most about whitewashing is the character it adds. Instead of a flat painted surface, you get depth, softness, and a finish that feels much more custom and interesting. No two pieces turn out exactly alike, and that is part of the charm.
If you are new to whitewashing, start with a small project or a sample board first. Then be sure to browse the project ideas above to see how I’ve used this technique on actual furniture makeovers. Those step-by-step tutorials will help you decide which whitewashing method and look is best for your next project.
Yay! Let me know how it goes.
Thank you for the details and photos.Every piece turned out differently. I’m going to give this a try and see how it goes.