Two Tone White Chalk Paint And Stained Furniture Makeover Idea
As an Amazon Associate, I earn from qualifying purchases.
This is a fabulous two-tone furniture makeover featuring white chalk paint and the original stained finish on a vintage chest of drawers.
![]()
Today is Furniture Fixer Upper Tour Day, and, as usual, my painting partners have some doozies for us. I’m going to tell you all about this beaut,y then you can take the tour at the end of the post.

I bought the chest of drawers at the Nashville Flea Market in May from one of my favorite vendors. The price for the chest was $60. Hard to resist. I had to have it. Seriously, it’s very difficult to find this style of furniture anymore. It even had all the original hardware. Win-Win.
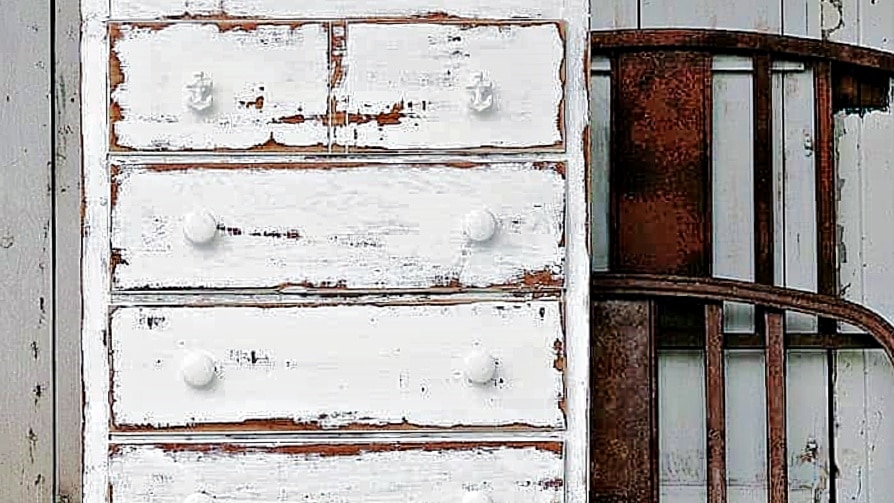
The veneer drawer fronts were orangy yellow and I’m not a fan of that color. I knew I was painting the drawers. The sides of the chest were dark and not yellow at all. The top was also dark and had a really pretty stained finish, no yellow veneer. Too bad it was damaged.

I really didn’t want to paint the top of the chest but I think someone spilled fingernail polish remover or something similar in spots. Whatever it was gunked up the finish. You guys know I don’t refinish or stain furniture so the top is going to get painted. I sanded the rough gunky areas on the top with 100-grit sandpaper to smooth them out before painting.
The chest was really dirty and I found a coin purse when I removed the drawers. I hold my breath every time I work with a junk find waiting for the day I find that million. Today wasn’t the day. The coin purse was empty.
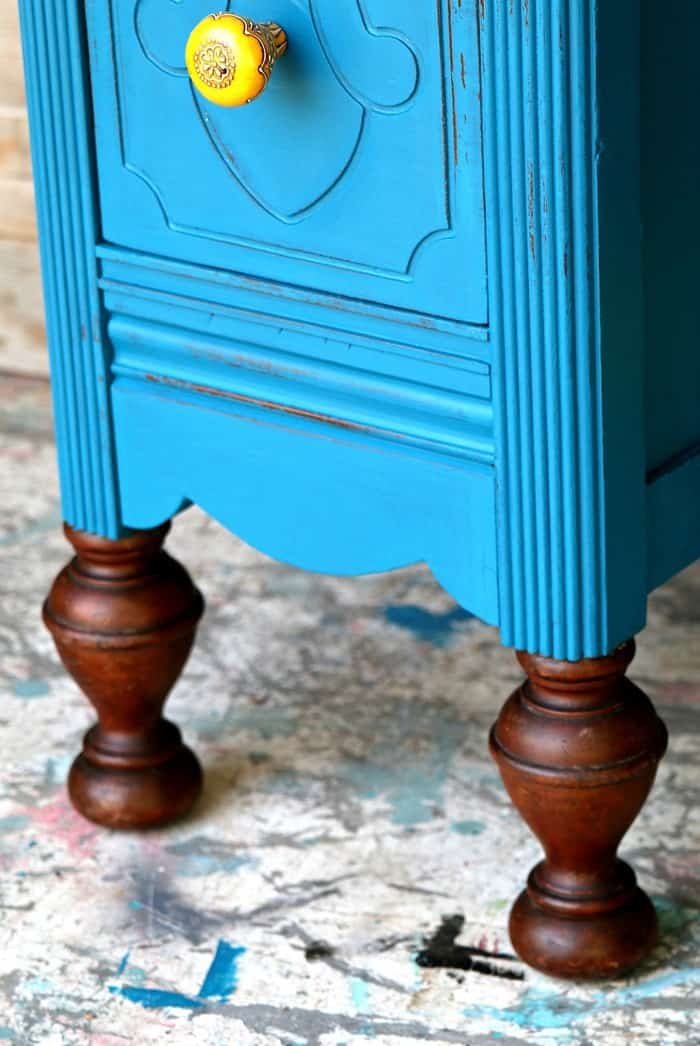
I vacuumed up the dust bunnies and dirt dauber nests then cleaned the chest inside and out with Simple Green. Next, I revived the finish with Howard’s Wax, color Walnut. See how nice that leg looks after a bit of sprucing up?

I chose to go flat paint again and pulled out my FolkArt Home Décor Chalk, color White Adirondack. I brushed on one coat of paint and noticed that a bit of the paint was getting a brown tinge meaning the stain from the original finish was seeping through the paint.
I didn’t want to go back and put primer over the paint so I just kept painting. You can see in the upper right photo where I applied a second coat of paint. The darker area just has one coat of paint.
I applied a third coat of paint and didn’t notice any stains seeping through. There was not any staining of the paint on the top of the chest. Probably because there was a different type of wood or stain on the top.
Two coats of paint for the top and I didn’t wax or seal the chalk. I like the flat look without waxing.

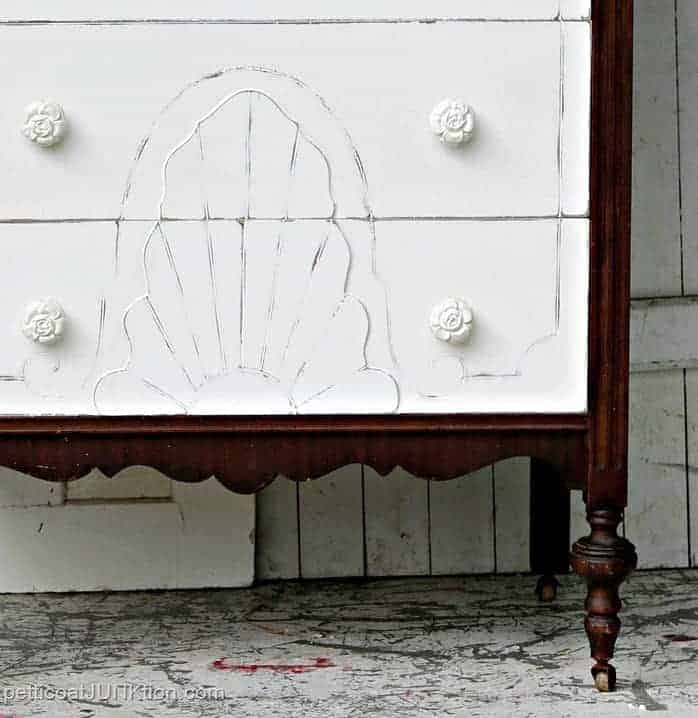
I couldn’t let all those lovely details hide under the paint. I grabbed my sandpaper and started sanding by hand. After 30 minutes and not much to show for all that sanding,
I grabbed the battery-operated sander. Those three coats of paint adhered well. I would have never finished distressing the paint by hand.
There is an art to using the sander and getting in all those tiny details. The sander is pretty powerful and it takes patience to not make a mess of the paint.

I wanted to use the original drawer pulls, but that didn’t work out. I tried cleaning them with Bar Keeper’s Friend, and they were still tarnished. I don’t mind a little tarnish, but the original finish wasn’t really pretty. It wasn’t shiny gold or copper like they usually are.
Next, I painted the pulls with Rust-Oleum Oil-Rubbed Bronze spray paint. The bronze color was close to the pulls’ original color. After painting them, I put a set of pulls on one of the drawers, and they didn’t look right.
I think the pulls’ style didn’t match the newly painted look. I decided against using the original pulls. Plan B. Buy new knobs or find some in my stash.
I always go the cheapest route first. I found eight knobs in my stash, four each of 2 different kinds. I primed them with Rustoleum Spray Primer, then painted the knobs with the FolkArt paint. The same paint I used on the drawers.
When the knobs were dry, I held them up to the chest to see how they would look, and the knobs were white-white compared to the paint on the drawers. I think the paint on the drawers took on a slight off-white cast from the stain.
Guess what I did next. Right, I used my favorite Rustoleum Spray Paint in Heirloom Satin White. The color is slightly off-white, and it really is my favorite spray paint. The color was just right.
I wish I had had at least 6 of those plastic rose knobs. I bought 7 of them at the Nashville Flea Market a while ago but have used several on other projects. A reader told me she thought they were curtain tie-backs which could be right.
The white painted drawers really pop. I was happy just to clean and restore the original stained finish on the chest’s body since it was in pretty good shape.
The white paint color I decided on for the drawers and the stained finish look lovely together. It’s a great day when I’m able to showcase the beauty of a vintage piece.
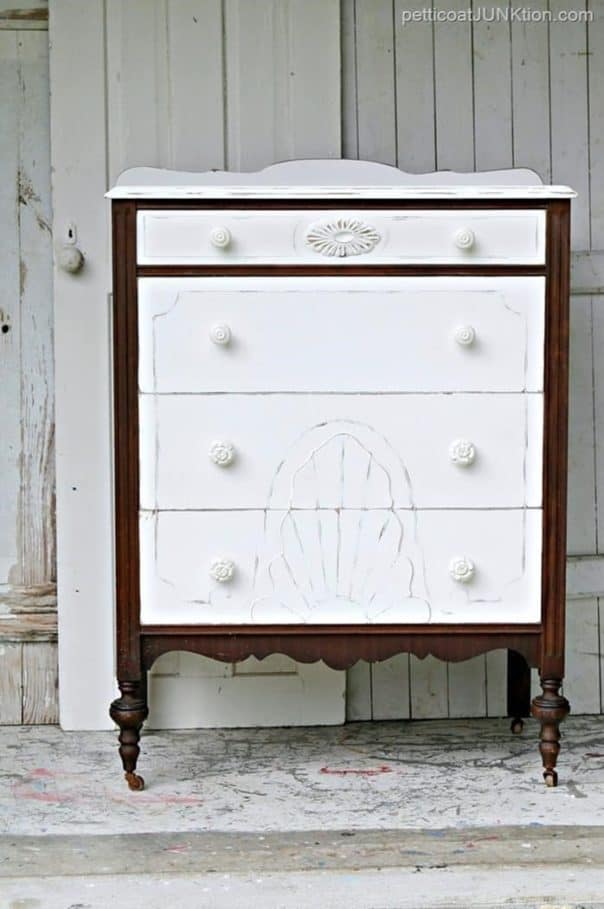
Get a look at those well-rounded legs. Aren’t they gorgeous? The white painted drawers with the light distressing and floral knobs make me smile. I love everything about this makeover. Patting myself on the back.

The plastic rose tie-backs make pretty drawer knobs. I think the mix of two types of knobs works. What do you guys think? Do the two different kinds of knobs look okay?
How about the white painted drawers, lightly distressed? How about the two-tone look……loving it……. hate it? You can’t tell in the photos, but the paint crackled in places, and it looks really cool.
I noticed a lot of the crackle before I put on the third coat of paint. The finish on the drawer fronts was a bit crackled and alligatored and something else….don’t know what to call it. All I can say is some areas felt really rough. But, that made the paint finish look really neat.
Leave a comment sharing your thoughts then pay a visit to my tour buddies. Just click the pink links below the “before” makeover photo.
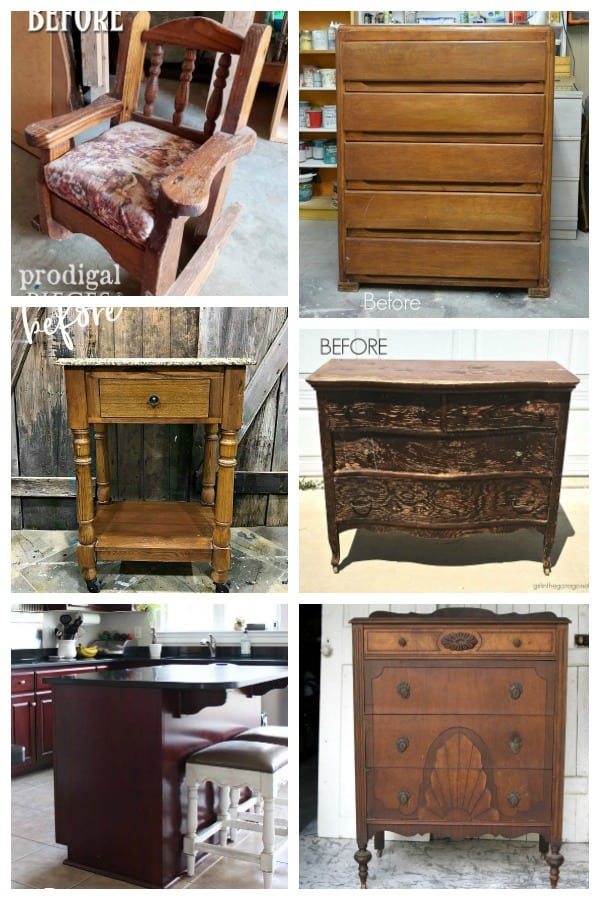
Serpentine Dresser Makeover – Girl In The Garage
Kitchen Island Makeover With Beadboard – Confessions Of A Serial Diyer
Child’s Rocking Chair – Prodigal Pieces
Distress Painted Furniture – Just The Woods
Whitewashed Geometric Dresser – The Interior Frugalista
Vintage Wardrobe with Painted Drawers – Petticoat Junktion (you are here)
As always, thanks for being here and have a great day, Kathy


I’m sad you painted this one. If you felt you had no other choice I feel the original knobs should have stayed even if they needed to be painted. I feel it’s lost a lot of it’s original integrity. Don’t get me wrong, I’m not “don’t paint anything” person either, just not EVERY piece. The reason we can’t find pieces like this anymore is because everyone is covering them in paint. 🙁
Beautiful face, beautiful bones, and beautiful paint color you selected. Thanks for sharing.
K
Wow I love everything about this piece now too, Kathy!! Great choices and I think the mix of knobs totally works and only adds to the charm! XO
So gorgeous, Kathy! I love the two tone look – just fab 😉
I absolutely LOVE how you painted this piece!! It is GORGEOUS! And I really appreciate how you include what you did, step by step. Thanks!!
That’s my bedroom set from ma have the whole set not painted of course. Good job!
Pat away girlfriend, pat away.
How lucky to find such a gorgeous piece and I gasped when you said you only paid $60! Pieces like this are hard to come by here and they cost an arm and a leg when you find them. Love how all the details on this dresser pop with the white distressed paint. Very nice, Kathy 🙂
love the new look kathy!!
Beautiful piece, great makeover! I’ve been working on a piece very similar the last few days; I’m doing a paint/stain combo too. Love all the pretty details on this era.
What a pretty dresser! Why didn’t you just paint the original pulls? Or maybe try rub n buff on them? I think the mix would work if you had six of the same on the bottom and two different on the top drawer because of the division with the dark wood. Anyways, it’s a really pretty dresser!
I really like it!!
Love how you gave it just the right touch to make this shine again, Kathy. Beautiful.