How To Add Metallic Gold Accents to Home Decor Using A Sponge | Video Tutorial
As an Amazon Associate, I earn from qualifying purchases.
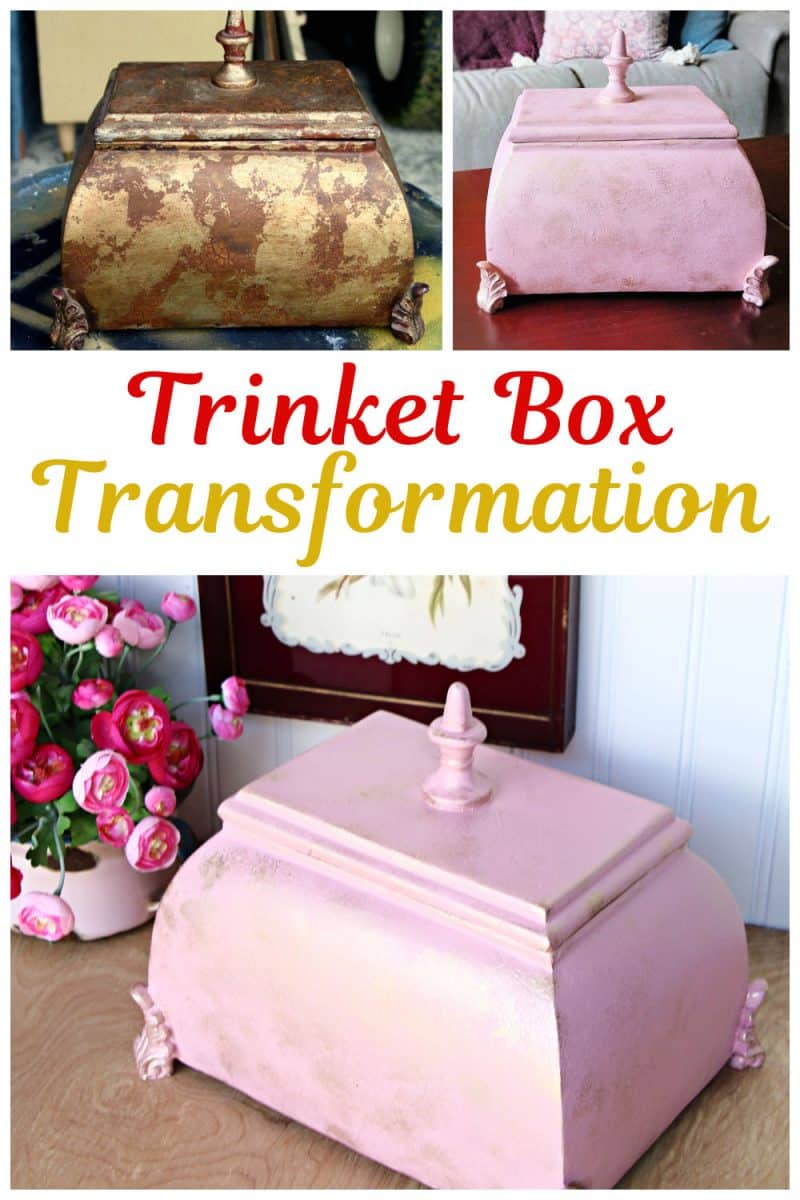
This little trinket box was stuck in the 1990s — dark, dated, and definitely not my style. A few coats of soft pink paint and easy metallic gold accents turned it into a fresh, modern piece that looks like it came from a high‑end boutique.

I love updating small décor pieces because the transformations can be amazing. This makeover is simple, beginner‑friendly, and only takes a little paint, a paintbrush, and a sponge. I even made a step‑by‑step video so you can see exactly how I apply the metallic gold accents with the sponge and how I fix things when my first idea doesn’t work.
Today is Trashy Treasure Tuesday, and the links to my friends’ trashy treasure makeovers are at the end of the post. Be sure to take the tour. Nancy’s project piece is very similar in color to mine and from the same time period (and probably the same store). I can’t wait to see what she did with it.
How to Paint a Jewelry or Trinket Box and Add Gold Accents

The Trinket Box
I purchased this jewelry/trinket box for $2 at our local online auction — definitely a deal.
")
The box is extremely heavy. Much heavier than it looks, and I think it must be made of iron. I know, that’s weird, right? I don’t know what I expected the box to be made of, but it certainly wasn’t lead.

The interior is painted black with some rough areas that no amount of sanding would smooth out. It looks like a piece from Kirkland’s or The Bombay Company from many years ago — the kind of thing that was very in style at the time but really outdated now.
Supplies for this Project:
- Latex paint (for the exterior)
- Small paintbrushes or chip brush
- Foam sponge (for the metallic accents)
- Paper plate or small cup (for pouring paint)
- Paper towels or shop towels (for blotting the sponge)
- Gold metallic paint – I used FolkArt Treasure Brilliant Metallic in Mayan Gold
You don’t need these exact products to get a similar look. Any latex paint color you love and a warm metallic gold will work just fine.
Selecting The Paint Color
")
I planned to display the box on our coffee table in the family room, so I needed a color that would work with the decor. The colors in the room are various shades of navy and pink, so a soft pink felt like the perfect choice.
I went to my paint stash (instead of the store — always my first stop!) and found an oops paint sample that was close to what I had in mind. I never buy paint if I can work with what I have on hand.
Paint the Exterior of the Trinket Box

I applied two coats of paint to the box.

And two coats to the lid. I used a small paintbrush since the box isn’t very big. A chip brush would work too.
Select the Paint Color for the Interior of the Trinket Box
")
At first, I thought I would leave the interior of the box as is, but the black was so harsh, and those rough spots really stood out.
Since I planned to add gold accents to the outside, it made sense to carry that same look inside. I used FolkArt Treasure Brilliant Metallic Paint in Mayan Gold. It’s an intense metallic with a high sheen — perfect for a jewelry or trinket box.
Paint the Interior of the Box
")
The bottle had been on my paint shelf for a few years, and I had used it on a previous project. The paint was thick, so I added water to the bottle and stirred it well.
Pouring the paint into a small paper cup instead of working from the bottle makes it much easier to load your brush evenly and control how much paint you’re using.
")
Metallic paints often look streaky on the first coat. Don’t panic. By the second coat, it starts to even out, and by the third coat, you get that rich, glowing coverage. The paint dries quickly, so I was able to do all three coats in less than an hour.
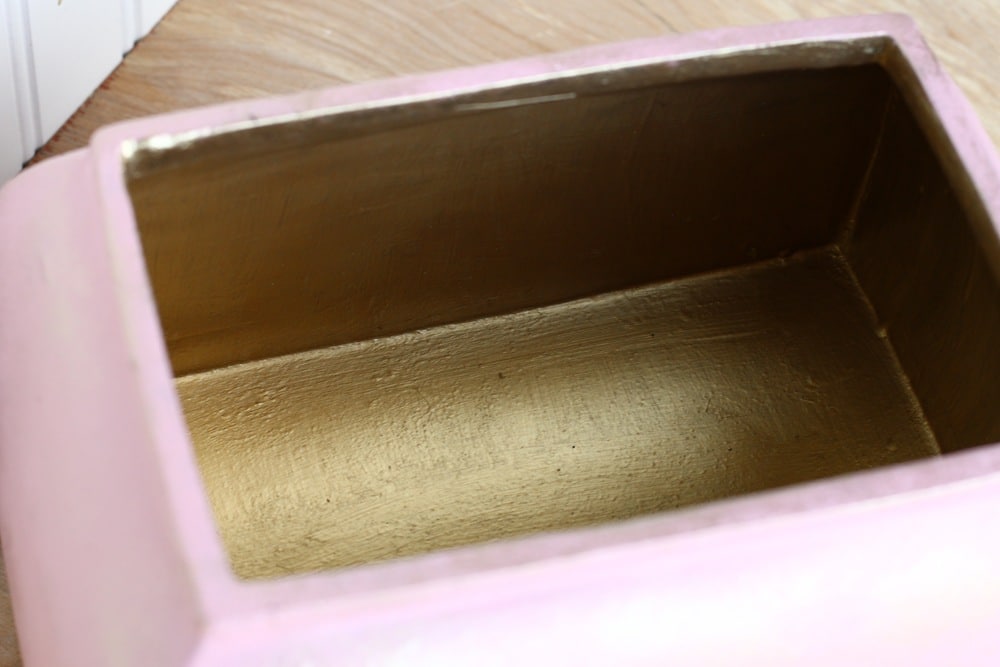
And the third coat did the trick. The metallic paint dries really fast so I did the three coats in less than an hour.
Access the Project

Once the first coats of pink paint dried, I realized the color was a little too strong — very “Pepto Pink.” Instead of starting over, I mixed in some off‑white paint until the pink softened to a color that would work in the room. Little changes like this can make a big difference in how a color works with your decor.

So I went back to my paint shelf and found an off-white paint to mix with the pink. I brushed the newly mixed paint color onto the pink box and kept mixing until the color was just right.

There wasn’t a major difference in the colors, but adding off-white to the pink instead of white softened its cool tone.
Friends, most of the time I don’t know what I’m doing. But I work with what I have, and I figure it out. As I always tell y’all, it isn’t rocket science. Paint something today.
Apply Gold Metallic Accents
")
I had the box painted inside and out and was happy with the results. Next, I started dry-brushing the gold onto the raised texture, but it just wasn’t deep or heavy enough. Instead of getting a light highlight, it looked like I was repainting the whole box.

I also tried stippling the paint on with a stencil brush, but that didn’t give me the soft, scattered look I wanted either.
So, I repainted the exterior pink and started over with a new plan: a foam sponge.

How to Apply Paint with a Sponge
My next plan was to use a sponge to apply the metallic paint. I used a foam sponge and brushed metallic paint onto the sponge.
- Load the sponge: I brushed a little metallic paint directly onto the flat side of a foam sponge.

2. Blot the excess: I dabbed the sponge onto a shop towel to remove most of the paint. This is key — you want the sponge to be almost dry.
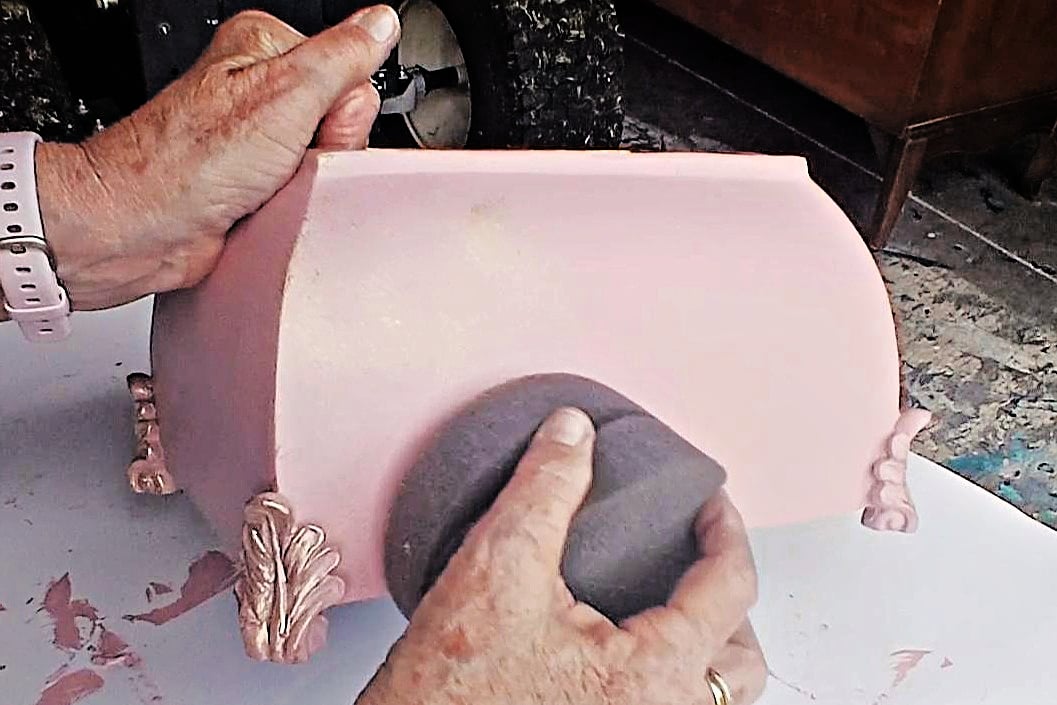
3. Lightly tap the box: I gently tapped the sponge onto the pink box, here and there, letting the paint just kiss the surface. I rotated the sponge in my hand as I worked, so the pattern stayed random rather than too uniform.

4. Repeat on the lid and knob: I used the same technique on the lid and then lightly dry‑brushed the knob with a small paintbrush for a little extra shine.
The sponge gave me exactly what I was looking for: soft, irregular metallic highlights that catch the light without covering up the pink.
Trinket Box Video Tutorial
And that’s the story of this little trinket box and all the twists and turns along the way. Sometimes the first (or second!) idea doesn’t work out, but that’s part of the fun of experimenting with paint.
")
The finished box looks clean, fresh, and just a little bit glam. The metallic sheen is subtle in low light and really shines in bright light. Can you believe it’s the same dark, outdated piece I started with?

I took these photos at the end of my garage workshop, with the door open and the sun bright.

I love those dry-brushed feet. The metallic sheen is just right.

The trinket box looks so clean and fresh now. The old look was dark and depressing, and screamed 1990.

Dry brushing is my favorite paint technique. It can make a ho-hum detail shine. For a tutorial on dry brushing paint, check this one out… Dry Brush Painting Technique For Furniture
If you’ve got a small decor piece that feels a little blah, don’t overthink it — grab some paint, a sponge, and get to work. It isn’t rocket science. Paint something today.

What do you like best about this project? Leave me a quick note before heading out on the tour, please. Let’s try something new today. Rate my makeover on a scale of 1-10!
And now it’s time for the tour! Just click the links below the “before makeovers” photo collage…….
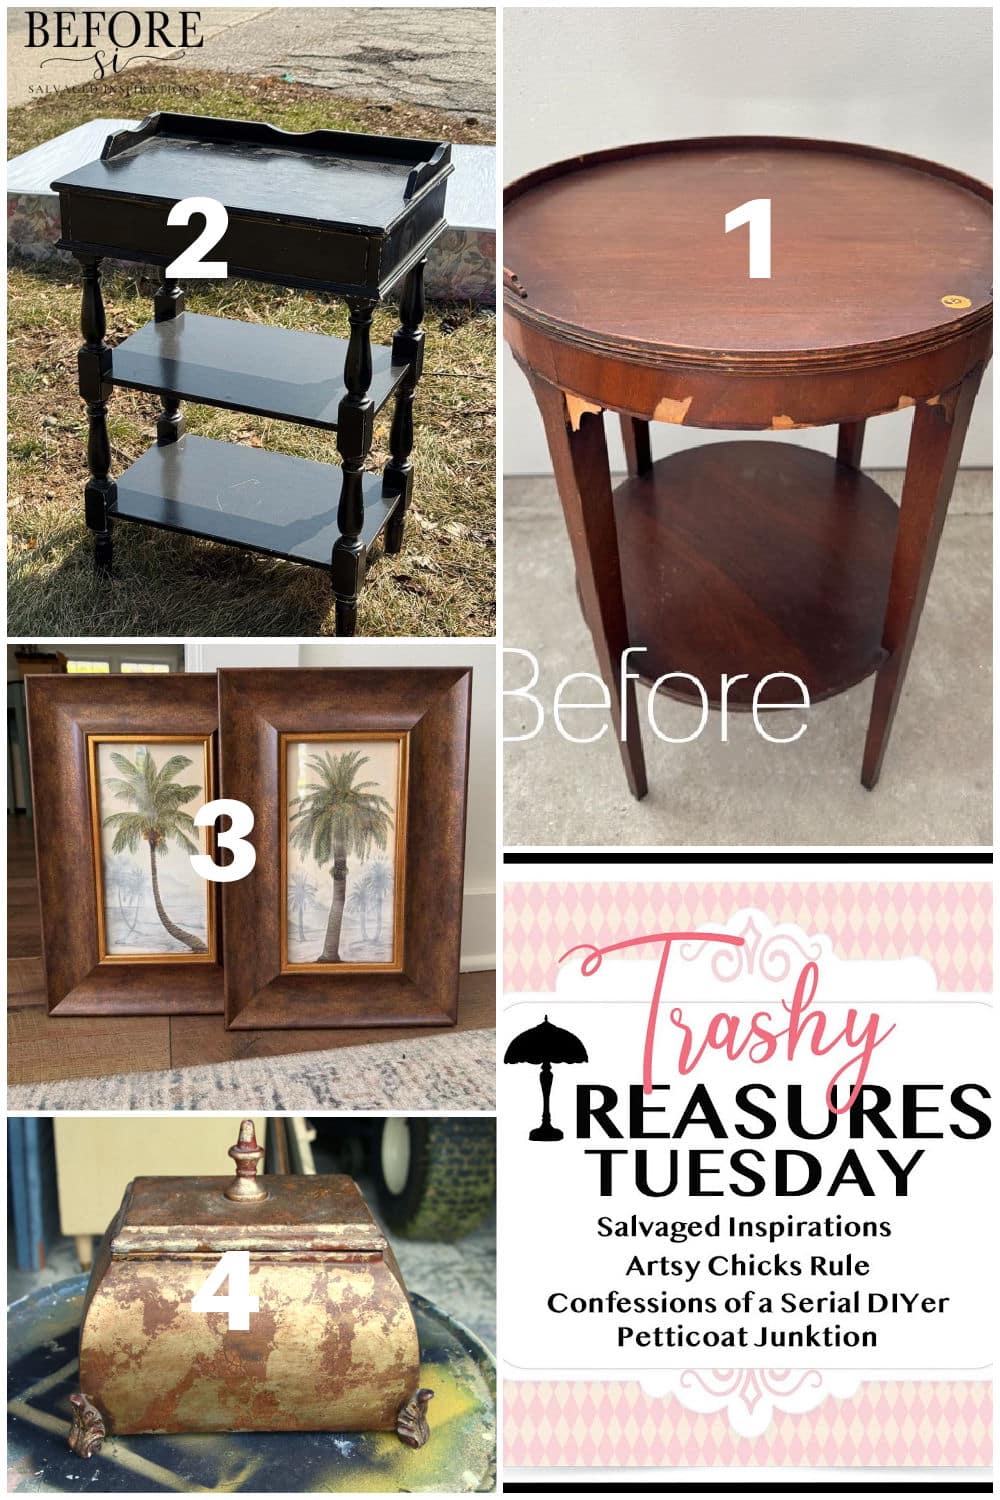
Trashy Treasures Tuesday Tour:
Vintage Side Table Makeover – Confessions of a Serial DIYer
Use A Bold Color To Update Furniture – Salvaged Inspirations
Upcycled Framed Print Set – Artsy Chicks Rule
Trinket Box With Gold Metallic Accents – Petticoat Junktion (you are here)

As always, thanks for being here, Kathy
Same!! I’ve slowed down alot!
So good to see you’re still out there creating and transforming! Miss sharing ideas with you!
Well, I didn’t think about painting the legs and knob so we’re even! I like the idea of painting the knob gold but not the legs. What do you think?
Beautiful piece to update! I love the pink, but I wonder if you had considered painting the top knob and legs in gold? Great idea for the inside, too. I would have never thought of that!
Definitely a 10. I love the new color with the gold.
I’m also a pin fan.
Cynthia
Pretty in pink!! Love the addition of the gold! xo
So much better now than that dated look before! It’s funny how makeovers lead us where to go next! XOXO
Hi Kathy! Love the new pink and gold look and I enjoyed the video watching you sponge on the gold – I need to try that!! 😃 Have a great week my friend. XOXO