How To Wet Distress Paint Using A Household Cleaner
As an Amazon Associate, I earn from qualifying purchases.
I learned this trick a while ago and haven’t shared it before, I don’t think. I call it the household cleaner wet distress paint technique and I actually use Simple Green but I figure any good cleaner will work. I have a short video showing the technique along with a lot of photos of the finished chest. It’s Furniture Fixer Upper Tour Day too so let’s get started.
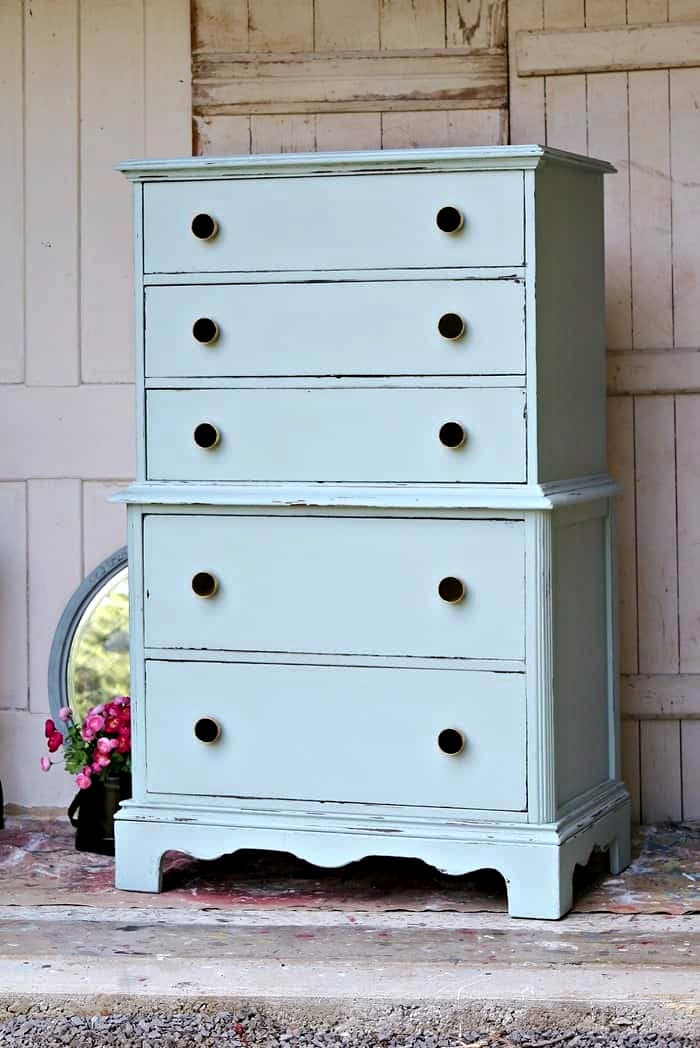
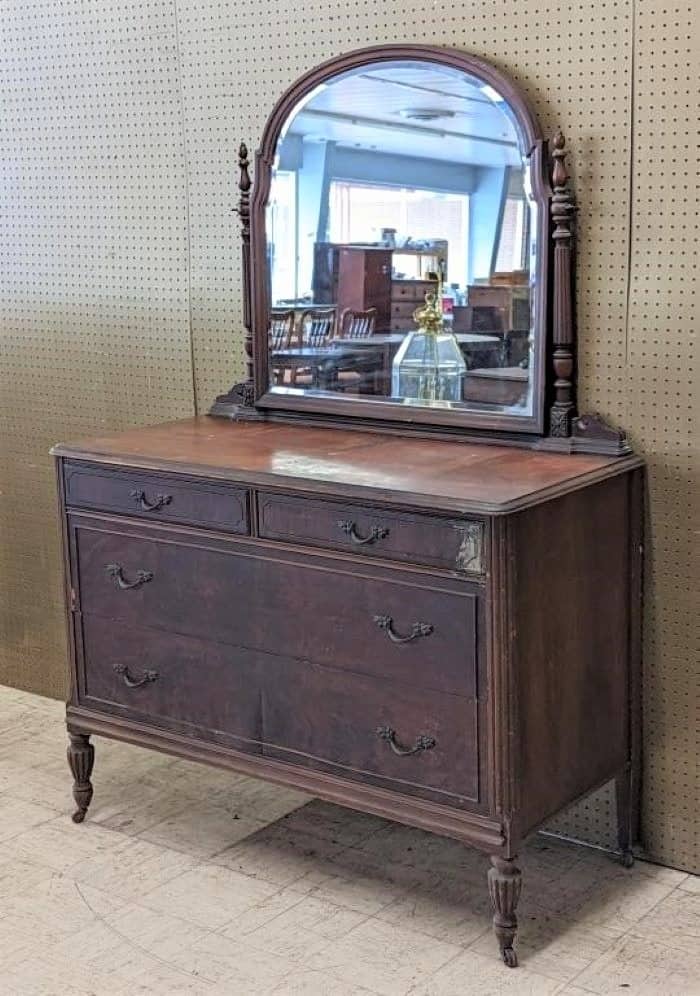
I wish you guys could see this chest of drawers in person. The knobs were a questionable choice but I put them on and didn’t look back. The small details are hard to see in the photos but the whole look works.

The chest is what I call a chest on chest and it’s one of my favorite furniture styles. The piece has a few curvy details too.

I bought the chest of drawers at an online auction and only had the photos to go by when bidding. I won the bid at $45 plus 10% auction fees. Not a bad price.

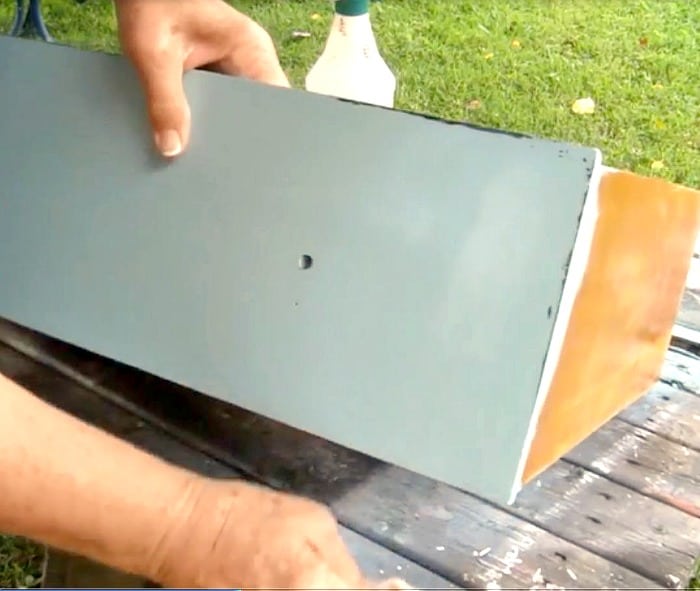
The photo collage above shows a small part of the process I went through to clean and repair the chest. It was very dirty and I used the shop vac and Simple Green to clean it up. A couple of the drawers needed repairing but that didn’t take much. I used my Ryobi brad nailer ( a favorite tool) to put the drawers back together.
Also most of the drawer stops were missing. I couldn’t find any at the local hardware stores so I ordered some online. A small pack of 12 metal drawer stops was almost $9. Highway robbery.

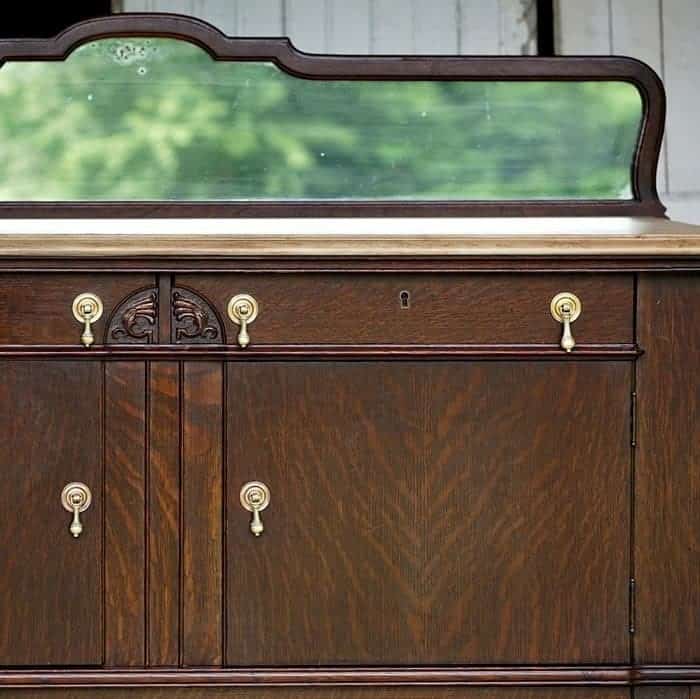
I always remove the drawer pulls before painting furniture. The chest was getting modernized and I didn’t want to use the old pulls so I bagged and saved them for a future project.

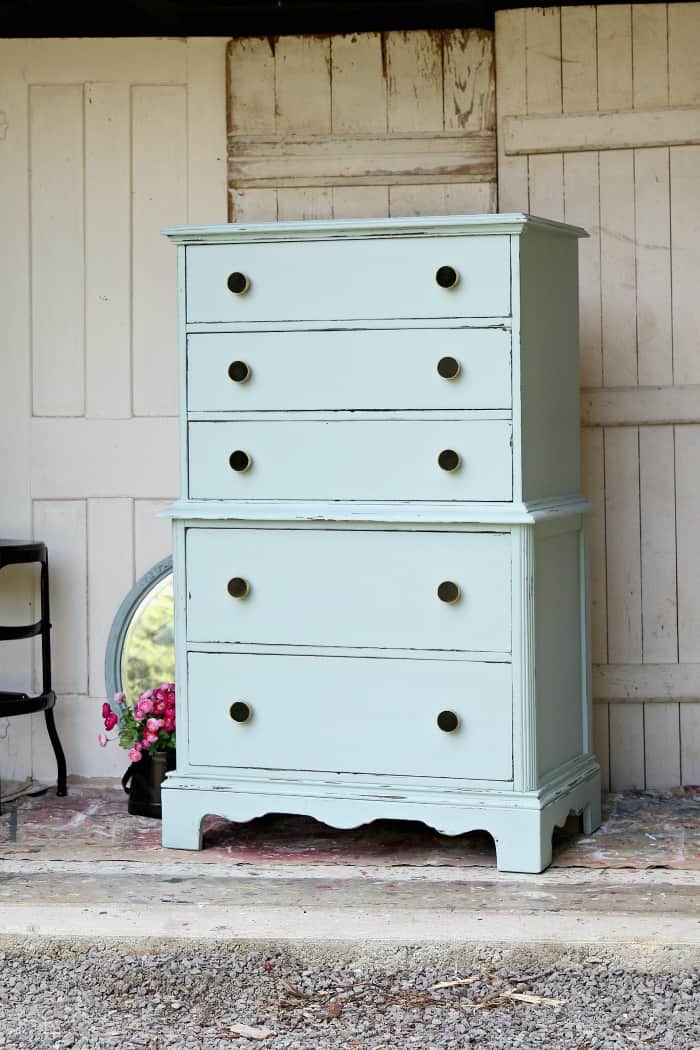
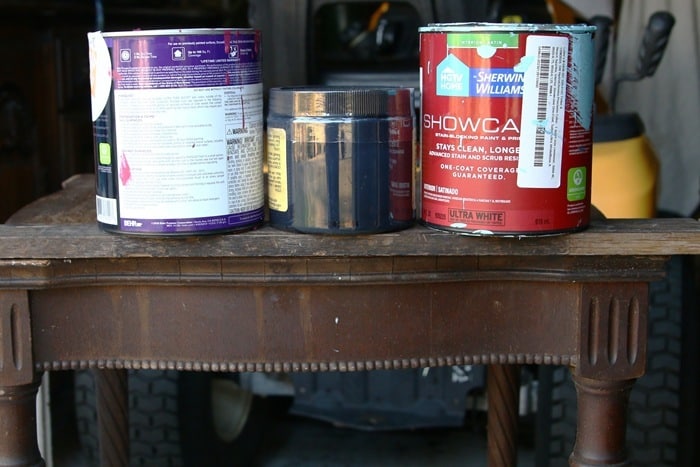
For the color I chose Just Duckie in Miss Lillian’s No-Wax Chock Paint. I just happen to know Marilyn the creator of the paint. She has a booth in the shop I’m in and I knew her before she became famous! She calls her paint “Chock” because you know the “Chalk Paint” name is trademarked.

Just Duckie is soft blue with just a hint of green. Reminds me of the beach. I applied one coat of paint and it covered pretty well. I applied a second coat about an hour after the first coat. The paint dried really fast. I use my FolkArt Chalk brush with all paints. I love it.
I distressed the paint by spraying Simple Green on a rag and wiping it over the drawer edges and the details on the chest casing.
It took me a while to decide how I was going to finish the chest so the paint had dried for 2 or 3 days. It’s much easier to wet distress the paint when it has only been dry for a few hours or a day at most.
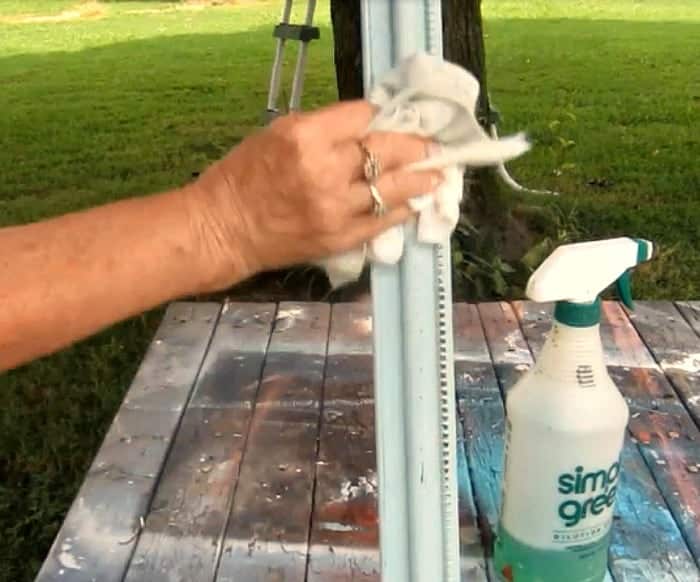
I didn’t take photos while filming the short video so the two photos above are clips from the video and they aren’t the best. You can see how cool the distressing looks on the detailed picture frame in the photo above.
Tip: Wipe the Simple Green dampened rag over the surface you want to wet distress and let it wait about a minute. The paint will be easier to distress.
You ask “Why wet distress”? Because wet distressing showcases the original furniture finish. When you use sandpaper to distress paint it usually takes the paint down to raw wood unless you are very careful.

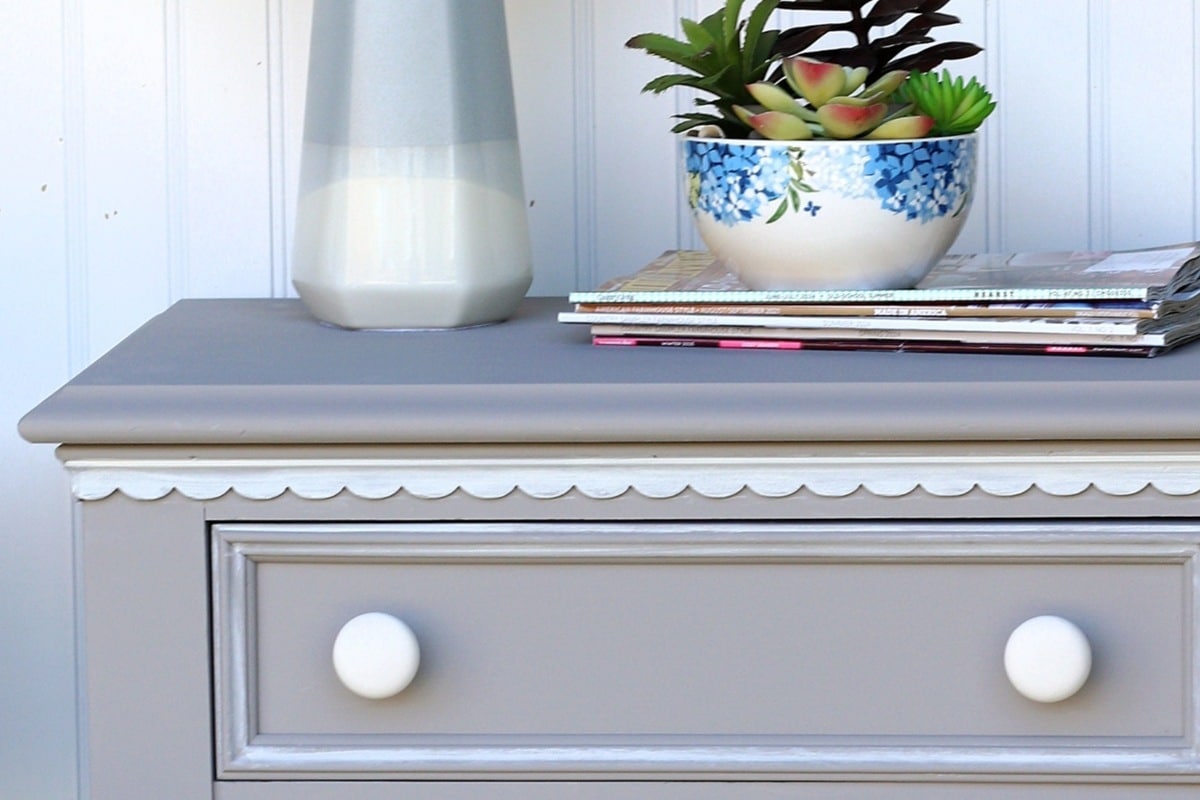
I had a hard time deciding what knobs to use. I went through my stash and I went to Hobby Lobby to look at knobs. Nothing seemed right. I had the ones above in the workshop. I bought them at Bargain Hunt store a few weeks ago. The price was right ($5/box) and they were pretty.
I bought two boxes of the black with gold rims and 2 boxes of metallic silver knobs. I needed 10 black knobs for the chest and only had 8. I went back to the store and luckily they still had a few boxes. I wasn’t sure how the knobs would look but they seemed to be the only option I had.

The knobs really pop against the blue and the contrast of the dark knobs and soft paint gives the chest a classy look.

It’s hard to see the pretty gold rim around the knobs in the front on photos of the chest. You can see in this photo how shiny they are.

The original finish on the chest had a red tone to it but the distressed areas of the chest are very dark, almost black.

The Just Duckie color was so pretty I looked around the shop and found a few more items to paint. I distressed the mirror and large frame too. I used sandpaper on the mirror and Simple Green on the frame.
You can see how the Simple Green works in the video. Take a look at the video below. It’s very, very short……
How To Wet Distress Paint

Household Cleaner Wet Distress Paint Technique
So what do you think of the paint color and what do you think about wet distressing paint with a household cleaner? Find my favorite DIY products including brushes and paints on my Amazon page here.
Please leave a note then click the links below the “before makeover” photo collage to see what beauties my friends have this month.

Furniture Fixer Uppers:
Vintage Metal Desk Makeover– Girl In The Garage
Antique Headboard Bench – Confessions Of A Serial Diyer
Paint And Stain– Just The Woods
DIY Faux Apothecary Cabinet – The Interior Frugalista
Painting Without Brush Marks – Salvaged Inspirations
Wet Distress Paint – Petticoat Junktion (you are here)
As always, thanks for being here, Kathy
I haven’t stained anything so I can’t help you with that but I do think your ideas sounds good. I don’t know about staining the top half and painting the bottom half but I like the idea of the stained top.
I have a dresser on a dresser.
it looked awesome when I bought it in the store but bringing it home now looks dirty
I’d like to paint it a soft color I am into Gray’s but thinking of staining the top and the top of the bottom half
would you have any suggestions. I have a picture but don’t know how to apply itit .
Hi Claire, It is an all-purpose household cleaner. You can probably use any water based household cleaner to wet distress paint. You can even use plain old water but it takes a little more rubbing and time.
Hi, I live in Australia, can you let me in on what the Simple Green is? Thanks
Thanks Tess. It’s super easy.
So in love with your wet distress method! Can’t wait to try it!!! I, too, hate the dust sanding makes. I really like the color, too. Great job!!!
I need to try that Shalon. I know a lot of DIY’ers make their own chalk paint.
So beautiful. I love the wet distress technique. My new favorite. I make my own chalk paint so I’m going to try it out and crossing figures it works the same. Chalk paint is so easy to make with calcium carbonate and oops paint from Home Depot and Lowes. Very cheap.
Kathy this paint color is so pretty! And the distressing is perfect, not too much. It looks gorgeous now. xo
Thanks Naomi! I thought about white porcelain knobs. They would have been pretty too but I didn’t have enough of them and the store was out.
Thanks Phyllis
I love a chest on chest too! This one turned out gorgeous & the knobs really make it all pop! Great job.
Very nice color choice. Kathy! Not sure about the knobs–I might like something a bit less heavy. But that’s just me. I think the wet-distress method sounds really easy and the results look great. Good job!
Steal of a deal for the dresser and those knobs… they look great on this piece! And I love your wet distress tip. Anything to avoid nasty dust is a winner for me. 🙂
I will have to try this, Kathy! That dust can be a pain when you are sanding chalk paint. This turned out SO good!! XOXO
Ooooh, the paint color is lovely, Kathy and I think the knobs look perfect. I can’t believe that price too! Huh, never would have thought to use a household cleaner to distress.
I love this dresser! the new paint color and hardware are perfect!