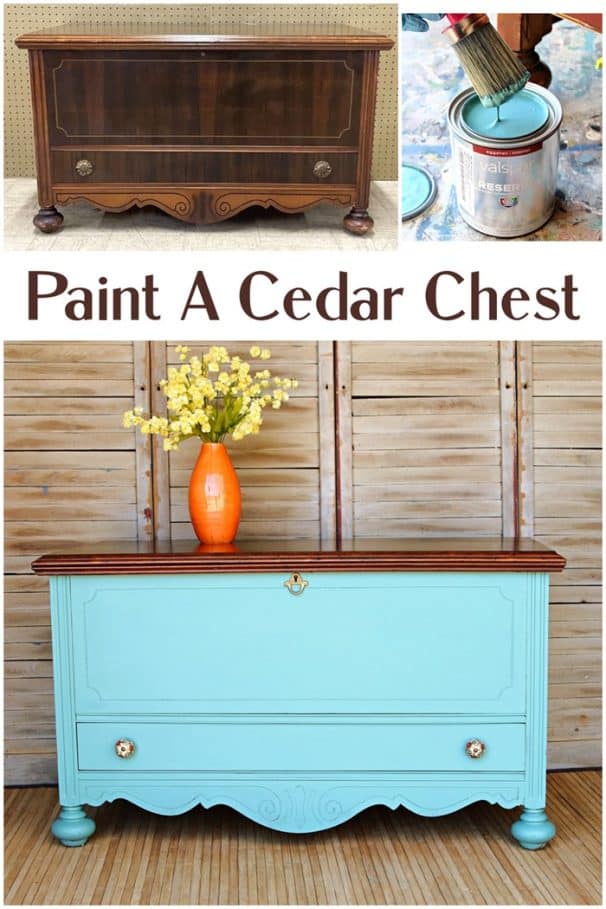
Cedar Chest Makeover: Trendy Two Tone Paint And Stain Finish
As an Amazon Associate, I earn from qualifying purchases.
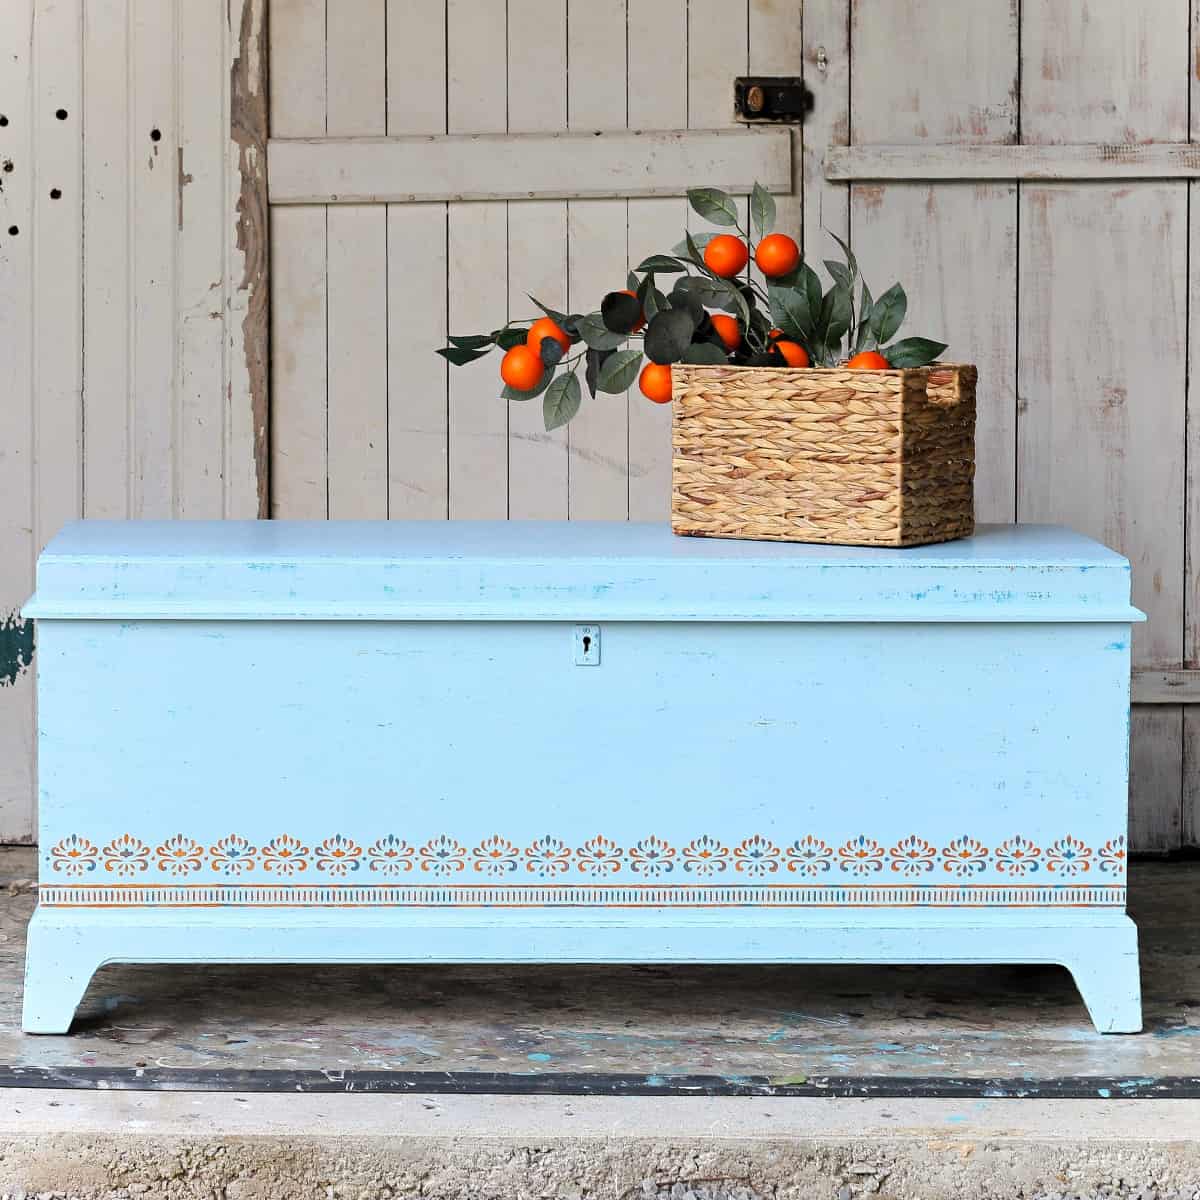
Tutorial for a vintage cedar chest makeover with a two tone paint and stain finish.
Is it okay to paint an old cedar chest? Sure it is, and this cedar chest makeover proves it. The two tone paint and original stain finish combine the new with the best of the old.
Today is my favorite day of the month, the Furniture Fixer Upper Tour. I’ll take you step by step through the cedar chest makeover, and then you can head off on the tour!

I paid $77 for the cedar chest in an online auction, and I guess it was a fair price. The chest style is one I haven’t seen before, and I couldn’t pass it up.
If you’ve spent much time here at Petticoat Junktion, you know I have a thing for cedar chests. The pieces are really functional and I love updating them with paint.
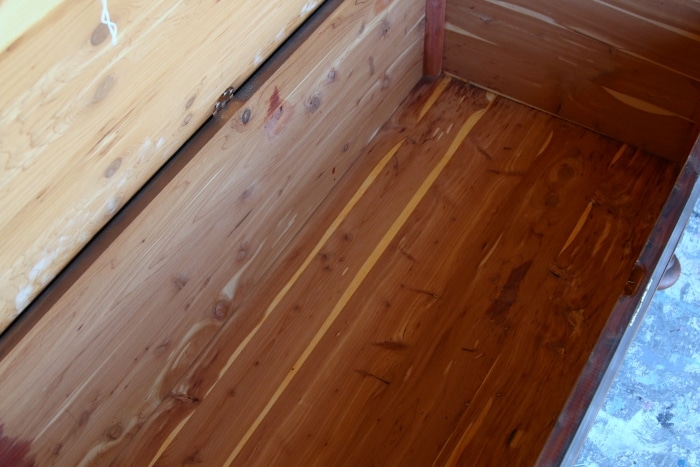
There were a few scratches on the top of the chest, and the ball feet were scuffed up, but overall, it was in great shape.
At first, I planned to resell the chest as is, but after thinking about it for a while, I decided to paint everything but the top.

I went over the chest, cleaning it with Simple Green and tightening all the screws.
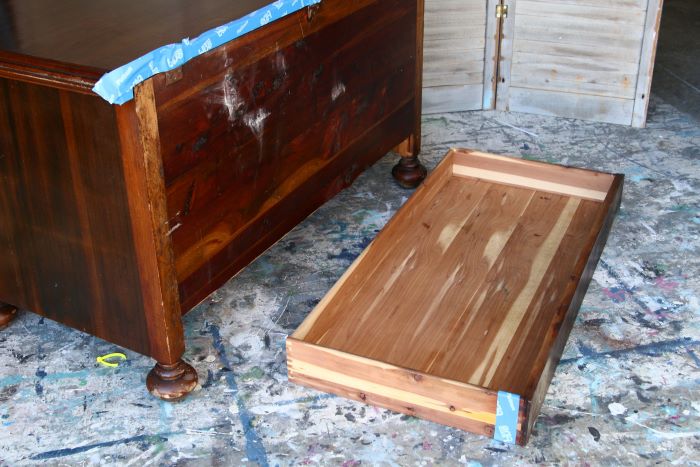
Cedar chests make great coffee tables or end-of-bed storage, so I always like to paint the back of the chest. Since I planned to leave the top unpainted, I taped off the top’s back edge and along the sides of the drawer front with painter’s tape—nice, clean paint lines. (this post may contain affiliate links)

Deciding on the color took a bit of time. I wasn’t inspired by anything on my paint shelves. Then I started thinking about the blond table I painted for my Aunt. The paint color I used on the table was Lost Atlantis by Valspar—such a pretty color. I went to Lowe’s and had a quart of paint mixed for the cedar chest.

Sometimes, one coat of paint will do the trick, but not very often. Covering every nick and cranny with one coat of paint is hard. The photo above shows how the chest looked after a single coat of paint.
You can also see where I stuck the paintbrush into my gloves. This is a great way to keep the paint from drying on the brush between coats of paint. If you don’t wear gloves, and sometimes I don’t, then wrap a piece of plastic wrap around the brush or stick it in a plastic baggy.

The old cedar chests have locks that automatically lock in place when closed, which is a safety problem. I always remove the locks and cover the hole with a decorative piece. I had this one in my stash of hardware. All I did was nail it into place over the hole left by the lock.

To refresh the stained top, I wiped it down with Howard’s Feed n Wax. This product works amazingly well.

Finding the perfect knobs is sometimes hard for me. But this time, when I went to Hobby Lobby, I looked down the knob aisle with more of an open mind. That’s why I ended up with these colorful knobs.

The knobs have a small yellow, red, green, and blue floral design. I would normally look for knobs that have a blue design or solid blue color to match the chest. Now, I know not to be so narrow in my thinking. These knobs are perfect.

And the small keyhole hardware piece I added over the hole left by the lock looks like it was always there.

Does anything look out of place in the photo above? When I slid the chest onto the bamboo mat, I forgot to take the little slider things out from under the feet. I noticed the sliders after taking about 30 photos!

I forgot how much I liked the Lost Atlantis color. I will definitely be using it more often. I bought a quart of Valspar Reserve Paint and only used a small amount of the paint. Valspar is on my favorite paint list.
Now it’s time to take the Furniture Fixer Upper Tour. Click the text links below the “before makeovers” photo collage to visit my friends and view their makeovers…….

Furniture Fixer Upper Tour:
Louvered Door Cabinet Makeover – Confessions of a Serial DIY’er
Painted Bedside Table – Salvaged Inspirations
Double Sided Chalkboard Sign – My Repurposed Life
Painting Cane Furniture – A Ray Of Sunlight
Cedar Chest Makeover- Petticoat Junktion (you are here)

What did you think of the two tone paint and stain makeover? Do you think I did the cedar chest justice? Leave a note if you have the time, and thanks for being here, Kathy


I sometimes have the same problem Loti! If it is a drip I usually can peel it off but sometimes its better to sand the area. Whichever method you choose be sure and paint the spot again with a couple of coats of paint so it blends together. I try to go around my piece after I brush on a coat of paint to be sure there are not any drips or runs. It’s always better to catch them when the paint is wet and brush them away. Happy Painting!
I love the color and it is beautiful. I do have a paint question that I know you can answer.
Sometimes I paint legs on furniture and it looks good and then I find a drip spot. What is the best way to fix it? Sand it, try to peel it off? Thanks for your support. I always love what you do.
Good Morning….WOW…..beautiful done love the color and your right perfect hardware……
Another great makeover!!!!!
It really looks lovely! I love the colors! Another great makeover.
I like the overall look of the cedar chest, Kathy. Especially the fact that you left the wood on the lid unpainted. I was wondering how it would look if you had left the feet unpainted to match the lid. Just because I really like the cute shape of the feet and think it would be interesting to have emphasized them. But that’s just my imagination. All in all, I think the re-do looks great.
Kathy,
I love the color of your latest cedar chest project! The two-toned effect is beautiful!!
I need to try that Howard’s Feed & Wax.
Pinned!
gail
I love the knobs. The red in the floral appears to match the top. So glad you kept the wood instead of painting it.
Such a fun color for a cedar chest!! Pinned!
Great job. LOVE, LOVE the color🤗
Love it! This is my favorite color! It turned out so pretty! I would definitely keep it for myself too!
Cute and fresh. I do like the wood top.
The keyhole detail definitely belongs there. 🙂
Thanks.
It’s very pretty. You did a beautiful job.
This is absolutely gorgeous, Kathy!! I love that it has a drawer. I haven’t seen that before on a cedar chest. And, I love the contrast of the wood on top with that gorgeous blue! XOXO
I love this Lost Atlantis paint color too, it puts a smile on my face. And the keyhole and knobs are the perfect touch. Beautiful Kathy! Pinned!! XOXO
Kathy,
I love this one, the paint color is amazing. I love that bee was it does a great job on my 1955 kitchen cabinets.
💜💜💜😊