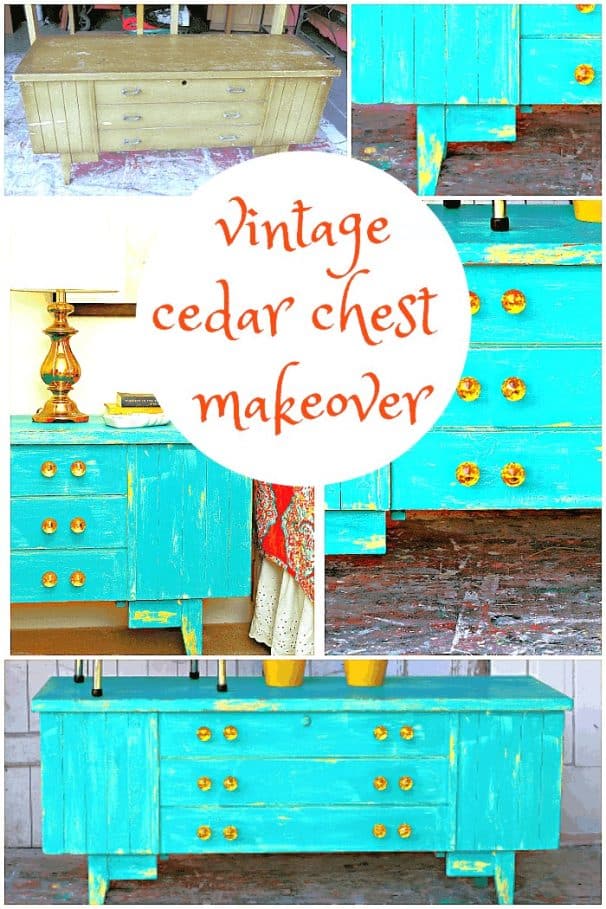
Vaseline Distressed Turquoise And Yellow Cedar Chest
As an Amazon Associate, I earn from qualifying purchases.
This is a Vaseline distressed furniture makeover, and I made a video of the process. The project didn’t go as planned, but the cedar chest turned out much better than I expected. When I use a special painting technique, I never know how it’s going to turn out.
I was a bit heavy-handed with the Vaseline. Using petroleum jelly as a paint resist is a technique that takes a bit of practice.
Today is Furniture Fixer Upper day and we have a new member in our group! Her name is Denise and she blogs at Salvaged Inspirations. She is an amazing painter and we are so happy she joined us. You are going to love her projects.

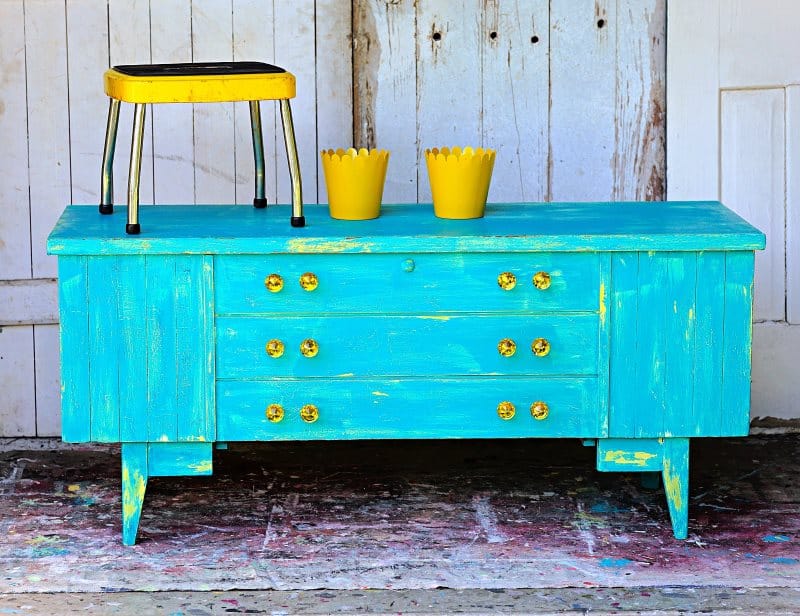
Now it’s time to show you how I got this amazing textured, layered paint finish. I bought the cedar chest at my favorite junk shop. I can’t remember the price, but I want to say it was $20.

The piece was pretty banged up, and a trim piece was missing on the right front side. The JTS is getting ready to cut that board you see lying on the cedar chest and make a piece of trim.

He cut the trim with a circular saw, but it was a bit…….not straight….so he used this other machine to shape it up.

I attached the replacement trim to the cedar chest using my Ryobi brad nailer, my new favorite tool.

Mr. Butler at the junk shop had already replaced the missing back leg. Not perfect but it will do.

The inside of the cedar chest was in almost mint condition.

It’s time to paint. I selected three paint colors for the layered look. All of the colors were in my paint stash….Twenty Carat, Honeydew, and FolkArt Chalk Island Indigo.
I’ll walk you through the process, but be sure to watch the video because seeing the process while it’s happening is so much better than my explanations.
I applied my first paint color, yellow (Twenty Carat). After it dried, I rubbed Vaseline in small areas in various places on the chest. Next, I applied the second color of paint, a pale green (Honeydew). Once that was dry, I applied the coat of turquoise (Island Indigo).
I didn’t apply a layer of Vaseline between the green coat of paint and the turquoise because I was too heavy-handed when I applied the Vaseline on the first color of paint.
That happens sometimes, as I explain in the video. There is a fine line between just too little, too much, and just enough.
After the layer of turquoise paint dried I used 3M flexible sandpaper to distress the paint. The areas in the photo above where you see larger patches of yellow is where the Vaseline was applied. I used Howard’s Neutral wax to seal the paint and give it a nice sheen.
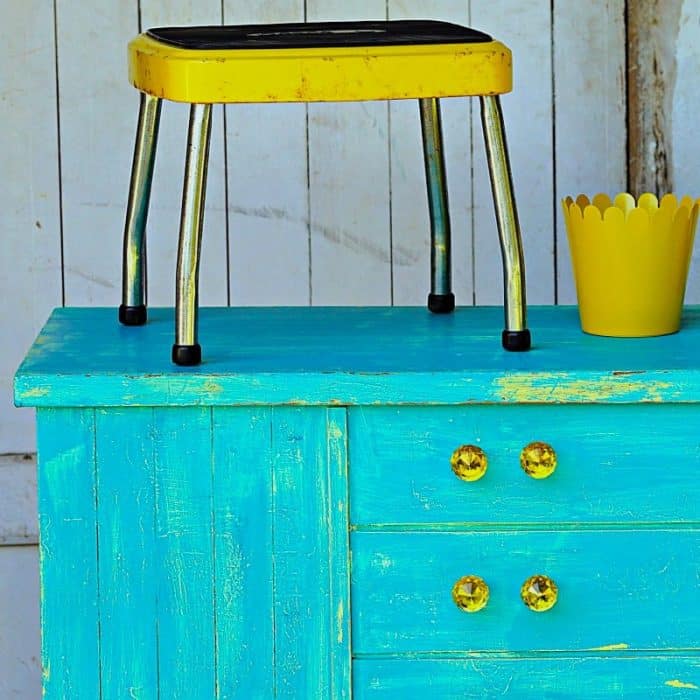
I had the original hardware, and I brush-painted it with the Island Indigo color. I put them on the chest, and they were so dull. I was thinking about what other color I could paint them when I thought about the yellow knobs I ordered for an earlier project and never used. I had 12 knobs exactly and 12 holes.
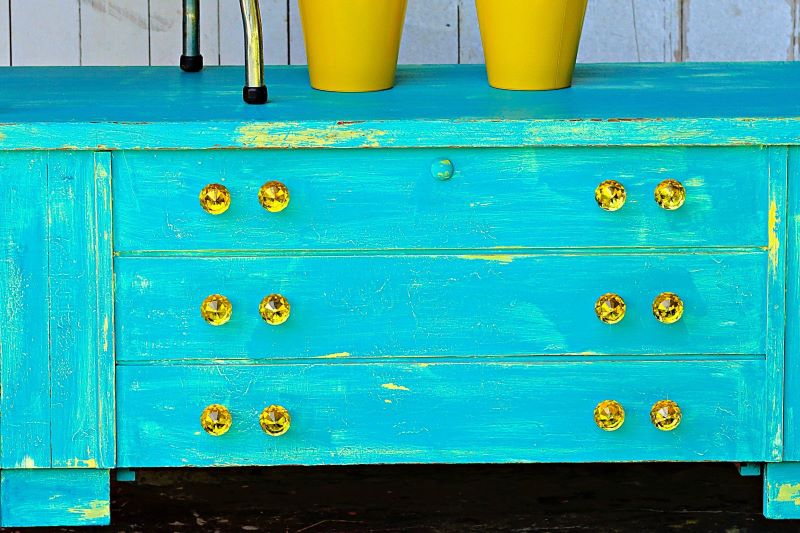
I have never been a fan of using two knobs side by side in place of a drawer pull, but……I thought, why not? I have to admit they look perfect on this fun, unique-looking cedar chest.
I mentioned in the video that I ordered the knobs from eBay but when checking to see what I paid for them I found I ordered them from Amazon. The 12 knobs were very inexpensive.
Let me tell you what I would do differently on this makeover if I had it to do over. I would apply less Vaseline for sure. I would also use a bolder color of green.
The green was very light and there was not much contrast between the yellow paint and the green paint. That is why it looks like only two paint colors are on the chest.
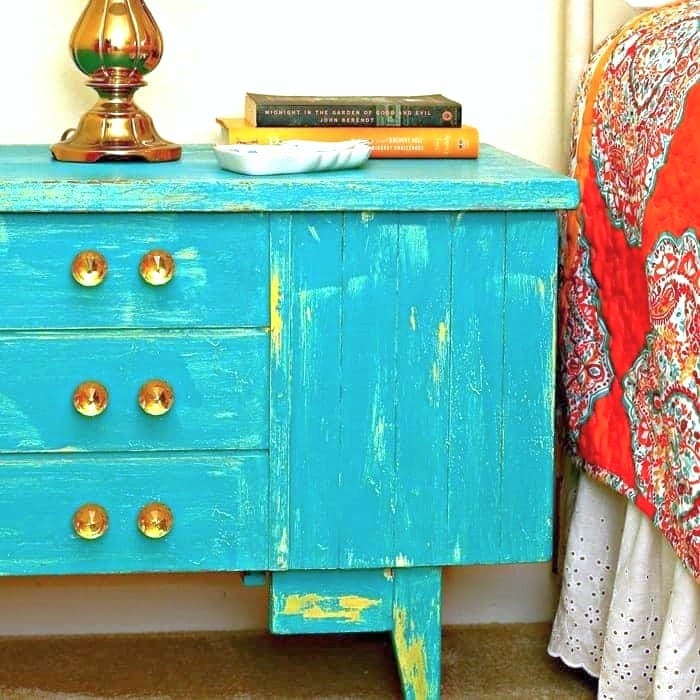
I placed the cedar chest beside the bed in the granddaughter’s bedroom just to get a photo because the colors look so good together. The chest will be going to the shop. We’ll see if anyone buys it or if I have to repaint it!
What do you guys think of the chest? I know it’s not to everyone’s liking or taste. Please watch the video below for a more detailed look at the Vaseline distressed furniture technique. I’m really fashion-forward in my paint-splattered clothes, too……
[adthrive-in-post-video-player video-id=”X0mOX7C9″ upload-date=”2019-05-23T02:50:20.000Z” name=”Vaseline Paint Layering Distressing Technique for Furniture” description=”Video showing the Vaseline paint distressing technique to layer paint on furniture. The Vaseline is a paint resist and is applied between the layers of paint.”]
Vaseline Distressing Technique
Find the FolkArt Texture Chalk in Indigo Island, the 3M Sandpaper, the Howard’s Wax, and the Yellow Crystal Knobs on Amazon by clicking the product name (Amazon affiliate links).
Now it’s time to see what everyone else worked on this month. Just click the text links below the “before makeover” photo collage below.

Ethan Allen Nightstand Makeover – Girl In The Garage
Farmhouse Dresser Updated With Transfer – Confessions Of A Serial Diyer
Paint Drip Furniture Painting Technique – Just The Woods
Antique White Sideboard Buffet – The Interior Frugalista
How To Glaze Furniture – Salvaged Inspirations
Vaseline Distressed Cedar Chest – Petticoat Junktion (you are here)
As always, thanks for being here and have a great day, Kathy
Thanks Marlene, I like to be upfront about the makeovers because a lot of people want to paint furniture but are afraid of making a mistake. Mistakes can be corrected……or sometimes they are good mistakes. I just want my readers to know that we all have problem projects from time to time. That’s part of the process.
This piece is edgy (in the figurative sense) and will find a home. It’s so Bohemian!
I totally get why you made the choices you did and then critiqued your piece and commented that you would have used less Vaseline could you have a do over. You have to step out of your comfort zone from time to time and it appears you did. How else will we learn things?
Keep experimenting and enjoy the results.
Heather, You’re email made my day…no make that my month. You are so sweet and I’m glad you are going to have your own craft room and grandbaby’s are the best!. As you can see from the Vaseline video and other things I do that things do not always turn out as planned. But I just work through it and either make it work or start over with a new plan, lol.
I’m so glad I found you on Pinterest, my youngest daughter and I have always loved arts and crafts but wanted to try new things. I found this wooden box that looked like a baby block and it already had the letters on it, it is good size box and I wanted to use it for my oldest daughters baby shower. I knew how I wanted it in my head but I had just had neck surgery the month before and had not worked with chalk paint on furniture. I had only used it on glass for center pieces at my youngest daughters wedding shower (the blessing and curse of being artsy fartsy and I love decorating too..lol) and everyone loved them and asked me where I got them. Anyway my box didn’t work of course because I tried the vaseline method on my 1st project..lol. I didn’t have time to mess with it anymore because I had other projects but it will still get used. So we just bought a newer home and I don’t want to waist money on a bunch of new furniture, for a bunch of reasons. I need to save money, I’d rather have project pieces like you have done because I just love them and you can get stuff so inexpensive on our local garage sale websights and fill up the house on a very small budget. The greatest part is I will finally have my own craft room to play in..lol. We are moving for me to keep my new grandbaby and I’m hoping to make a little cash on the side (really because I love doing things and I’m not scared to try new ones)because they always say it’s not work if you love what you do.? I just wanted to thank you so very much for sharing your videos and explaining things. I know when you 1st start things it’s hit or miss but I can’t wait to start. Now that I found your blog I feel more confident and my daughter will be ecstatic because she just bought a new small buffet and wants it to look unique but I didn’t know where to begin to get the look she was wanting, now I do thanks to you.? My God bless you on your beautiful work and gift that he has given you. Your pieces are so gorgeous!!!
Thanks Kaycee!
Yay! I knew you would like it. Color!
Thanks Leslie. I’ve heard of using wax. I have to try that next!
Thanks Jen! I would have never thought of the Emerald City, cool.
Kathy I love how you make bold choices. 🙂 This piece reminds me of the Emerald City in Wizard of Oz. The knobs are perfect for it too!
This is so fun and those knobs make it perfect! Great job! The vaseline is a great idea. I used candle wax between layers on a few pieces a few years ago. It worked great, but it gave a different effect. It looked more like chipping paint. This is a great option. The knobs side-by-side give it a great twist to make this piece a real standout! Well done!
It’s one of my favorites. Well done!
Hi Kathy! What a fun new look, I love the colors and the knobs work perfectly on this piece! I don’t think you will have any problem selling this chest it is so pretty and boho!
Thank you Denise, so glad you are here. I like the MMM name, lol.
Thanks Verletta!
ah thanks Marie
Thanks Kandice!
Yay! Thanks Lori. I love a colorful home too.
Thanks Christy, but you do you so well. I love your style!
So glad you like it Laura! Your idea for a buffet sounds great. It does look island-ish!
When I first saw the chest I thought “Yikes!”, but for whatever reason I now love it! The colors are very island-ish and happy. A beautiful, different piece. It would look gorgeous as a buffet with bright Fieastaware dishes. The knobs look amazing and are the perfect jewelry for the chest. Unique!
I have never been a fan of two knobs side by side like that either, but it totally works on this chest! And can I say that I just love when you go bold or go home. You love color and aren’t afraid to use it! I need to step outside my safe color zone! Fantastic save! XOXO
I love it! Yellow is my favorite and i love having a colorful home
how cool! love the knobs and the fun bold colors
Kathy, I love the double knobs, it just works on this piece! Pretty paint colors and I quite like the high distressed finish. Great video tutorial too!
I love it the way it is!!
Love your vaseline distressing/layering technique Kathy… and those knobs! It looks stunning in your granddaughters room. And what really put a smile on my face was you Junktion Technical Specialist” or “The JTS”! Loved clicking through and reading. What a sweetheart. ?I totally get it. I have my own JTS referred to as MMM. aka My Mystery Man…lol. Thanks for the kind intro. Im thrilled to be included with all you talented ladies. XO
Thanks Sharon
Thank you Cathy!!
I LOVE this! I don’t think you used too much Vaseline at all. Very nice contrast! And I love the knobs!! Absolutely gorgeous!!
You definitely chose the right knobs for the project. It came out beautifully.