Paint, Distress, and Wax Chalk Finish Paint: How to Get It Right
As an Amazon Associate, I earn from qualifying purchases.
I get questions weekly about how to wax chalk-finish paint, or whether chalky-type paint has to be waxed. Sometimes I wax, and sometimes I don’t; it depends on the brand of chalk-finish paint I’m using and the type of furniture.
Quick Project Overview:
-
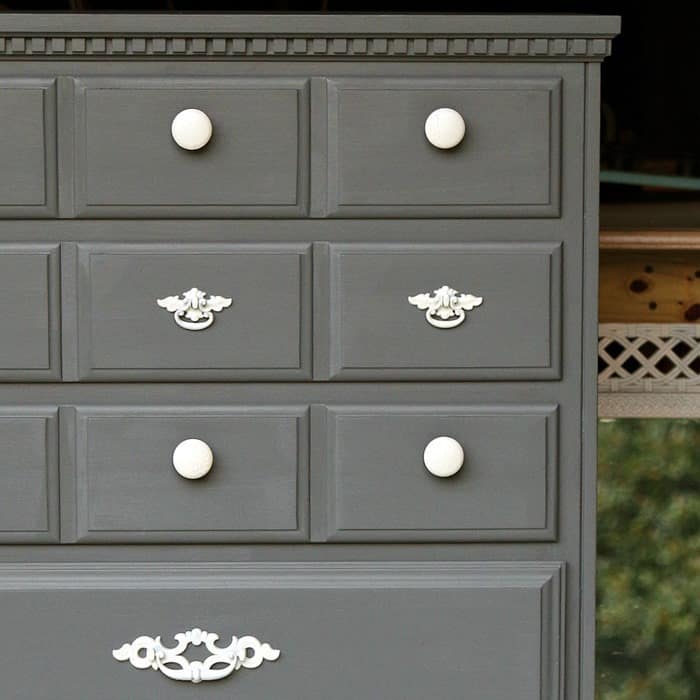
Best Paint for Detailed Carvings: Chalk-finish paint (Color: Cascade) creates a beautiful matte base that is incredibly easy to distress.
-
Why Use Neutral Wax? Wiping clear or neutral wax over distressed chalk paint instantly deepens the raw wood highlights and removes the dry, whitish haze left by sanding.
-
Pro Tip: If a vintage piece has a broken or missing drawer, don’t throw the whole piece out. Trash the drawer, remove the tracks, and add a piece of salvage wood trim to create an intentional, gorgeous open-shelf look.
How to Paint, Distress, and Wax a Chalk Painted Cedar Chest
My project today is a cedar chest and yes, it’s waxed! There is a definite reason I chose to wax this piece, and I’m excited to share that with you.
It seems like every month I have at least one cedar chest makeover on the schedule—I guess I just have a thing for them! This particular piece is painted, distressed, and waxed, and it turned out absolutely gorgeous (shameful bragging rights intended). Today is also the Furniture Fixer Upper Tour day, so we have another fantastic lineup of projects waiting for you. You can find all of those inspiration links at the very bottom of this post.
The unique carved details on this chest made it the perfect candidate for a distressed finish. Honestly, there is just something about a plain paint finish with no special technique, no stenciling, and no antiquing that can look a little blah. Distressing the paint adds instant depth and interest.
How to Repair a Vintage Cedar Chest

This is the first vintage cedar chest I’ve ever run across that actually featured a bottom drawer. Unfortunately, the drawer was completely falling apart. My very first thought was to repair it, but my second thought won out: just trash it!

I turned the cedar chest completely upside down and removed the old drawer slides. It was incredibly easy—just a matter of backing out a few screws and knocking the glued wood blocks loose.

The thing that first caught my eye when I spotted this chest at my favorite junk shop was that open space on the bottom right between those beautiful, detailed feet. I just loved that open look.
Once I realized a clunky drawer was supposed to go there, I knew it wasn’t for me. However, the space felt like it was missing a little something, and I knew exactly how to fix it.

The flat, raw edge where the drawer used to sit really needed a decorative detail to make it look finished and blend with the chest’s overall look. I dug through my wood stash and found the perfect piece of vintage trim. I cut it to size using a small miter saw and attached it to the front of the chest using my Ryobi brad nailer (seriously, that tool is a lifesaver).
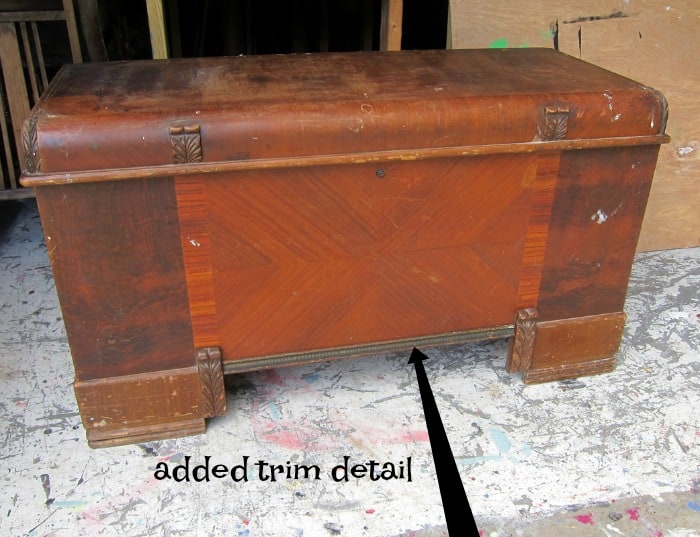
See what a massive difference that makes? All it took was a few minutes of time, and look at the added drama it gives the whole piece.

The cedar-lined inside of the chest was in beautiful condition and smelled amazing. That’s the best part about cedar—you never have to worry about it getting a yucky or musty smell. I think I forgot to mention that I only paid $40 for this chest. Not bad at all!
How to Clean Vintage Furniture Before Painting

It was a bit sad to see, but there is an original wood tag with a sweet inscription attached to the inside top lid: “Thelma from Victor.” It always makes me wonder if family members know what actually happens to their old family heirlooms.
This chest is a Cavalier brand, which is a vintage name I hadn’t actually run across before.

The top wood veneer had what looked like sticky, oily spots scattered here and there. Just to be completely on the safe side, I gave the top a light sanding before opening my paint.

I didn’t want to take any chances with old oils bleeding through the fresh paint layer. It is always better to be safe with a little extra work now than to face bad news and a major redo later!.

After sanding, all that was left to do was clean the chest from top to bottom with Simple Green. Then it was finally time to paint.
Choosing the Best Chalk Paint Color

I went to select a paint color for the cedar chest and found 4 colors from my paint stash that looked promising. I painted samples on a piece of wood and really liked all of them.
I thought I might do a two tone finish…..and I did start brushing on a second color on the cedar chest but I didn’t like it. Not enough contrast. So one color only.
The color I decided on was the second from the left, Cascade. The pretty color was brighter and fresher than the other three. (By the way, I did a Facebook live and asked which color everyone liked the best. Be sure and follow me on Facebook.)
Ideas for Choosing Paint Color to Match Your Decor
If you don’t have a stash of leftover paint at home to choose from, picking the perfect color doesn’t have to be a guessing game. The best way to start is by looking at the room where your furniture will live.
Grab a favorite throw pillow, a piece of fabric, or a beloved decor item that has the exact colors you love, and take it right with you to the store. Holding your inspiration piece directly against the paint display makes it incredibly easy to spot the undertones that will look best in your space.
Once you’re at the paint counter, grab a handful of paint chips or paper color samples that closely match. Don’t just look at them under the harsh, bright store lights—they will look completely different once you get them home.
Tape the paint chips directly onto your furniture piece and watch how the color changes throughout the day in your room’s natural light. This quick trick saves you from buying a whole can of paint only to realize it looks completely different on your piece than it did on the store shelf!
How to Paint a Vintage Cedar Chest

This is how one coat of paint looked. I applied a second coat after this one dried.

How to Distress Chalk Finish Paint
After the paint dried, I distressed all the lovely details, then ran the sander over the whole chest—working on the edges and a few spots on the front and top. I wanted to sand off just a bit of paint in some areas, but a lot of paint on the carved details.
I tried sanding by hand at first, but I was having a hard time getting the paint off. So, I pulled out my power sander, and it did the job in no time at all.
Sanding Tips for Distressed Furniture:

-
The Power Sander Advantage: If the paint is adhering really well, don’t wear your arms out sanding by hand. A lightweight orbital sander or detail sander, or mouse sander for tight spaces, makes quick work of stubborn paint.
-
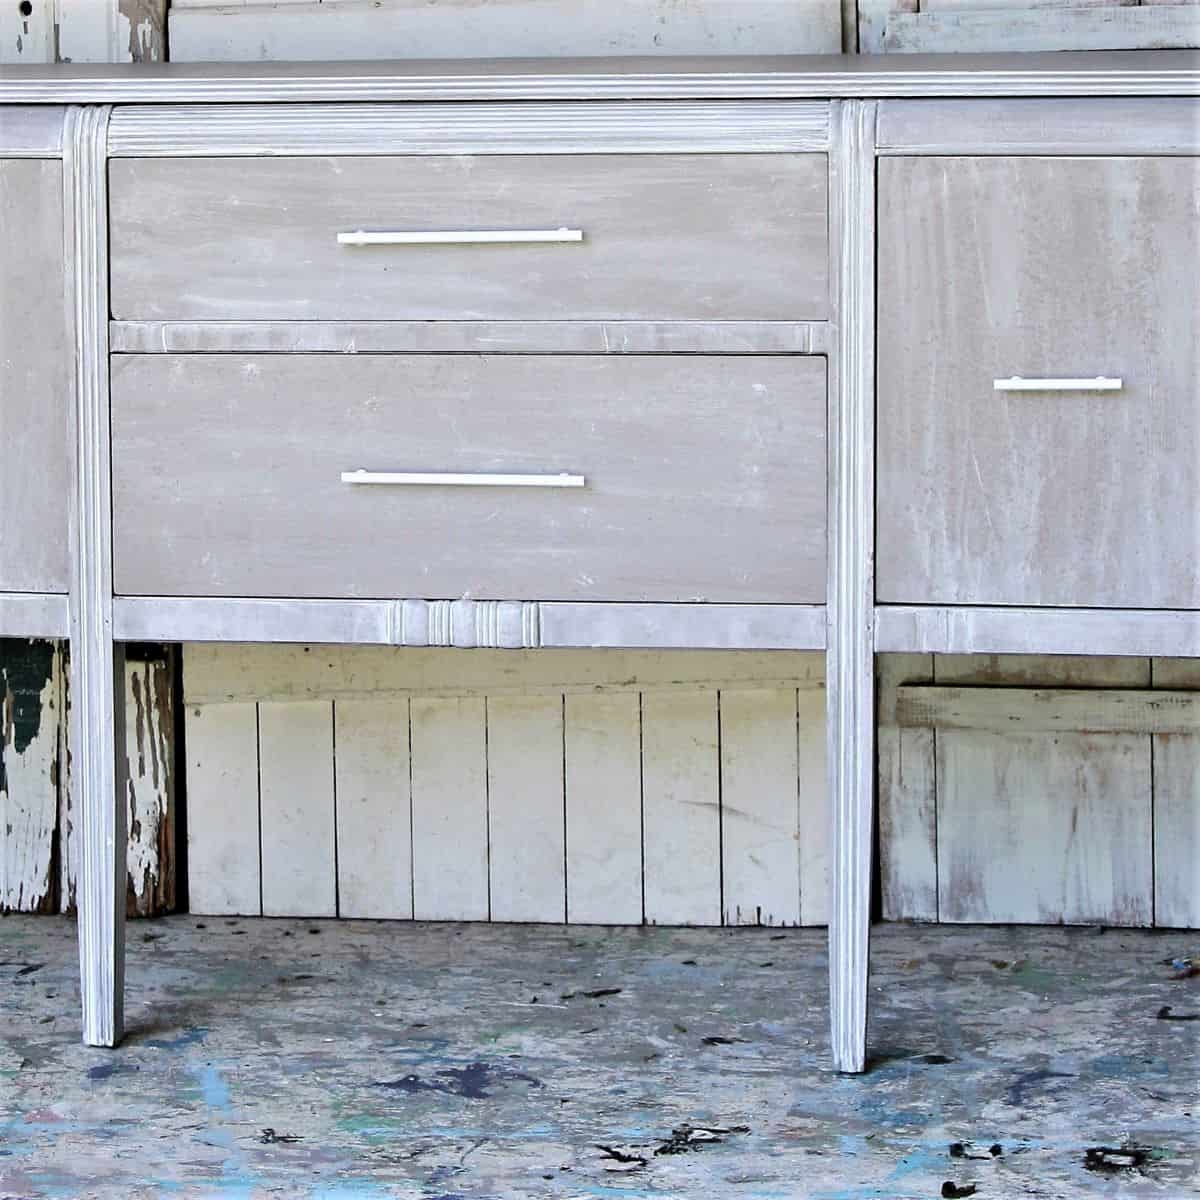
Wax the “Haze”: This is how the chest looked after sanding it all over. You can see the whitish or lighter areas where the sander was used. Don’t panic when you see this dry haze—to hide those areas and bring back the deep wood color, just wax the paint.
How to Wax Chalk Finish Paint

Waxing the paint and the raw wood will make your chalk painted piece shine!
Step-by-Step Waxing Tips:
-
Apply with a Rag: Use a clean, lint-free rag to apply the wax. When you wipe the wax over the chest, you’ll see the distressed raw wood instantly darken up beautifully.
-
Watch the Streaks Disappear: Don’t worry about any white sanding streaks on the paint—the wax makes them vanish immediately.
-
Dry and Buff: The wax will dry in about 30 minutes. Once it’s dry, take a fresh lint-free rag and buff the surface. The paint will have a gorgeous, soft sheen.
When to Use Tinted Wax:
When I want to darken, age, or antique painted furniture, I use tinted Howard’s Wax in the color Walnut. I love Howard’s because it doesn’t cost an arm and a leg, and it adds a really nice sheen and patina to a painted finish.
Add Special Details to Vintage Furniture

The lock had been removed from the chest, and a small metal insert remained in place. I found a brass keyhole escutcheon in my stash and drilled holes to place it over the metal piece.

The brass was a bit too shiny so I spray painted the piece with Rustoleum Antique Brass Metallic Spray Paint.

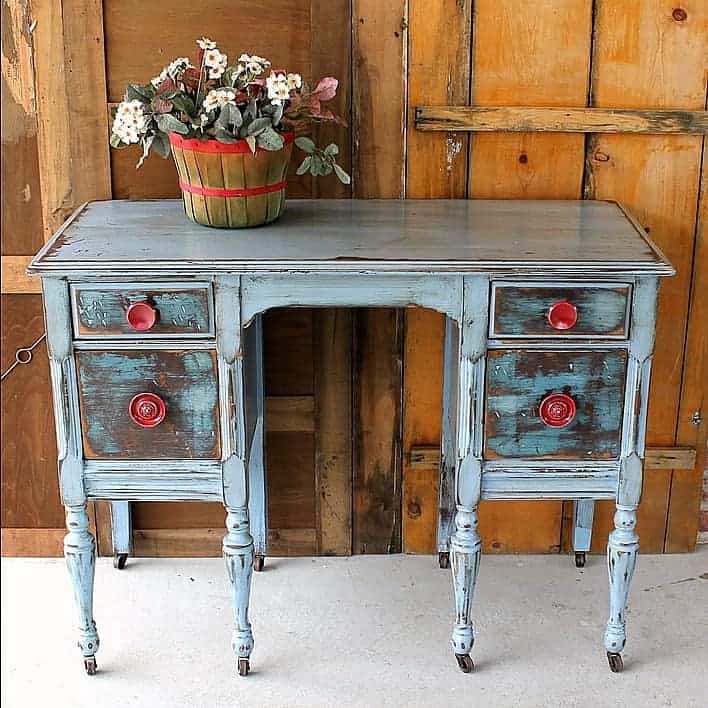
The keyhole escutcheon was the finishing touch the cedar chest needed. The Cascade color paint is a winner. The distressing is icing on the cake.

You can see where I sanded the corners, edges, and details rather heavily. The detail trim I added at the bottom in place of the drawer looks like it belongs there. I did good. The cedar chest is larger than most I’ve worked on. It will be a nice piece for blanket storage or maybe a coffee table.

I thought about not painting the cedar chest. I was going to clean and oil the finish but after closer inspection there were too many damaged areas in the original finish.

I’m glad I didn’t go with a two-tone paint finish. Given the amount of carved detail, the feet, and the overall look of the chest, two colors would have taken away from it rather than showcasing the cedar chest. Patting myself on the back.
Want to know how to distress furniture without the mess? It’s called wet distressing and you will be amazed at what I use to wet distress the paint See my video below….
Wet Distress Paint

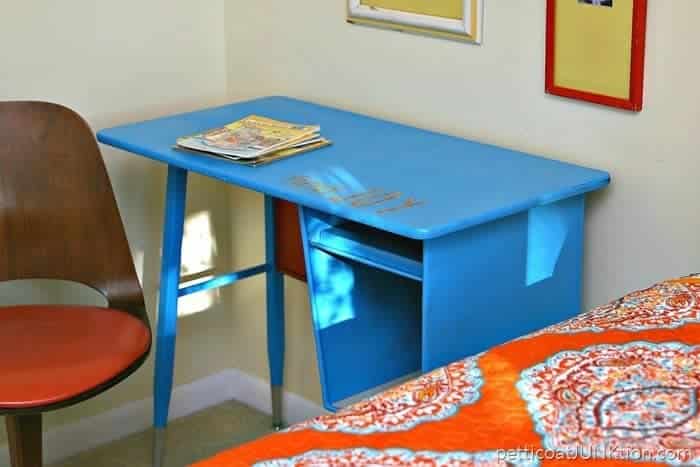
The red accessories really pop against the turquoisy blue paint. One of my favorite color combinations. So what do you think of the cedar chest? How about the color and distressing? Leave a note before you head out on the tour.
Supplies used in this project can be found on Amazon:
FolkArt Home Decor Chalk – Cascade
FolkArt Chalk Brush
Howard’s Wax – Neutral
Simple Green Cleaner
Ryobi Sander
Ryobi Brad Nailer
Furniture Fixer Upper Projects
Click the text links below the “before makeovers” photo collage to take the Furniture Fixer Upper Tour…..
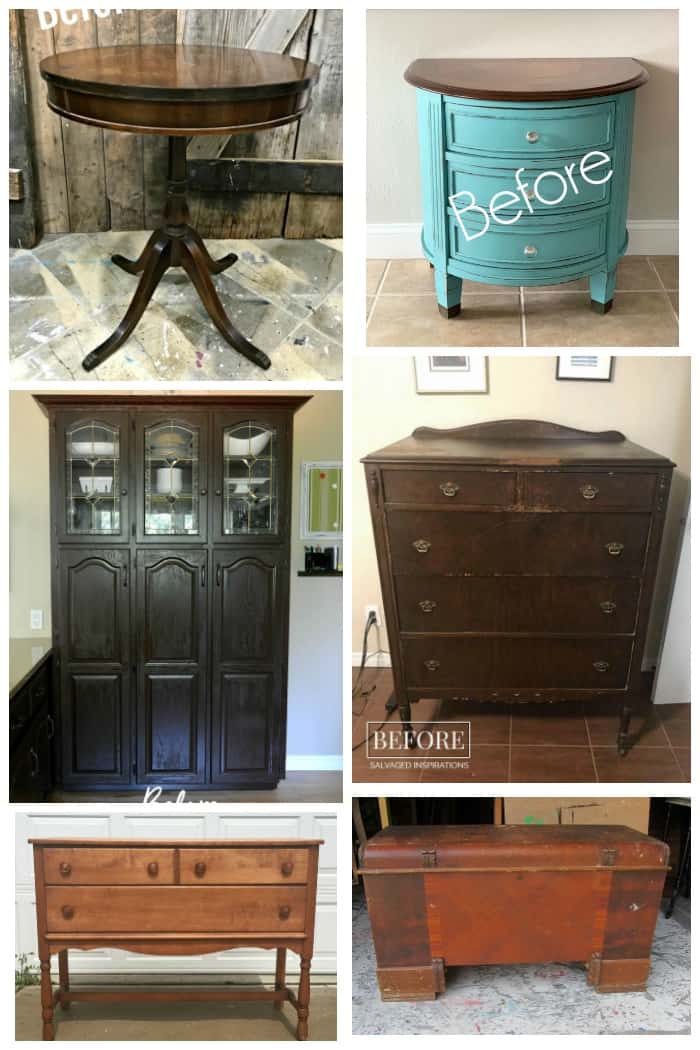
Refinish A Table – Just The Woods
Night Table Makeover – Confessions Of A Serial Diyer
Built In Kitchen Pantry Makeover – The Interior Frugalista
Fuchsia Sunset Painted Dresser – Salvaged Inspirations
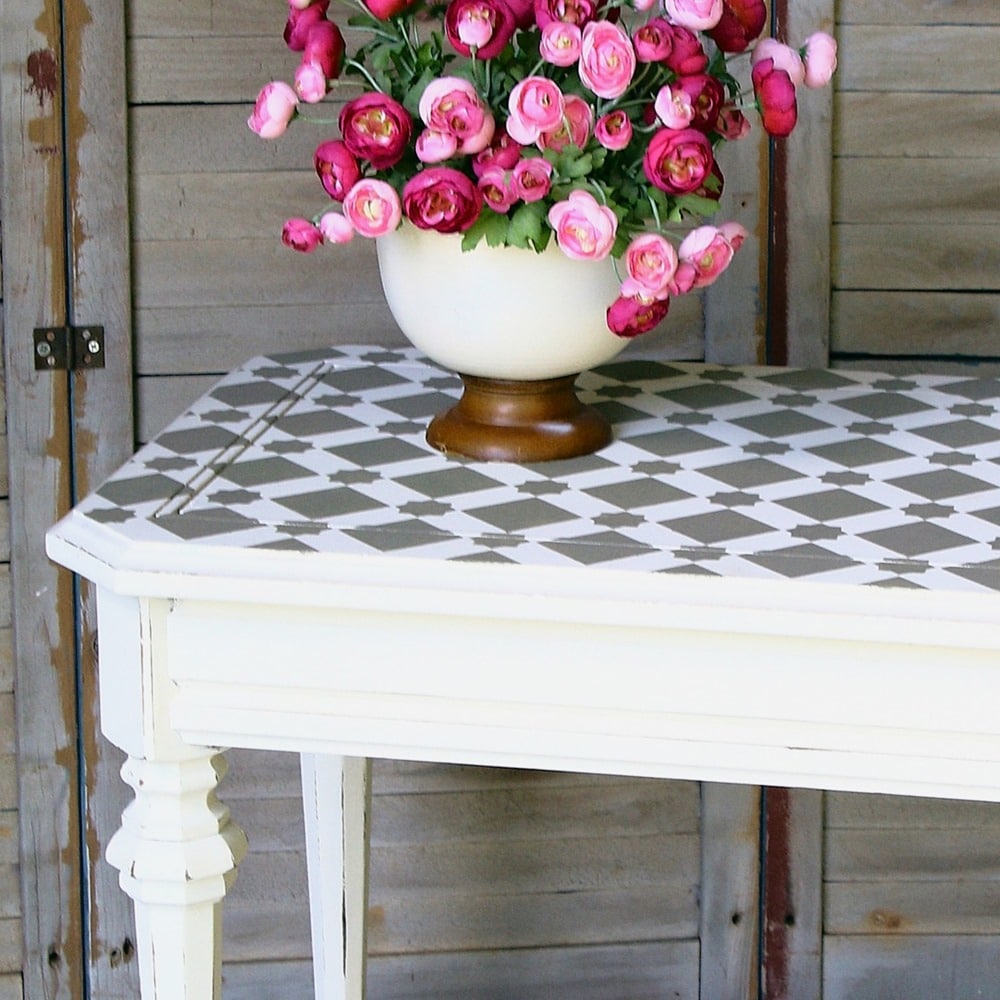
How To Stencil Bone Inlay – Girl In The Garage
Waxing Chalk Finish Paint – Petticoat Junktion
As always, thanks for being here and have a great day, Kathy
I love that color. You come up with such cool stuff. Can never wait to see what your gonna do next. I have a bird cage just like the one in your picture. Right now it has a small cement dragon swinging in it. When Halloween gets here it will contain a raven.
“I did good.” LOL. Yes you did Kathy! The carved details are beautiful and you really made them pop with the distressing. Great idea adding the trim to the front too. It’s a winner!
Cavalier cedar chests were made in Chattanooga Tennessee.
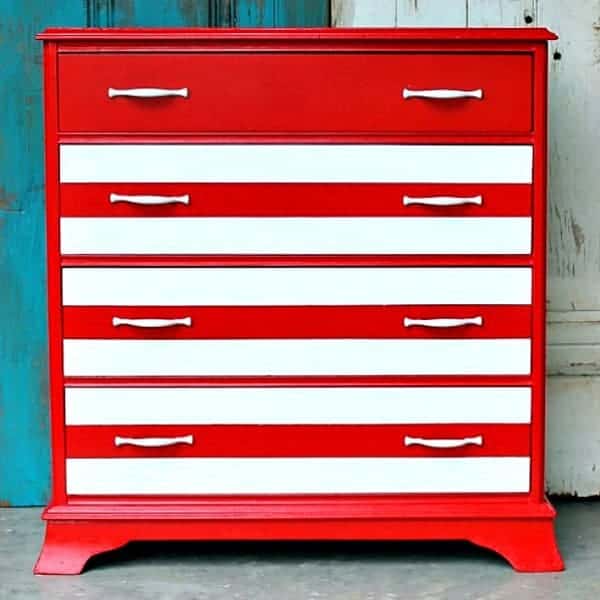
Love the color you’ve chosen, and pics are gorgeous! That combination of white/ red and turquoise… yummy!
I agree, you did do good…you are my painting super hero!
Wow, you find the best chests! It was smart to remove that drawer and with the added trim, you’d never know it was even there! love the color too!! XOXO
I totally understand Nancy!
Thanks Denise.
Thanks Kathleen. I totally understand about the wood grain and saving the look.
Yes, I do have a big stash of stuff. I know everyone doesn’t have an accumulation of junk like I do.
ah thanks!
Thank you Gloria!
This one is really a winner. You did everything right!
It’s beautiful, Kathy! The color is gorgeous with just the perfect amount of distressing. I bet Thelma and Victor would be pleased.
I love what you did to the chest and especially the distressing. It looks great – I would love to have a stash of knobs, trim etc that you always seem to have. Enjoy reading your posts and seeing your creativity!
That sad chest now has a new life. I sort of agree with Nancy, above, about wood grain and such, but the surface of this need a pick-me -up. You are always so bold with your colors, I’m not half as adventurous as you. Everyone thinks I’m kinda out there-I think, but I tend to be reserved on colors. Muted, but not neutral or orange or yellow. You always hit the mark with your color choices.
So sweet that you found the inscription on the inside. I sometimes wonder the back story to these old pieces too. Anyway, LOVE the color and makeover Kathy. I’m heading over to take a peek at your FB LIVE now.?
I like the after, but to be honest, I liked the grain of the wood a bit better. If it had been me, I think I would have tried to clean up the woo, remove he orange finish, and finish with oil. I am not expert at this, but, sometimes, it makes me a little sad to see beautiful wood covered up
Wow, what a difference! Good job girl!
Girl, I love everything you do. I’ve been following you a couple of years. You are so creative. I thank you so much God Blessed you with creative!!
Just love the chest mskeover. I have a old cedar chest , gives me some great ideas.