How To Give White Furniture An Antique Paint Finish That Looks Old
As an Amazon Associate, I earn from qualifying purchases.
This horribly worn cedar chest had previously been painted and antiqued with too much gold detail. The antique finish was outdated so I gave it a new antiqued paint finish. The unusual tools I used to achieve the new look will make you laugh. I invented this technique myself.
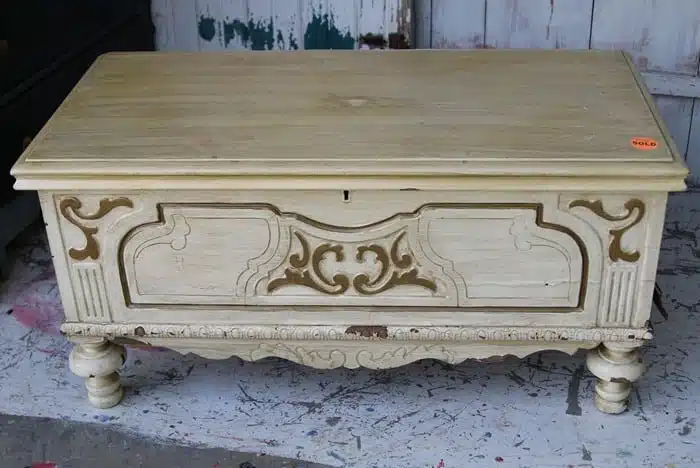
This is how the chest started out. It was “antiqued” back in the ’60s. At least that’s what I was told when I bought it. The shop owner purchased several pieces from an estate and the lady said she personally painted all of them. I remember when my Mom “antiqued” a bedroom suite in avocado green. That color was so horrible.
The chest was $40 and even though it was in sad condition, the carved wood details were too lovely to pass up. I had to do a lot of prep work to repaint the chest.
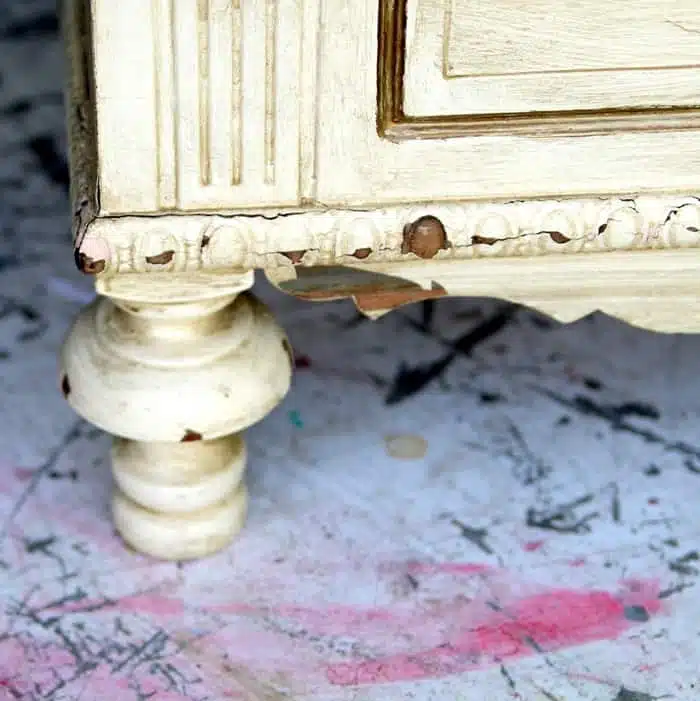
The decorative carved trim at the base of the chest was my inspiration for the makeover. Most of the white paint popped off when I cleaned the trim, and the wood was so pretty I didn’t want to paint over it.
I carefully removed the decorative trim pieces (marking them for placement) before painting the chest. I planned to paint the chest off-white to match the trim. That means I would need to antique or age the paint somehow.
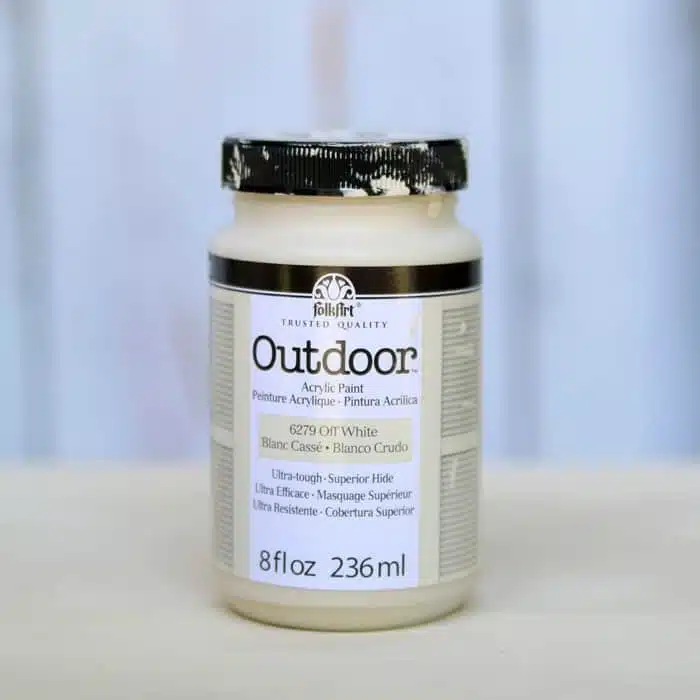
I chose FolkArt® Outdoor Acrylic Paint in Off White for the makeover. The paint was made for outdoor use but can also be used for indoor projects. I like the way it brushes on and I really liked the sheen….not too shiny…..just right, and no sealing is required. It was a good color match for the paint on the trim.
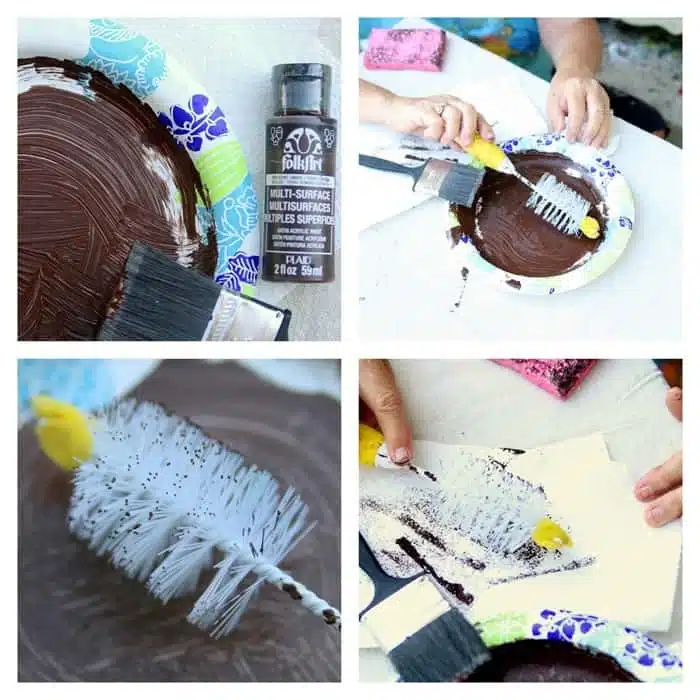
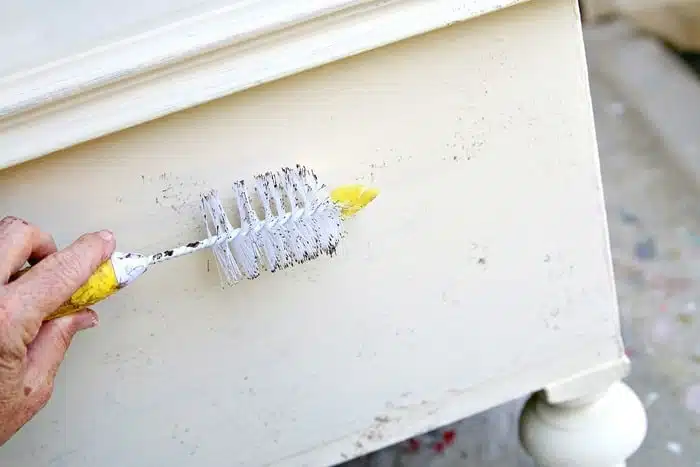
My new favorite tools for antiquing painted furniture are a sponge and a bottle brush. The bottle brush is left over from the days our Sofi was a baby. She is now 12.
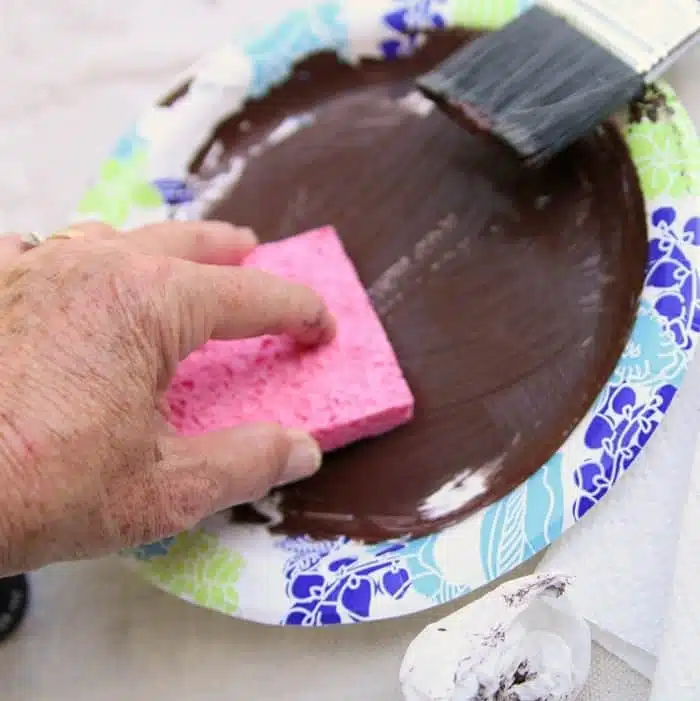
To use the bottle brush to age the cedar chest, I first poured FolkArt Acrylic Paint, color Burnt Umber, onto a paper plate. I then spread out the paint in a thin layer over the bottom of the plate using a paint brush. Next, I twirled the bristles of the bottle brush in the paint and dabbed off the excess on a paper towel.
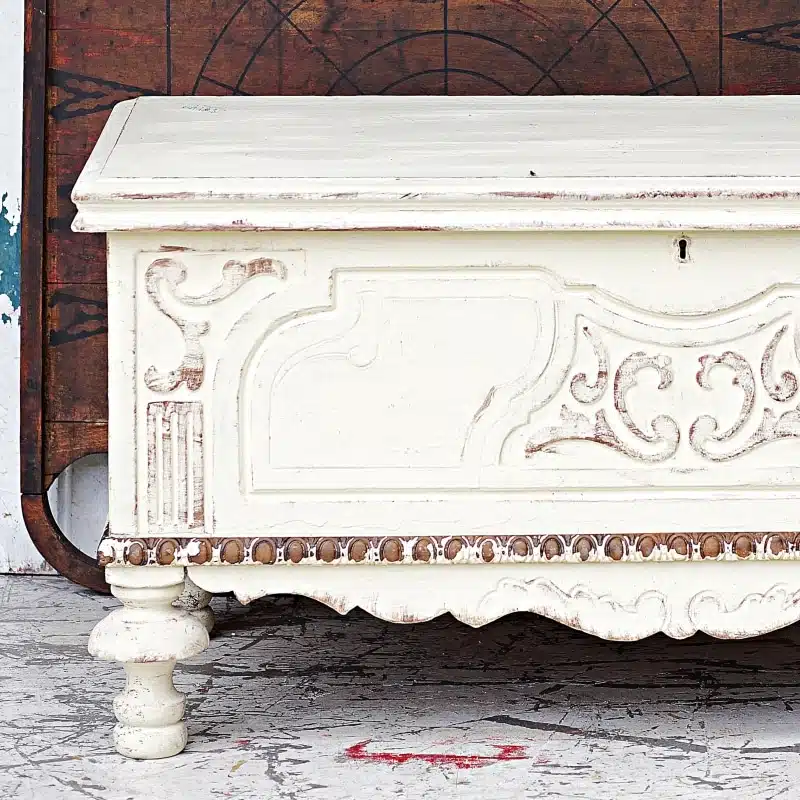
Now comes the fun part! I just touched the brush to the chest and ta-dah, tiny dots of paint. The dots look natural because they are really small and look like age spots or areas of chipped paint.
I went over the whole chest, dabbing the paint on randomly. I tried not to overdo it. It’s always best to start out with less and then add more later if you decide it’s not “antique” enough.
Now we move on to sponge distressing or dry distressing. I’ve never used a sponge to dry brush or faux distress so I guess we call it dry sponging? Did I invent a new term? Funny. I dipped one edge of the sponge in the paint and then dabbed the excess off on a paper towel.
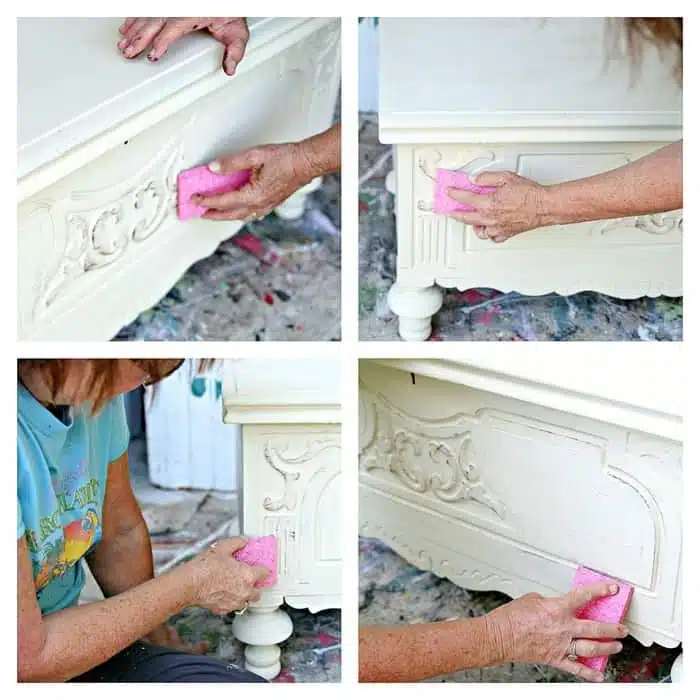
Here comes the fun part again. I ran the sponge over all the raised details, chest edges, and legs. I added more paint to the sponge as needed. Again, start with less, then add more if needed. I actually did add more before the project was completely finished.
When I nailed the original trim to the chest, once the paint job was finished, I took a step back to look at the chest and decided the colors were a little off balance.
There was a lot of dark wood showing on the trim and not as much aging or dark color to the chest so I added more dark paint to all of the details to balance the dark wood trim.
I really liked using the sponge to “dry brush,” maybe more than using a brush. I have more control with the sponge because it’s flexible and doesn’t have all those bristles going every which way. I was able to bend the sponge to work around the curved details. Easy.
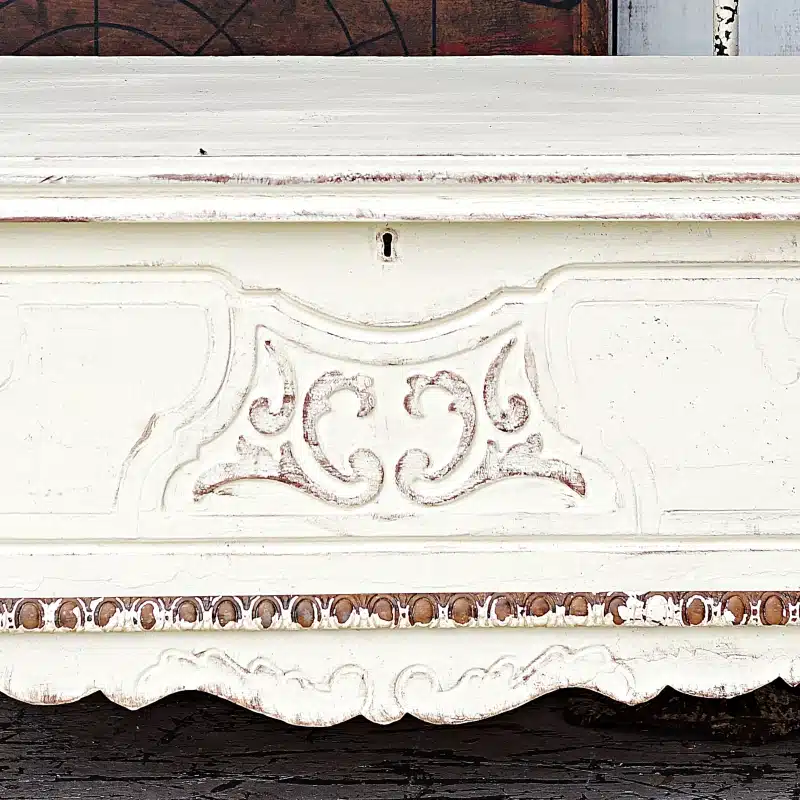
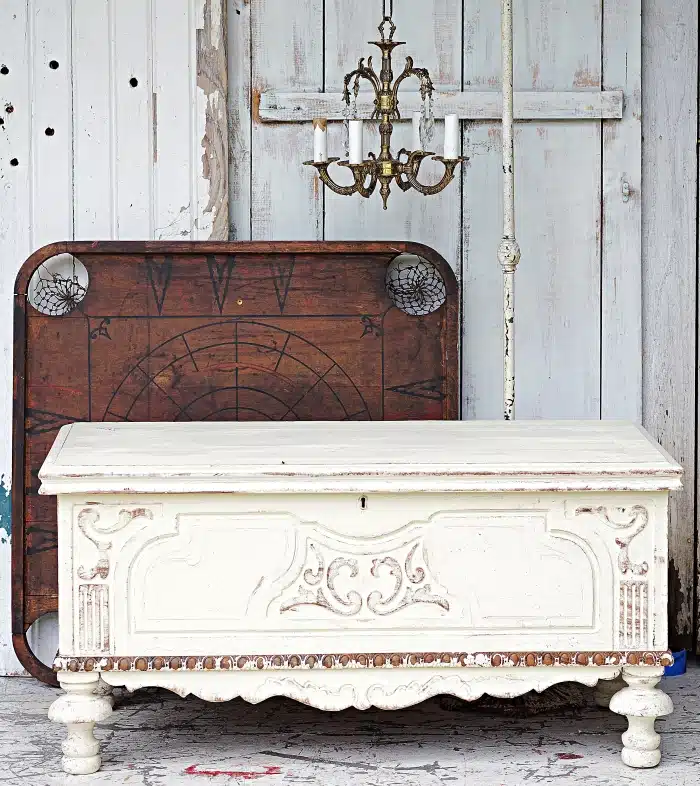
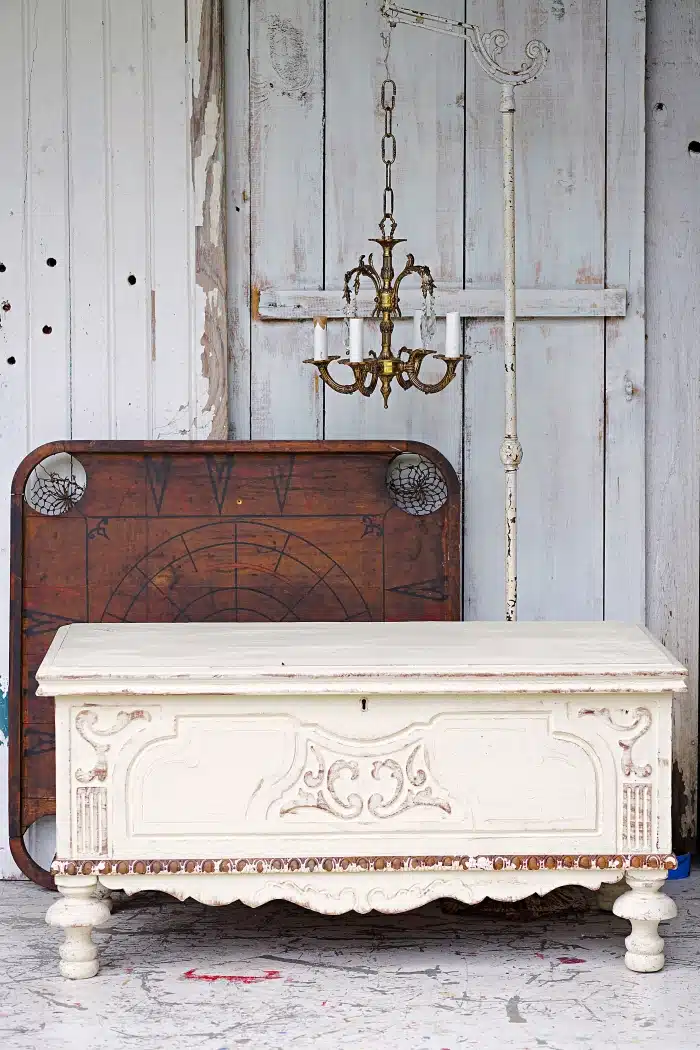
Then I was done. I must admit to doing the happy dance and patting myself on the back a lot. Take a look at the before photo and you can see how similar the new look is…..only lighter, cleaner, and much better.
The original chippy wood trim is the focal point and man is it pretty. The detailed wood trim adds character to the wood chest. You have to admit the chest would look much different without the trim. I would like to keep the cedar chest instead of selling it. What to do, what to do.
What do you think about my new DIY tools and the new antique paint finish? This technique to age white painted furniture is now officially my favorite paint technique. This is an easy technique and can be used on any painted surface, such as painted signs, outdoor décor, etc.
View this post for another technique to age white paint….How To Distress And Antique White Painted Furniture
Don’t forget to pin the project.
This is a safety alert from Lane…..Since many of our cedar chest products have withstood the test of time and have been in homes for decades, there have been cases where children have climbed inside chests with old style latching mechanisms and locked themselves in, and there have been incidences of suffocation inside chests. As a result of this important and urgent safety concern, Lane has launched numerous successful programs since 1987, all concentrating on lock replacement. However, based on our best records, there are still an estimated 6 million chests owned by consumers that may require the new lock upgrade. Please click here for more information
As always, thanks for being here, and have a great day, Kathy

Beautiful work! The trim with the darker color is so beautiful! I vote for keeping this cedar chest for yourself!
I am loving this!
Thanks Julie
You’re welcome Susan. Yes, the brush is so much easier and not nearly as messy!
Love the bottle trick! I bet it will work better than spattering with a brush. And will try the sponge dry brush technique too! Thanks for the tips!
Great idea to use the sponge! Chest looks beautiful.
What a beautiful chest! Love the beaded trim.
Thank you for showing us how to do the “aging” effect. The chest looks great!!