DIY Snowmen Made From Enamel Lids, Buttons, And Just Junk
As an Amazon Associate, I earn from qualifying purchases.
These DIY Snowmen come in all shapes and sizes and are made from all kinds of things including just junky stuff. I’ve made a bunch of snowmen in the past and these are the best!

DIY Snowmen
This snowman is made from enamel pot lids, furniture knobs, and buttons. The hat is part of a straw basket. If you look around your house long enough you will find something to work with. I didn’t start this project thinking I would use a woven basket as a snowman hat.
Enamel Lid DIY Snowmen

I started with some junk treasures from My Favorite Junk Shop.

The reclaimed wood door panel came from the Nashville Flea Market. I added a saw tooth hanger and pad protectors to the back of the panel before I started on the snowman.

I found an old basket and cut it up for the snowman hat. Then I just tried bits and pieces to see what would work.

I attached the enamel pot lids using a punch to start the holes in the lid and an electric drill to finish the hole. Then I just screwed the lids to the panel.

I selected a bunch of buttons to make the mouth and two knobs for the eyes. I used E6000 to adhere the buttons and knobs. I chose burlap for his scarf and attached it at the neck with a white staple tack thingy (?don’t ask me). The hat was attached with regular staples

I don’t have the tutorial on the second pot lid snowman but I can tell you that this hat is actually a large piece of folded up sandpaper.
DIY Snowmen Made From Buttons
The next three snowmen are made from buttons and utilize unique items like branches….and wire….and reclaimed hardware…..and other handy stuff. Some projects don’t require running to the store and spending money on crafting materials. You probably have things you could work with at home. You just have to look at objects in a different way.

Aren’t these little snowmen just the cutest! A piece of dried fence wood, twigs, wire, a dab of paint, buttons, and hot glue. Nothing to it.
My friend Paula gives me a hard time because I want to use the glue gun for everything. She believes in using slow drying glue, or a needle and thread, or heaven forbid….a sewing machine for crafts. Not me. Not if the glue gun works. I’m never short of glue sticks.

I pulled a few pieces of wood from my stash. I get wood from random places; broken furniture, new home construction work sites (just the leftover bits and pieces), my fav junk shop, curbside trash, you name it. I grabbed one of my button jars and also a few junky rusty metal things. 
Then I went to work with the glue gun. This is project number one with the buttons. I’m calling this one “The Three Ice Men”. Moving on to project number two.

The second project was just as easy. Grab the glue gun again. The wood I selected for the background was beat up and had holes but that just adds to the character. And as you can see a few of the buttons still had the thread. I think that adds to the look. Imagine how the button snowmen would look on a new piece of wood and not thread in the eyes. Not the same.
The two rusty metal pieces are perfect together. One is a washer and the other is a door knob thingie. Branch arms again. I’m calling these three “The Buttoned-Up Trio”. The hardest part of putting assemblage art (or whatever you want to call it) together is finding just the right combination of things. There have been times I’ve set and gone through one box of stuff for hours trying to find just the just the perfect combination of bits and pieces.
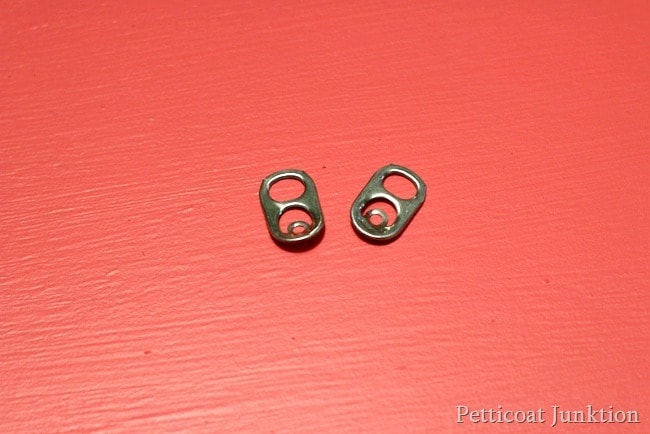
I didn’t get a photo of the back of the snowmen but see these soda pop tabs or they could be beer tabs? I use the tabs to hang small wall decor. The tabs are free and recyclable. I usually staple them on or sometimes use a very small screw. Time for project number three.

The backdrop for this snowman is a metal plate. The little metal rectangle came from the bottom of a cabinet (earlier project). I removed all four of the plates from the cabinet and stored them away in my junk stash. I think they were the thingies the legs attached to…..maybe. You guys know I don’t throw anything away. See how perfect they are for this project!
I was working on this project when I had a little accident. I cut my finger while snipping arms for the Snowmen. I not only cut my finger, I cut a little hunk out of it. I put a clean work rag over my finger and walked up to the house so the JTS (aka Junktion Technical Specialist, aka hubby) could check it out. It was bleeding pretty good and after applying pressure for a few minutes we decided just to bandage it tightly to stop the bleeding and doctor it up this morning.
Oh, I forgot to mention that I get queasy at the sight of blood. I had to lay down for a while last night to keep from passing out! The moral of the story is when using heavy duty Titanium scissors…..be careful.

The next morning my finger was sore but that didn’t stop me from finishing the snowmen. I ended up making three like this. The arms of the snowmen are vinyl wrapped wire. Something from my stash. I cut my finger while cutting the wire. I’m calling these guys “Heavy Metal Men”.

Which of the 3 diy snowmen do you like best? Have you been thinking about your junk drawer and finding things to put together?
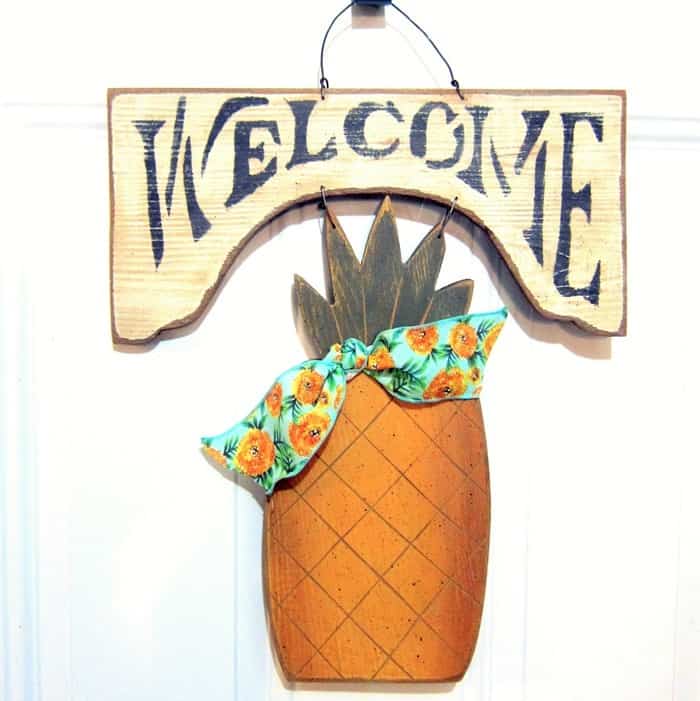
DIY Snowmen Signs
Now I have a few stamped and stenciled signs! Making these little Christmas signs was a lot of fun. I definitely need to do more crafting. The signs don’t all have a snowman as the star but you will like the other signs too!

I told you they were cute.

These boards are the perfect size for signs and I even cut some of them in half for smaller signs. I had three bundles of the boards I purchased when we lived in Florida and this is the last bundle.

I also had some other odd sized boards and I painted all of them using a variety of colors.

The stamps and stencils above are part of my junk collection.

I stamped and stenciled all of the boards in a random way for a rustic look. The boards were rough and the stamped signs were a little uneven which was perfectly okay. I didn’t have to distress them.

I applied dark wax to some of the signs for an aged look. I drilled holes and inserted wire to make hangers. This type of hanger is so easy. It’s kind of the lazy girl’s method of hanging stuff.

Most of the wire came from yard sales and has an aged look. No shininess here. I like that turquoisy sign with the green trees and red Merry Christmas a lot!
DIY Snowmen made with jar lids.

The jar lid snowmen ornaments would be a great project for the kids. Find it here…..Snowman Handmade Christmas Ornament Is The Tops
The next snowmen ornaments were made from a variety of junk drawer items.
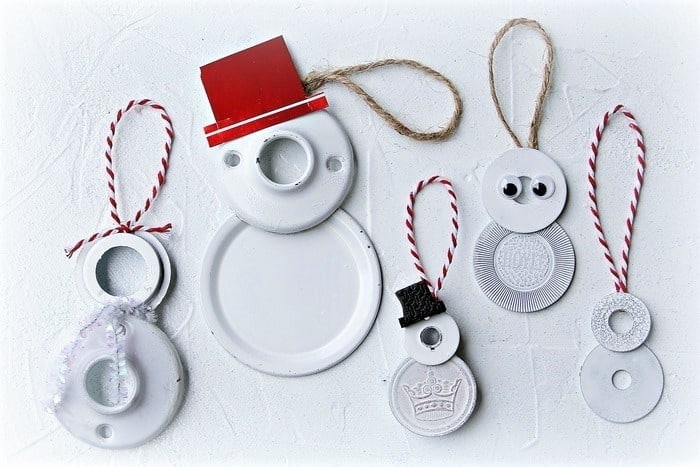
You can find the tutorial for these junk drawer snowmen here.
Hope you liked the diy snowmen show. I have a new furniture project for you tomorrow if I get all the photos together and the post written! Leave a note and tell me your favorite snowman project please. Thanks for being here, Kathy

Adorable! So much inspiration here!
I loved them all-
xo Lisa S
I am loving all these adorable and creative snowmen ideas! I’d love for you to come share with us over at You’re the Star. It’s a month long linky party with new features each week. Please come share your amazing recipes with us each week!
https://www.momthelunchlady.ca/2020/12/youre-star-garden-feature.html
Your “junk” makes the best snowmen I cannot pick my favorite because they are all my favorite. How your boo boo is ok.
Love the snowmen. I think the three button guys on the blue and white board are my favorite!
Just plain AWESOME snowmen!! Loved all of them!
Love your originality! So creative and fun.
I simply love all of the ideas you shared. Thank you.
I love making snowmen too!
Yours are so cute!
Thanks for sharing.
All are adorable!!! Hope your finger is doing better!!!
Kathy,
I just love your creations! Snowmen are just about my favorite winter decoration and you’ve brought me a ton of joy in showing how to use leftover “junk.” I am a firm believer in recycling, upcycling, and repurposing. Your ornaments and decor pieces are true winners! Keep up the great work.
I’m guessing you had a lot of fun with these clever little creations!
I love them all!!! I can’t decide on a favorite. What a bunch of cute snowmen!!! I love all your “junk” pieces. I call them treasures!! These are the kind of things I look at first at a garage sale. ? Thank you for the fresh ideas!! ☃️☃️☃️