Paint A Bench And Distress The Paint
As an Amazon Associate, I earn from qualifying purchases.
Paint a bench white and then distress the paint.
Wait until you see the mess this bench was in. It had a padded seat and I did all kinds of work and recovered the seat just to find out the thing was all wonky.
You get the complete tutorial and an update on hubby and his broken arm.

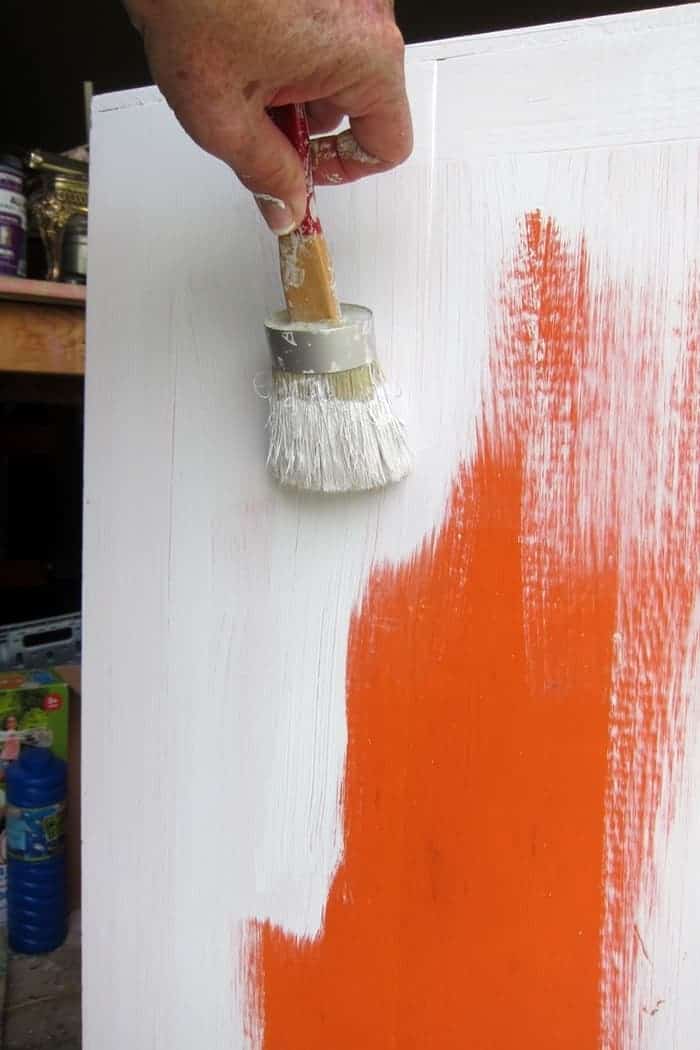
The bench was painted white when I bought it. Not a pretty white. Too glossy.

I got the bench at the Nashville Flea Market. The padded seat top wasn’t attached when I bought it but I didn’t think anything about it.

It had a nice storage area for odds and ends.

The JTS (hubby, aka Junktion Technical Specialist) removed the screws that were on the bottom side of the padded top.

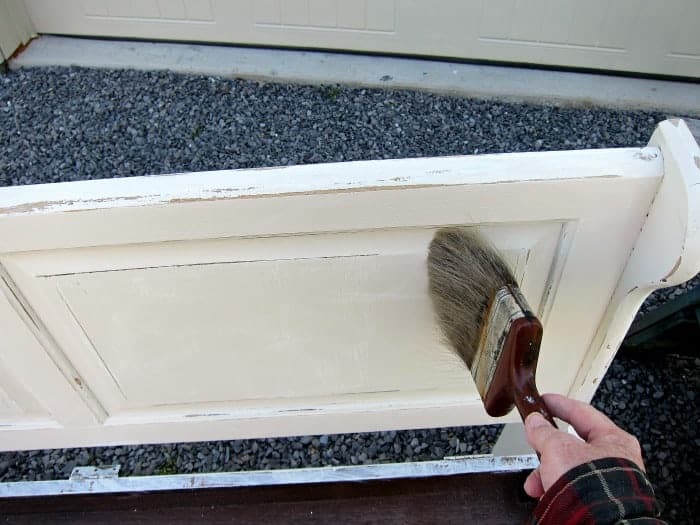
We added the wood pegs to the holes to hide the screws. And the remaining holes I filled with wood filler. I didn’t care for the shininess of the paint so I brushed on a coat of Beyond Paint in Off-White ((find the paint here)It has just a slight sheen, almost a flat look.

While the paint was drying I re-covered the bench seat. I shopped for fabric at all my local stores searching for something grain sack looking or Buffalo Plaid or an airy turquoise and brown print.
Couldn’t find a thing. I stumbled around the workshop and found these sheets. They are old ones I was going to use for rags. I thought the really muted design with the goldish stripes would work well with the off-white paint and also maintain the neutral look.

I washed the sheet, cut it to size and stapled it over the existing padding and fabric cover. I laid the newly covered seat on the bench and thought…”This doesn’t look right, it’s sticking out way too far plus the fabric looks crappy”.
I tried lifting the front edge of the seat and pushing it back so it could be secured with the hinges on the base of the seat. No go. There was no way the seat top could be attached with the padding on.
Apparently the seat was never attached after the fabric padding was added. That’s what I get for not checking the piece out a bit more before buying it. Now what?

I decided to remove the fabric and the padding….there had to be a wood board under there, right? I pulled out about a million staples…okay, maybe a couple hundred. The JTS came out to the workshop about the time I was ready to pull my hair out and took over with the staple pulling. He’s awesome.

You can’t see it in this photo but the wood was badly damaged. I guess the bench had been left in the rain and the wood was all rippled. Now, how to work with that.

You can see the badly damaged wood in the photo above. I decided to give it a good sanding and see what happened.

I grabbed a sander, then a different sander and I sanded on that top forever. There were still a few ripples when I quit but I could work with that. I also distressed the bench while I had the sanders out.

This is what the seat looked like after distressing. I first thought to leave it that way but it was too darn ugly. I painted the seat off-white with the Beyond Paint then distressed ever so lightly.
I loved the look of the distressed paint on the bench. After brushing and wiping the sanded particles off I applied a coat of clear wax to the whole bench.

Now that the bench was all white with just a little distressing it needed something else. Something simple. I decided to add a stencil and the color I wanted for the stenciled design was a taupy grayish brown. Nothing I had was the perfect color so I mixed a brown and gray together to get the perfect color.

I could have stenciled a large design, big words, flowers…. just about anything…..but I decided to go simple. I turned the bench on it’s back and went to work. Stenciling is so easy. Remember….dry brush, dry brush, dry brush.

I was going to quit at “sit”. It felt off balance. I know, I’m nuts. Anyway, I added just a bit of branch in the corner of the seat panel.

Again I used a stencil because I can’t even paint a simple branch freehand.

Some people would probably prefer not to have the stencil but I like it.

White Farmhouse Style Bench
I bought the fabric to make a bench pad but so far that hasn’t happened. The bench would be perfect on a front porch, in the foyer, or just about anywhere.
How about a video on stenciling like a pro? I made this just for you…..
How To Stencil
I completed the farmhouse style white bench 4 years ago. Some of you have never seen it and it’s fun to take a look back. I guess you can call this throwback Thursday. It seems like I worked on this project just last week. Time sure goes fast.
An update on the hubby. He is still trying to recover from surgery for his broken arm. He doesn’t sleep very well at night and doesn’t have much energy. I think he is frustrated because he can’t do much with just one hand. We’ve only had a couple of cranky days between the two of us…..so far.

As always thanks for being here! I know you have other things to do and I appreciate the time you spend with me and my craziness. Kathy
Hope JTS gets better soon! Love the bench!
I like’sit’ but would have changed the font. The paint is perfect!! Prayers for JTS too!
My eyes went straight to the little branch—perfect!
Haha, good advice, thanks!
Amen!
That’s okay Gloria. I still like it, lol.
Good advice for all Linda!
It was going so well until you put the “SIT” stencil on it! Oh, no!! It looks a bit contrived, sorry.
Simple and beautiful. I love it.
Love that bench! See how perseverance pays off? Good for you. We are all going through a brand new experience in the world right now, compounded with that broken arm is a real bummer. Have patience with him. If he goes acting like a jackass, just walk away…..
Have a blessed day and stay safe and healthy.
I love this bench!! The colors, distressing and stencil are just perfect!! I’ve had several projects go awry and sometimes when I have to go a different route it turns out better than I originally hoped, and then sometimes I just put it away until I’m ready to deal with the project gone bad. Lol. Anyway, you did an awesome job on this!! Thanks for linking up at Sweet Inspirations!
Kathy, I love this! The stencil and small branch are the perfect details! Thanks for linking up with Merry Monday 🙂
I love this bench. I love that you kept the stencil simple so it doesn’t take away from the character of the bench. I love shopping for “junk” pieces and making them beautiful again.
Hi Kathy,
I just love this bench. The color? Check. The finish? Check. The Styling? Double check. It’s just the total package……a great redo….great look.
Thanks so much for linking to Friday’s Furniture Fix. We love having you share with us!!
Susie from The Chelsea Project
I love your bench, Kathy!! It’s perfect now 🙂
Very nice, love the simplicity of it.
Love the bench!!