The Secret To Painting Wood Dining Chairs
As an Amazon Associate, I earn from qualifying purchases.
Painting wood dining room chairs takes time and patience but I know the secret to speeding up the painting process. If you never paint anything else you should at least paint a wood chair and preferably one with a fabric seat. It’s the project that will give you the most dramatic change with the least amount of work.
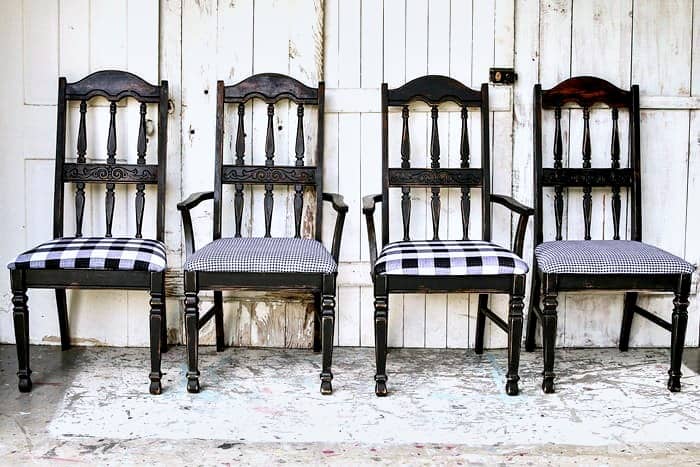
I painted these beautifully detailed wood chairs black and recovered the seats with black and white buffalo check. This makeover goes right at the top of my list of favorites. Like many of my furniture makeovers, it took a turn or two during the project but the end result is amazing.

I paid $20 for the four chairs. I picked them up at a roadside sale on the way home from the Nashville Flea Market on Saturday. They were a great find and I was glad to get them since I didn’t bring anything home from the flea market.
The Secret To Painting Wood Dining Chairs
I painted the chairs with a paint sprayer and then covered the seats with a reversible black and white buffalo check plaid fabric. And just for you, I made a video of the whole process…..painting, distressing, waxing, and covering the chair seats. It’s a must-see.

Painting The Wood Chairs
I used the HomeRight Finish Max Super Paint Sprayer to paint the chairs. I also painted two more chairs I had in the workshop. It took one hour to paint all 6 chairs. If you guys have ever brush-painted a chair you will appreciate this.
It usually takes me a total of 3 hours to paint one chair with two coats of paint using a brush. Between the legs, spindles, and frame, it takes time to cover all the curves, edges, twists, and turns.

The paint is Beyond paint and the color is Licorice. This is the first time I used the Beyond paint in a paint sprayer. To tell you the truth I wasn’t sure how or if it would work.
The Beyond paint is thicker than latex paint. I watered it down with an equal amount of water. I never measure, just pour water in and stir until it looks the right consistency for spraying.

This is how the chair looked after painting. Remember I have a video that shows the whole process. It’s kind of hard to take photos while using a paint sprayer. I’m good but not that good.

I clipped the above photo out of the video and that’s why it is a little blurry. This paint sprayer is so easy to use. This is the new sprayer with more power.
Distressing The Painted Chairs

Next, I sanded the paint with my Ryobi battery-powered sander. I distressed the chairs very heavily using 100 grit sandpaper. That wasn’t the original plan but it worked. I started out distressing the paint really lightly but the contrast wasn’t there. The pretty carved details just called for extra distressing.
Waxing The Chairs

After all of the distressing I used Howard’s Wax in neutral to cover the hazy look caused by the sanding. The wax also deepens the color of the wood. The Beyond Paint is a primer-paint-sealer all in one. I just used the wax because of the distressing but I don’t normally use a sealer with the Beyond Paint.

Now that the chairs are painted, distressed, and waxed, time to cover the seats.

Covering The Chair Seats With Buffalo Check Fabric
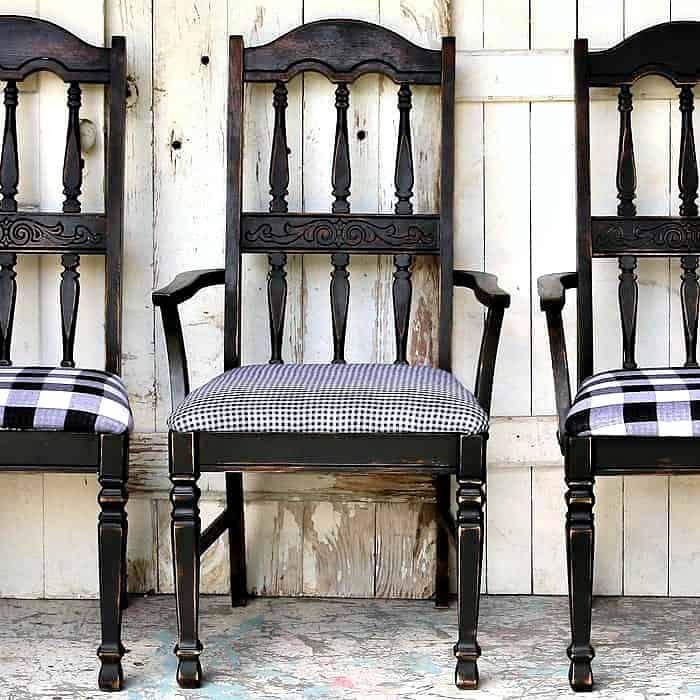
I bought the reversible buffalo check fabric at Hobby Lobby. It is sooooo soft. Since it is reversible I covered two of the seats with the small check and two with the large check.

The first step in covering a fabric chair seat is to cut the fabric to size leaving 2 or 3 inches on all sides so you have enough fabric to cover the seat and staple it to the bottom of the seat.

Covering the seats is super easy. You just need a good heavy-duty stapler. Working the corners of the fabric so you don’t have very many wrinkles is the hardest part. This fabric was very lightweight and that made working the corners of the seat easy.

I like the two buffalo check designs together. The largest is my favorite but that would have been overkill on four chairs.

Ta-Dah. I did a fantastic job on those seats. Patting myself on the back. having a piece of chocolate. The four chairs look awesome now. I’m calling them bold, bodacious, and beautiful. Black and white is so classy anyway and these chairs have class.

The heavy distressing on the chairs works well with the checked fabric. I was a bit concerned but no need.

See how well the covered seats sit on the wood chair frames. Sometimes the fabric is thick on the corners and the seats don’t sit completely flat on the chairs.

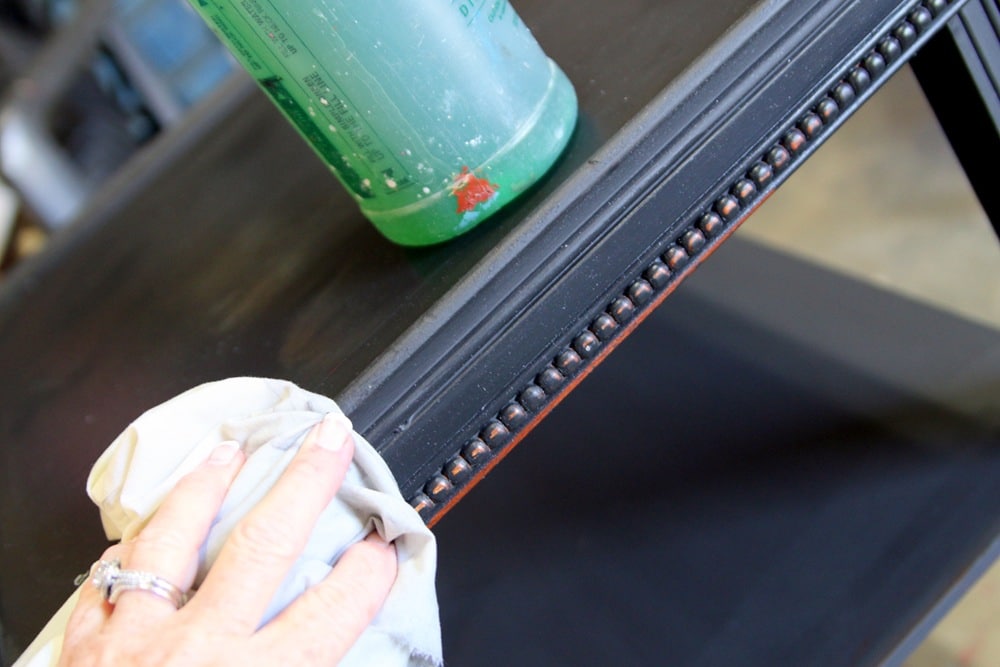
I also didn’t remove the original fabric. The fabric and foam were in great shape. Nice and thick and no tears in the fabric. I did clean and refresh the old fabric with Simple Green and let it dry well before covering it.
Video Tutorial: Painting Wood Dining Chairs
Time to take a look at the video. Don’t worry I sped up the dull parts but you get to see each step. You guys know I don’t want you to sit through 30 minutes of me just using the paint sprayer. This video is less than 4 minutes long and includes painting, distressing, waxing, and covering one chair seat. Enjoy….
How To Paint Chairs And Cover The Seats

Find more of my dining room chair makeovers here…. 21 Dining Chair Makeovers: Painted Chairs With New Fabric Covered Seats
What do you think of the chairs, the color, and the fabric? Leave a note before heading out. As always, thanks for being here and have a great day, Kathy
If you don’t have a traditional paint sprayer? Then you can pick up a staying tool that affixes into a spray paint can . Now you do have to shake the can of paint vigorously and for an additional good 10 min . Affix your sprayer and take a couple of practice sprays . And in an even sweep spray back and forth . Make sure that you are holding your sprayer about a foot of distant between your project piece and your sprayer . Remember not to spray in one spot , or spraying to thick or you will have drips of paint . But if you do see any drip then you can take a lightly wet brush ( wet with water) and very lightly brush over the drip . Allow the paint to settle and dry and then you can spray over that area again . Good luck to you , have fun and enjoy your new craft accomplishments !
Sincerely , janeofalltrades@
Christina K. H-Silva
Hi, any tips or you don’t have a sprayer?
They look so pretty, good job and thanks for sharing, pinned them.
Great job on the chairs
Re doing chairs are my favorite project