Custom Color Latex Paint For Master Bedroom Furniture Makeover
As an Amazon Associate, I earn from qualifying purchases.
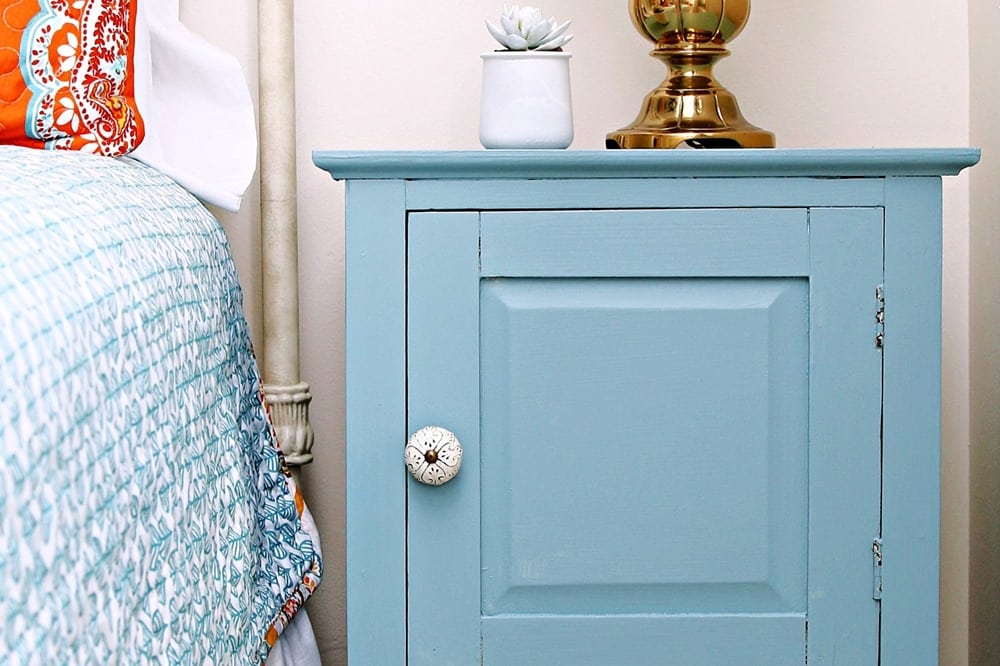
Get the formula right here for my custom color latex paint. I used the custom color for the master bedroom furniture makeover. I first mixed this color myself to use on the nightstands in our master bedroom. And now I painted this dresser with the same custom color mix too!
You guys know that painting furniture is my thing and I’m always trying new colors, paints, paint combinations, special furniture painting techniques, etc. My custom color is a combination of white latex primer and a dab of our bedroom wall paint color. Yes, you can paint furniture with latex paint. I have a list of reasons I like to use latex paint right here.

This dresser is the last piece I needed to complete the new bedroom decor. Seems I was hunting forever for the perfect dresser to fit the only spot in the bedroom big enough for a dresser or chest.

I was on the hunt for a Mid-Century Modern piece with it’s original stained finish for the room but then decided a painted piece would look better against the brown walls.
I’m still looking for a couple of Mid-Century Modern pieces for other rooms in the house. Maybe that will take care of my MCM fixation.
Today is also Furniture Fixer Upper Day. Don’t forget to check out the all of the makeovers. You never know what the other girls have been up to but I can guarantee it will be worth your time to check out their posts.
Custom Color Latex Paint For Master Bedroom Furniture Makeover
1. Where to Find Furniture To Paint

If you’re looking for furniture to paint I would suggest shopping your local flea markets, thrift stores, junk shops, or online sites like Marketplace.
I buy a lot of my furniture for makeovers at The Nashville Flea Market but the market has been closed for several months now. I also search the two flea market/thrift/antique shops where I have my booths. Sometimes I run up on a good deal.
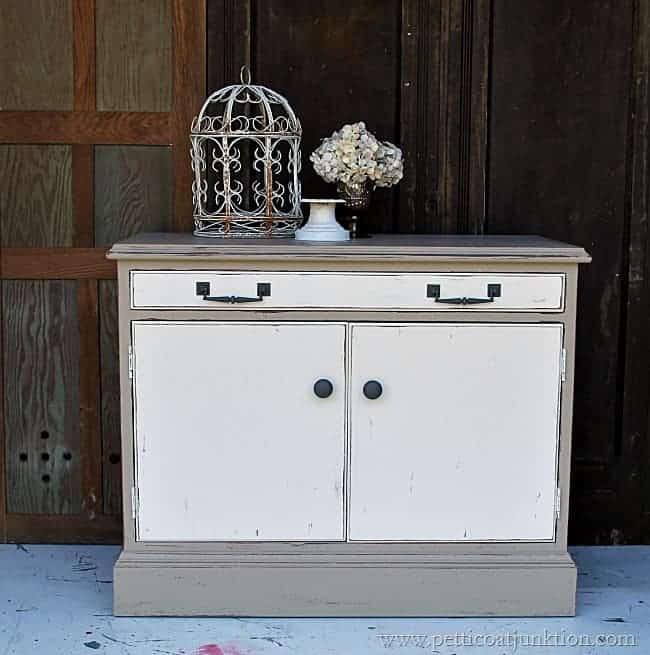
And then there is always my favorite place for junk of all kind. This dresser came from my favorite junk shop, where else. It was $35 and there was no way I could beat that price for a dresser this size.
2. Repair Furniture Before Makeover

Always make any repairs in preparation for painting the furniture. Look the piece over from top to bottom. The drawers sometimes need re-gluing or the bottoms might need to be replaced. Often the back is loose and just needs to be nailed in place.
Sometimes there are deep scratches in the wood or the edges are chewed up and wood putty is needed to fill or smooth the dings. The number of issues are limitless but most repairs are easy to take care of and you usually don’t need any expensive tools or supplies. The dresser had chewed up corners around the base. I took care of those and you would never know there was a problem.
The back was also loose in a few places and I took care of those quickly with my brad nailer. A regular hammer and nails would work just fine too just takes a bit longer and a little more elbow grease. Fix any problems then move on to cleaning and general prep.

3. Prepping For Master Bedroom Furniture Makeover
Remove the drawers from the dresser to prep them for painting. Mark the back of the drawers according to position. The red writing on my piece was already there and the RB I wrote on the back stands for right bottom. Remove all of the drawer pulls after marking the drawers. Place a small piece of painter’s tape over the screw holes on the inside of the drawer where the pulls are to keep paint from leaking into the drawers.

The dust board, which was really just heavy duty paperboard, was a mess. One of the drawer runners was off and some of the other runners were loose.

Tighten loose screws and use a shop vacuum to remove heavy lint buildup. I decided to just remove that bottom dust panel. Then I vacuumed and cleaned the inside of the dresser. I nailed the runner back in place using my brad nailer.

I checked all of the runners and tightened the loose screws. With old furniture the screws tend to loosen up over the years because of the furniture being moved or just because it’s aged and the wood has dried or either swollen a bit.

There were a ton of screws in this piece. I used an Allen wrench to tighten the screws around the legs and the base. Look for hidden screws. You would be surprised how many screws it takes to put a piece of furniture together.

Clean up after the repairs and prep work because there is always a mes after the process. You don’t want to clean the repair and prep because you just have to do another clean up. The drawers on the dresser had screwed on front panels. Along with cleaning the body of the dresser I cleaned the inside and outside of the drawers with Simple Green.

I used DAP plastic wood filler to cover the chewed up places. It looks rough now but I’ll sand it down when the putty dries.

To keep the paint lines from looking rough I applied painters tape to the inside of the cabinet, inset an inch or so. You might remember I mentioned earlier about removing all of the drawers. Well, I could not get the top middle drawer out no matter how I tried. The cabinet below it is solid and I couldn’t get to the bottom of the drawer or the runner.

The little rubber thing on the drawer runner is the problem. It’s a type of drawer stop and you really have to pull and jerk on the drawers to get them out of the dresser. I finally removed all of the rubber stops. Some of them were missing anyway. The drawers are not going to pull all the way out accidentally anyway.

Even though the drawers and other parts of the dresser were solid wood the top was made of MDF aka fake wood. You can see where it bubbled up a bit on the edges from being wet at some prior time.
4. Prime Furniture Before Painting
At one time I didn’t prime furniture because most of the paint formulas now are made well and you don’t have to prime. Also the best paint brands have primer built in.
Lately I use primer because it gives a smooth solid finish for the top coat. Most furniture has shades of colors even in the stained finish and a lot of the used furniture has water rings or discolored areas. Covering these up with primer gives that solid base color you need before brushing on the top coat.

Since the paint for the makeover is an off-white I decided to go ahead and prime first with white Glidden Gripper primer.

I don’t worry about getting a solid coat of primer on my furniture pieces. Just apply one coat and it gives the topcoat something to adhere to.

Once the wood putty was dry I sanded it as smooth as I could and applied another coat of putty and sanded it down. The photo above shows the putty after one coat and sanding once.

5. Select the Best Paint Brand and Color For Your Furniture
Latex paint can be used for furniture makeovers. Choose a good name brand, and there are many, and then select your paint color. You can also match fabric, wallpaper, etc. to make your own custom latex paint color for your furniture. Similar to what I did here by mixing paint colors together to co-ordinate with the color of our bedroom walls.
Custom Color Latex Paint
I choose Behr Ultra stain blocking latex paint and primer in one for my custom color paint mix. I like this brand and use it often. One of the many reasons I like latex paint is because you can have any paint color you want.

When I mixed the paint for the master bedroom nightstands I was hoping to get an off-white color that would work with the brown bedroom walls. We all know there are thousands of white colors and they have different shades and tones. I sure didn’t want to select a white with a blue undertone for the bedroom so that’s why I mixed my own color using white primer and a bit of the wall color.
Why did I use primer? Because that is the only white paint I had on hand besides a satin paint and I didn’t want the furniture to be shiny. I liked the color I mixed up so I took the stir stick with dried paint on it to Home Depot to have my custom color mixed. I name my custom paint colors and I’m calling this one White Velvet.
I choose a matte finish but after looking at the paint in the room and comparing it to the nightstands I which I would have went with an eggshell finish. The color formula is on the photo above if you like the color. I would get a small sample mixed if I were you because colors look different on various computer screens.

6. Paint Furniture With Your Custom Color
Time to paint. This is the easiest part of the project believe it or not. Apply two coats of paint over the primer for solid coverage. The photo above shows me brushing on one coat of the custom color latex mix. I applied two coats of paint although one covered really well. On the first coat there are always spots that get a thin coat of paint or corners that get no paint so go ahead and apply two coats.

7. Distress the Painted Furniture
Distressing the furniture is not necessary…..but distressed paint adds depth and character to the furniture. You can distress or sand paint by hand using a piece of sandpaper or you can distress the furniture using a power sander. It really depends on the paint, the furniture, and the look you want to achieve. I started distressing the paint by hand with 100 grit flexible sandpaper. It was a slow go because the paint really adhered to the furniture.

I pulled out the battery powered Ryobi mouse sander and 120 grit sandpaper to finish the job.

I was looking to just sand down to the original finish and no further. For the most part that’s what I did. I actually had a difficult time getting the paint to come off with the sander too. Good Paint.

After the distressing I pulled off the painters tape. What about that crisp clean paint line??

I used the shop vacuum and a tack cloth to remove the residue from sanding. A tack cloth is just like the name implies. The cloth has a very sticky feel and it picks up bits and pieces that you don’t even know is there.
8. Selecting New Knobs For Furniture Makeovers
Knobs or drawer pulls can make or break a furniture makeover. You choose knobs by the type of look or feel you are going for. You can make furniture look modern, antique, feminine, Art Deco, etc. just by changing out the knobs.

I actually had quit a few drawer pull/knob choices on hand. Every once in a while when Hobby Lobby has knobs on sale I go in and pick up a few that interest me. The long rectangular knobs with the wood in the middle came from Burkes. I happened across two packs of four knobs each on sale for $2.99. Deal.
I wasn’t sure which knobs I would like the best and the only ones I had 12 of which is how many I needed were the turquoise glass knobs. I couldn’t see using all turquoise knobs. I used the same turquoise knobs on the nightstands but I thought they might be overkill on the big dresser.

So I tried different knobs and different combinations of knobs. I really thought I would like three turquoise knobs on the top but I didn’t. The rattan wrapped ring knob was a last minute buy. I went to Hobby Lobby to see what other options I had and picked the ring knob to go on the cabinet door.

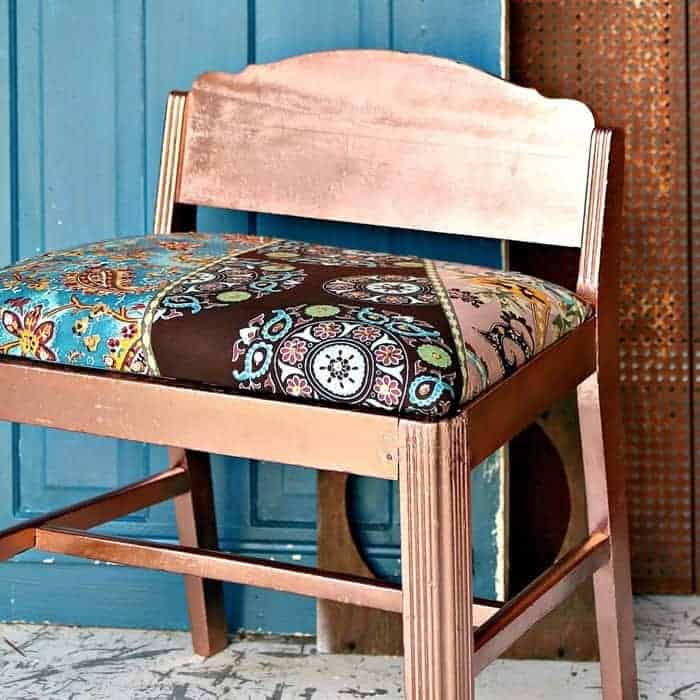
Next I put the round wood and porcelain inlay knob on a drawer and decided it was too busy. These are the same knobs I used on the vintage server that’s now in Sofi’s bedroom.
")
I really wished I had more of the rectangular knobs but since they were on clearance no go. In the end I liked the ring knobs so I made another trip to Hobby Lobby to get enough for the top three drawers. Good thing I live close to Hobby Lobby.
This is the way it often goes with a furniture makeover. Finding the right knobs or maybe having to fill screw holes and drill new holes for different knobs is the most time consuming part of the makeover. It’s not the painting that takes time it’s prep and hardware stuff.

The ring knobs and the rectangular knobs look pretty good together and they fit my theme. No, I really don’t have a theme but trying to work with texture and maybe a touch of beach inspiration.

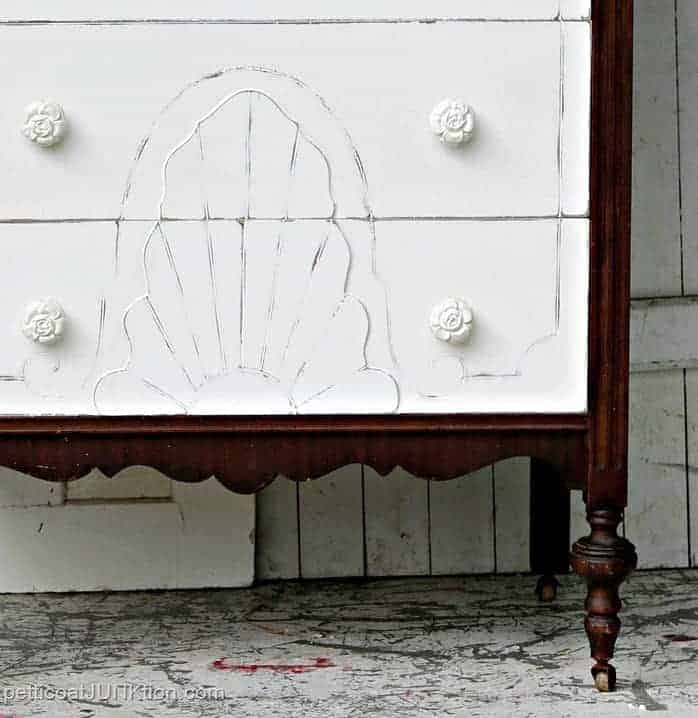
Do you remember where the wood was all chewed up at the feet on both sides of the dresser? Can’t really tell that now. I filled in with wood putty the best I could then distressed the painted putty which didn’t work too well because the putty is very light in color. I touched up the light brown putty with brown paint and…..Ta-dah……blends right in with the other distressing.

The dresser has a lot of storage and we could probably do without one of the nightstands in the bedroom but they balance out the bed. I’ll share photos next week of the master bedroom since the decorating is finished and you can see everything in place.
If you haven’t watched my video tutorial on how to sand painted furniture you can see it below……
How To Sand or Distress Painted Furniture

How about the paint color? What do you think of the master bedroom furniture makeover? Do you prefer stained furniture, painted furniture, or a combination of both in your home? Have you had any paint custom mixed, maybe to match a fabric or wallpaper? What do you think of the knob selection? Please take a minute to leave a note before you head out on the tour. I would love to hear your thoughts.

Just click the pink text links below the “before” makeovers photo collage….
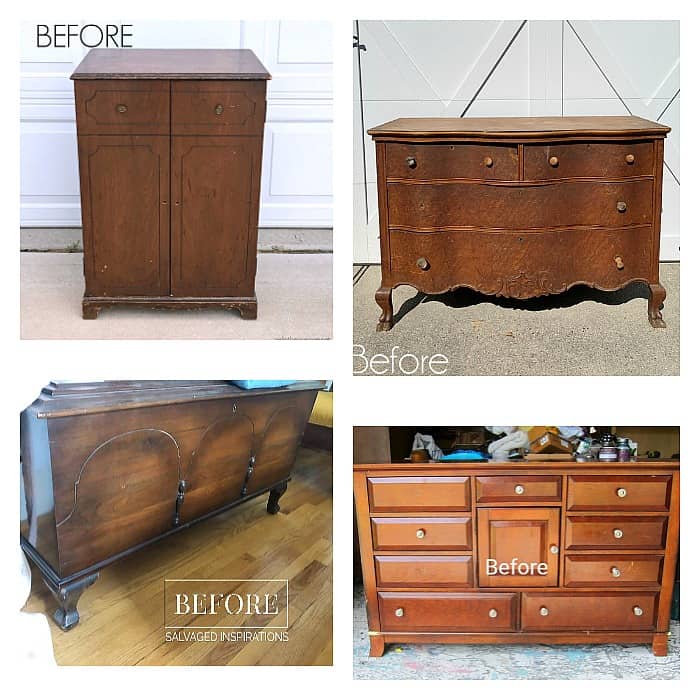
Antique Serpentine Dresser With Transfer from Confessions of a Serial DIY’er
DIY Apothecary Cabinet from Girl In The Garage
How To Make Any Surface Paintable from Salvaged Inspirations
Bedroom Dresser With Custom Color Latex Paint Makeover from Petticoat Junktion (You are here)
As always thanks for being here, Kathy
Thanks for the comment Sandra. I totally agree!
Finally some real paint…..I honestly do not understand the fixation with with chalk paint. The cost, the finishing, the waxing—-it isn’t easier at all.
I do know I sold anything I painted and or crackled, when i had a shop. And, often my driveway was lined up with 10 or more pieces getting various finishes. Your tutorial is great…the only thing I would have done was to give your repaired edges a quick spray paint of a wood tone, tan or brown in a satin finish. This is a quick way to seal those vulnerable spots so when you are sanding down your edges…they have a similar ‘color’ to the other bared spots. Yes, spray paint-I would take really ‘bad furniture pieces’ give them multicolor layers of spray paints and then paint with whites or light colors so when sanding…a whole history would appear.
Even the simplest shelf would end up looking like it was an historic farmhouse piece. I know longer have a venue for furniture, so I don’t get to do any as I’m totally retired, but LOVE SEEING REAL PAINT!!!
First Kathy, I’m so jealous that you live near Hobby Lobby. Being Canadian, it’s a 10 hour drive to the nearest store. ? Love the dresser painted custom white and as usual, the distressing is perfection. Your hardware choice in the end is so pretty too. Can’t beat that price too!
LOVE it!
Really great work.
Kathy, what a great score and I love the new look! We were kind of on the same wavelength this time. 🙂 I really like the ring pulls on the top drawers- good choice.
Fabulous! I want that dresser in my bedroom!
Love its new look!
Night and day makeover my friend! And I LOVE the mixed and matched hardware you picked! XO
So Cute. You always do a great job.
Thanks Windy, I’m very happy with it.
Thank you Gina
Thanks Christy
Thank you
Thanks Bev!
Love the combo of knobs! I love how made your own paint color, too. What a huge project, but sure worth the work!! Lovely!
Great job!
Beautiful, Kathy! I love the combination of pulls you settled you on! XOXO
This is brilliant! I love the combo of knobs and this piece looks like it was destined to be this way!
Absolutely stunning! you should be so proud!!