How To Distress Painted Furniture Using Vaseline: Cedar Chest Makeover
As an Amazon Associate, I earn from qualifying purchases.
You can distress painted furniture using Vaseline petroleum jelly for a perfectly chipped, layered look. Petroleum jelly works as a paint resist, meaning paint will not adhere to any area covered with Vaseline. It’s an easy, beginner‑friendly Vaseline paint distressing technique and a great way to layer paint on furniture.

In this post, I’m walking you through one of my favorite cedar chest makeovers using the Vaseline technique.

I paid $15.00 for the cedar chest with a broken top. The JTS made the repairs for me. I could see potential in the cedar chest despite the flaws. It was a bit discolored inside, but a little cleaning with Simple Green took care of that. And yes, it still has that wonderful cedar smell.
How To Distress Painted Furniture With Vaseline (Step‑By‑Step)
This is the basic Vaseline paint resist process I use on furniture. You can adapt it to almost any piece, including home decor accessories.
Step 1. Paint the furniture your base color
Paint the furniture the desired color using the paint of your choice. This first coat will be the base layer that shows through when you distress.

I didn’t have the perfect paint color on hand, so I combined several colors from my paint stash to get this beautiful turquoise blue.

I hate to go buy more paint if I can work with what I have on hand. You may have read that you can’t mix different paint sheens, but I do it all the time for furniture makeovers.
Step 2. Apply Vaseline where you want distressing
Once the paint is dry, lightly wipe Vaseline over selected areas of the painted surface.

Vaseline paint resist
The technique of using Vaseline (petroleum jelly) as a paint resist has been around for a while. I’ve used this process numerous times with beautiful results.
For this cedar chest, I rubbed a little Vaseline on the piece in strategic areas after the coat of turquoise paint was dry. I wore gloves so my hands wouldn’t be icky, and I didn’t put the Vaseline on thick or all over the chest—just little swipes here and there along the edges, corners, and raised details where furniture naturally wears.
Step 3. Brush on a second coat of paint in a contrasting color
Next, brush on a second coat of paint in a color that contrasts with your base coat. This is what creates that pretty, layered look once we start distressing.
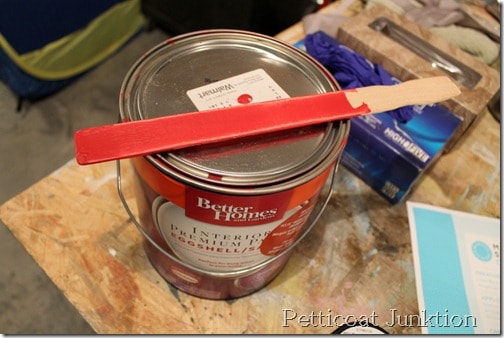
I used a can of Oops paint from Walmart for the top coat. This paint had been sitting on my shelf for over a year.
It’s a beautiful Cherry Red, and I fell in love with it at first sight—I just hadn’t found the perfect project until now.

After I rubbed the chest down with Vaseline (sounds a little strange when I put it that way), I brushed a coat of Cherry Red on the bottom of the chest. I originally intended to leave the top turquoise with no red topcoat.
Step 4. Wipe back the top layer of paint
When the red paint was dry, I took a damp rag and wiped it down. The areas where the Vaseline was applied rubbed off pretty easily, revealing the turquoise underneath.
At this point, I decided to go ahead and put Vaseline on the top and then paint it red too. I wasn’t loving the contrast between the top and the body of the cedar chest. It’s okay to change furniture makeover plans mid‑stream. I do it all the time. If the original plan isn’t working, move on.
I went through the same process with the top—Vaseline, red paint, let it dry, then a damp rag, rub all over, paint comes off. I use a damp rag instead of sandpaper because I don’t want the scratched-paint look you sometimes get from sanding.
Step 5. Add a stenciled detail
Next for the “over‑the‑top” touch, I pulled out a Martha Stewart stencil (similar stencils are easy to find on Amazon). I selected specific parts of the stencil and arranged them in a decorative pattern on the top.

I used the same turquoise paint for the stencil, so the design tied in with the base coat.
The secret to a perfect stenciled design? Use a very dry brush. Wipe off most of the paint, then use the brush on the stencil in light, straight‑up‑and‑down dabs.

I didn’t want a perfect, crisp look, so I did a few off‑center curlicues at the bottom of the design. Then I took a sanding block and lightly sanded the whole chest, stencil included, just very lightly so the paint wouldn’t look scratched but would feel soft and worn.
To protect the finish and add a little extra pow, I applied two coats of Minwax Polycrylic Latex Gloss sealer.
The turquoise and red really pop against each other. The turquoise doesn’t show as well in the photos—it’s a little more vibrant than it looks here—but in person, the layered paint is gorgeous.
Wet Distress Technique For Painted Furniture
You don’t have to use Vaseline every time you distress furniture. I painted another cedar chest with a similar look using a wet distress technique. I wanted to share just a few of those photos with you so you can see how you can use the same paint colors but get a different look.

This chest has red paint as the base color and blue on the top. I actually think I like the blue as the top color the best.

I purchased the cedar chest at the Nashville Flea Market. The top was completely broken down the middle. I probably overpaid for it, but I liked the legs and the brass details.

I planned to just paint her red, apply some dark wax, and ta-dah, done. But it was a little too plain for me.

I used some of my husband’s wet cleaning towels, you know the kind that come in a canister, and you open the tab on the top and pull them out one at a time to do the wet distressing. Some people use baby wipes, but these were handier.
I don’t think this is what is known as “wet sanding,” so I’m calling it wet cloth distressing. When the top coat of turquoise was dry, I rubbed it with the wet towel in strategic places. Sometimes I rubbed pretty hard. (I think I let the paint dry too long.) Rub the paint off until you get the look you want..

Next, I applied a light coat of Howard’s Wax in Walnut. It gives the chest an aged look. I like the wet cloth distressing: it’s not as messy, but I think it takes longer than using the electric sander.

If you want a deep dive into the method, supplies, and color ideas, be sure to read my Vaseline Paint Layering Technique For Furniture: A Complete Guide.
Favorite DIY Tools and Paints
These are the tools and paints I reach for again and again when I’m painting and distressing furniture:
Beyond Paint for Furniture
FrogTape Painters Tape
Howard’s Restore-a-Finish
Rustoleum Heirloom White Spray Paint
Rustoleum Metallic Copper Spray Paint
Important Safety Alert for Lane Cedar Chests
This is a safety alert from Lane. Since many of their cedar chests have withstood the test of time and have been in homes for decades, there have been cases where children have climbed inside chests with old‑style latching mechanisms and locked themselves in. Sadly, there have been incidents of suffocation inside chests.
As a result of this important and urgent safety concern, Lane has launched numerous programs since 1987 focusing on lock replacement. However, based on their records, an estimated 6 million consumer-owned chests may still require the new lock upgrade. Please click through to Lane’s safety information to see if your chest needs a new lock.
If you have any questions about this process, just email me at kathy@petticoatjunktion.com. As always, thanks for being here, and have a great day.
Kathy
I didn’t know about using Vaseline. Thank you for sharing this tip. Merry Christmas.
Does the vaseline get onto your brush? Love this bold color!