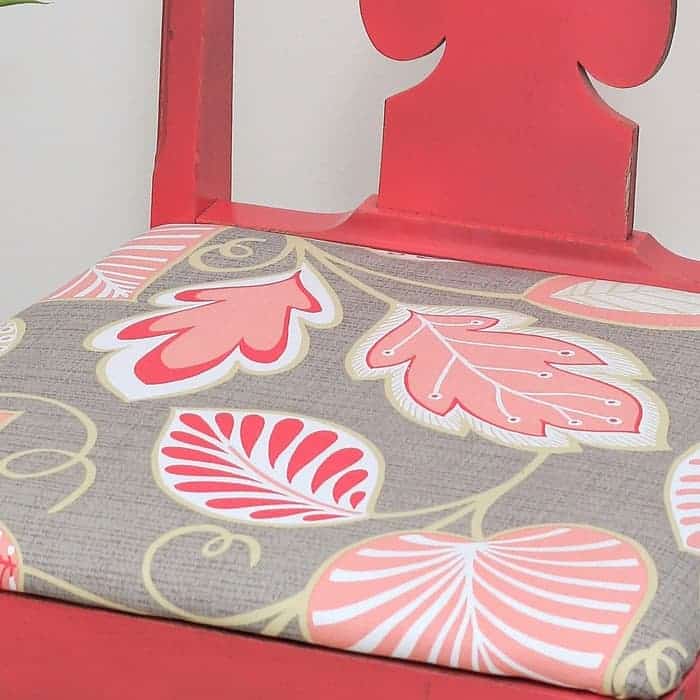
Rustic Red Bench Antiqued With Dark Wax
As an Amazon Associate, I earn from qualifying purchases.
Let me show you how antiquing paint using dark wax gives furniture an aged look. Dark wax adds depth and character and the antiquing process is just one step. Can’t beat that.

I used E6000 to adhere the stars to this end of the newly painted and antiqued red bench and……

to glue the horseshoe on the other end. Let’s talk about the before and the paint….
$10 Work Bench
I love finding pieces like this….….and flipping them into functional and fun furniture for my home. I got this really rustic bench at My Favorite Junk Shop for $10. It’s obviously handmade using rough lumber pieces and it’s been through the ringer. That doesn’t mean it can’t be rejuvenated. This project just goes to prove you can fix up just about anything.

This is the photo I took the day I found it. You can see the hand hole cut in the middle. The bench is pretty low and it would be perfect for kids.

I used my special mix of red paint. This is the same paint I used on the Antiqued Red Cedar Chest you can see here if you missed the makeover. The red is not too orange and not too blue. I decided the color I custom mixed was the perfect red. Now what to do about not having anymore of it?
I brushed a little bit of paint on a paint stick so I can take it to Home Depot and get the guys to mix a quart of the color for me. I’m calling it “Junktion Red”. My own custom paint color.

Antiquing Paint Using Dark Wax
I’m antiquing the bench just like I did the cedar chest I mentioned earlier. It’s the easy wax method. The Howard’s Wax in Golden Oak adds just a touch of darkness and patina to paint. I drew that black line with a photo editor. The left side has wax on it. See how the wax darkened the white and raw wood areas? I took this photo during the waxing process so the wax wasn’t dried and shined up yet.

Can you guess why the bench is standing on end? I was sitting there holding the three stars in place while the glue dried and I got tired of waiting. I went on to other things when I heard a kerplunk!
One of the stars fell off. I glued it back on and stood the bench on end so the stars would lay flat. Did the same thing for the horseshoe after the stars were dry. Do what you gotta do.

I shared this bedroom yesterday with it all tidied up and guest ready. I thought I would put the bench in there along the empty wall. I really like the less is more thing I have going on. So even though I like the bench and the color is perfect for the bedroom…..I will probably take it to the shop to sell.
The fresh flowers really pop. Love the bright yellow against the blue wall. I took the soda crates from the workshop….you know I’ve been cleaning it…..right? I really have. It’s an ongoing process but I’m not stopping until it’s in order again.
The crates were a couple I emptied while cleaning. I may keep the crates in the house for a while. They are the perfect size to store and display magazines.

And that’s how easy it is to give paint an antiqued look. What do you think? Going to give it a try?
I have another antiquing process that I absolutely love. I use Caromal Colors Toner to age the paint. I made a video of the process and you can view it below…..
How To Antique Furniture
Find E6000 and Howard’s Wax on the Petticoat Junktion Amazon Page here.
As always, thanks for being here and have a great day, Kathy
That bench is cute! I bet it goes fast!
So that’s why it was standing on end! I love that bench, especially the color.
Great job on the bench.
I have to say if I was a guest at your home, that bench would come in handy for my “stuff”…
Love that bench! Could use one at my front door! If you are like me I kept all kinds of magazines, as I subscribed to too many, but not any more. I feel like I can get anything I want on the internet, especially these blogs! Just trying to help you unclutter!!!
love love this and oh my what a change you made..this won’t last 5 minutes in the shop say hi to the jts and you have a good week end xx
I love that bench! It has given me an idea about what to do with a bench we have! I like when that happens!