Shabby Chic Furniture: The Art Of Distressing Paint
As an Amazon Associate, I earn from qualifying purchases.
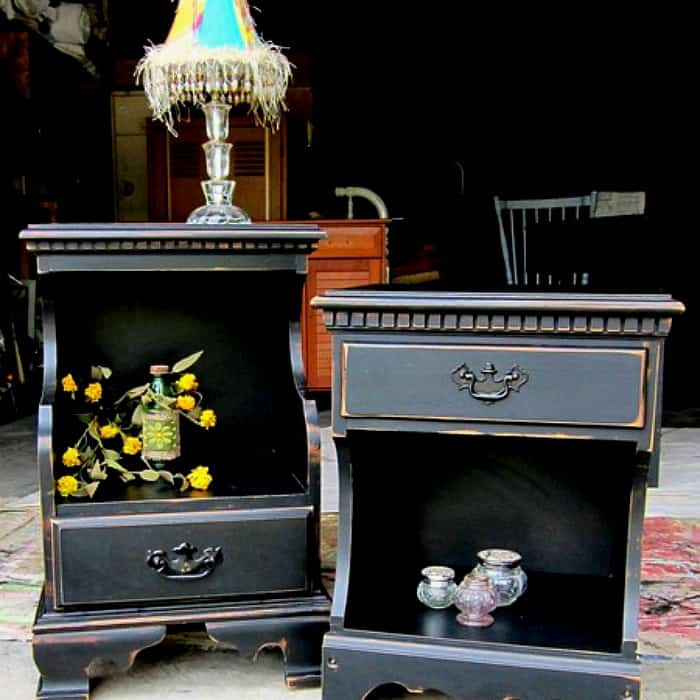
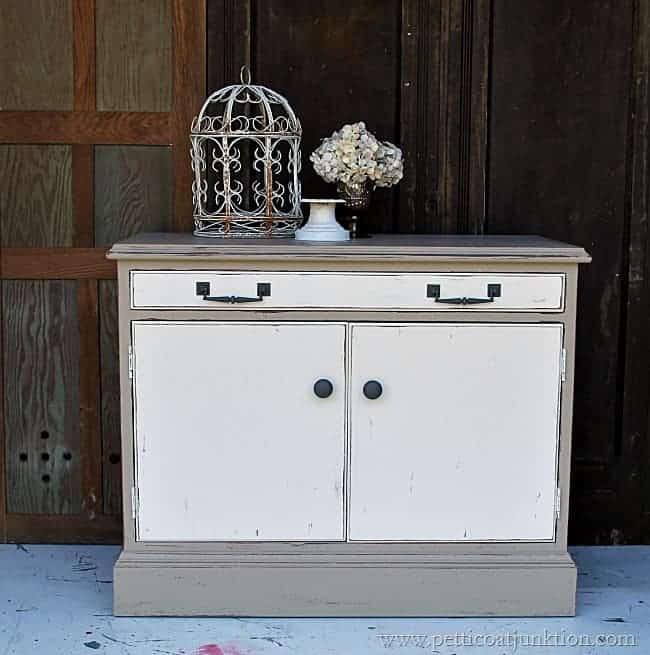
Shabby chic distressed white furniture is still popular at least with me. I love the look, and I think there is always a place for it in your home.
You guys know I’m the queen of distressing. I think I’ve been really good lately and haven’t gone over the top with the electric sander. Heck, I haven’t even taken it off the shelf in weeks, until this week.
I went all out and made a video showing how I distressed this little showstopper using an electric sander. The video is very short, under two minutes, and it’s a little further down in the post.
Before I get to the distressing details, you need to know this is Furniture Fixer Upper day and my friends have some truly awesome projects to share. The links are at the bottom of this post. On to my project….

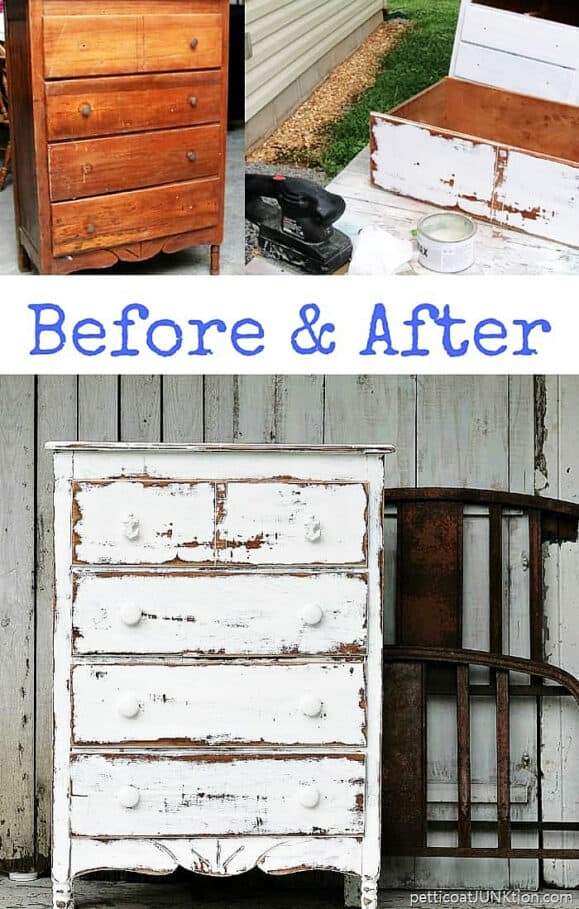
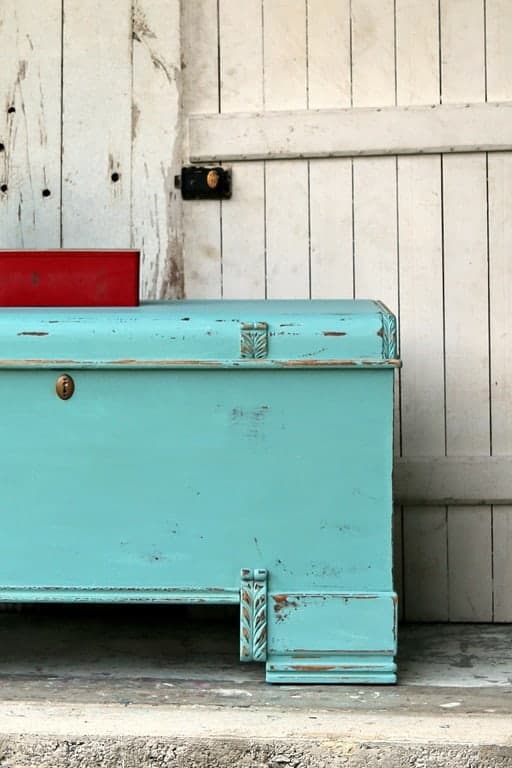
The chest came from my favorite junk shop and cost me $25. Plan number 1 for this chest was to paint it white, with no distressing, and add pretty fuchsia knobs.
It was a good plan, but then I thought of how cool it would be to paint the chest white and distress the heck out of it for a shabby chic coastal vibe. I remembered the anchor knobs I had in my stash, and plan number 2 was a done deal.

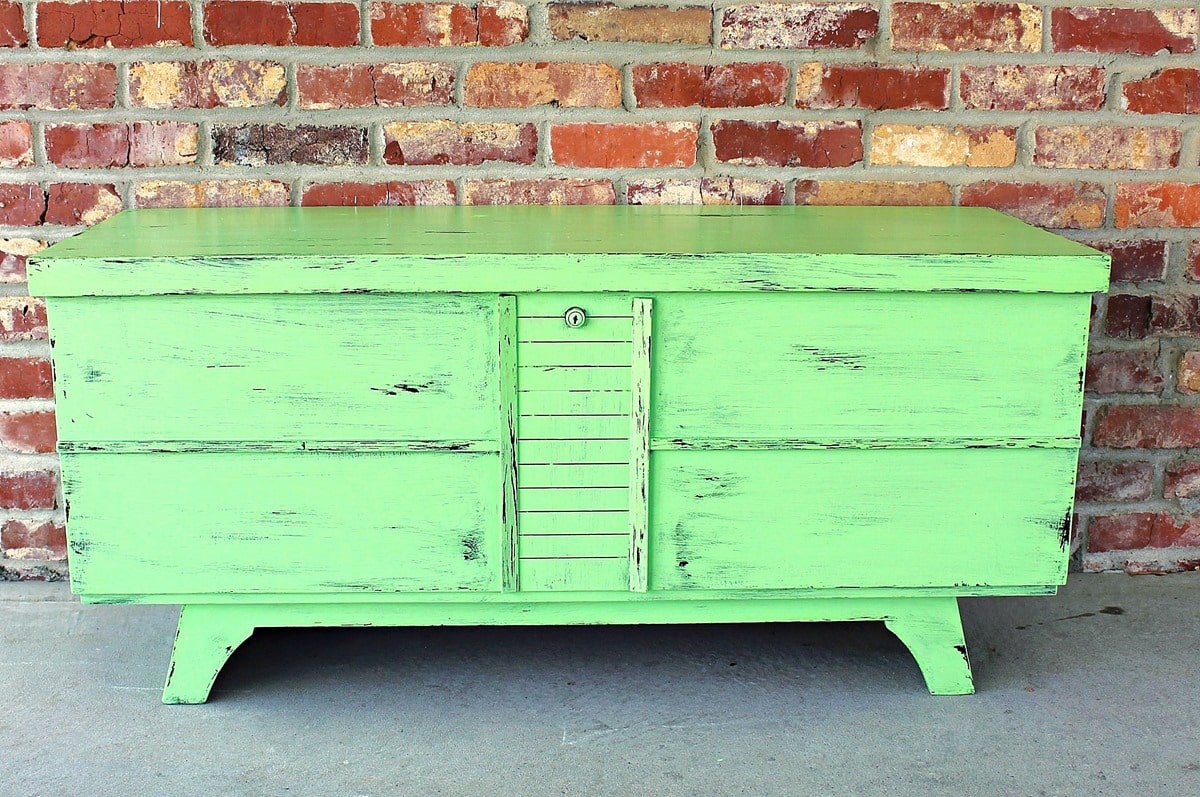
It was a mess. Who uses staples to hold drawers together. There were staples on all sides of this drawer.

The JTS patiently removed all of the staples and made the repairs using wood glue and clamps. I found a can of flat white paint on the shelf. Remember, I’m trying to use what I have and not buy new paint until I just have to.

One coat of paint wasn’t enough—two coats and on to distressing.

I went to town with my favorite electric sander. I brushed the sanded bits off with a dry paint brush then wiped the chest down with cheesecloth. Next, I applied a coat of clear wax. The wax gives the raw sanded wood a nice look.
To make sure you got all the details on how to use the sander, I made a video! Very short, less than 90 seconds.

I painted the wood knobs using the same paint. Distressing them was over the top too much. Yes, I said that. I distressed two of them and put them on the chest. No. Painted them again, and no distressing for the wood knobs.

The nautical anchor knobs were a long-ago find at T.J. Maxx. It’s about time I worked them into a project.

I know the distressing was too much for some of you guys, and that’s okay. Just be kind in the comments below. Well-thought-out and nicely worded constructive criticism is always welcome.
Time to take the latest Furniture Fixer Upper Tour! New projects from my friends, and this favorite makeover from me. I am in Arkansas with my Dad. He is in the hospital. Click the links below the photo collage to take the tour……
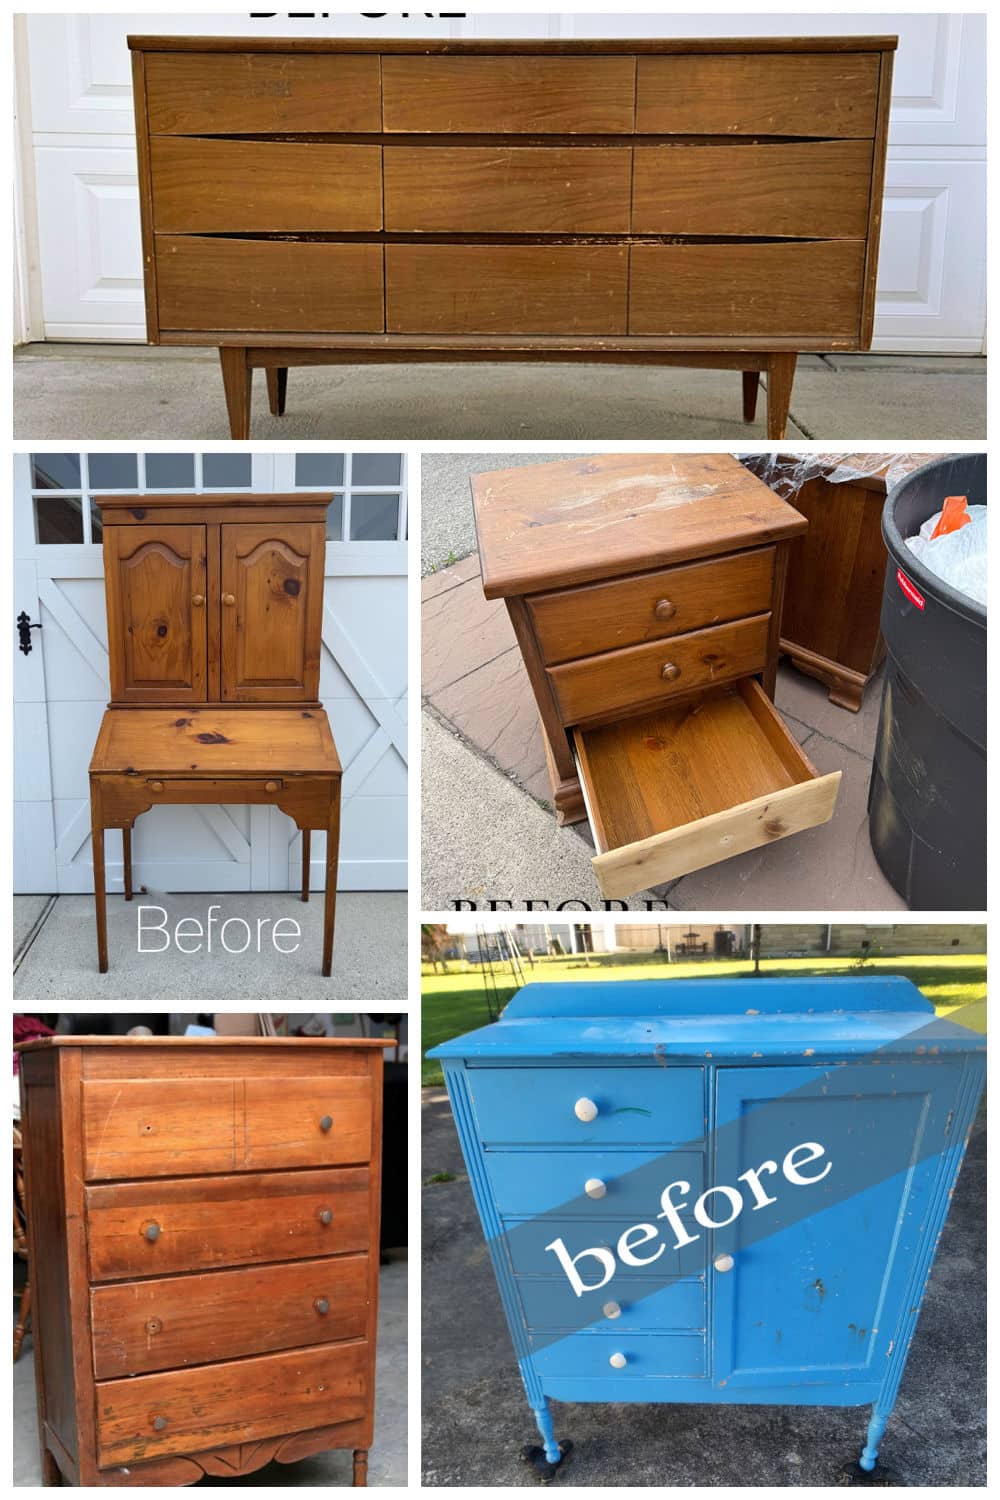
Furniture Fixer Upper Tour:
Painted Secretary Desk – Confessions of a Serial DIY’er
Gel Stain Furniture Project – Salvaged Inspirations
Antique Wardrobe Makeover – My Repurposed Life
Broken Dresser – A Ray Of Sunlight
Shabby Chic Furniture- Petticoat Junktion (you are here)

Below you will find the tour from the original post date. Just click the pink text links below the “before” photo collage.
1. Girl In The Garage
2. Just The Woods
3. Prodigal Pieces
4. Confessions Of A Serial Diy’er
5. The Interior Frugalista

Have a great day and I’ll see you next week!
I really love the over-distressed look on this piece! Well done! Thank you for sharing. I would be happy to own this lovely piece.
I love a distressed piece as well and this would fit right in in my shabby little beach cottage in my head lol! XOXO
This makeover is definitely different from what we usually see, and I love it! The shabby chic distressed look gives the dresser so much character and makes it stand out in the best way.
Very shabby chic coastal my friend and I love that you both worked on this piece! Pinned XOXO
I like the distressing. I think I would also add just a bit more off white paint worked in here and there, nothing intrusive, just to highlight the exposed wood. That for me would add to the ‘homely’ and pre-loved feel of this piece which certainly wasn’t there in it’s original condition and your treatment of it has really brought it back to new life in a big way. It’s very warm hearted and I can just picture it in a child’s room with a toy ship and a teddy bear on the top.
I absolutely LOVE this distressed piece and would be so awesome with the coastal vibe. I have never been very good with using wax on large pieces. I don’t paint anymore but when I see these really cool pieces it makes me want to go finding.
I love the distressed look…shabby chic. I like everything about the look, This piece is inspiring me to do my tv console. Shabby chic is such a romantic vibe……Thank you for sharing this gorgeous piece!
Looks amazing! I have a dresser very similar I want to try this on. I have some white flat and some white eggshell laying around…does it matter what type of paint I use and my second question is did you do any other prep (aside from the repairs/staples etc) did you prep the wood in any way? Thank you.
Hi I want to.thank you for this tutorial! I have been wanting to try this for a long time!
I just have one question, what kind of wax do I use? Thank you
I think it improves this rather uninteresting piece. Very nice, but. I love chippy, distressed stuff.
It’s beautiful. I’m a lover.
I love it! Very coastal chic.
I loved this little chest when you bought it but I am definitely not a fan of the heavily distressed look, The cute anchor knobs disappear into the white background. I would have saved them for something where they would show up. Sorry, you lost me on this one.
Yeah, the distressing is a little too much for me on this piece—I think. But the more I looked at it the more I thought it would be perfect for a cabin or beach house. And I think you did a great job on it. I guess for me it depends on where the piece is used as to whether heavy distressing is the right look or not.
I love seeing your projects.
This piece really did cry out for a good distressing. It turned out fantastic.
Some pieces look really good distressed Kathy, and this is one of them. The anchors are like a hidden surprise, I almost didn’t even notice them until I read about them in your post. Haha. The right buyer will Love this piece!
The dresser is GORGEOUS with the distressing!
I think that a heavily distressed piece speaks to me like a perfectly-painted, smooth piece would speak to someone else. Life takes all kinds. I think it looks wonderful! I really love your style! 🙂
Thank you Dena. Yes the prep is the most important and time intensive part of the makeover!
I’m so happy you ordered those staples out! (I need a JTS) Repairing and prepping a piece can take longer than all the following steps but it’s the most important IMO. I love the simplicity of the white with the distressing, it’s perfectly lovely.
Staples, seriously, talk about a MacGyver. I think the distressing looks fabulous on this dresser. Kind of reminds me of those popular naked cakes. One day I’m going to be brave and pull out my sander (we have the exact same model) and give this a try. Love it, Kathy!
This piece is off the hook awesome!!!
I love it! and I had to laugh out loud at the staples holding the drawers together. hehe Love the added video too. 😉
Wow! I’m not normally a huge fan of extreme distressing, but this one needed it! It looks GREAT!
You know I love a good shabby piece, and that look really works on this dresser! Love it! XOXO
Kathy, this lovely little piece might be more distressed than you usually do, but I don’t think it’s overdone. I think it’s pretty!
So glad you went wight he 2nd idea. I love it!
I think it looks great, and you could use it in most any room.
The drawers are a little more distressed than I prefer, but I love how the paint brings out the details on the bottom and the anchors are adorable.
You go girl! You know I love me some distressing and this one is perfect. Love the refreshed new (old ) look!
I like this piece. I paint furniture for resale and sometimes a piece just says ‘go for it’! Then other times I just hit the edges. I think it keeps my selling spaces interesting. Good job.