How To Repair And Paint A Wood Desk And Recover A Chair Seat
As an Amazon Associate, I earn from qualifying purchases.
Learn how to repair and paint a wood desk and then paint a chair to go with the desk. Next, you can recover the chair seat with a fun fabric that used to be a skirt. When painting a vintage wood desk you can decide to work with the flaws caused by aging or try to restore it to its original state. You guys know me. I work with the flaws! That’s why the technique of distressing paint was invented. I also have a chair to go with the desk and I painted it and re-covered the chair seat. The fabric choice might have you oohing and aahing.

This desk is so pretty now but it didn’t start out that way. There was a lot of work to be done before getting to the painting. Even though the wood was chipped in places and the desk had dents and dings paint is distressed showing the character of the piece.
Make all furniture repairs before painting.
Almost all furniture makeovers involve repairs. Some of the repairs are minor and some are very major. I always say painting is the easy part of a makeover it’s getting to that point that takes time and energy.

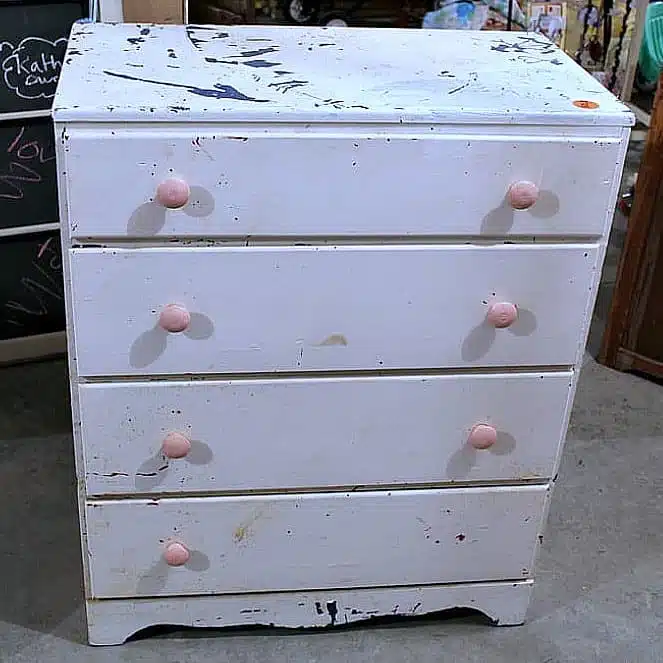
The JTS bought this table/desk at an auction. He’s getting pretty good at this auction thing. I really like the table but it needed a bit of work.

At one time there was something on the back…maybe a mirror. The table is pretty old but I have no idea about the age. It’s solid wood and that’s always good. I like the turned legs and the fact the table has a drawer.

I went through my reclaimed wood stash and found a board that would work perfectly on the back. The JTS cut it down to size for me.

And here is the little cutie working on the table. He likes helping with my projects. At least he says he does and some of the stuff I couldn’t do without him. He used the nail gun to attach the board to the back. I was sitting right there taking photos….and a break. I happened to notice…since I was sitting there doing nothing… the board was a slight ¼ inch too long on one end and ¼ inch too short on the other end. Gals are into the details.

The JTS taking the board off and re-aligning. He evened things out and then cut a stop block to nail inside the drawer slot. The drawer would just push in way too far without it.

I removed the drawer knob preparing to paint when I noticed there was an extra hole. Now I had to fill one of them in. I tried a new knob on the drawer and decided to use the top hole for the new knob. I put Frog Tape over the screw hole on the inside of the drawer. This keeps the wood filler and paint from flowing into the inside of the drawer. Elmer’s wood filler is my number one pick for this job.

I was taking photos for you guys when I realized I filled the wrong hole…duh. I guess I had the top hole on my mind because that is the one I wanted to keep. Good thing the wood filler wasn’t dry yet. I poked that out and filled the bottom hole. After the filler dries I’ll sand it down so it’s flush with the drawer front. Then it’ll be ready to paint.
How To Paint The Desk

Select the paint for the desk.
The paint is “ Botanicals “ made by Caromal Colours. I attended a two-day workshop back in 2007 in Pennsylvania when Caromal Colours was a very young company. Carol, the creator of Caromal Colours taught the class. I used the Country Living Caromal Colours line of paint for many years.
The Botanicals line is fairly new and Sara at the shop where I have a booth retails the paint. She hasn’t had a chance to try the latest formulation of the paint and she asked me to try it out. So I did. I’ll give you my opinion of the paint at the end of the post.

Paint the desk.
I applied a coat of paint to the desk and let it dry overnight. The paint covered really well so I just gave the desk a light coat of paint the next day….mainly to cover areas I missed. I always use a good brush and apply the paint with the grain of the furniture.
.

Distress the paint.
The desk had dings and chipped-off wood so of course I distressed the paint. No way was the desk ever going to look perfect anyway. I’m very impatient and I decided to wet sand. At a recent conference, the 3M vendor was handing out samples of their new 3M flexible sandpaper so I gave it a try. I love it. It doesn’t tear and I can bend it or roll it or whatever.
Anyway, the second coat of paint was still a little wet to the touch and I just started sanding. The paint came off pretty easily and I was careful not to overdo it. The photo above shows the beautiful crackle of the original finish on the desk.

Select the right drawer pull.
Moving on to the drawer pull/ curtain tieback. I have a bag of seven of these. Someone told me that might be curtain tiebacks. I thought the rose would be perfect for the desk…if I painted it.

The pretty paint I decided on is the Krylon Cherry Red Gloss. Once the rose was dry I “dry-brushed” a little fuchsia paint over the petals. Just so it wouldn’t be so flat looking.

The red rose had a screw embedded in the back so all I had to do was screw it into the hole in the desk drawer. The only problem is the hole was too big. I filled that hole with wood putty and painted over the wood putty after it dried. I made a new hole a little lower on the drawer for the new red rose pull. There’s always something. NO project goes as planned.
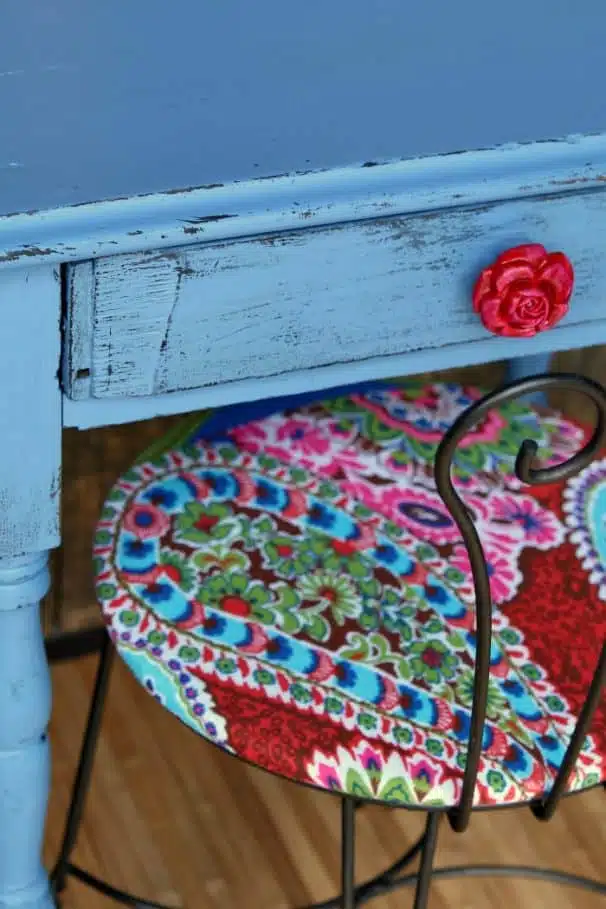
That cherry red paint is so pretty and the knob really compliments the fabric seat.

Moving on to the vanity chair which is a purchase from the Nashville Flea Market.
How To Recover a Chair Seat

Remove the seat from the frame.
I turned the chair upside down and removed the seat. It’s easy to remove the screws holding the seat to the frame.

Then I painted the metal frame using RustOleum Metallic Oil Rubbed Bronze Spray Paint. Five minutes and the job was done.

Select the fabric for recovering the chair seat.
The fabric is from an old shirt. I love this shirt. I wore it for three or four years then something happened. It was a combination of shirt shrinkage after so many washings and dryings and weight gain on my part. Just the facts. But, I kept the shirt and put it in my fabric stash in the workshop. Glad I did.

Cover the chair seat.
I cut the bottom half of the shirt and it was barely big enough to cover the seat. It’s a good thing the fabric was stretchy and the seat was small.

I stretched the fabric all around the seat and put a ton of staples around the sides.

The only thing left to do was trim off the excess fabric and put the seat back on the chair.

I like the Botanical paint. I wasn’t sure about it at first. The paint is really thin and I was afraid it wouldn’t cover well but it did. The paint takes a little longer to dry than any of the paints I normally use.

I like the sheen on the finished project too. The paint contains a sealer so no need for wax or additional sealer.
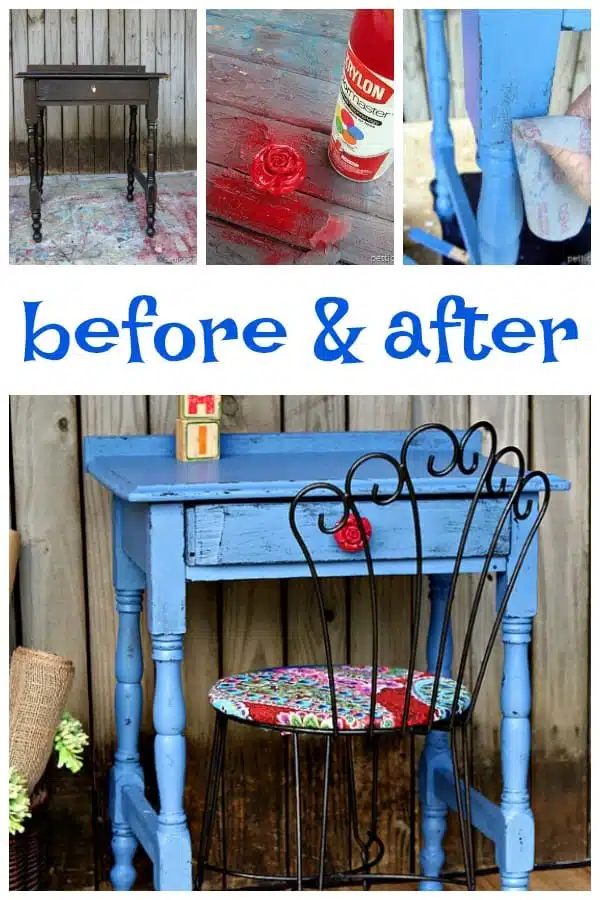
Repaired and Painted Desk With Chair
And that’s it folks. The project sounds like a lot of work but it really wasn’t. It’s actually two projects…..desk…and chair.
Products used in this project:
Shop thrift stores/flea markets/auctions for furniture!
RustOleum Spray Paint – Oil Rubbed Bronze
Krylon Spray Paint – Cherry Red Gloss
Botanicals Paint – Iris
3M 150 Grit Flexible Sandpaper
Staple Gun (similar)
Fabric of choice
Watch my short video on how I distress paint below…
[adthrive-in-post-video-player video-id=”hp6s2SF0″ upload-date=”2016-10-03T22:16:50.000Z” name=”Petticoat Junktion – Painting And Distressing Home Decor” description=”spray paint,distressed, how to distress paint,white paint” player-type=”default” override-embed=”default”]
How To Distress Paint
As always, thanks for being here and have a great day, Kathy
Thanks
You know, that would look good. Maybe more fitting for the vintage piece?
It’s a very cute set now, Kathy. The colors wouldn’t work in my house but the the fabric and paint choices are very compatible and cheerful.
I think I’d like to try that flexible sandpaper. I always have trouble with the stiff stuff in small or intricate places.
Thanks for showing what you can do with a piece that is in serious “vintage” shape.
Love it!!!?
I liked the desk and chair, but for me I would have preferred to have a darker glaze over the blue paint. I’m just not thrilled with the bright blue, that is a personal choice.
I absolutely love the color choices!!
Yes, I love the chair!
Thanks Karen
That is really pretty. I love the color combination. Thank you for sharing!
Very pretty and what an unusual chair, it really makes the set.
A shirt? Really!! Smart move saving it because it makes for a gorgeous upholstered seat. I’ll be rethinking donating my old clothing after seeing this. LOVE!!!
Nice job! I really like the rose drawer pull. The blue of the desk and the bright fabric on the chair really complement each other. An appealing combination.
you always do such great work
Beautiful!!! What great colors
As always very cute…I have a desk similar to this one that I purchased on the Hwy 80 garage sale (Texas side). The problem with my desk is it was painted very poorly and had a lot of drips and paint runs. Any suggestions other than a lot of sanding?
I never would have thought to use old clothing! Great move.
Very cute!
I’m about to paint laminate shelves…..using primer, then paint. I see you mentioned sealer and or wax to finish. is this a necessary step, and can I skip it? Thanks for all you ideas and inspiration!!