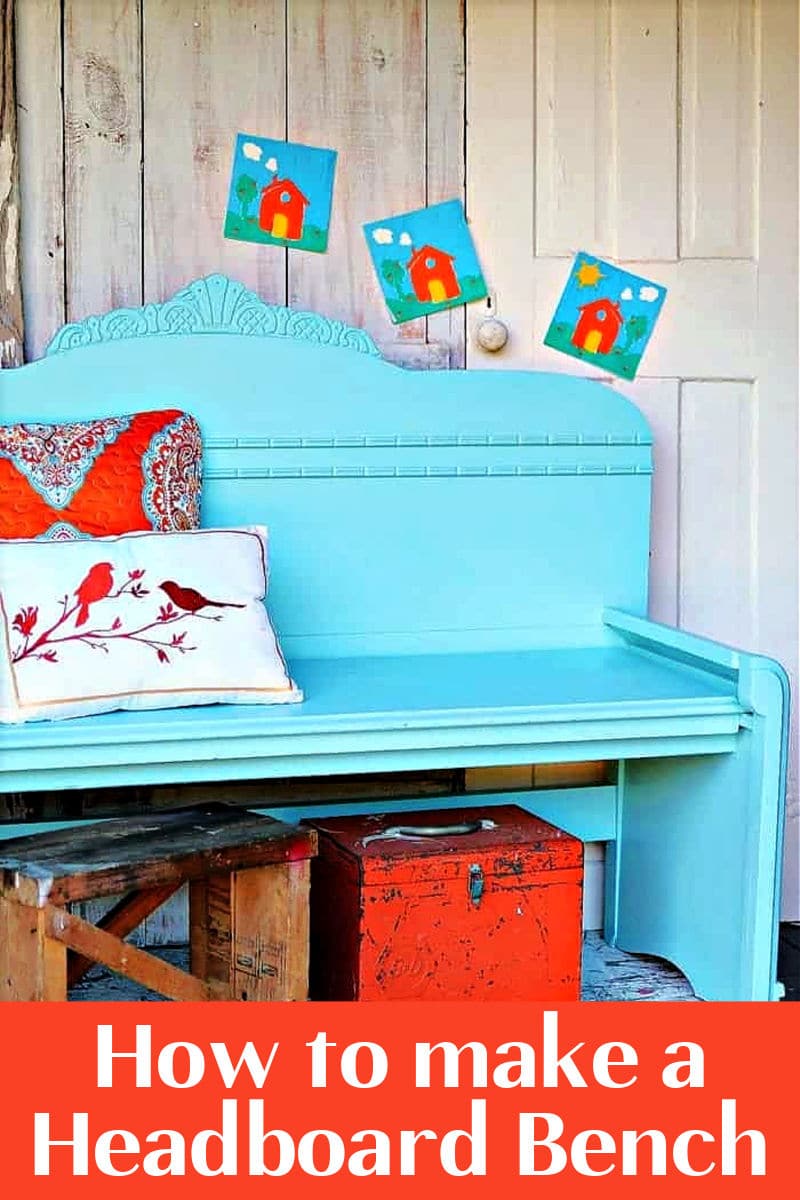
How To Make A Headboard Bench Using A Vintage Bed
As an Amazon Associate, I earn from qualifying purchases.
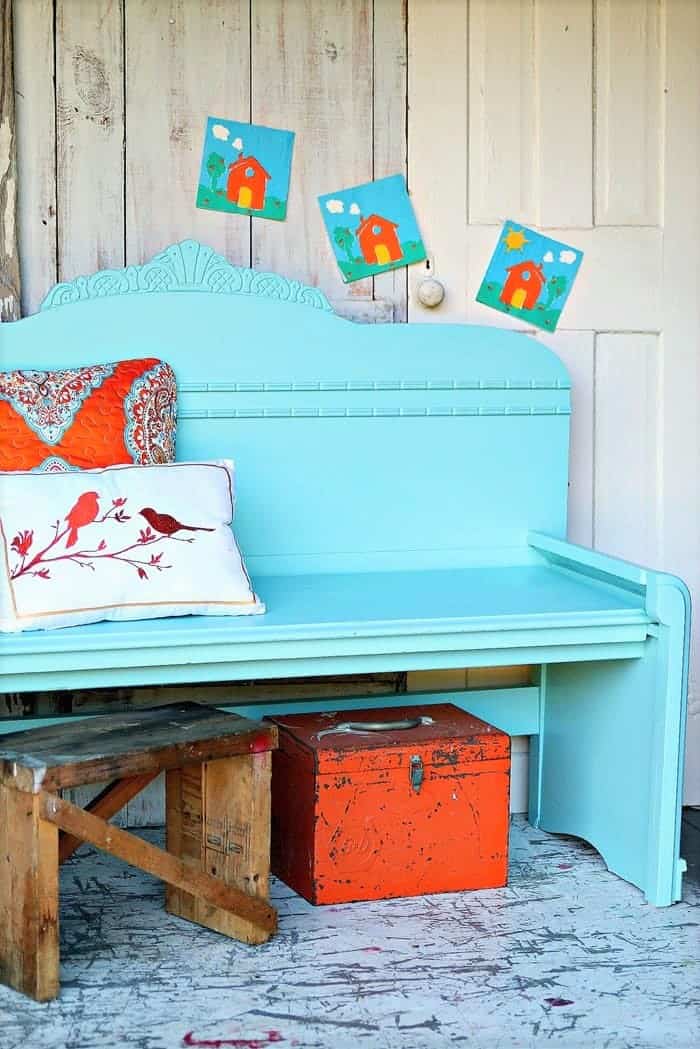
Create a unique headboard bench using the headboard and footboard of a vintage Waterfall Bed. This was a trial and error project for me and hubby. Meaning there were a lot of errors before we got stuff right.

I bought This vintage Waterfall headboard and footboard at my favorite junk shop. I don’t remember how much I paid for it, but it was probably around $20-$30. Waterfall furniture, which features many rounded edges, tops, and corners, was made in the 1930s and 40s.
This project took a lot of work but the JTS and I muddled through it. It was our first time to make a bench using a headboard and footboard and we learned a lot along the way. I even had problems with the paint color. The first plan was a no-go. The bench did turn out great!
How To Make a Headboard Bench
I cleaned the bed before we started on the project, but as you can see, there was a lot of discoloration in the stain. That’s okay because it will get a paint job after the transformation.

1. Cut the footboard to make the sides of the bench.
We measured the footboard so the sides of the bench would be 18” deep which is pretty standard for seating.

Then we cut the footboard using a circular saw (cordless Ryobi). We cut out the middle of the bench and used the two ends for the bench sides.

We cut the footboard with it lying on its front side but had to flip it over to cut the curved detail.

2. Measure and cut the footboard to the preferred seat height.
We decided the height of the seat was going to be too high if we left the pieces as they were so we cut a bit off the bottom of each side/bench end.
We placed the pieces of the bench-to-be together just to see what it looked like and decided the headboard/bench back was too tall. It looked a little out of proportion so we cut 2 inches off of the headboard legs.

3. Cut reclaimed wood or new wood for the bench seat.
I found a reclaimed sofa tabletop in my junk stash. We could have used new wood to make the bench seat, but I liked the look of the reclaimed table top, and it was the perfect length. A match made in Heaven—or so I thought. More on that later.

There was a small apron on the underneath side of the tabletop, and we left it as is. The only cutting we did was to rip one long side down to the apron. This means we basically cut the decorative edge of the wood off of the long length of one side.

4. Attach the bench seat to the bench sides.
To attach the seat to the sides we set the piece we cut for the seat on the inside lip of each bench side.

We used a brad nailer to hold the seat to the sides for temporary attachment. This made it much easier to put all the pieces together before using screws to make the bench sturdy and secure.
5. Attach the bench seat and sides to the headboard

The JTS (aka Junktion Technical Specialist, aka hubby) used really long screws to attach the headboard to the sides of the bench. He drilled from the backside of the headboard into the end of the bench side/arm.

6. Attach wood brace for the headboard
To ensure the bench was sturdy, we added a wood brace between the legs of the headboard. We used a 2×6 found in the wood stash and ripped it down the middle.

7. Add wood support under bench seat
For added seat support we used the other half of the 2×6 under the seat along with a 2×4. The wood seat supports were attached to the bench sides and the reclaimed bench seat.
The back lip of the seat was attached to the headboard along the whole length of the seat using screws.

We did extra work to make sure the bench would be sturdy and secure. We wouldn’t want it to fall in!! And keep in mind this is our first DIY bench project and we developed our plan as we went along.

The JTS volunteered to try it out. I think he just needed a rest. Putting the bench together took us several hours over four or five days. The project was stressing us out.
We needed a timeout one day because we were having issues. We know when to stop for the day before things get too heated, lol. Do you and your significant other do this, too?

8. Painting the headboard bench
Now it’s time to paint the bench but I’m not sure about the color. No plans to paint the seat. That was the whole reason for using the reclaimed piece. Leave it as is, except for cleaning and refreshing.
Well, I chose the wrong paint color. Choosing the right paint color is sometimes the hardest part of a furniture makeover. My original plan was to paint the bench black and distress all those lovely details.
I planned to leave the brown wood reclaimed tabletop as is. I started painting and stained the unfinished wood braces to match the bench seat, but I didn’t love the look.

I was visiting Arkansas, and my sister gave me her opinion on the color of the bench. She felt the same way I did about the black and the stained wood.
After talking it over, we both came to the conclusion that the bench should be a different color and the same color all over. Thanks little sis.
I pulled a jar of turquoise paint I mixed up myself from the paint shelf and went to work. After two coats of paint I was satisfied and moved on to distressing the paint.

Distressing the paint
I started on the headboard details distressing the paint by hand with 100 grit flexible sandpaper. I stepped back to look at the distressing and didn’t like it at all. The black paint showing through just made the paint look dirty and the blonde finish showing through looked like raw wood.

Paint over the distressed areas
I pulled out the paint and a paint brush and painted over the distressing. It looks much better not distressed. I show you all the processes I go through in a project (well, most of them) so you know that nothing goes smoothly and it’s okay to change plans.

The headboard and footboard were not perfect. There were little dings and imperfections but the overall look works. I like all the curves and details on the vintage bed pieces.

Miss Sofi couldn’t help but get in the photos. When I try to take pictures of her she either makes funny faces or hides her face. As sure as I’m trying to take photos of a project she wants in. I don’t mind at all. I love seeing that smiling face.
So what do you think? If you don’t want to attempt the bench build, you might find a headboard bench in a local store to paint it and make your own.
I’m a fan of the turquoise color I mixed from leftover paints. I plan to paint a sample board and have my paint mixed at the hardware store. I’ll share the color code once it’s mixed.
Seriously, we made the headboard bench the hard way. I have the vision for the projects but sometimes the vision turns out to be a nightmare. Using the reclaimed sofa table top was where I went wrong.
It would have been easier to make a support for the seat and then use plywood as the seat (like my friend Marie did here). Live and learn. Next time….and there will be a next time….well, we have a little experience in headboard bench building.

Thanks for being here and have a great day, Kathy

Looks so cute, so very creative. Love the chosen color of blue. Thank you for sharing at Love Your Creativity. I am happy to feature your headboard bench on Sunday.
Wow! It looks incredible. Great job! Visiting from Creatively Crafty Link Up.
I love your bench..it has my style written all over it!! Love the style of the headboard, I have never heard of waterfall furniture, but I love it! I especially love the colour,it’s my favourite,along with teal and a shade of blue I mix up myself.
Well done,it’s a beautiful bench.
Noreen in Ireland!( but I’ve been to Arkakasas,lived in Texas too)
I love this bench. I wish I lived closer so I could buy the items you recreate. Such a crafty mind. Love the fact you work together as well. I have noticed when I work too long, get too frustrated I make mistakes so now I quit or move to another project. Thanks for sharing the details of your great projects. I love to learn.
Absolutely BEAUTIFUL bench and the Turquoise is so lovely!! Good job and thanks for sharing!!!
True about the turquoise!
This is one where i think a tamer color would have worked better. That turquoise is getting pedestrian.
hahaha
Great job you two!!! Never knew bed was called waterfall. Randy and I worked in yard today. He let me be the boss for one day!!! Lol.
Great Job!
That turned out great! Sometimes my vision isn’t the straightest path to completion either lol
Perfect color! You did a great job. Never in a million years could I imagine my husband helping me with this type of project. Your husband deserves a gold star.
Wow, I remember those beds from my childhood. I still like them, but never knew they were called Waterfall beds. What an awesome job you and the JTS did! Personally, I liked the black and brown look better, I would use it indoors, perhaps in an entryway!
Miss Sofi is growing up and she is just beautiful!
Love the bench and color fabulous! The two of you created a masterpiece ?
I love that you used the reclaimed table top for the seat! It makes the bench look very substantial!
Good job!!
Love the color!!
I really appreciate that you share the “mistakes” do-overs and changes of plans. When this happens to me, I get self-critical and doubt that I should be refinishing furniture at all (on the worst days). Luckily most of the time I’m able to take a deep breath and go to plan B. I’m so glad I am no the only one this happens to.
I have seen, and made a lot of headboard benches. But, I have to say this is the most beautiful I’ve seen!!
The table top may have been a “mistake” to you, but, the look in the finished product is just awesome!! Thanks for the great guided tour of “how to”!!
Out of all of your projects this is my absolute favorite. Well done. Love it!
I love it ! The color is great . Did you use latex ?? I’ve read your tutorials and know you use latex a lot .