How To Paint And Antique A Wood And Iron Table To Make It Look Old
As an Amazon Associate, I earn from qualifying purchases.
The JTS (aka Junktion Technical Specialist, aka hubby) bought the angel/cherub wood and iron table at an auction. I don’t remember how much he paid for the table because it’s been sitting in the workshop for a few months.

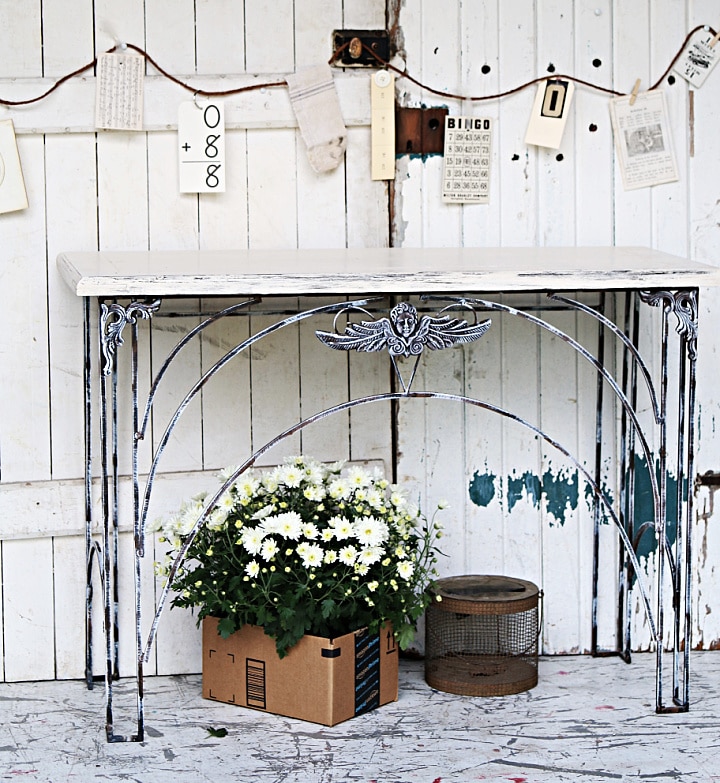
This is how the table looked before the makeover. I’m not a big fan of angels or cherubs on furniture and I planned to remove the decorative iron piece. The iron cherub (looks like a cherub face so that’s what I’m calling the piece) applique was easy to remove from the table base.
The only problem was a small gap (one inch) where the two pieces of rounded iron met at the top. I wasn’t a fan of the gap. I searched the workshop for something to replace the cherub….no luck. I was more fond of the cherub than the gap, so the it went back onto the table.

There was a big gap running across the wood tabletop. The JTS filled the gap with wood filler. Once the filler was dry, I sanded it flush to the table. There were a few low or sunken places in the filler, as there usually is as the filler dries, so I filled the low spots and repeated the drying, sanding process.

I decided to paint the tabletop with Beyond Paint in off-white. Beyond Paint is a three-in-one paint meaning it requires no priming or sealing. So all you have to do after making sure you have a smooth surface to paint, is paint the project.

Next, I dry-brushed the iron base with the same off-white paint. I didn’t plan to paint the base, but the dark iron was too stark against the white tabletop.

Now it’s time for the magic. I applied Caromal Colours Toner with a brush. You can see the toner is dark and I applied a lot of the toner to the top. It’s best to work with the toner in small areas at a time.

I wiped the toner back with a damp rag which means I wiped some of the toner off. This process wipes the toner smoothly onto the paint. Wipe off a lot of toner or just a little depending on the look you are going for. Once the toner is dry it is there to stay. The toner gives the paint an antiqued look.. I use this product a lot.

The toner will sit more heavily in corners, grooves, etc. which looks really cool. I did a little distressing with sandpaper by hand once the toner was dry.

I have to say the cherub does look nice. I think the bit of dry-brushing helped.
How about the cricket container? I got it at My Favorite Junk Shop. You guys would be so jealous of the junk shop. I wish I could take each and every one of you junk shopping with me.
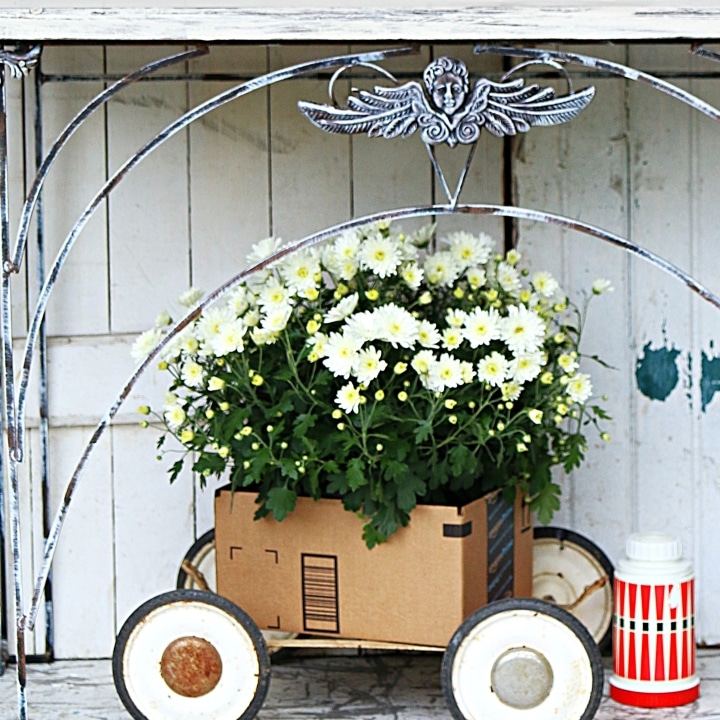
Does anyone recognize the plant “container”? Yes, it’s an Amazon shipping box. Those things are awfully handy. I painted the table the first part of October, took it to the shop, and it’s sold. I guess the Cherub Table turned out pretty well.
If you like this table, you need to see my plant table made from an aquarium stand…How To Make A Reclaimed Wood Plant Stand
I am pleased you replaced the angel, because this is where it belongs. Your table is breathtaking. Thanks for sharing.
Love it, Kathy – so much better now and especially after you hit the iron with the paint brush. No surprise it sold quickly. Wishing you the best next week with your parents and hope you had a wonderful Thanksgiving lunch this afternoon. I’m putting our tree up tonight too. Not decorating it until Sunday when I have more time. So you’re not the only blogger behind the eight ball.
Gracie, I can see why you don’t have any steam left. You need to treat yourself. Sounds like your husband works for a wonderful company. So sorry about your mother. That is hard. I hope you and your family have a happy Thanksgiving. Thank you for sharing.
The table is lovely! You really brought out its potential with the white paint!
This will be the first year in over ten years that I will not be hosting Thanksgiving dinner. My husband, son and I, along with my youngest daughter, her husband and my young granddaughter will be having a quiet dinner that is prepared by the company that my husband works for.
I take care of my mother, who has vascular dementia, during the week, and two days per week I have my granddaughter at my house. I just don`t have enough “steam” left in the “boiler” for hosting a large celebration this year.
May you and your family have a wonderful Thanksgiving, Kathy!
Thanks Kim!
Sounds like fun. I usually decorate the tree all by myself. After our lunch my son and his family will be going to his wife’s family Thanksgiving dinner. I know you will miss your grandchild who will be with his Dad. That must be hard. Glad you like the table!
I don’t usually decorate with angels either except at Christmas. But I love that table. Our Thanksgiving Dinner is at my house with my family which is me, husband, 2 daughters, 1 son-in-law and 4 grandchildren. Because of divorce one grandchild has to be with his Dad. But this year a girlfriend and a boyfriend of two of my grandchildren will be joining us for the first time.
After dinner we decorate the Christmas tree. That is a HUGE help to me!!
I love the angel table. Great item!