Vintage Sideboard Painted With Miss Lillian’s No-Wax Chock Paint
As an Amazon Associate, I earn from qualifying purchases.
Give a vintage sideboard a modern look by painting it with Miss Lillian’s No-Wax Chock Paint and then whitewashing the paint. Miss Lillian’s No-Wax Chock Paint is fabulous. The water-based paint is self-leveling so no brush marks. And the best part….it has a built-in sealer and doesn’t need waxing like chalk paint does!

Well, this is one of those times when I painted a piece of furniture and hated it. So I painted it again and now I love it! Not the first time this has happened and I’m sure it will not be the last. I’m even going to show you the paint finish I hated so much!
Today is Furniture Fixer Upper Day and the tour links are at the bottom of the post. I know you enjoy this tour as much as I do. So many ideas.

The vintage sideboard was an auction buy and the price was $77. It is the waterfall style popular in the ’30s and ’40s. Not my favorite style of furniture but some pieces look really nice painted. This sideboard is a good example.

The top was in rough condition with a lot of discoloration and some splits in the wood.

There was chocolate candy melted and stuck hard and fast in the right side cabinet. I finally peeled a lot of it up using a paint scraper. It was still a mess that I couldn’t remove with Goo Gone or anything else. I tried sanding it off too. No luck. I cleaned it as best I could and placed a heavy paper liner in the two drawers and both side cabinets.

I removed all of the drawer pulls, vacuumed the sideboard, cleaned it with Simple Green, then used painter’s tape in the areas I didn’t want to look messy with over-brushed paint.
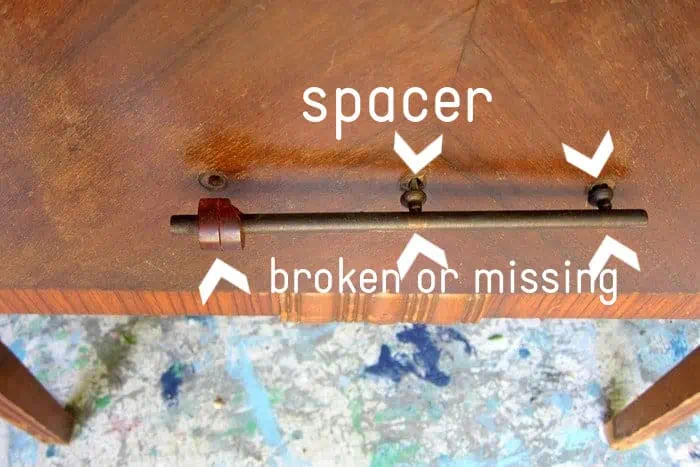
The plastic or Bakelite (?) parts of the drawer handles were all broken and a few of the small spacer pieces were missing. So what did I do?

I had enough of the spacers to use on the ends of the long pulls so I could just do away with the middle spacer and screw hole. At first I forgot to do anything about the extra hole until I started painting the first drawer. The handles on the drawers were the longest and originally had the three spacers and three screw holes.
The long pulls will work just fine without the middle attachment. I used putty to fill the middle screw holes on each drawer and sanded it smooth to the drawer surface once it was dry. I didn’t need to do any extra work for the short pulls on the cabinet doors.

As you can see from the photo with the putty filler I painted the sideboard black. I love black furniture. It is so classy looking. But the only black paint I had on my shelf was FolkArt Home Decor Chalk and there is no shine to this paint at all. Just has a flat look. I could have waxed it, ugh.
Or I could have brushed on a coat of sealer with a satin sheen but what did I do instead? I used a laying block and added metallic gold highlights. A lot of gold highlights. To say the least the gold accents on the black did not turn out as well as the gold on the turquoise cedar chest here…How To Add Metallic Gold Accents to Painted Furniture. At this point I let the sideboard sit for a few days until I could decide to finish up the black and gold look or go with something else.

I decided on something else and went back to the paint shelf. Nothing in my paint stash appealed to me. It was going to take a unique color and finish to bring the sideboard into the 21st century. I bit the bullet and bought some Miss Lillian’s No-Wax Chock Paint, color Graystone, at the shop where I have my booth. I really like to use my stash of paint instead of buying more.

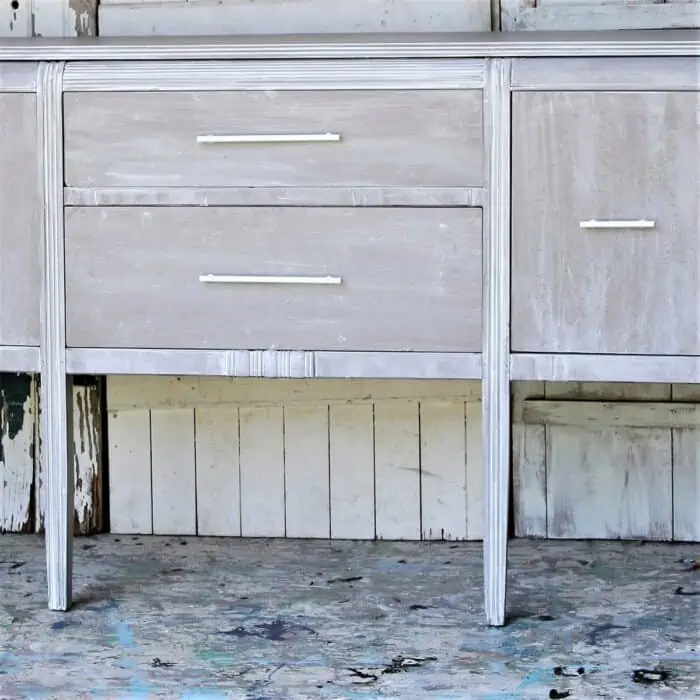
This is what the sideboard looked like with one coat of paint. I brushed on two coats and that did the trick. The paint covers really well.

Next, I decided to do the same whitewash finish I did here on another piece where I used Chock paint, color English Tapestry. Very similar to the Graystone color.
I love to whitewash paint. The finished look is so fresh and light. To do the whitewash technique I mix an off-white paint (no certain color) with water, about a 50/50 ratio. Then I use a rag to wipe the whitewash onto the painted surface and into the pretty details. Then I wipe the whitewash back or off until I get the look I’m going for. I have a video in the post below from a prior furniture makeover showing just how to do the whitewash technique.

To add even more whitewash to the details I used a tiny paint brush. Some of those small details are hard to get the paint into using a rag.

Just add white paint where you want the details highlighted. If you paint outside of the lines just smudge it or wipe it off with a damp rag.

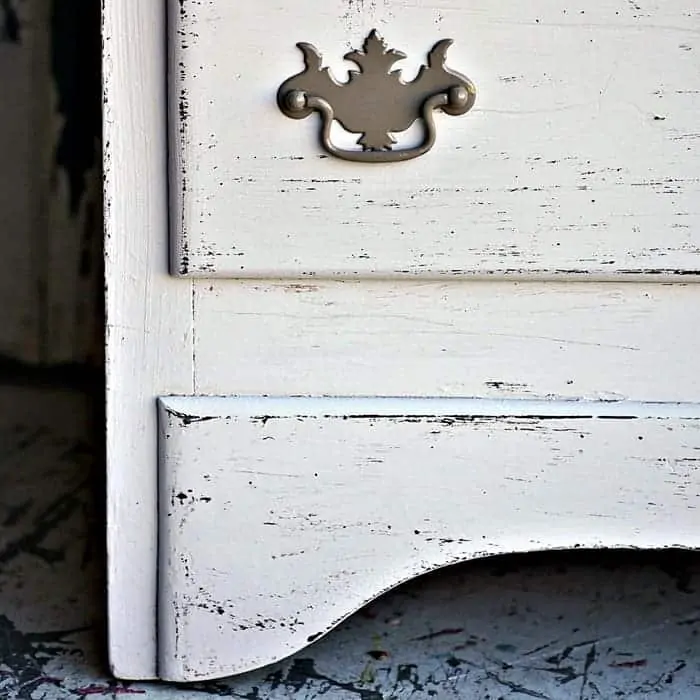
In the photo above you can see where the veneer is chipped off. That is the perfect place to add a bit of whitewash.

The technique does take a bit of practice but once you get it down you can whitewash a sideboard or a piece this size in about an hour. Remember it shouldn’t go for perfection to get the perfect look.

Even though it doesn’t look like it in the photo above I did whitewash the inside of the back legs. I guess it’s the shadow on the leg making it look dark.
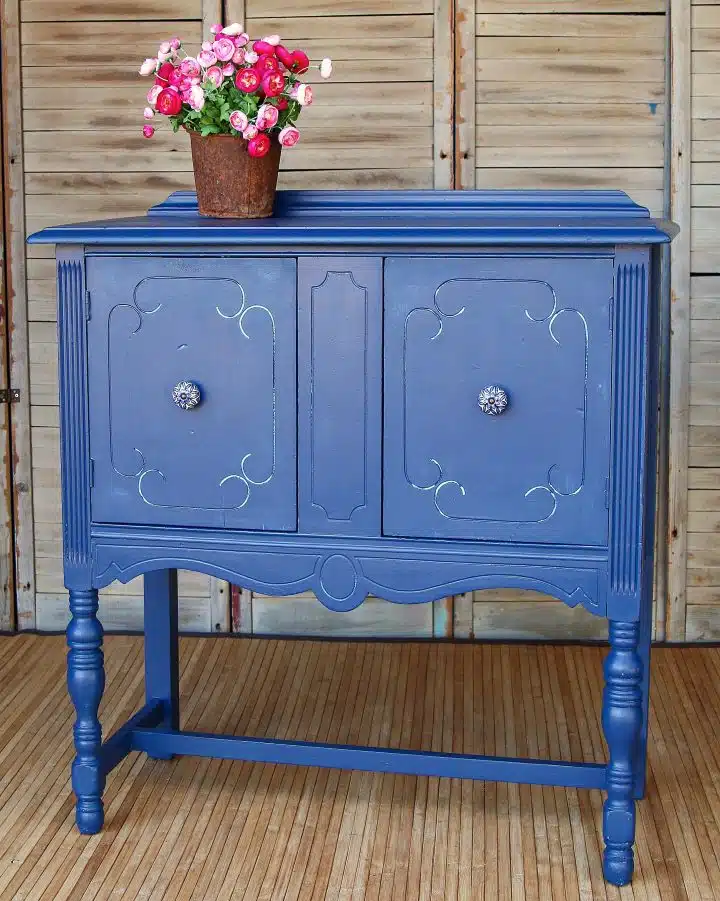
The white paint makes the details really pop and the sideboard doesn’t look outdated anymore.

I spray painted the drawer pulls with Rustoleum Spray Paint, and color Satin Blossom White. View the video below to see how I whitewashed a chest of drawers….
[adthrive-in-post-video-player video-id=”ac6sWRNo” upload-date=”2020-08-26T07:00:00.000Z” name=”How To Whitewash Painted Furniture.m4v” description=”Tutorial on whitewash technique for painted furniture. Whitewash is easy. Just mix water with white latex paint then brush on painted furniture and wipe back whitewash for desired look.” player-type=”default” override-embed=”default”]
How To Whitewash Painted Furniture
I forgot to take a photo of the inside of the cabinet and drawers before taking the sideboard to the shop. I used the same liner to line the cabinets and the drawers as I used on this piece here.

How do you like the paint color and are you familiar with chock paint? Please leave a note if you have time before heading out on the tour. Just click the blog links below the “before” makeovers photo collage for the tour……..

Furniture Fixer Upper Tour
Painted Dresser With Transfer – Confessions of a Serial DIY’er
Painted Faux Linen Dresser – Salvaged Inspirations
Green Painted Furniture – Girl In The Garage
Vintage Sideboard Painted – Petticoat Junktion (you are here)
As always thanks for being here, Kathy

That came out beautifully. I love the color!! And the white wash makes it!
This piece is super versatile now and I’m sure it will sell quickly, Kathy! xo
I like the color and finish. I’ve never heard of that paint brand before. I’ll have to check it out. Really good work!
I was digging the black lol, but the finished piece is light and fresh and definitely not dated anymore! XOXO
I’ve never heard of this brand of paint but it did a gorgeous job on this buffet! Have a super day my friend! XOXO
I liked the first paint color best..lol….thanks for sharing your techniques..