How To Add Metallic Gold Accents to Painted Furniture
As an Amazon Associate, I earn from qualifying purchases.
Add metallic gold accents to painted furniture, in this case a Lane Cedar Chest, using Martha Stewart Crafts Paint, a small paint brush, and a layering block.
I wanted to paint this cedar chest turquoise but other than that I had no plan. Usually, I distress the paint or maybe “age” the paint a little or try some other special paint technique. I kept thinking about distressing the turquoise paint but for some reason, that idea just didn’t appeal to me.

It took a couple of days to come up with the idea for the gold accents. And now I’m patting myself on the back! The turquoise paint with the gold accents is so pretty. I wish you guys could see the piece in person. The gold really shines when the light hits it. I have all the paint details for you plus today is Furniture Fixer Upper Tour Day.
The bold orange links in this post have details on similar projects or supplies used in the project so just click the links. Also, check out the MORE TUTORIALS FOR YOU section at the end of this post!
The cedar chest is one of my auction buys. The price was $71. With the price of used furniture and paint supplies these days I don’t make a lot of profit when I sell my pieces at the shop. Painting furniture is more or less my hobby.

I’m sure most of you know that the old cedar chests lock when they are closed and the only way to open them is to push the button on the outside. For that reason, we cannot sell cedar chests with the original locks. I am definitely okay with that. You can contact the Lane cedar chest company and they will send a replacement for the original lock. This cedar chest isn’t a Lane so not sure about it but I always remove the locks!

I covered the hole on the outside of the cedar chest with a fancy little keyhole thingy I had in my hardware stash.

There was damage to the veneer in several places but the most prominent one on the top needed some work. It looked like someone had covered part of the damage with wood putty but they didn’t do a very good job. And why putty the place if you aren’t going to paint the chest afterward?

I covered the whole area with 3M putty and then sanded it flush with the surrounding area.

See how nice and smooth that looks. I do a good job with wood filler and putty.

The inside of the chest was in great shape and you can see it has an interior shelf for storing small items. I applied painter’s tape around the inside top edge of the chest to keep it from getting painted in that area.

I started using the blue paint in the container shone on the right in the photo above. I applied one coat of paint and decided it was too blue. I found several colors of dark turquoise in my stash and mixed those with some of the blue paint to make the pretty turquoise color on the left.

You can see how the blue paint color looked after one coat of paint. Not the turquoise color I was going for at all. Sometimes you cannot tell the true shade of a color until the paint dries and you look at it in natural light.

The photo above shows the difference between the blue and the turquoise paint. I had just started brushing the turquoise paint on the bottom left corner of the chest.

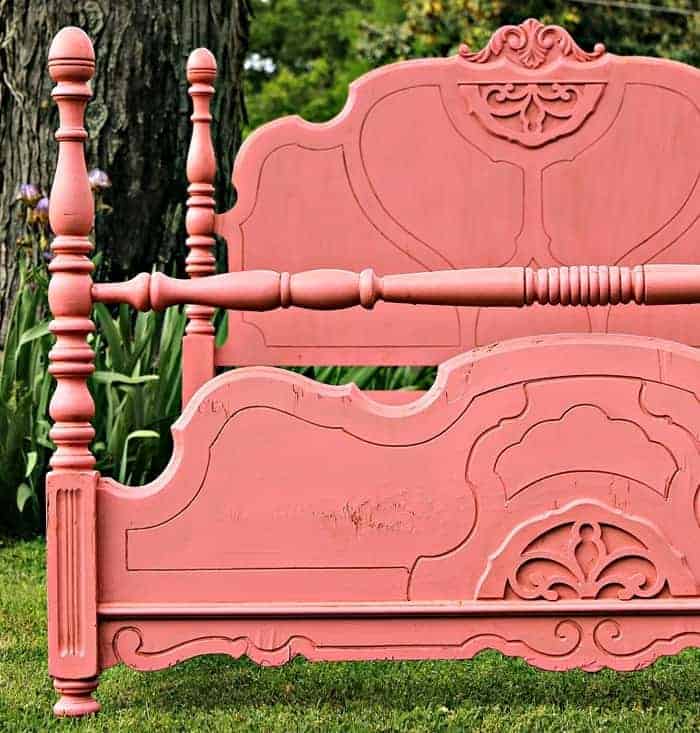
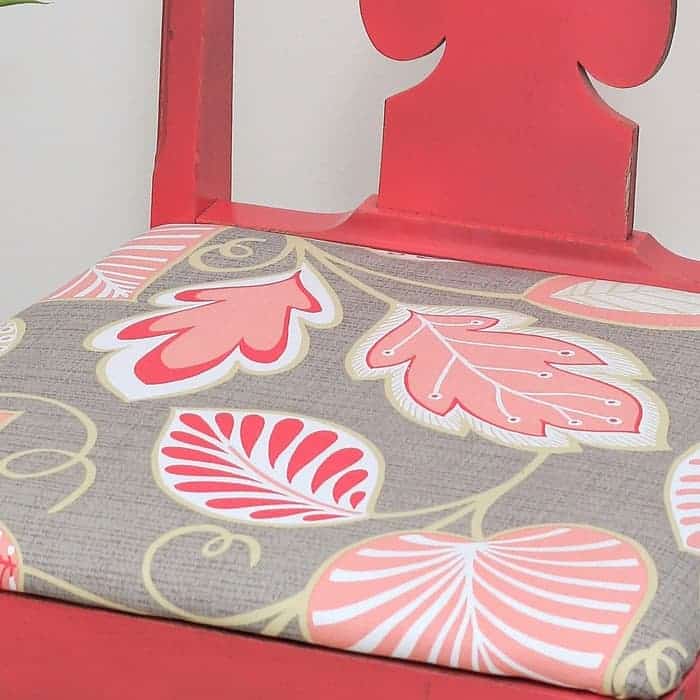
I decided on the metallic gold highlights when looking at this pin on Pinterest. I saw the photo a few weeks ago and pinned it to one of my Pinterest boards. I loved the look of the pink-painted furniture with the gold accents. So now I had a plan. I sampled several metallic gold paints I had in the workshop and the Martha Stewart Craft Paint out showed them all. The other paints looked flat in comparison.

I poured a bit of the metallic gold paint onto a paper plate. Then I used a small paintbrush to coat the bottom of the FolkArt Layering Block with paint. (Find the layering block here on Amazon and the Martha Stewart Crafts Paint here on Amazon)

Next, I ran the layering block over the surface of the cedar chest. I use the layering block a lot on my furniture projects. Usually I brush the paint onto the block and dab a bit of the paint off using a paper towel. For this project I brushed a thick layer of paint on the block and didn’t wipe any of it off. I wanted to lay down a lot of the metallic gold paint.
The layering block works great for faux distressing too. You guys know that just like walls, floors, ceilings, etc., the sides and drawers of the furniture are not perfectly flat. There are always imperfections, dips and dives, lol. That is why the color is so uneven when using the layering block. And that is what you want.

For the raised areas and tight angles, I brushed the gold paint on using a small paintbrush.

There was no perfection to any of it. I just brushed the paint on here and there.
")
And that’s how I got this fabulous paint finish. Well, I think it’s fabulous. Please take time to let me know what you think of the paint finish in the comment section at the end of the post.

I painted the keyhole thingy turquoise too then highlighted the pretty details using the small paintbrush.

The metallic gold color is so shiny. I can see myself doing this technique several more times.

More shine!

The photo above shows how I used the small paintbrush to paint the curved sides of the cedar chest top. The technique I use to distress and highlight details is to never go for symmetry or perfection. You don’t need to have the same amount of gold paint on the matching detail on the opposite side. Then it just looks like a piece manufactured by the thousands.

One more look at the cedar chest and now it’s time to take the Furniture Fixer Upper Tour. Just click the text links below the “before” makeovers photo collage…….

Furniture Fixer Upper Tour
Blue and White Painted Sofa Table – Confessions of a Serial DIY’er
Repurposed Desk Into Painted Nightstands – Salvaged Inspirations
Paint a Bookcase White – Girl In The Garage
– Petticoat Junktion (you are here)

As always, thanks for being here and have a great day, Kathy
Hello, I came across your website while looking for gold “distressed” inspiration. The chest looks fab! I’m wondering if I could do this gold effect at the back of an unused fireplace I have…trouble is, I’m not sure what a layering block is! I’m in the UK and my search is coming up empty…maybe there’s another name for it here!
I appreciate all of the work that goes into this project. I am so tired of seeing distressed furniture, to me it looks like it needs a paint job!
Are your customers still asking for distressed pieces?
Hi Cecilia, I don’t know that I can help. I have never tried to use poly over wax. All I can say is give it a try in a small inconspicuous area, on the side maybe or the bottom front. I would suggest trying Varathane Polyurethane.
Kathy! I need your help, please. I have a bathroom vanity made painted distressed slightly and he waxed it a little I need to know what I can put on the top of this vanity so the water doesn’t ruin the top finish. Everything I read about polyurethanes and different things said you can’t do it if it’s already been waxed. It has been waxed but it’s not a heavy wax please if you can help me I would so appreciate it thank you.
I love turquoise and gold together. Beautiful work, Kathy!
I am swooning over this gorgeous piece! If it were mine I’d be staring at it all.day.long. The color combo is perfect and it feels very elegant in an almost “treasures from India” sort of way!
Well, Kathy, it’s an interesting makeover. I’m not fond of gold accents on anything so that part, while giving the chest a unique look, doesn’t really grab me. What I do like is the way painting the cedar chest a solid color emphasizes the curves and basic shape of the piece much better than the natural wood grain did. You did a great job with the makeover and for someone who likes the blue and gold combination it will be perfect. Thanks for sharing the technique. I’m imagining using it with a silver accent paint–not sure on what base color.
Love this combination of that pretty blue and gold, and I love the new addition to the keyhole! XOXO
Love itll
Oooooh! She’s a true beauty once again! Love it!
You really turned a Big Old Ugly into a BEAUTY!! I just love those gold accents.
This looks great! I love the gold ALL OVER the chest.
This is a brilliant makeover Kathy! I wouldn’t have thought to distress with gold metallic but it looks amazing!!! Pinned! XOXO