Total Trash To Treasure Furniture Transformation
As an Amazon Associate, I earn from qualifying purchases.
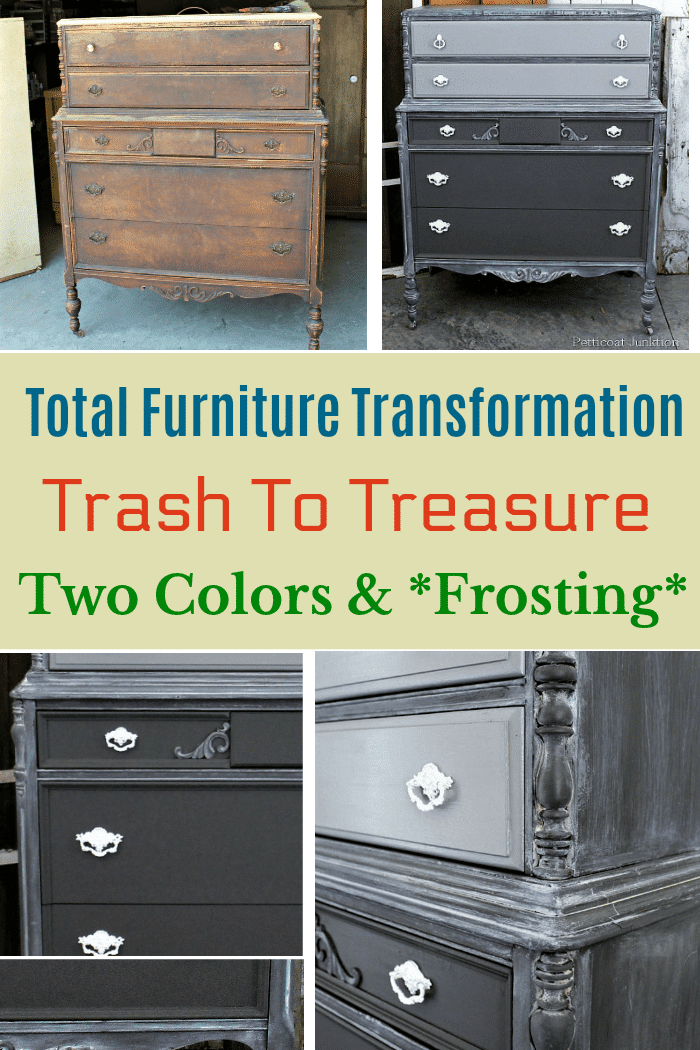
You haven’t seen trash to treasure furniture until you’ve seen this makeover. It’s unbelievable. I call this piece my “horse eaten” chest. The story is too funny.
I went all out and mixed two paint colors myself. One is a lighter shade of the first mix then I did a whitewash or “frosting” over part of the chest.

I kind of winged it on this makeover. I enjoy playing with paint and trying new techniques. I like mixing colors together and adding depth with a mix of paint techniques.
With paint if you mess it up just paint over it. No problem, just a little extra time and supplies. If you don’t try out new ideas, well you might miss something really special.

Trash To Treasure Furniture
The chest was a total mess. I call it the horse eaten chest of drawers. When I purchased this chest it was in one piece. While loading it in the truck the top section separated from the bottom.
That could have been really bad. I always worry when moving and loading furniture. My husband and I and a lot of people we deal with aren’t spring chickens.
I would be really upset if someone was injured while moving furniture for me. Thank goodness this time the only one injured was the chest of drawers.
Now in two pieces the chest looked really bad. Apparently part of it’s history included being stored in a barn…..occupied by a horse…..who thought the chest was his personal chew toy.
The pictures do not show the devastation caused by the horse. It was total trash and my job was to turn it into a treasure!

The moulding around the top is a mess. It’s eaten up and has lots of sharp edges and hunks of missing wood. Oh, but it was calling my name. The details are awesome.
I have no idea the age of this piece but it’s solid wood everywhere, and it is heavy.
The purchase price was $95. Much more than I usually spend for a chest of drawers. I was sucked in by all those details. I saw potential.

The Junktion Technical Specialist glued the top onto the bottom part of the chest and used a router to smooth the top edge.
It wasn’t perfect but I didn’t want to replace the top piece, so it worked for me!! Even at $95, I couldn’t pass up this chest with all the lovely details. And those legs…..who could resist those.
I love frosting don’t you? Well, that’s one of the things I did to this chest of drawers. I “frosted” it. Another name for the technique is whitewash. I just call it frosting because it’s like adding icing to a cake. I’ll tell you exactly how I got “the look”.

Whitewash Paint Tutorial For Furniture
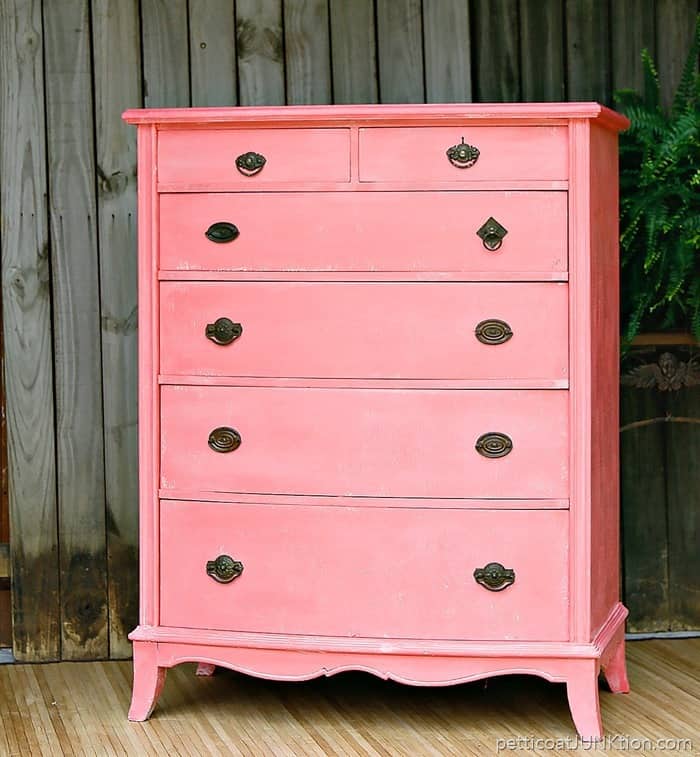
I combined Beyond Paint colors Licorice and Mocha, and Rust-Oleum White Latex paints to make a taupey gray color. That’s the best I can explain the color. You guys know I love to mix paints. (find Beyond paint here in all colors)
I painted the casing of the chest and the bottom three drawers with the paint mixture then I added some white paint to the taupey gray color paint to lighten it up and I painted the top two drawers with the new paint mixture. I love the contrast of the two colors.
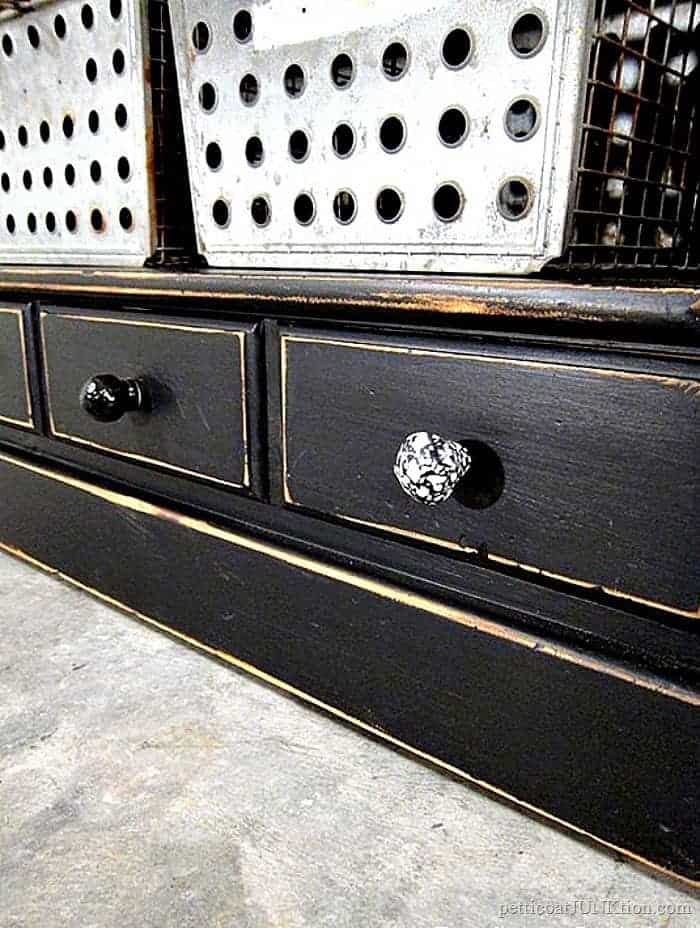
The original hardware was in good condition but the two knobs on the top drawer had been replaced with new shiny brass knobs, yuk. I went through my stash of hardware and found two replacements.
I spray painted all of the hardware off-white, then decided I wanted a white-white. So I sprayed them again. Don’t you just love spray paint. This is the spray paint I used here.
Now for the “frosting” or whitewash. I thought I had some glaze in a can that I purchased a long time ago. But I couldn’t find any, so maybe I dreamed that. I did have some antiquing glaze that was definitely brown.
I added some white latex paint to it and it still looked a little heavy and thick so I added water. And seriously, you can just mix the paint and water (like I did here) you don’t need the glaze but I think the glaze gives you longer working time with the finish.

I know…not much help am I. I kind-of wing it. I mix stuff until I get what I want. Don’t be afraid to experiment and try new things.
It’s only paint and you can always paint over it or try a different technique if it doesn’t come out right the first time. Anyway, what you have is like a white-wash.
I brushed the whitewash paint (frosting) on and wiped it off with a wet rag. You need to wet that rag and keep it handy or your whitewash will be too heavy. Wipe it off until you get the look you want.
You can always do a practice board if you aren’t sure of the technique. And don’t try to frost the whole piece at once. work on one area at a time. I applied frosting to the casing of the chest only, not to the drawers.

Trash to Treasure Furniture – Two Tone Whitewashed Chest of Drawers
I know ya’ll are going to be shocked…… I didn’t do any distressing on the chest, not even the hardware. So what do you think of the frosted paint finish or the whitewash? Are you going to try it on a piece of furniture?
Do you think this is a true trash to treasure furniture transformation? I really think this piece was destined for the junk pile but I saved it.

I love this piece so much. If you remember we re-painted our bedroom just a few weeks ago and this piece will not work with the new bedroom color. So dad.

I made a tutorial on how to white wash furniture on another piece. It’s short and sweet…..
How To Whitewash Furniture
Thanks for being here! Kathy
Hi Kathy, love the two-tone grey finish but the frosting detail makes this piece so unique. Thanks for sharing the makeover with us at the Snickerdoodle Party. You are my feature this weekend!
What a lovely makevoer, Kathy! Perfet colors for the piece, and I love the two tones!
Kathy girl, once again you’ve done it up beautifully. I agree with y’all. I don’t think I would have been brave enough to take on this chew toy. And…I’m from Jax too. We have got to get together. I think a road trip is a must to see our blogger friend. And…yes, I’m an old chick! Keep posting Kathy. We love your creative ideas.
Beautiful! Gives me incentive to try this technique. I am just beginning as “rehab” junk and love your work!
Love it. Fantastic job. But…what is that rectangle piece of wood on the one drawer?
Kathy, you knocked it out of the park! This is simply gorgeous! You really have an eye–I would have never bought the horse’s chew toy–well, not for $95. It’s stunning! I hope you make a mint on this if you can part with it.
This is gorgeous, can’t believe it’s the same piece you started with.
Great job. I love it.
Oh my goodness! What a transformation! I was in your shop the other day and if this had been in it I would have had to bring it home.
WOW, nice, very nice. You would never know the shape it was in before. You are very good.
What a piece of history! Beautiful! Did you do anything with the inside?
Beautiful. This is one of the first I’ve seen that I actually like. Thanks for sharing.
I’m in Jacksonville also. What is the name of your shop? I’m sure I have been there.
Kathy!! I love it. I had an almost scary moment moving a piece with a dolly. It did fall and I did get popped in the face with the dolly but it could have been worrse. Be careful. This is such a pretty piece.
I so look forward to your blog posts. As a fellow shop vendor (Jacksonville, Fl), and no spring chicken, it gives me the motivation to try something “out of the box”. Wish we were neighbors!