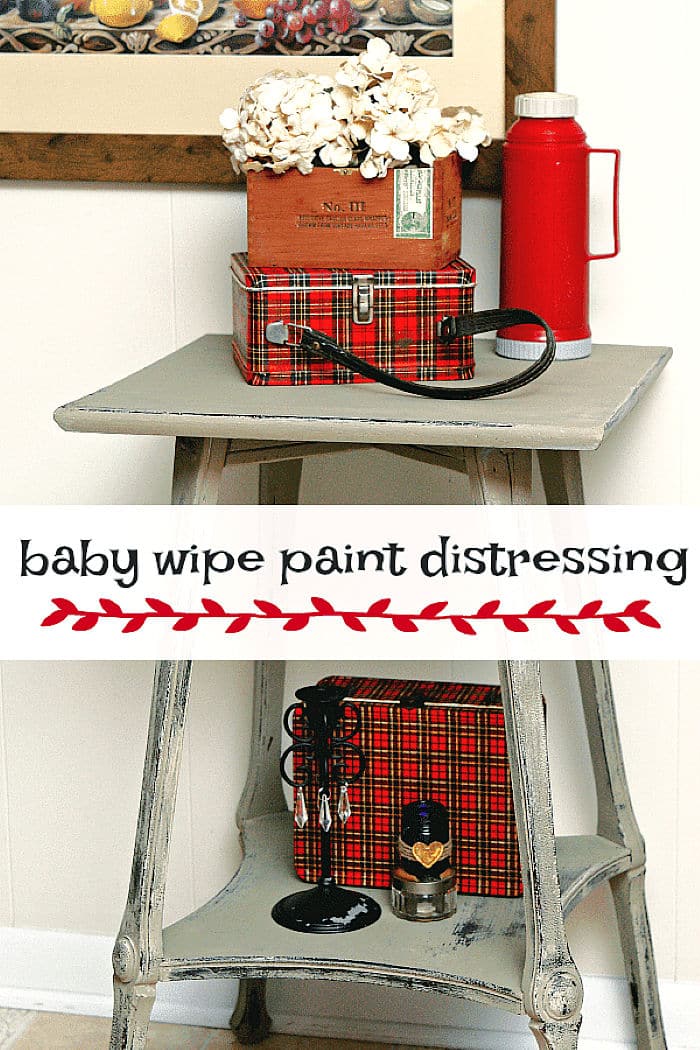
No Mess Baby Wipe Method For Distressing Painted Furniture
As an Amazon Associate, I earn from qualifying purchases.
Baby wipe distressing is the best dust-free and mess-free method for distressing painted furniture. I learned a few tips and tricks to make the process easier and am sharing them today.
When using this distressing technique, you don’t need to wear a mask or goggles or dust yourself off. The coolest thing is that this technique highlights the original stained finish versus the bare, raw-looking finish you get with sandpaper.

My original plan was to paint the table base black and the top with black and white stripes. I’m so glad I didn’t go with that plan. It was too modern for this table.
I’m sharing all the details for this paint technique because I want you to try it. Your project doesn’t have to be furniture, you can do this on home décor accessories too. After using the baby wipes on several projects, I know how to get the best results. Keep reading.

I bought the table at my favorite junk shop for $15. The top was a mess. A chunk of wood was missing from one side of the top, and the original finish was worn away in several places.
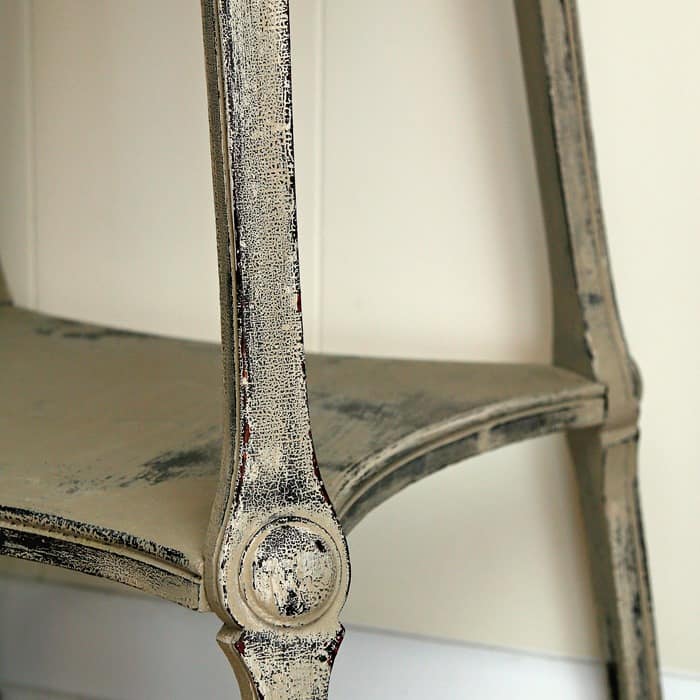
And then there was the alligatoring. The vocabulary dictionary describes alligatored….. having the appearance of alligator hide. I don’t know anything about alligator hide, but I think the rough finish is neat-looking and looks even better painted and distressed.
I believe the alligatoring has something to do with the varnish and heat…..maybe. I bet one of you can help me out.

I applied one coat of FolkArt Home Décor Chalk, color French Linen, to the table and decided the color was too light. No oomph.

I went to my paint stash and found the FolkArt Texture Chalk color Wet Sand. Perfect. This thick paint can be mushed on for texture or brushed on for a smooth look. I went with smooth after all the table finish was already slightly textured.

Both of the chalk finish paints cover great. The table needed one coat of Wet Sand over the French Linen. No waste of paint because the first paint layer served as a basecoat. This is by far my favorite brush for chalk. The paint loads well and brushes on smoothly.

Moving on to the fun part…..distressing the paint. TIP: To do this right, you must distress the paint just after it has dried.
Wait too long, and the paint will not come off unless you use sandpaper, and that doesn’t give us the look we’re going for here. We want the dark original finish to shine through after the distressing….not raw wood.
I worked with one section of the table at a time. Some of the areas didn’t want to let go of the paint. TIP: Wipe over these areas several times with the baby wipes to dampen the paint.
Then go back and rub over the damp area to remove the paint. It’s up to you how heavy to distress. The baby wipes do get coated with paint, and they might leave a very light film (almost unnoticeable) of paint over the distressed areas.
TIP: To showcase the original dark wood finish, take a fresh baby wipe and remove this film. Wipe over the distressed area several times with a fresh wipe.

The last step is to apply a coat of neutral (clear) wax over the chalk finish to seal the paint. I sometimes skip this process because I like the chalk’s flat look. The wax gives it just a bit of sheen.
My go-to wax is Howard’s because it is inexpensive compared to most branded furniture waxes and the sheen it leaves after a nice buffing is perfection. (find the wax on Amazon here)
More tips and tricks for distressing furniture here… What You Should Know About Distressing Painted Furniture And Home Decor

There was no alligatoring on the top of the table. I distressed the edges and the top with baby wipes where the boards were glued together.

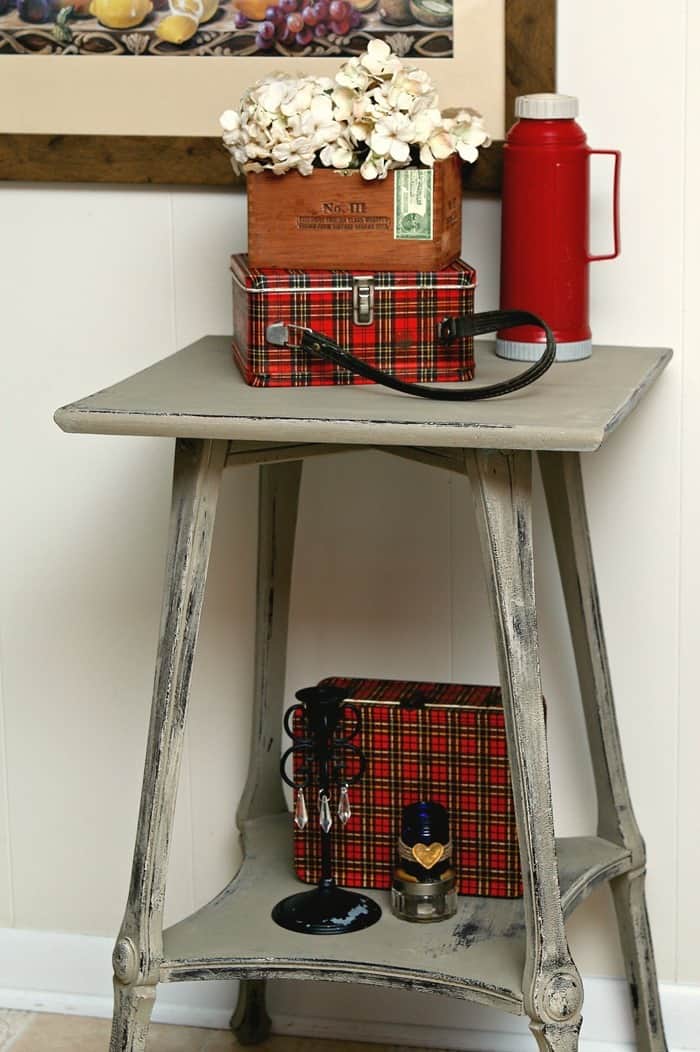
The distressed finish is the perfect complement to the antique table. I think I did it proud. The color is nice and neutral.
My red vintage finds make fun photo props and the red really pops against the sand color. PIN THIS PROJECT FOR LATER (CLICK HERE)
What do you think of the baby wipe distressing no dust no mess technique? Do you think I did justice to the antique table? Another project I used this technique on can be found here….Turquoise Table.
I’ve also wet distressed furniture using a household cleaner like Simple Green. I made a video of the process, and you can watch it below….
[adthrive-in-post-video-player video-id=”I5G14pXt” upload-date=”2019-07-25T13:13:17.000Z” name=”Wet Distress Painted Furniture” description=”How To Wet Distress Painted Furniture Using Simple Green Cleaner” player-type=”default” override-embed=”default”]
How To Wet Distress Paint
It’s time to visit my talented friends. Links to their makeovers are below the “before” photo collage…

Silver Metallic Furniture – Just The Woods
Nine Drawer Dresser Makeover – The Interior Frugalista
Felted Wood Footstools – Prodigal Pieces
Drop-Leaf Table Makeover – Confessions Of A Serial Diyer
Faux Stain Furniture – Girl In The Garage
Paint And Distress Antique Furniture – Petticoat Junktion (you are here)
Thanks for being here and have a great weekend, Kathy

Yes, the alligatored finish will look so good painted and distressed!
I was so glad to find this post. I have an old china cabinet with lots of “aligatoring “ and I keep putting off redoing it because I thought I would have to strip it ?. Now I’m just going to embrace it! Thanks so much for the great tip!
Even though the table was painted, it still looks very authentic and natural. Beautiful job, Kathy!
I have painted and distressed many pieces of furniture and rarely use sandpaper. I discovered early on using a damp cloth works well and is much easier. Your piece turned out well. My favorite chalk paint is Rethunk Junk. It goes a long way and dries with a soft shine. However, sometimes I add a coat of polyacrylic for added protection.
Kathy, you have such a gift to see past the original condition of the pieces you buy. Thanks for sharing your knowledge. I love the look!
Speaking of baby wipes – did you know they are excellent for cleaning paint off stencils? It comes right off with the baby wipes if you use them right after you are finished with the stencil.
Your table is great as usual. Love your projects and your “outside the box” thinking.
the texture on this table is amazing Kathy! I love how you really enhanced it!
Baby wipes, eh? This is a new technique to me and now I’m itching to give it a try. Love the finish, it’s perfect for this style of table.
Wow ! Love the alligator finish . Makes you wonder where the table lived before it came home with you . Beautiful legs and detail on the legs . Baby wipes ? How cool ! Who knew ? I love the finished product . You did it proud and the red staging accents are perfect ! My sister had this very lunch box and got sent to the principals office for hitting a boy with it on the school bus ! Ahhh. Memories ! You did a great job on this table !
Awesome as usual!
Kathy, I love the way the “alligatoring” looks after you painted the table and used your baby wipe distressing technique! Very pretty!
It looks so much better! The condition of this table made it the perfect candidate for this kind of finish, and I love that authentic alligator from age kind of finish! XO
I looked up the alligator thing and found this : ‘The alligatoring of varnish is caused by the use of quick-drying, short-oil, hard varnishes over long-oil elastic varnishes.’ Maybe someone revarnished the table at some time with the wrong stuff. Either way it did you a favour as the effect with the paint finish you put on is lovely – and so much easier than trying to scrape all that rough scaly finish off first.
It looks like a lot of work but I love the finished product. I don’t know how you thought of using baby wipes in the first place. You never cease to amaze me. I appreciate you sharing the years of trial and error because it helps the rest of us so much. Happy Creating.
Karen
How fun! Love the fresh new look, Kathy.