How To Whitewash Painted Furniture
As an Amazon Associate, I earn from qualifying purchases.
I have a new whitewash technique for painted furniture. You guys know how I’m always trying new things. This is new. I made a video of the process for you.
This is Furniture Fixer Upper Tour Day. I can’t wait to see what my friends have been up to. The “before makeover” photos are intriguing. The tour starts at the bottom of this post.
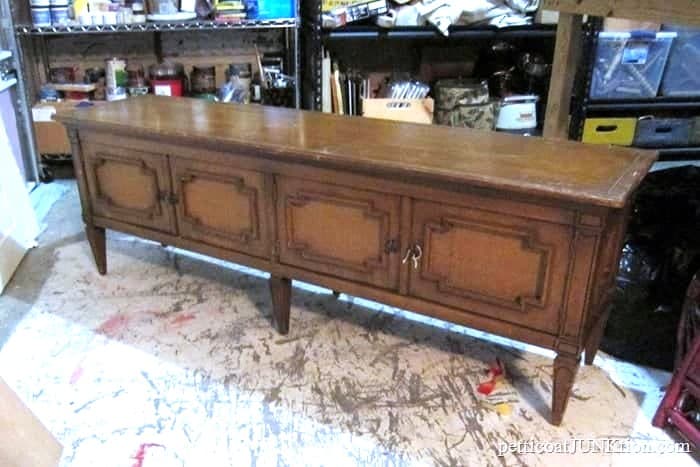
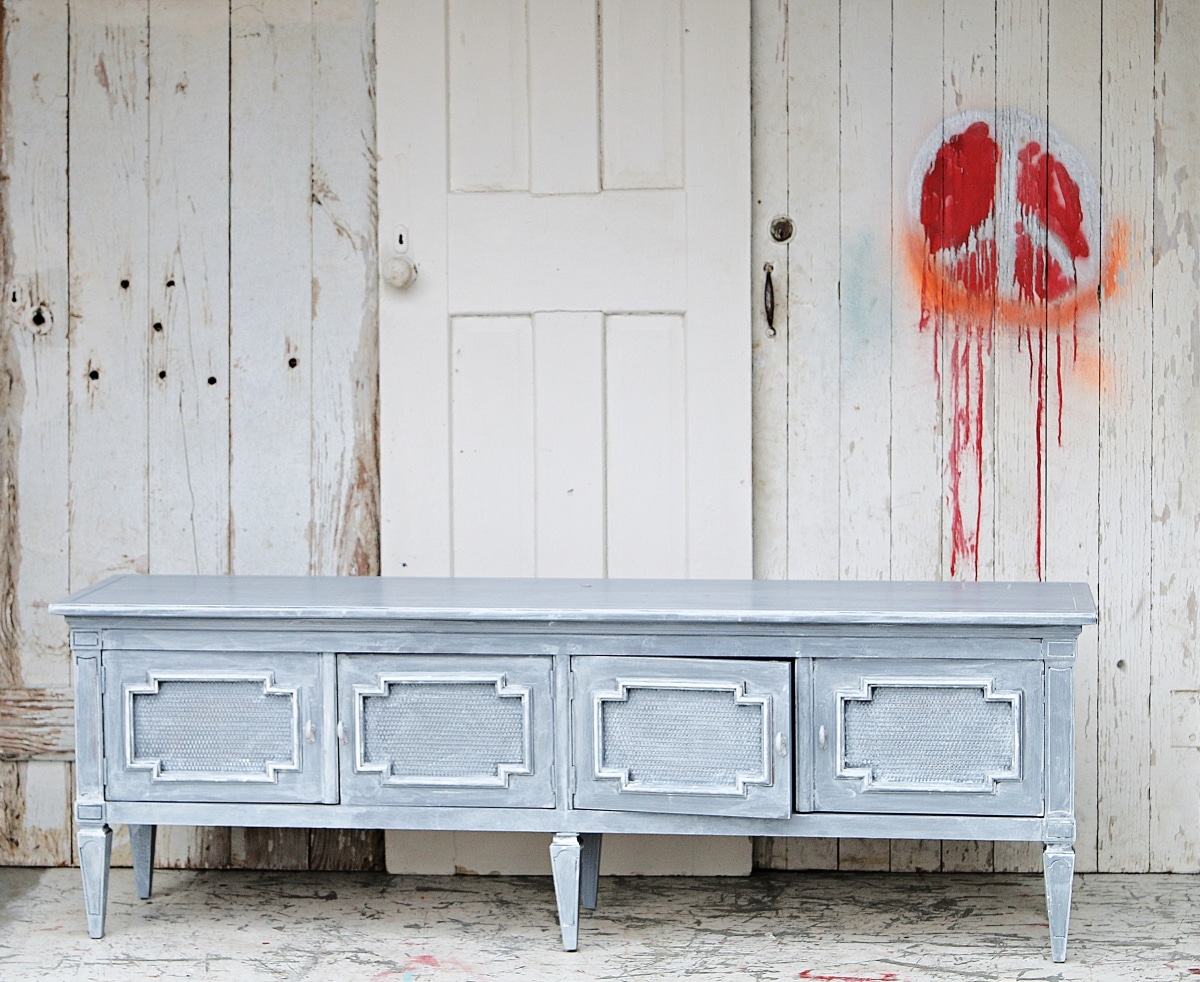
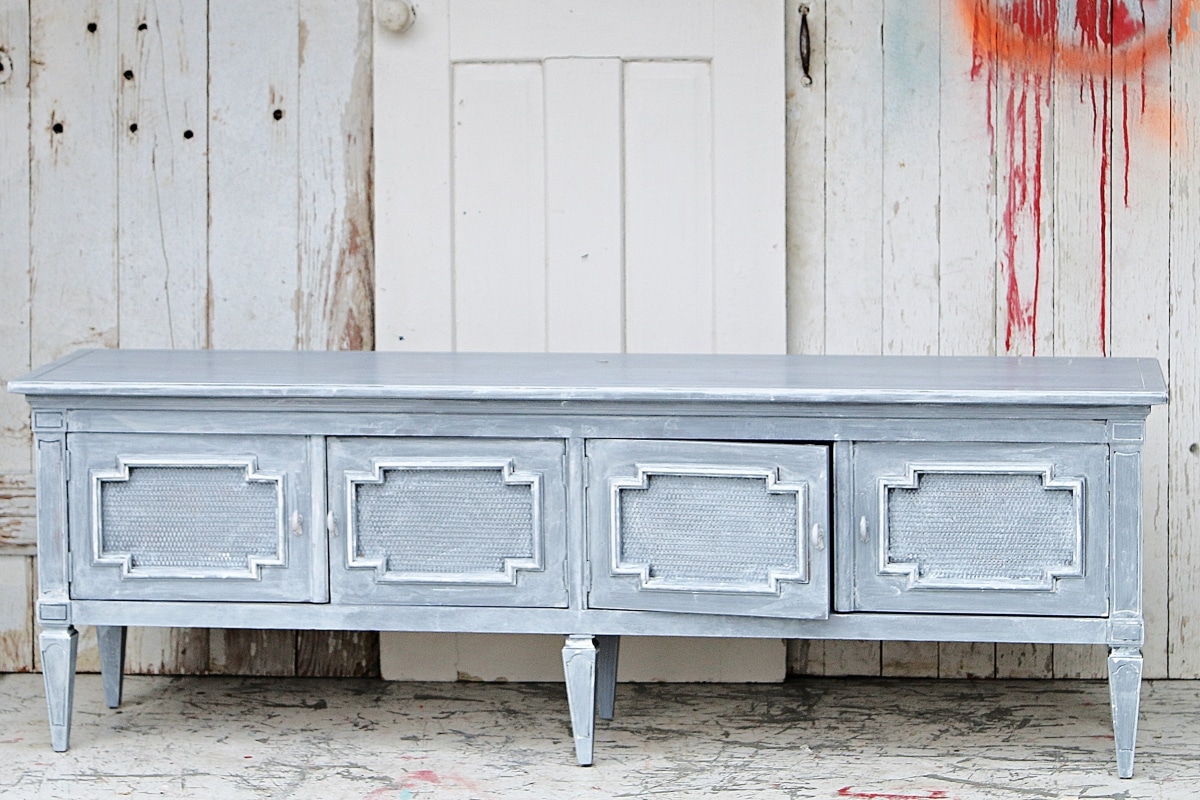
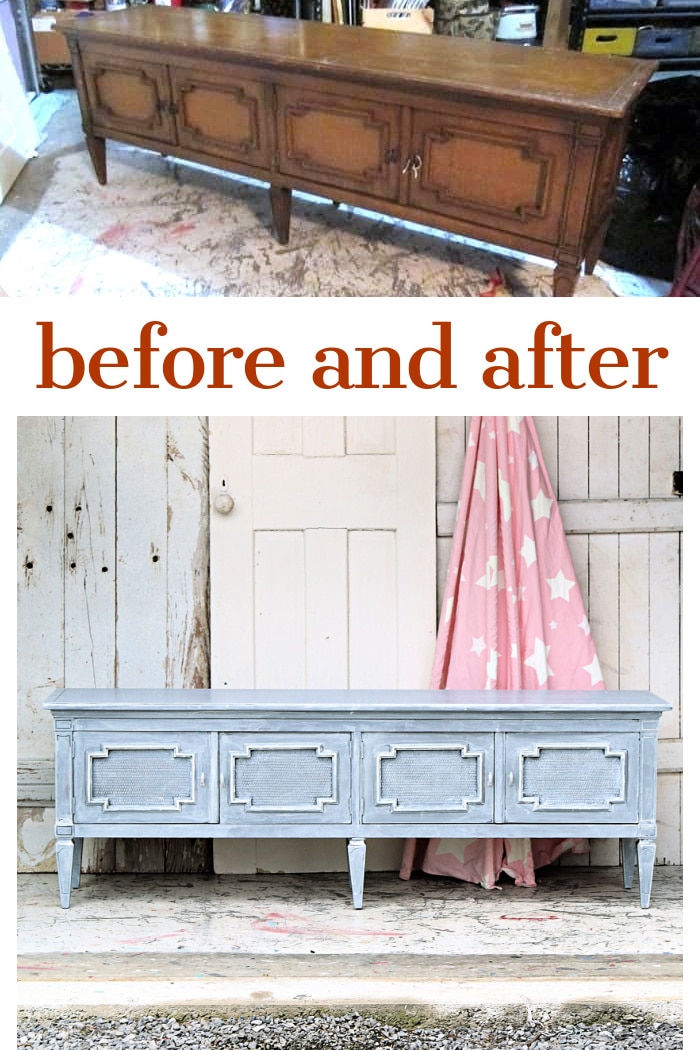
This piece is 5 feet long and not very tall. It reminds me of hotel furniture from the 1970s. I think this style is called a credenza.

I bought it at a local shop for $45. My little sister has been looking for a piece to put in her hallway to catch shoes and other things. I thought this might work. We’ll see if she likes the paint job.
Update to post. My sister liked the whitewashed piece, and I delivered it to Arkansas during my last visit. Now, she’s trying to decide if it works with her decor and how to decorate around it.
In preparation for painting, I removed the knobs, cleaned the credenza with Simple Green, and placed painter’s tape to mark off areas I did not want to paint. I always remove the furniture knobs before painting.
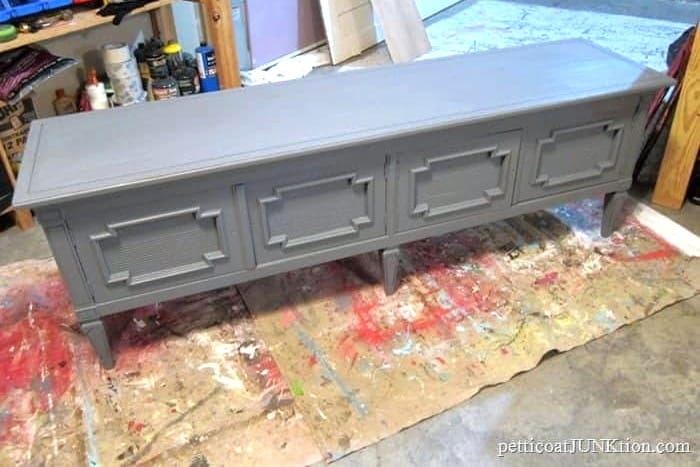
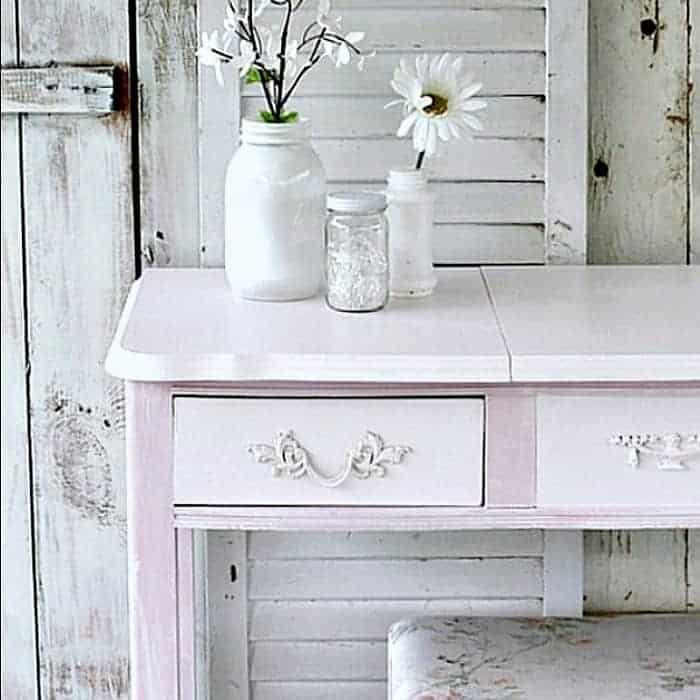
The paint I chose for the project is Beyond Paint in Pewter. You guys have heard me talk about this paint. It needs no priming or sealing. I especially like the sheen of the paint. It’s kind of between flat and satin.
Beyond paint also works well for whitewash and other techniques. It doesn’t resist products (wax, toner, etc.) like latex paints and doesn’t soak up too much of the products like chalk paints.
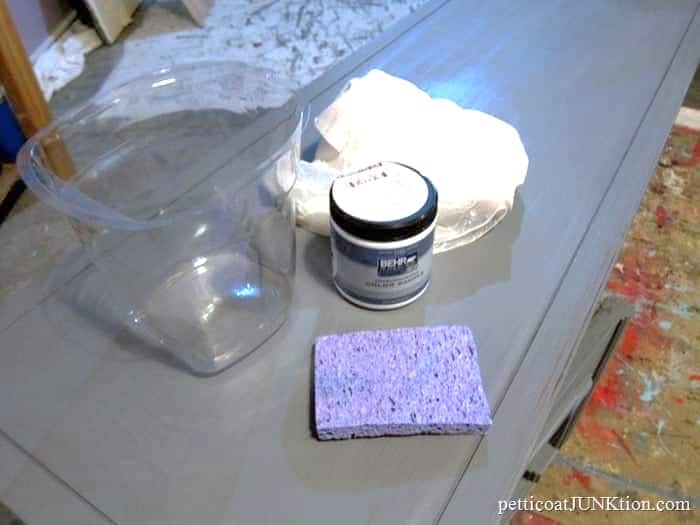
Moving on to the whitewash technique. I mixed a sample of off-white Bher Paint with water. I did not measure anything. I used about half of the sample paint container and maybe 3 cups of water. The whitewash was thin. You can see the mixing and everything in the video.
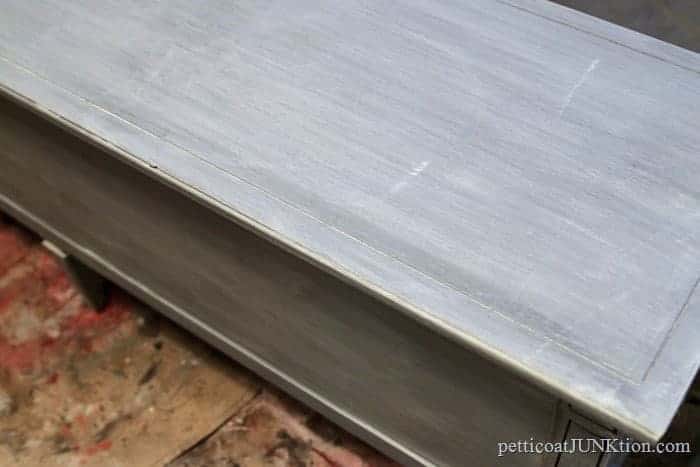
I used a sponge and just wiped the whitewash all over the chest. Next, I went over the chest with a slightly damp, lint-free rag, removing some of the whitewash. Then, I dabbed various of the furniture top with the sponge to add extra white areas.
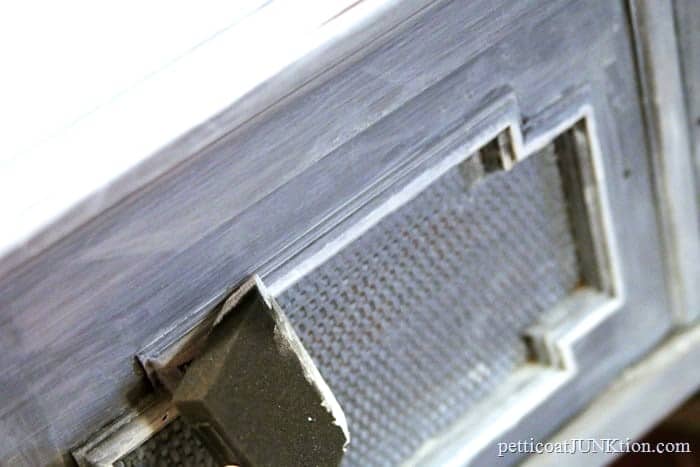
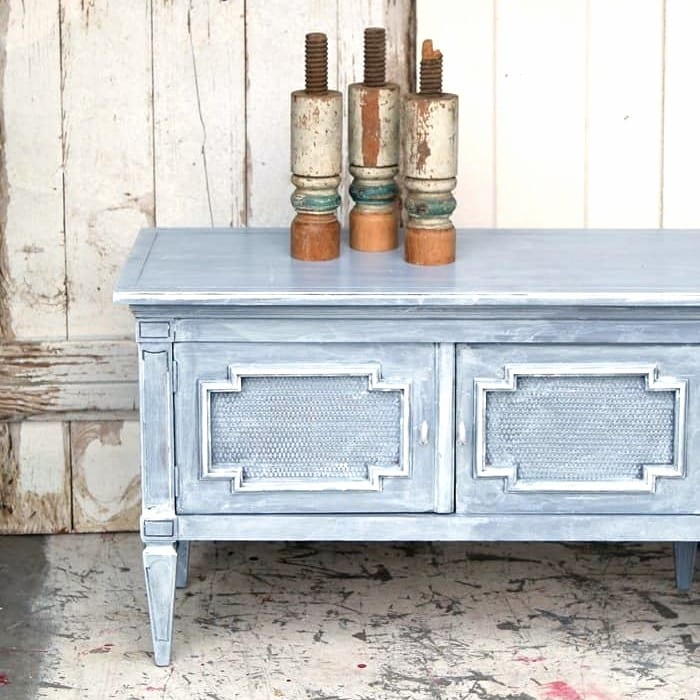
I must admit it was a pain sponging around all those details. I thought I was finished with the project but the more I looked at it the more I knew it needed something else. The raised details around the plastic rattan inserts just blended in. They needed to pop, so I used a sponge brush and undiluted sample paint to highlight the detail by running the brush along the raised edges.
I used the original knobs, painting them a light gray. I tried new knobs I had in my stash, thinking something larger would look good. No, they were too much with the busy whitewash.
The door with the peace sign has been around forever. I use it as a backdrop in my photos, but you don’t usually see this side of the door. I like the bright colors and the peace sign, but the runs from dripping paint look like blood.

The whitewash technique can be used on any paint color.
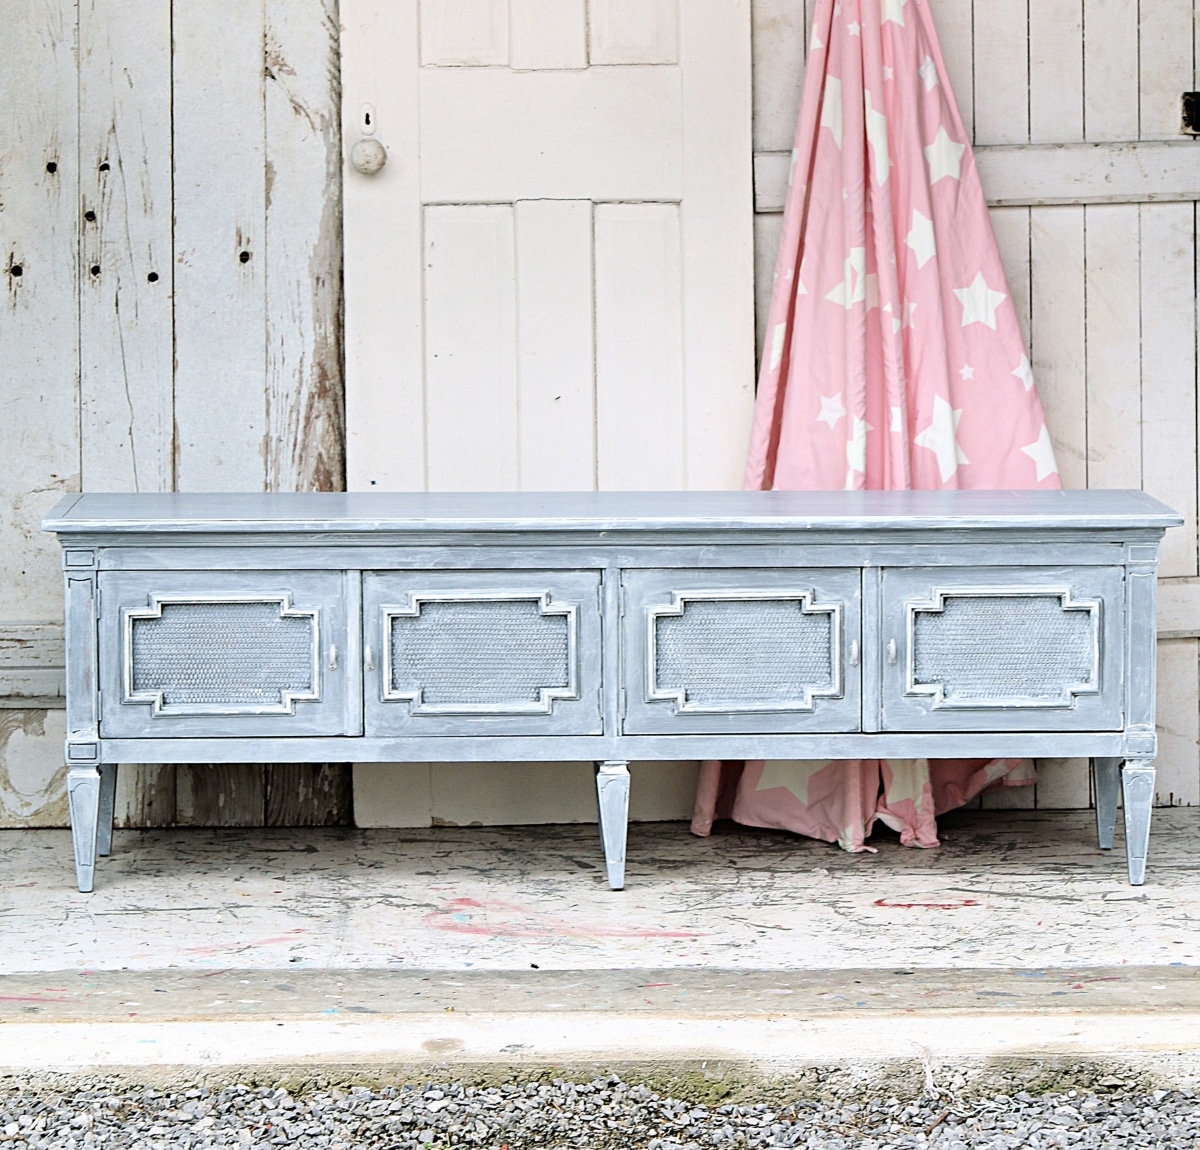
I sure am glad I highlighted the frames around the fake rattan inserts. Patting myself on the back. The credenza doesn’t look like hotel furniture anymore.
I used a very small paint brush with stiff bristles to push white paint into the cut-in grooves on the legs and sides of the piece.
Seeing the makeover in progress is so much better than reading about it. View the video tutorial below…..
Whitewash Paint Technique Video Tutorial
It’s time to take the Furniture Fixer Upper Tour-click the pink links below the “before makeover” photo.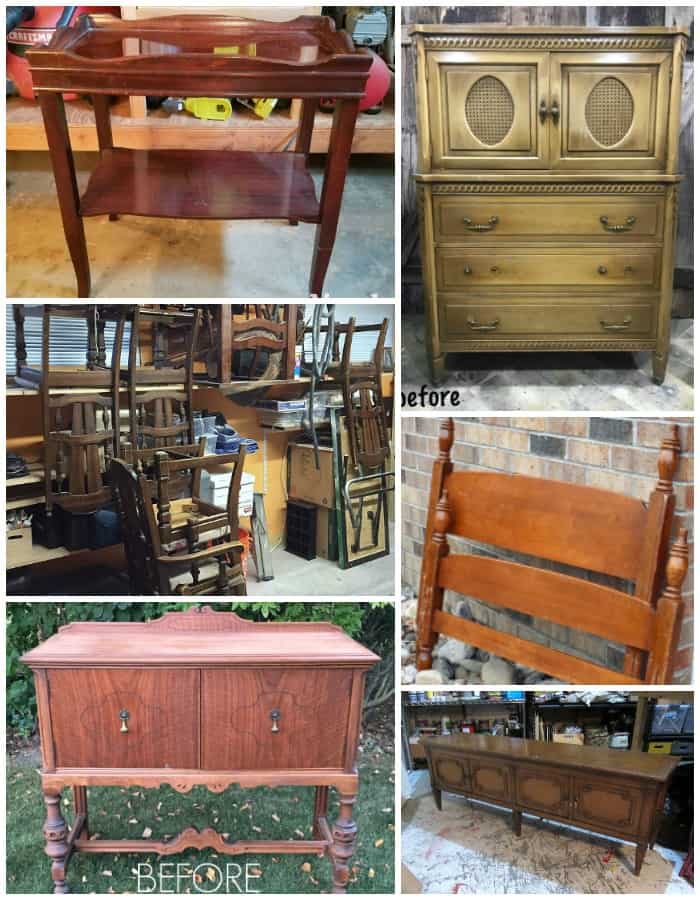
Child’s Tea Cart from Repurposed Table Prodigal Pieces
Distressed Painted Furniture Just The Woods
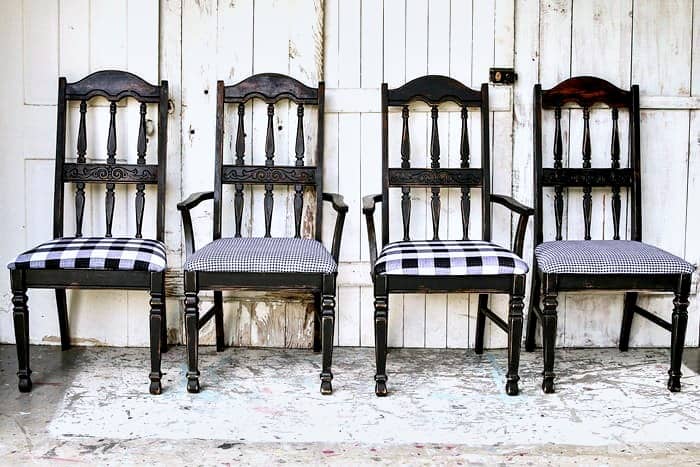
Two Tone Dining Set The Interior Frugalista
Shabby Headboard Bench Confessions of a Serial Diyer
Antique Sideboard Makeover Girl In The Garage
Whitewash Paint Technique Petticoat Junktion (you are here)
Thanks for being here, Kathy

I love your projects and other posts. You are one of my “go to’s” for how to do things and for inspiration.
I have to tease you a bit; based upon personal preference. WHO PAINTS OVER A LANE CEDAR CHEST? I have one that we meticulously restored and it is absolutely stunning. I looked on EBay and my $45 garage sale find is going for $600 – $800 and none on EBay were painted.
I love everything else. Much love and gratitude!
Pam Blackbird
The Woodlands/Galveston TX
Yes, that credenza really turned out great. Love the color and size. Sandy
Luuuuuuv the color!!!!!
We had something like this at one of the old offices where I worked and was called a credenza. SO much wonderful storage space !! I hope she likes it !!
Kathy you did a 180 on this piece! So elegant and stylish now. xo
This is absolutely, outstanding., breathtaking gorgeous. Thanks for sharing this fabulous transformation
Love the technique! By the way, this piece is called a “credenza” and was a popular 60-70’s hotel furniture due to how sturdy they are for luggage and storage. They work great at the end of beds, in hallways, or even under long windows. Great find!
Cushions not cousins…….got plenty of those lol
I love it! It will look great in my entry way. We need to keep an eye out for a couple of cousins.
Great makeover, Kathy! I’m sure your sister will love it! XO
Gorgeous! I love it so please accept a pat on the back from me too! Thanks for sharing – saving this one!
Very clever. I think this is just the technique I’ve been looking for for one of my own projects – and not expensive which is definitely good for me right now. Thank you for sharing this.
Really like the new look, Kathy! You must keep us posted whether your sister loved the finish and will be taking it to her house. Great whitewash tutorial too – pinned.
P.S. Love the peace sign!
what a unique piece! love the fresh light new look.
What a huge beauty and you made it new again. I just adore the new look, Kathy. Wow!