IKEA Nightstand Hack | Guest Bedroom Furniture
As an Amazon Associate, I earn from qualifying purchases.
Ikea Nightstand Hack
If I had to list my favorite DIY projects, the IKEA nightstand hack I just completed would definitely be on the list. The best part of the project? The paint finish. Not because it was super easy (it was) but because the finish combines two of my favorite things, white paint and unfinished wood. The nightstand came in a box……in pieces. Here’s the story…..

You guys know I’m a member of the Plaid Creators team and we get to make cool projects with Plaid products. This month the team was tasked with painting an IKEA nightstand.
I also stenciled a piece of artwork to create a pretty vignette. We were encouraged to do a hack ( modification or personalization) to the nightstand and create to our hearts’ content.
Well, you know I love a good challenge. So do my friends. I’ve seen all of the team members’ nightstands and I’m feeling a little WOWED. The links to all of the nightstands are at the end of this post.

The guest bedroom or as we normally call it, Miss Sofi’s room, needed a nightstand so that was my plan for the challenge. Make a guest bedroom nightstand.
This nightstand has enough shelving to hold pretty flowers, candles, a dish for jewelry, books, magazines, and a container filled with lotions and pretty things. Any guest would feel welcome. I also made a neat add on for the table so keep reading.

The IKEA Tarva nightstand came in a long flat box with a bunch of pieces to put together. The photo above on the right is how the nightstand looks after assembled.

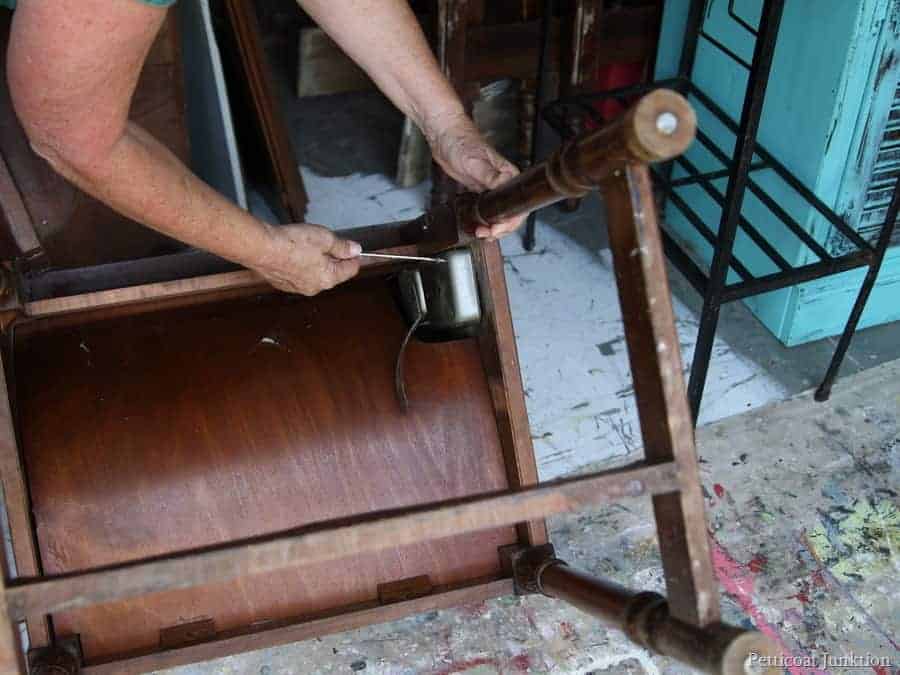
This is how my nightstand looks. The JTS and I did away with the drawer and added a bottom shelf instead. We used the boards meant for the drawer to make the shelf.

I could have painted the boards before putting everything together but I hadn’t decided what color or style to paint the nightstand. That’s how I roll. I finally opted for white paint and this is where the paint finish gets interesting.
I started applying the paint with the chalk brush and noticed how the wood grain showed through the layer of paint. It looked really cool. I decided to go for a really light layer of paint and started brushing the wet paint and spreading it and spreading it over the wood until the paint layer was really thin and the wood grain looked really nice.
The paint itself isn’t thin and most times will cover in one coat but I was just spreading a small amount of paint for all it was worth so the wood grain would show.
Then it got even better. I decided to kind of ombre the paint and starting just above the base of the table I dry brushed the paint down to the legs which allowed a lot more of the natural wood to show. I know, it’s kind of hard to picture. But the next photo should help.

The paint I used is FolkArt® Home Decor™ Chalk and the color is White Adirondack. You can see in the photo above how nicely the wood grain is highlighted with the light covering of white paint, fresh and kind of beachy.
The chalk paint is no-prep acrylic paint and it dries super fast. I think the nightstand was completely dry about 15 minutes after I painted it. The ultra-matte chalk finish can be used on furniture, cabinets, walls, decorative glass, metal, and more. I used FolkArt Home Décor Clear Wax to seal the chalk paint.

One more step for the nightstand. I had a piece of rippled aluminum in my stash and it just happened to be the perfect size to cover the back of the nightstand. Something that easy never happens. I think the aluminum was meant to be a sign. The edges were all finished and everything. That made it easy to work with. I used a few small wood pieces and a nail gun to adhere the aluminum to the back.

And there you have how the IKEA Tarva nightstand was transformed into my guest bedroom nightstand. But I’m not finished yet.
I still had a leftover piece of wood, in the drawer front. I used one of the new chalk colors, Silver Shadow. to paint the wood. The drawer front was a good size for a serving tray, bedside tray, or whatever tray. I added a drawer pull to each end and the tray was done.

How cute is that? The serving tray with chocolates and a cool drink should make any guest smile. It makes me smile and who do you think got to sample those chocolates after the photo shoot? That’s right, me and Miss Sofi.

Hope you guys are still with me because I have one more quick project to complete the vignette. Can you guess what the brown bowl used to be?

It was a footed wood bowl I purchased at the thrift store. I took a hammer and knocked the stand from the bowl. I wasn’t sure if that would work but it did. I used the FolkArt HandMade Charlotte Stencil Tangier to add a little spice to the bowl. The chalk colors I chose for the pretty design are Provincial Blue, Vintage Mustard, Monarch, and Irish.
Always use several colors in a stenciled design to give it depth. After about 5 minutes of stenciling and it was done. I nailed a saw tooth hanger to the back of the bowl.

I love the way the paint pops against the wood of that bowl. The round wall hanging also plays well with the square lines of the nightstand. The guest room is ready. Yay!

One more look at the paint finish. The sides of the nightstand have the same paint finish. The paint gets steadily lighter closer to the base until there is no paint in areas on the legs. I need to paint more unfinished furniture. It’s fun.
This whole bedroom has been updated with new paint and decor. See it here…Guest Bedroom Makeover Before And After | White With Pops Of Color
I love the FolkArt chalk paint and the chalk paint brushes. Those brushes are the best hands down. Plaid is always coming out with new fun products and I got a chance to try out the new FolkArt Texture Chalk when I was in Atlanta a few months ago. It’s great.
The textured paint gives the coveted “old world” vintage feel to furniture and home accessories. The thick paint can be applied, layered, distressed and waxed to create a beautiful vintage finish. It comes in 12 beautiful water-based colors.
Thanks for being here and have a great day, Kathy
Disclosure: This post is sponsored by Plaid Crafts as part of the Plaid Creators program. All words, project ideas, and opinions are 100% my own.

Love it all. The wooden bowl is my favorite. Unique idea. Thanks.
You did such an awesome job on this IKEA table hack Kathy, and JTS! The shelf in lieu of drawer looks great, and that painted finish is awesome! I’ll bet Miss Sofi loves her fabulous room!
What a fun project, Kathy! And the aluminum back was inspired. When I first looked at the finished nightstand I tho’t you had added a back to it with a patterned paper on it. Which I think would be nice, too, but the corrugated aluminum just gives it a fun, funky touch. Great job. Woo-woo!
I love how this turned out! I would most definitely put it in my house…you know, in case, you get tired of it. 😉 It’s just my style! I also didn’t realize when I first saw your project that you had made the little tray too, from the drawer front…genius idea.
Thanks Sherry!
Love the nightstand!! The aluminum piece on the back is perfect!! Love the tray & bowl too! Ou always give me great ideas with your projects.