Painting A Mid Century Modern Sewing Cabinet
As an Amazon Associate, I earn from qualifying purchases.
Painting a mid century modern sewing cabinet when the original finish is in bad shape doesn’t bother me. Painting furniture is what I do. I don’t restore furniture to its original finish because it’s a lot of work. I’ve mentioned before that I’m lazy, and it’s true.

I spotted the sewing cabinet at the Southern Kentucky Flea Market and it was $20. The cane panel on the front was the selling point for me.
My original plan was just to paint the cabinet white and be done. I have to admit even with the cool mid-century style, the newly painted look was too one-dimensional, and I came up with a new plan.
Thankfully, the sewing machine had already been removed from the cabinet. I still had a little body work to do, though. This piece will make the perfect side table, nightstand, foyer piece, you name it. (this post may contain affiliate links)
Supplies for this project:

Before painting furniture there are always repairs or updates that need to be taken care of. In the past, when the JTS and I have worked on sewing cabinets, we just nailed the top down and that was it.
This time, I decided to remove the hinges on the side where the top is hinged so the top will lay completely flat on the cabinet base.

I used my brad nailer to nail the top to the body. Now there isn’t a tiny space caused by the hinges. The space wasn’t really noticeable on past pieces, but I knew this would make a major difference in the finished look of the mid-century style cabinet.

The cane panel on the front opened to the inside. There is no drawer or little compartment for thread, etc. inside. The piece is too short to pull a chair under, so I guess that is why the door opens….for leg room. It sure would be awkward while sewing.

I removed those side hinges from the door and the cabinet. Then, I held the front cover firmly in place and used the brad nailer to reattach it to the cabinet casing. This brad nailer is so easy. I would much rather use it than a hammer and nails or a screwdriver and screws.

The photo comparison above shows how I closed that gap by removing the hinges and nailing the front in place.

Someone mistreated this nice piece. The top of the mid-century modern cabinet had a bunch of water rings. I guess they didn’t have a coaster. Furniture should be treated better than that.

I smoothed out the top with my power sander before I started painting.

Next, I wrapped painter’s tape around the metal caps on the feet to keep from getting white paint on them. I’m kind of messy.
I choose Beyond Paint in off-white for the paint finish. Painting furniture with Beyond Paint is quick and easy because it requires no priming or sealing – a Win-Win. I applied two coats of paint for complete coverage.

When the paint was thoroughly dry, I removed the tape from the metal feet and placed tape over the newly painted wood above the metal feet. I don’t want to get metallic gold paint on the white legs.

I gently sanded the top flat part of the metal feet before painting because they were rusty. Rustoleum Metallic Spray Paint in Gold is soooo shiny! It took about a minute to spray the metal feet.

The mid century modern sewing cabinet looked okay but it didn’t feel right. The white paint was too blah or too flat or too one-dimensional (photo taken before painting the metal feet).
 I decided to pump up the look by adding bits of gold over the white. The FolkArt Metallic Treasure Gold paint is like butter; it’s so smooth. I used a dry-brush technique and dabbed the gold paint around all the sides and raised edges.
Then I flecked bits of gold all over the body using the tips of the paint brush. I didn’t put gold paint on the legs. The spray painted metallic gold feet were enough.

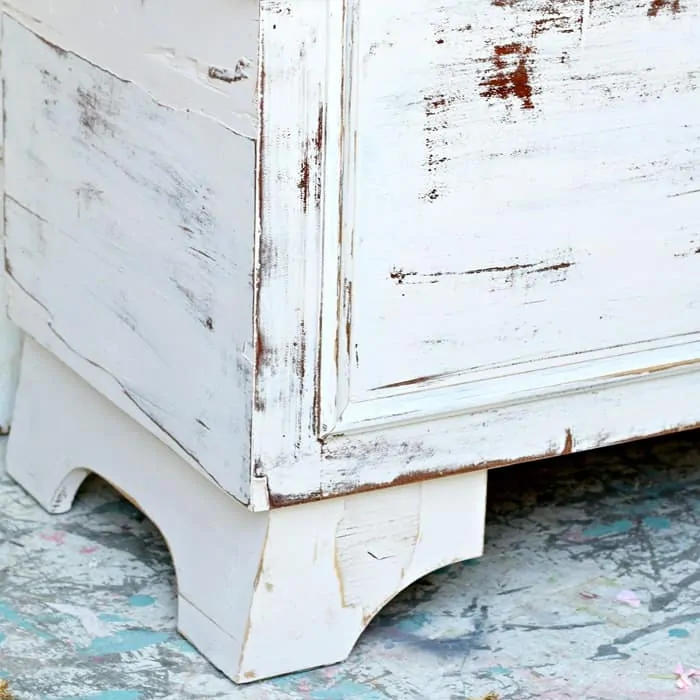
You can’t see the gold paint and the way it shines in the photos of the entire cabinet, but you can see the paint in this close-up.

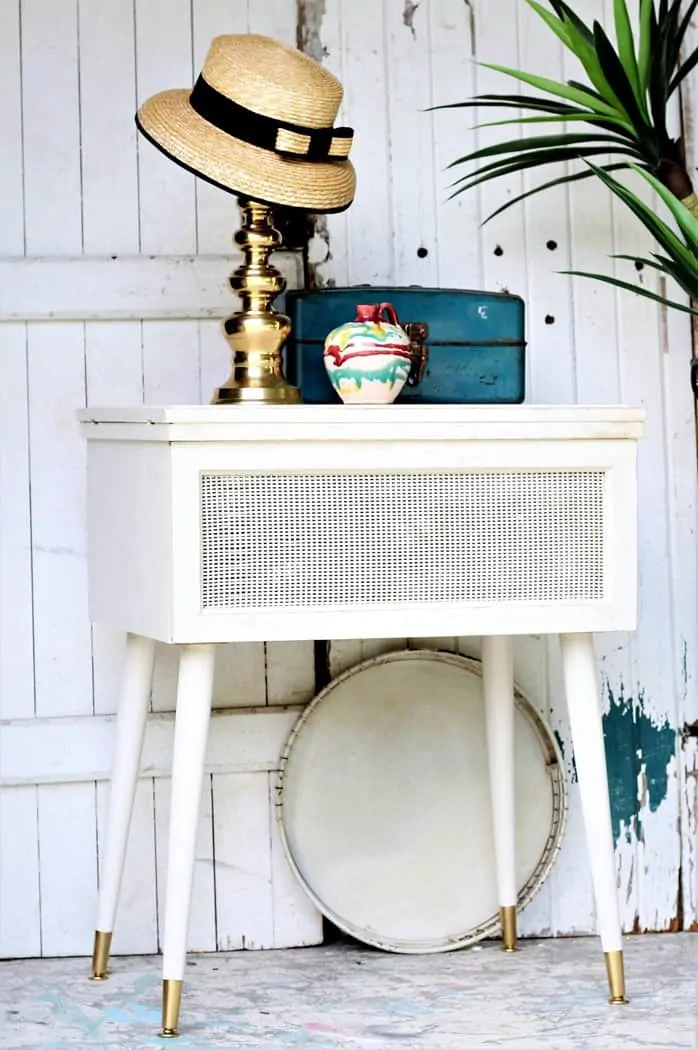
I’m happy with the finished look, although I admit I expected more when I envisioned this piece being painted.

The gold feet are the stand-out stars and an easy part of the project. Spray paint can work miracles in a short time.

The cane panel painted white with the dark wood underneath adds depth and dimension to the cabinet.
If you aren’t familiar with the dry brush technique I used to apply the gold paint watch my video below…..
[adthrive-in-post-video-player video-id=”a4LD2Vb4″ upload-date=”2018-07-19T13:02:06.000Z” name=”Dry Brush Paint Technique” description=”Detailed tutorial showing how to paint furniture using the dry brush paint technique.” player-type=”default” override-embed=”default”]
How To Use The Dry-Brush Paint Technique On Furniture
I would need to use spray paint to cover that underneath layer of wood and it’s hard to get into those tiny spaces with a paint brush without leaving blobs of paint and that isn’t a good look.

What about the dabs of gold on the cabinet? Do you guys like that? I know it’s almost impossible to see in the photos but it does make an impact in person. Would you have painted the cabinet differently?
Leave a note if you have time. Thanks for spending a bit of your day with me, Kathy
Well, sometimes the plan gets changed more than once….or twice, lol. Thank you
Those chairs sound lovely and it’s nice you have something from your aunt. I don’t think I would use them in an area with high humidity. It might very well ruin them. Are you using the chairs now? If not you might paint them and maybe you have spaces in bedrooms or other rooms of your home where a chair or two would come in handy. The Doctor/Pathologist I worked for in Nashville for 25 years lives in Belle Meade. Very Nice! Thank you so much for reading the blog.
Thank you Marsha
I think we have only had to remove one sewing machine and I think we took it to the recycling. I know that probably wasn’t the best option. You might check Senior Citizen Centers in your area or maybe similar organizations. Thank you for reading the blog and the nice comment. Makes my day!
Thank you Lori
This is beautiful. You are not lazy for painting furniture, you are creative and practical. I love what you did with this table. Thanks for sharing.
Lovely!! I have learned a lot from your blog, but i was wondering what do you do with the old sewing machines? I have 3 cabinets that I would love to make over. And I know I will never use those machines. Thanks for your help!
Wouldn’t change a thing! It’s fabulous!!!
I have some old wood dining room chairs with cane backs that I’m pretty sure are mid-century. They came from my aunt who lived in Belle Meade. She would now be about 110 years old. I have a set of six. Do you think I would be making a mistake if I want to paint them and use them on my screened porch? I just wonder how the old cane will hold up in our humidity here. I live in Christiana Tn. I love reading your blog because we are in the same area! Thank you so much for your help.
I always appreciate how you know just what to do when a plan doesn’t go as you expected. Project turned out great!
I think it’s beautiful. Understated and classy! Neutral and yet a standout!!
I love what you did with the sewing cabinet. If I were doing the project, I would paint the cabinet a glossy teal to make the brass feet stand out.