How To Replace Old Furniture Hardware On Painted Furniture
As an Amazon Associate, I earn from qualifying purchases.
It is so easy to replace old furniture hardware, drawer pulls and drawer knobs, with new drawer pulls or knobs.
Let’s face it. In most instances, the original hardware on a great piece of old wood furniture is the one thing holding it back after a pretty paint makeover.

Today, I will show you how to fix that problem. It’s a simple DIY project. You can update dresser hardware, chest of drawer hardware, buffet hardware, etc. You get the picture. Update those old drawer pulls!
How To Replace Old Furniture Hardware With New Drawer Pulls
If you can operate a small power drill, you’re good! I love my drill. The drill and the sander are my two favorite power tools. The first Christmas I asked for power tools as a gift, and I think the JTS freaked out. What woman wants power tools…..much less for Christmas? Me.
Why Change The Pulls?
Changing the hardware on furniture makes a big impact. The pulls or knobs can change the vibe from vintage to modern, country to stylish, etc.

Step 1. Prepare the furniture for painting.
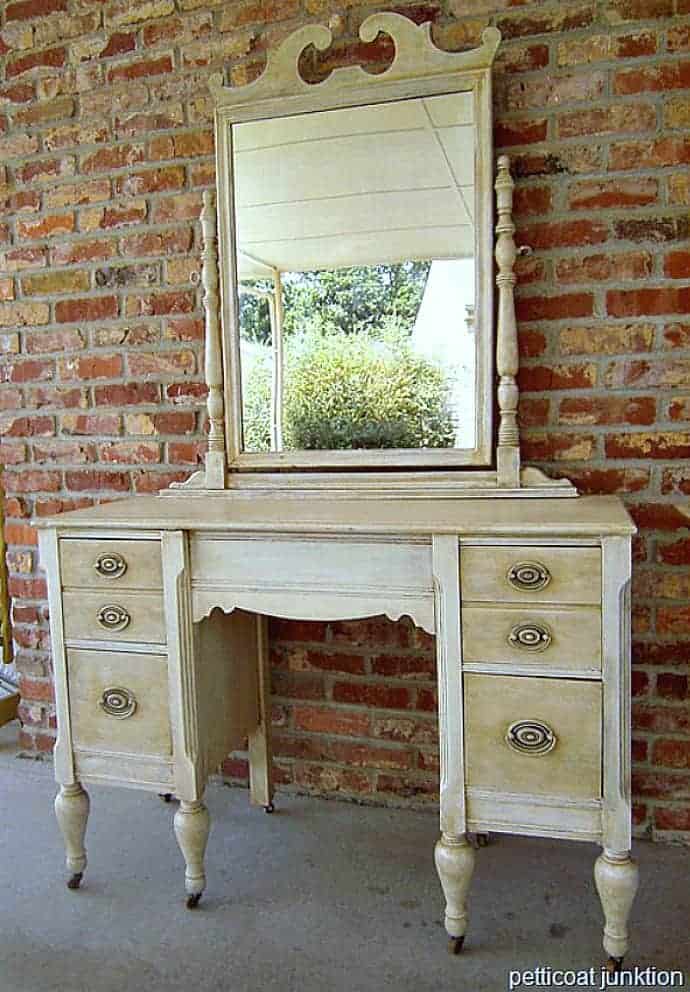
This is the furniture before the paint makeover and change of hardware. The dresser was Army property at one time. There was an inventory tag stapled to the bottom of the dresser.
The piece looks like an office credenza, and the style is Mid-Century Modern. Not very pretty for the house. I purchased the credenza at my favorite junk shop. The price was $40. I always get a deal at the junk shop.

The hardware looks like something you would see on office furniture so it has to go. I save all the old hardware I replace with new hardware because I never know what old hardware pieces I may need in the future. I have 100’s of drawer pulls and knobs in my stash.

When I remove the drawers from a chest or dresser, I always number or note on the back where the drawers are placed. This one quick step makes it easier to put the piece back together when the project is done. The drawers usually fit best in the slot they came out of.

Step 2. Remove the original hardware.
Use a screwdriver instead of a drill to remove the original hardware. The JTS likes to use the drill for this part of the project but I have more control with a screwdriver.

Step 3. Drill a hole for the new hardware.
I selected new knobs to replace the old hardware, and of course, you only need one screw hole for a knob. I drilled one hole in the center of the drawer for the new knob. If you decide on a new two-hole pull and the width is different from the old furniture hardware, you will need to measure and mark for two new holes.

I usually select a small bit first and drill a starter hole. Sometimes a large bit will jump over from the marked position and the hole will be a little off. That isn’t much of a problem when you just need one hole for the hardware. Once I get the small starter hole I drill a larger hole using a bit the size of the screw for the new knob.
Helpful Tool
Replacing the hardware with a two-hole drawer pull can be a problem unless you have one of these handy, inexpensive templates to mark the holes. The template has settings for all sizes of drawer pulls.
Try always to mark and drill the screw holes exactly. It takes a lot of extra time and energy if the holes are off the least bit, and you have to wallow them out so the widths between screw holes work.

Step 4. Protect the inside of the drawer.
You may want to skip this step depending on how OCD you are. I cover the holes inside the drawer with painter’s tape to keep the wood filler from seeping into the drawer.
I also cover the holes when painting to keep the paint from seeping into the drawer because I usually paint the drawer front with the drawer standing on its back and the drawer top facing up.

Step 5. Fill old hardware screw holes with wood filler.
Next, choose a good wood filler and fill the old screw holes with the filler. Be sure to overfill the hole with wood filler so the wood filler mounds over the top of the screw hole. As the wood filler hardens, it shrinks.

Step 6. Sand the wood filler.
Once the filler is dry, sand it flush to the drawer front. I use 100-grit sandpaper and sand by hand, but you could use a power sander. If the filler looks like a pond when it dries, you may need to repeat the process two or three times.
That little indention is not flush with the drawer and will still look like an indented area when painted. Repeat the fill and sand process until the filler is perfectly flush with the drawer front.
Repeat the Process
Sand the wood filler until it is flush with the drawer. I do this by hand with 100-grit sandpaper. This is where you will see if you need to add more filler to the hole so it’s flush with the drawer’s front surface.
If there is an indentation or dip in the screw hole filler, then add more filler and repeat the sanding when dry. I have a tutorial on replacing furniture hardware where you need to drill two holes for new pulls here….How To Replace Furniture Hardware

Step 7. Paint the furniture.
Now you’re ready to paint the drawers! If you did a good job with the filler, the holes will not be noticeable under the paint. My paint of choice for the credenza is Beyond Paint. I’ve painted many, many pieces using this specialty furniture and cabinet paint. The color I chose for the credenza is Pewter.

Beyond Paint, color- Pewter
The paint is a little thicker than other paints. It’s almost like a gel and brushes on like butter. The sheen of the paint is similar to eggshell. It’s not flat, but it’s not too shiny either- just right. You can use a foam roller or brush with the paint.

I painted the drawers and then moved on to the body of the dresser. I applied two coats of paint. The paint dries really fast, and I was able to apply the second coat of paint an hour after the first coat.

Step 8. Replace old furniture hardware with new knobs.
The last part is easy. Just screw the new knobs onto your freshly painted furniture. It may not seem important but selecting the right furniture knobs is a big deal. The knobs can change the whole vibe.
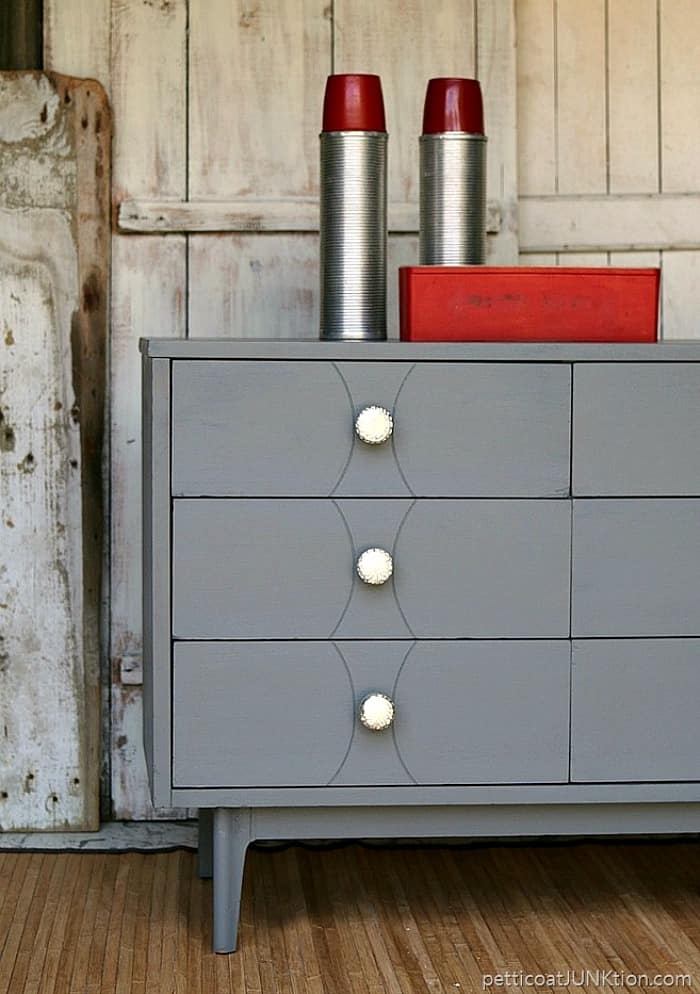
Who would guess this is the same piece of furniture? I made a short video of the paint process….
Beyond Paint Furniture Makeover Video 

How fun is the red vintage thermos set. I found it at a local antique store and had to have it. I love red. The set was still in it’s original brown faux leather case. At $12 it was a deal. The pops of red are gorgeous with the Pewter gray. Christmas will be here soon and I bet the thermos set shows up in my Christmas décor.

I can see the dresser used as a TV stand or maybe in a foyer……or heck…..as a dresser. I took it to the shop last week. Hope someone falls in love with it and hauls it home soon.
Click here to see a few of my favorite Beyond Paint projects: 15 Beyond Paint Furniture Projects.
Find Beyond Paint here. Disclosure: This project is a collaboration between Petticoat Junktion and Beyond Paint. All photos, project ideas, and opinions are my own. That’s it for today. I hope you guys enjoyed the tutorial. Have a great day, Kathy

Check you local antique/flea market stores. You might have to buy the complete handle but it would be worth it. Also check eBay. You can find a lot of vintage hardware on eBay.
I have a very old piece of furniture. It was my grandfather’s dresser. I use it as a sideboard. It has a marble top which is broken and will be replaced. Question: one of the drawer handles is missing a bale. Where or how do I go about finding a place that would have something like it? Thank you.
Hobby Lobby has knobs on sale every other week. Also you might find some at TJMaxx, Tuesday Morning, Bargain Hunt, World Market.
I love the drawer pulls you chose for this piece. They are perfect. Please share where you buy your hardware. You always choose such lovely items!
Awesome job.
My husband uses a cutting tool to cut them off. Yes, they are waaaaay too long!
What is the best way to shorten the screw on the new knob? They are all SO long,
Thanks
What a good project. The new color & new knobs make all the difference in making this a piece of furniture I would want in my home. Great job.
Beautiful work
Wow, went from office ugly to I want that in my house. Love the color and knobs!