How To Clean And Distress Old Painted Furniture
As an Amazon Associate, I earn from qualifying purchases.
This old chest of drawers was covered in layers of paint when I spied it at the Nashville Flea Market. Cleaning it up and distressing the paint gave it a whole new look.
I didn’t even open a can of paint for this makeover. The piece was already painted with three colors…..red, white, and blue. What could be more perfect?

I bought the chest from the Nashville Flea Market a couple of months ago and paid $30 for it.
Can you see where the paint is peeling off, revealing blue paint underneath? It’s really hard to see, but on the drawer fronts, there is red paint peeking through the peeling paint.

I’ve learned a few things in my painting journey and one of them is that everything doesn’t have to be re-painted or…. painted at all. Work smarter not harder.

I took my electric sander and some 100 grit sandpaper and went to town on the chest. I ran the sander all over the chest and the drawers. The sanding removed the yellowed layer of white paint. I didn’t really notice how the white paint had yellowed until I started distressing it.
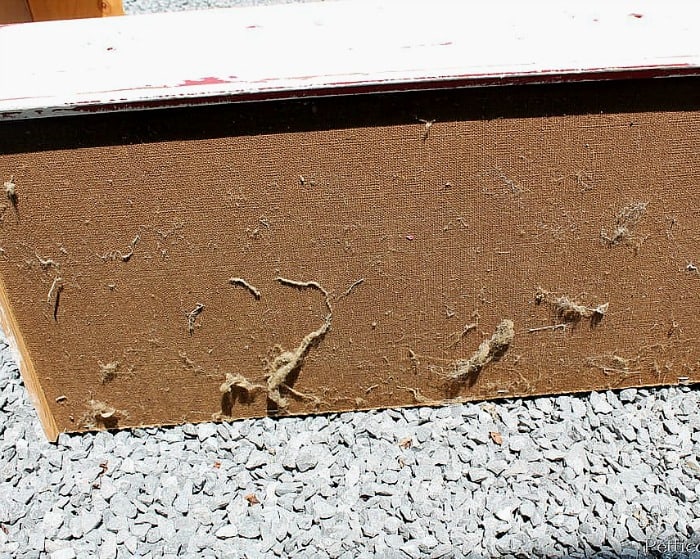
The piece was really really dirty. I used the shop vac to take off as much of the crud as I could then cleaned it all over with Simple Green.
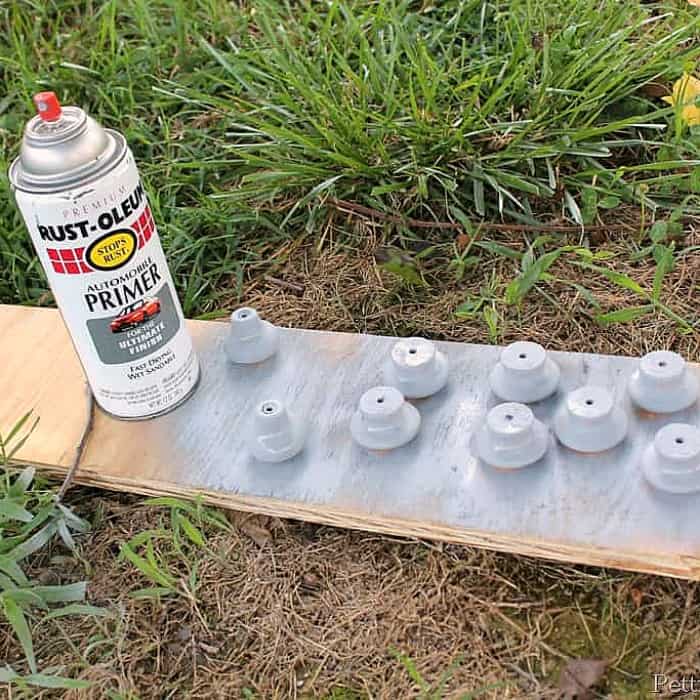
As you can see in the before picture, the knobs were pink, and one of them was missing. I found two matching replacement knobs for the top drawer.
The only spray primer I had on the shelf was Rust-Oleum automobile primer. I have no idea where the automobile primer came from. Anyway, I sprayed all of the knobs with the primer. Then after the primer dried, I spray-painted the knobs with this pretty gloss red!
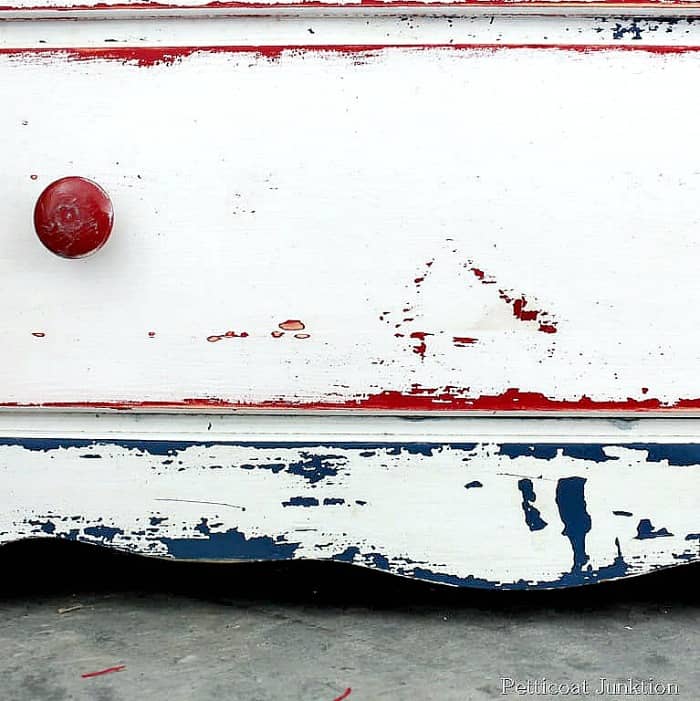
White paint with chunks of red and blue paint showing thru after the distressing. The details…..

I could not have improved on this piece by adding yet another coat of paint. The red and blue colors are deep and rich. That’s how I like them. For the final touch and to prevent more peeling, I applied a coat of Howard’s Neutral Wax.

I gently distressed the painted knobs. The swirls on the replacement knobs were perfect for distressing.

I know this look isn’t for everyone. Some of you will hate the over-the-top peeling/distressed paint finish…..and some of you will love it. To me….. the red, white, and blue color combination was too good to paint over. I really liked the little chest of drawers and was in no hurry to sell it. I kept it for a number of years before changing it out for other decor.

This project just goes to show that before jumping into your usual thing, you should consider what you already have to work with. In my case, that meant no painting required. I just worked with what was there.
The red, white, and blue chest looks great in our blue bedroom. The perfect decor for patriotic holidays.

When I first started painting furniture I would make a plan and it always included painting….always. Now I’ve learned to look at the furniture differently and see if I can work with what is there. I found this article with a lot of helpful information…..How to Start Flipping Your Furniture.
Sooooo…..let me know what you think. Do you like the layered paint look? Thanks for being here friends, Kathy
Love the chest!
I’ve seen this post before and love it! Happy Holidays!
It’s very cute, and will look great in just the right spot. It’s just a bit over the top for me with distressing, but maybe that’s just because I don’t have a place where it would look right in my home. I think in a kid’s bedroom–boys, specifically, it would be perfect. Good call, Kathy!
Have loved this since I first saw it!
What a lucky find and brilliant on your part to do this! Love it!
Thank you Sharon!
Perfect piece for the upcoming Memorial Day weekend! You have a great eye. The piece looks beautiful! It should fly out of your shop!
LOVE IT.
Couldn’t improve on an original. What you have there is the REAL thing! It is what we try to imitate with multiple coats of paint and distressing. Good for you for recognizing it.
Love it.
I LOVE it!!! It reminds me of the white enamel with red enamel dish pan that my mom had (and still uses) as I was growing up!! Good memories!!!!
LOVE LOVE LOVE IT!!
Such a gorgeous piece!
And you are so right. I first look at an item to see if it could be preserved as it is or partly painted.
Your projects are always an inspiration!
I so agree with you about not having to paint everything. Some things are best left alone. You gave this piece just enough to make it absolutely perfect!
Stopping by from Allis and happy to meet you!
Wow, what a better look. I love the color choices and the distressing:)
Looks so awesome and I would have left it as well. 🙂 thanks for sharing it with all of us.
Love this, Kathy! You’re one of my favorites from the Home{work} Wednesday link party. Thanks for linking up!
I love it! You did a fabulous job on the dresser. I have one bedroom that is decorated in red, white, and blue most of the year. Something like this would be so cute in the room. I may have to rethink the creamy white furniture that is in there presently! I joined you email subscription so that I will not miss your next blog post. I would love to have you stop by Still Woods Farmhouse for a visit when you have the opportunity!
Blessings from Still Woods Farmhouse
Kathy, I love it!! It looks so much better letting those colors come thru!! Beautiful!!
Love it! Unique and Fresh. I agree sometimes you can work better with the dresser without paint! Awesome job and vision.
I like it!. You can’t go wrong with red white & blue.
Oh wow, see, that is just awesome. The colors couldn’t be more perfect!
Thanks so much for sharing on Project Inspire{d]! Pinning!
Nancy
That is a wonderful look , came out stunning!
I love it! I keep going back and re-reading this over and over again and looking at the pictures of it. It’s gorgeous!
Very smart. I would have thought you painted it to look like that for sure!!
I love this. It turned out great.
That is so cool! I would never have thought of looking for what was underneath. I love how it turned out!
Love all the distressed, chippiness (is that a word?) of the piece… Just amazing! I’d have it in my home, no problem.
Beautiful piece. Love that you stopped before starting to decide that it only needed some tweaking to turn it in to such a beautiful piece.
Love it. I am getting so inspired to paint. Doing my first project next week with the help of a friend and fellow blogger. Can’t wait!
Mark me on the love it side. Fun project!
That piece is seriously amazing. LOVE IT.