How To Wet Distress Painted Furniture | Vanity Desk Makeover
As an Amazon Associate, I earn from qualifying purchases.
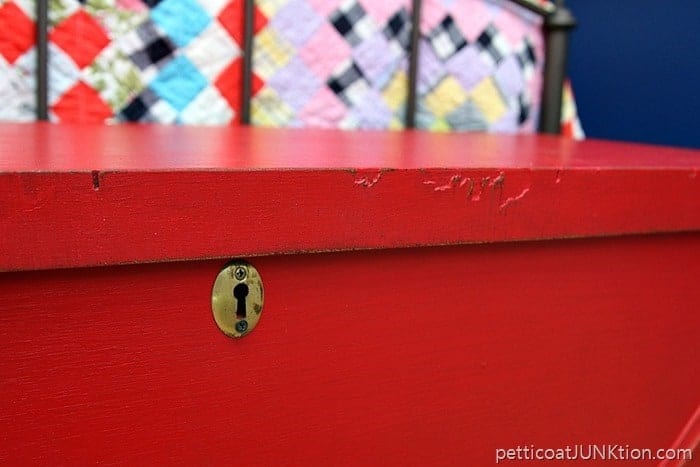
I like to wet distress painted furniture because there is no mess. That’s how I distressed this desk after painting it a beautiful blue color. I also saved some of the original stained finish by covering the few scratches with a stain marker and Howard’s Feed n Wax.

To create this fabulous look I wet distressed the paint using Simple Green and a rag. I made a video tutorial of the stained feet refresh and the wet distressed paint technique. The video is at the end of the post. Be sure and watch the video because I explain the process while walking you through each step.
The hard part of the makeover was selecting the perfect knobs for the new look. I tried out 7 different styles and I have photos of the different furniture knobs on the completed piece. You can let me know your favorite knobs. I’ve already picked mine.
 The vintage vanity came from my favorite junk shop. I paid $35 for it. In the video of my junk finds I think I said it was $20. Well, that was wrong. My mistake. It’s getting really hard to find these vintage pieces. I took one look at the feet and said “Sold”.

I wasn’t sure about the paint plan but I knew I wanted to showcase those feet by refreshing the stained finish.

Before I could paint the vanity it needed a few minor fixes. The mirror was missing so there was a gaping hole on the top at the back of the vanity.

I found a board in our stash that fit perfectly as far as width and I was okay with the board sticking up a bit above the vanity top on the back. I just needed to measure the length of the vanity back and make one cut on the board.

For some reason there was a bent nail sticking out of the vanity top on the back and I had to remove it before nailing on the replacement board.

My brad nailer made the job of nailing the board to the back side of the vanity super easy.

Those feet really needed a little love and I’ll show you how I did that in the video. I vacuumed out the dust and lint in the drawers and body of the vanity then cleaned it up with Simple Green. Before starting the paint job I used painter’s tape to cover the tops of the feet because I’m a messy painter. I also thought about refreshing the stained finish on the curvy detailed center board so I covered it with painter’s tape too.

The paint for this project is Miss Lillian’s No-Wax Chock Paint, color Ocean Depths. It’s so pretty!

After brushing on the first coat of paint I looked at the center piece, not painted, and didn’t like the look. The center piece was competing with the ball feet for attention and gave the vanity a disjointed look. So I painted the center detail piece too. The photo above shows the vanity with one coat of paint. I applied a second light coat.
")
Now it’s time to refresh those feet. I pulled off the painter’s tape and started going over all of the scratches with a Minwax stain marker. The markers are perfect for jobs like this.
Once the marker stain dried I went over the feet with Howard’s Feed n Wax. The video shows the process really well. I let the stain from the marker set on the scratches just a few seconds then wipe over it with a rag to remove the excess stain. This process works to cover furniture scratches on all stained finishes. The markers come in different colors. The one I used was walnut color.

And those feet turned out great. I love the paint color too. What do you think of the yellow knobs on the vanity, too modern or just right? I tried several colors and styles of knobs before deciding on the yellow ones. Take a look below at all of the other options I tried out.
 I kind of liked the red knobs too. The two top knobs are wood knobs I spray painted with Krylon Cherry Red. I love that color spray paint. The bottom two knobs are from Hobby Lobby.

Next I tried wood knobs spray painted brown and I put on a glossy white knob and neither of these did anything for me. How about you?

For the next look I was going for the gold. Two different styles of gold knobs and they were okay but not what I was looking for.
")
Next came crystal clear knobs. Not liking these either. I guess so far all the knobs were too drab for me except for the yellow knobs and the red knobs.
 The pop of color was what I was looking for. The yellow knobs have brown details around the center that are hard to see in this photo.

The distressing on the detailed parts of the dresser shows off the original stained finish. To get this distressed look I used Simple Green to “wet distress” the paint. It’s as easy as spraying Simple Green on a clean rag and then wiping over the paint with the wet rag. You may have to rub hard if the piece is not freshly painted. It’s best to do the wet distress a few hours after the paint has dried. I show you how to do the wet distressing in the video too! It’s all there.

Let’s take one more look at those feet. As you can see the finish is not perfect but it looks so much better after using the stain marker and feed n wax on the feet. Time to watch the video and see exactly how to cover furniture scratches and wet distress paint by using Simple Green….
Cover Furniture Scratches The Easy Way
Find more of my distressed furniture pieces and tutorials…..

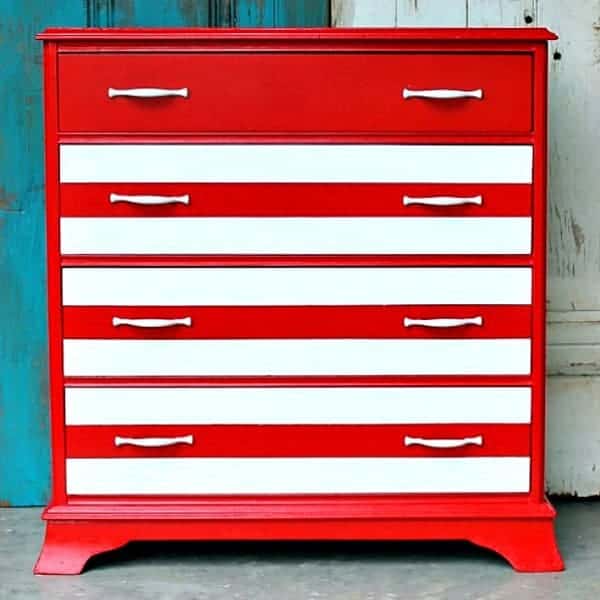
I used the wet distress method on the chest above and you can see the tutorial here.
Try the baby wipe distressing technique like on the table below….

Tutorial here…..How to use baby wipes to distress paint.
So leave me a note and give me your opinion on the knobs and the distressing. Thanks for spending part of your day with me, Kathy

I personally liked the glass knobs. It really shows off the feet with those on it.
The screws are easy to cut just remember to thread a nut onto the screw before you cut it.
When you remove the nut it will clean the threads of any burrs so that it will thread back on your knob without any trouble
I liked the crystal knobs, but I thought the brown knobs tied it all together best.
It’s a great desk!
Hi Kathy. The makeover is fabulous. The yellow knobs make the piece very “artsy”. But, I’m fond of glass knobs. It will depend on the buyer and where it will be used. Question…when using Hobby Lobby knobs the screws are so long. Do you replace the screws or cut them some how. I tend to shy away from them because they are too long. Im loving your Christmas projects and other tips and lists.
Again, another beautiful piece. Actually 2 great works of art! You are an artist with what you do.
Pretty. I like it with the crystal knobs.
I have an antique sideboard that belonged to my Grandmother. A few years ago I painted it red with gray drawer fronts. I left the top of it a dark walnut color. I plan to move in the near future and want to give this piece yet another look. I was thinking of painting it that beautiful blue you used on this vanity, but toning it down a bit with a black wash. Do you have any videos showing how to do this?
That piece turned out great!! For myself I would use the clear knobs. I’m not a yellow person., but the yellow does add to it.
i love this piece, the feet really are special and are beautiful. i guess i’m in agreement with many above comments, i would have liked the wood knobs better than the yellow, but hopefully a buyer will see the potential! The blue is fun and i love the distressing you did. thanks for the videos!
Love the blue paint and the yellow knobs and I like mixing stain and paint, but have to agree with Linda. I would have left the top two drawers and maybe the center trim piece the original stained wood to tie it all in…otherwise the feet look like extras added at the last minute. But a neat little piece…I would have bought it for $35, too. 🙂 Thanks for sharing!
Hi Kathy,
Let me start by saying I love your work, creativity, and sense of humor. Picking the right knob is probably my biggest dilemma. And I do exactly the same thing, scour thru my stash o’stuff. For me, I like the crystal and brown (Bronze might look cool tho too). Thank you for sharing.
Merry Christmas,
Terri
The blue is delightful and I think the knob choice has everything to do with where it’s going and who it’s hanging out with. The yellow is fun and looks great with the step stool and quilts. I also like the brown as it coordinates with the feet, and makes them friends!
Hi Kathy,
As is the feet don’t tie in with the rest of the piece, but rather look out of place. Sorta like wearing rain boots when the sun is shining. Maybe dark staining the top would bring it all home. Or matching the knobs gold color, though I’m not thrilled with that idea either .