Vaseline Paint Layering Technique For Furniture: A Complete Guide
As an Amazon Associate, I earn from qualifying purchases.
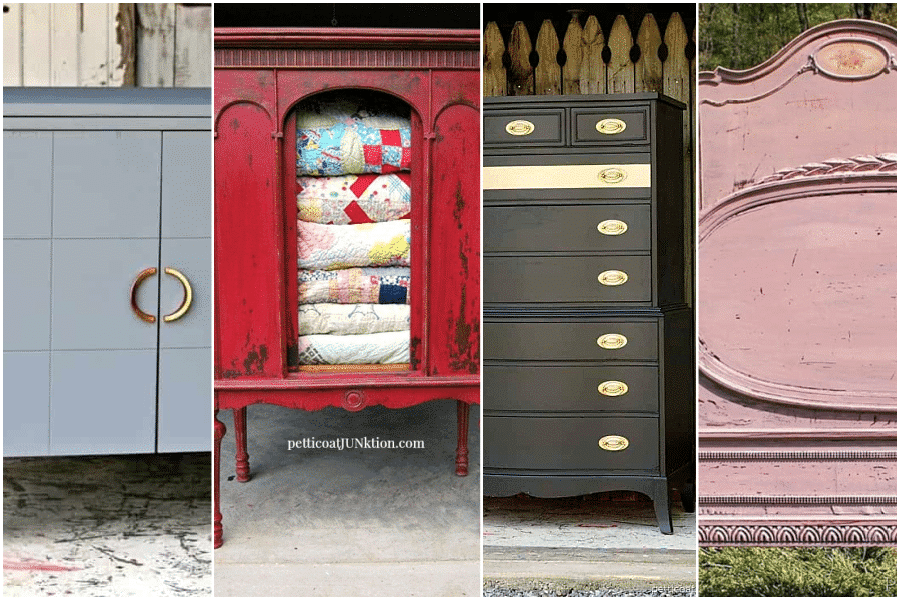
Learn how to layer paint on furniture with Vaseline and get that pretty, chippy, shabby chic look without a lot of fuss. If you love layered paint finishes, soft color peeking through, and pieces that look like they’ve been around for years, you’re going to love this paint distressing technique.
In this complete guide, I’ll walk you through exactly how the Vaseline paint layering technique works, what supplies you need, and the step-by-step process from prep to sealing. This tutorial is beginner‑friendly, and I’ll explain things in plain language, just like I was walking you through a project in my workshop.
Over the years, I’ve used Vaseline to layer paint on all kinds of pieces—nightstands, cedar chests, a bed, even a recycled sewing machine cabinet. These projects are listed below so you can see different color combinations and styles. Think of this post as your one‑stop guide for learning how to layer paint on furniture with Vaseline.
What Is The Vaseline Paint Layering Technique?
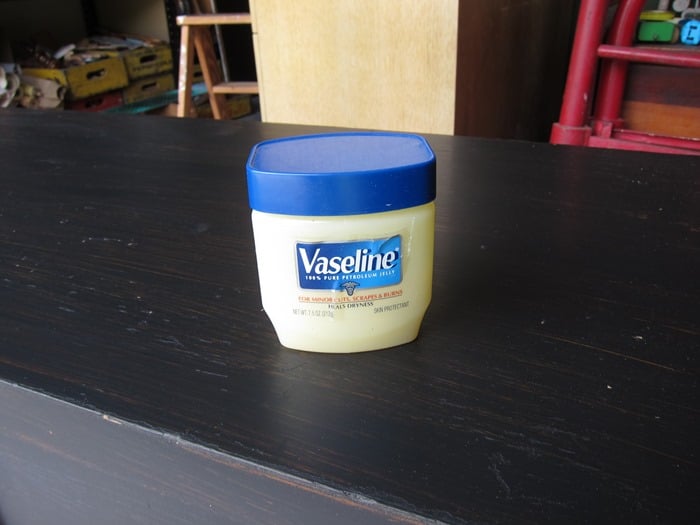
The Vaseline paint layering technique is simply using petroleum jelly as a paint resist. You paint a base color on your furniture, let it dry, then rub a thin layer of Vaseline on the areas where you want the paint to look worn. When you brush on your second coat of paint and let it dry, it won’t adhere well to the greasy spots.
When you lightly sand those areas (distressing the paint), the top color comes off easily, and the base color shows through. It’s a simple way to achieve a layered, distressed finish without sanding all the way down to bare wood.
Best Paints And Colors To Use With Vaseline
You can use this technique with most water‑based paints, including latex and chalk paint. The real magic is in the color combinations:
- Light over dark (white over coral, cream over turquoise)
- Dark over light (black over green for a dramatic look)
- Soft pastel over neutral for a shabby chic feel
You’ll get the most contrast and interest when the two colors are clearly different. Two very similar shades of pink, for example, won’t show the layers as well.
Supplies You Need For a Layered Paint Project
- Two contrasting paint colors
- Vaseline (or other petroleum jelly brand)
- Paintbrushes
- Sandpaper
- Cleaning supplies
- Stencils (optional)
- Scrapbook Paper for lining drawers (optional)
- Furniture knobs
- Furniture wax (optional)
Step‑By‑Step: How To Layer Paint On Furniture With Vaseline
1. Prep the Furniture
Good prep makes a huge difference in how your finish turns out. I consider it the most important part of a furniture makeover.
- Inspect the piece. Look for loose or bubbled veneer, deep scratches, or greasy spots.
- Repair if needed. Glue or remove loose veneer, fill deep gouges if you don’t want them to show, and tighten any wobbly parts.
- Sand lightly. A quick scuff sand with medium‑grit sandpaper (around 120–150) is usually enough to help the paint grab. You don’t have to sand down to bare wood.
- Clean well. Wipe everything down with a good cleaner or degreaser and let it dry. Paint and Vaseline both work better on a clean surface.
2. Apply the Base Coat of Paint
- Choose a contrasting color. This is where you can have fun—think coral pink under white, turquoise under red, black under green, or soft gray under cream.
- Brush on the base coat. Apply an even coat of paint to the whole piece, including the corners and details. Two coats of paint are best for good coverage.
- Let it dry completely. Don’t rush this step. If the base coat is even a little tacky when you add Vaseline, things can get messy.
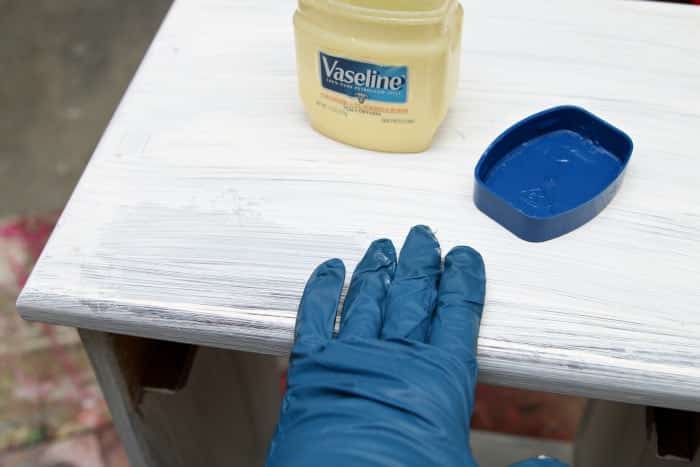
3. Apply Vaseline Where You Want Distressing
This is the magic step in how to layer paint on furniture with Vaseline. You’re deciding exactly where the top color will not stick.
- Use a light hand. A thin layer of Vaseline is all you need. Too much can make the paint drag and stay gummy.
- Apply with a rag or glove. I like to use a lint‑free rag or a gloved fingertip to rub Vaseline on:
- Edges and corners
- Around drawer pulls and knobs
- Raised trim and carved details
- The curvy parts of legs, feet, and any areas that would naturally wear over time
- Think about wear. Imagine where a piece would get bumped, grabbed, or rubbed over the years—that’s where you want the Vaseline.
You don’t have to cover every edge. A few well‑placed spots give you a more natural, time‑worn look.
4. Add the Top Coat of Paint
Now you’ll cover everything with your main, visible color.
- Choose your top color. This is usually the lighter or more neutral shade—white, cream, gray, or a fun color you want to see most of.
- Paint right over the Vaseline. Brush the top coat over the entire piece, including the petroleum jelly covered areas.
- Let it dry. Give the paint enough time to dry to the touch. It won’t bond well where the Vaseline is, and that’s okay—that’s how you get the layered look when you sand.
You may need to apply a second coat of the top color for complete coverage.
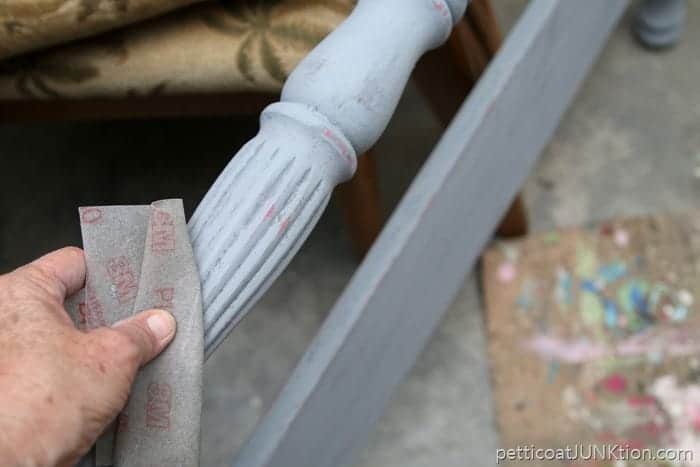
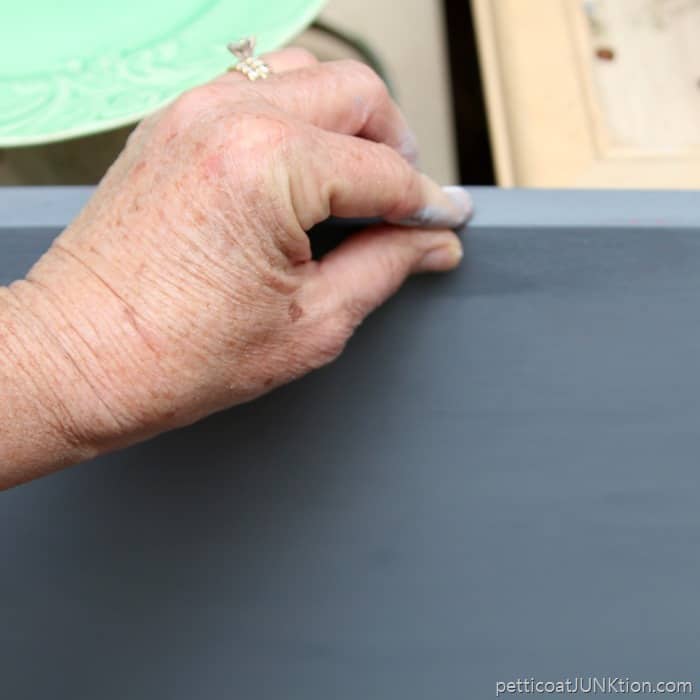
5. Distress and Reveal the Layers of Paint
This is the fun part—revealing the base color and all those pretty layers.
- Start with fine/medium grit. I usually begin with 100–150 grit sandpaper or a sanding sponge.
- Sand the Vaseline areas first. Gently sand where you know you applied Vaseline. The top coat will come off easily, and the base color will show through.
- Feather the edges. If a spot looks too harsh, lightly blend around it so the transition between colors looks natural.
- Add a little extra distressing if you like. You can lightly sand other edges and flat areas without Vaseline to let a bit of wood show for an older, well‑loved look.
When you’re happy with the amount of distressing:
- Wipe everything down. Use a clean, dry cloth to remove dust and any leftover Vaseline residue.
- Seal the finish. Once the piece feels dry and not greasy, add your favorite clear coat or wax to protect the paint and make it easy to clean.
Frequently Asked Questions About Layering Paint With Vaseline
-
What kind of paint works best with Vaseline?
Most water‑based paints work well with this technique, including latex and chalk paint. I usually use regular latex paint or specialty furniture paints. The main thing is to make sure the base coat is completely dry before you apply Vaseline, and to let the top coat dry before sanding.
-
Do I put the Vaseline on before or after the first coat of paint?
Once the base layer of color (one or two coats of paint) is dry, apply Vaseline to strategic areas.
-
How much Vaseline should I use?
Less is more. You only need a very thin layer of Vaseline. If you use too much, your brush can drag, and the paint may not dry or stick well in those spots. I either use a lint‑free rag or a gloved hand to lightly rub Vaseline on edges, corners, raised details, and anywhere the furniture would naturally wear over time.
-
Where should I apply Vaseline to my furniture piece?
Think about where an old piece would naturally get worn:
- Edges and corners
- Around drawer pulls and knobs
- Raised trim and carved details
- Legs and feet
You don’t have to cover every edge—choose a few key spots so the distressing looks natural, not overdone.
-
Will Vaseline ruin my paint or bleed through?
Used correctly and in thin layers, Vaseline won’t ruin your paint. It simply keeps the top coat from sticking in those areas. When painting over the Vaseline-covered areas, the top coat should look uniform over the complete piece. You should not be able to tell there is Vaseline beneath the top coat until you start sanding.
-
How do I seal furniture that’s been painted with the Vaseline technique?
After sanding and wiping away any loose paint and Vaseline residue, let the piece sit for a bit and make sure it feels dry. Then you can seal it with your favorite clear coat or furniture wax, following the product directions. A light, even coat is usually all you need.
-
What if I sand too much and remove both paint colors?
If you sand too hard in one spot and go through both layers of paint, don’t panic. You have options:
- Lightly touch up with the top coat color and let it dry, then gently distress again, or
- Embrace the extra‑worn look and let a little wood show through—sometimes those “mistakes” end up being your favorite parts.
-
Can I use this technique on any piece of furniture?
You can use the Vaseline paint layering technique on most wood and wood‑veneer furniture: nightstands, dressers, beds, cedar chests, accent tables, and more. But this technique isn’t just for furniture; use it on any detailed decor accessories. I like the Vaseline technique on pieces with some detail—curves, trim, or panels—because the layered paint really highlights those areas.
-
What are your favorite color combinations for Vaseline layering?
- Coral pink base with an off‑white top coat (soft and feminine)
- Turquoise base with cherry red on top (bold and fun)
- Green over black (dramatic, farmhouse feel)
- Soft gray or taupe under creamy white (neutral shabby chic)
You want enough contrast so the bottom color shows through. If the two colors are almost the same, you won’t see much layering.
-
Is this technique beginner‑friendly?
Yes, absolutely. That’s one reason I love it. The steps are simple, and the finish doesn’t have to be perfect to look good. A little extra distressing here or a lighter spot there just adds to the charm. If you’re nervous, start with a smaller piece like a nightstand or a side table before tackling a big dresser or bed. You could also paint a sample board for practice.
-
Can I fix areas where the Vaseline was too thick, or the paint looks gummy?
If you notice a gummy or very shiny spot where the paint never really dried, it usually means there was too much Vaseline in that area. Let it dry as much as it will, then:
- Gently wipe away the excess Vaseline and paint with a rag,
- Lightly sand if needed.
- Touch up the area with the base coat of paint, wipe with just a bit of Vaseline, then paint the top coat and distress.
- Or paint the top color over the problem area after removing the excess Vaseline.
Next time, use a lighter hand with the Vaseline. A tiny bit goes a long way.
Vaseline Paint Layering Project Ideas
Below are some of my favorite furniture makeovers using the Vaseline paint layering technique. Click each project title to see the full step‑by‑step tutorial and more photos.
-
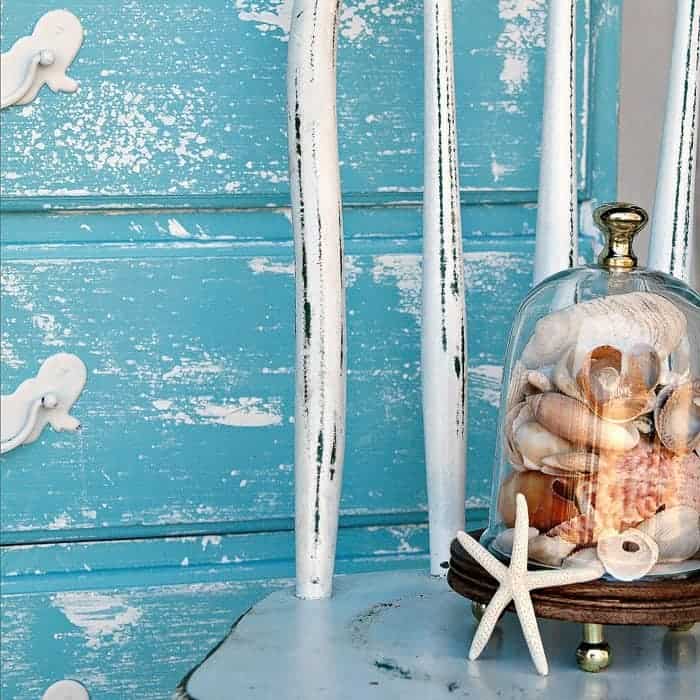
Pink And White Layered Nightstand (Half Vanity Makeover)
Good for: feminine shabby chic, small bedrooms, guest rooms
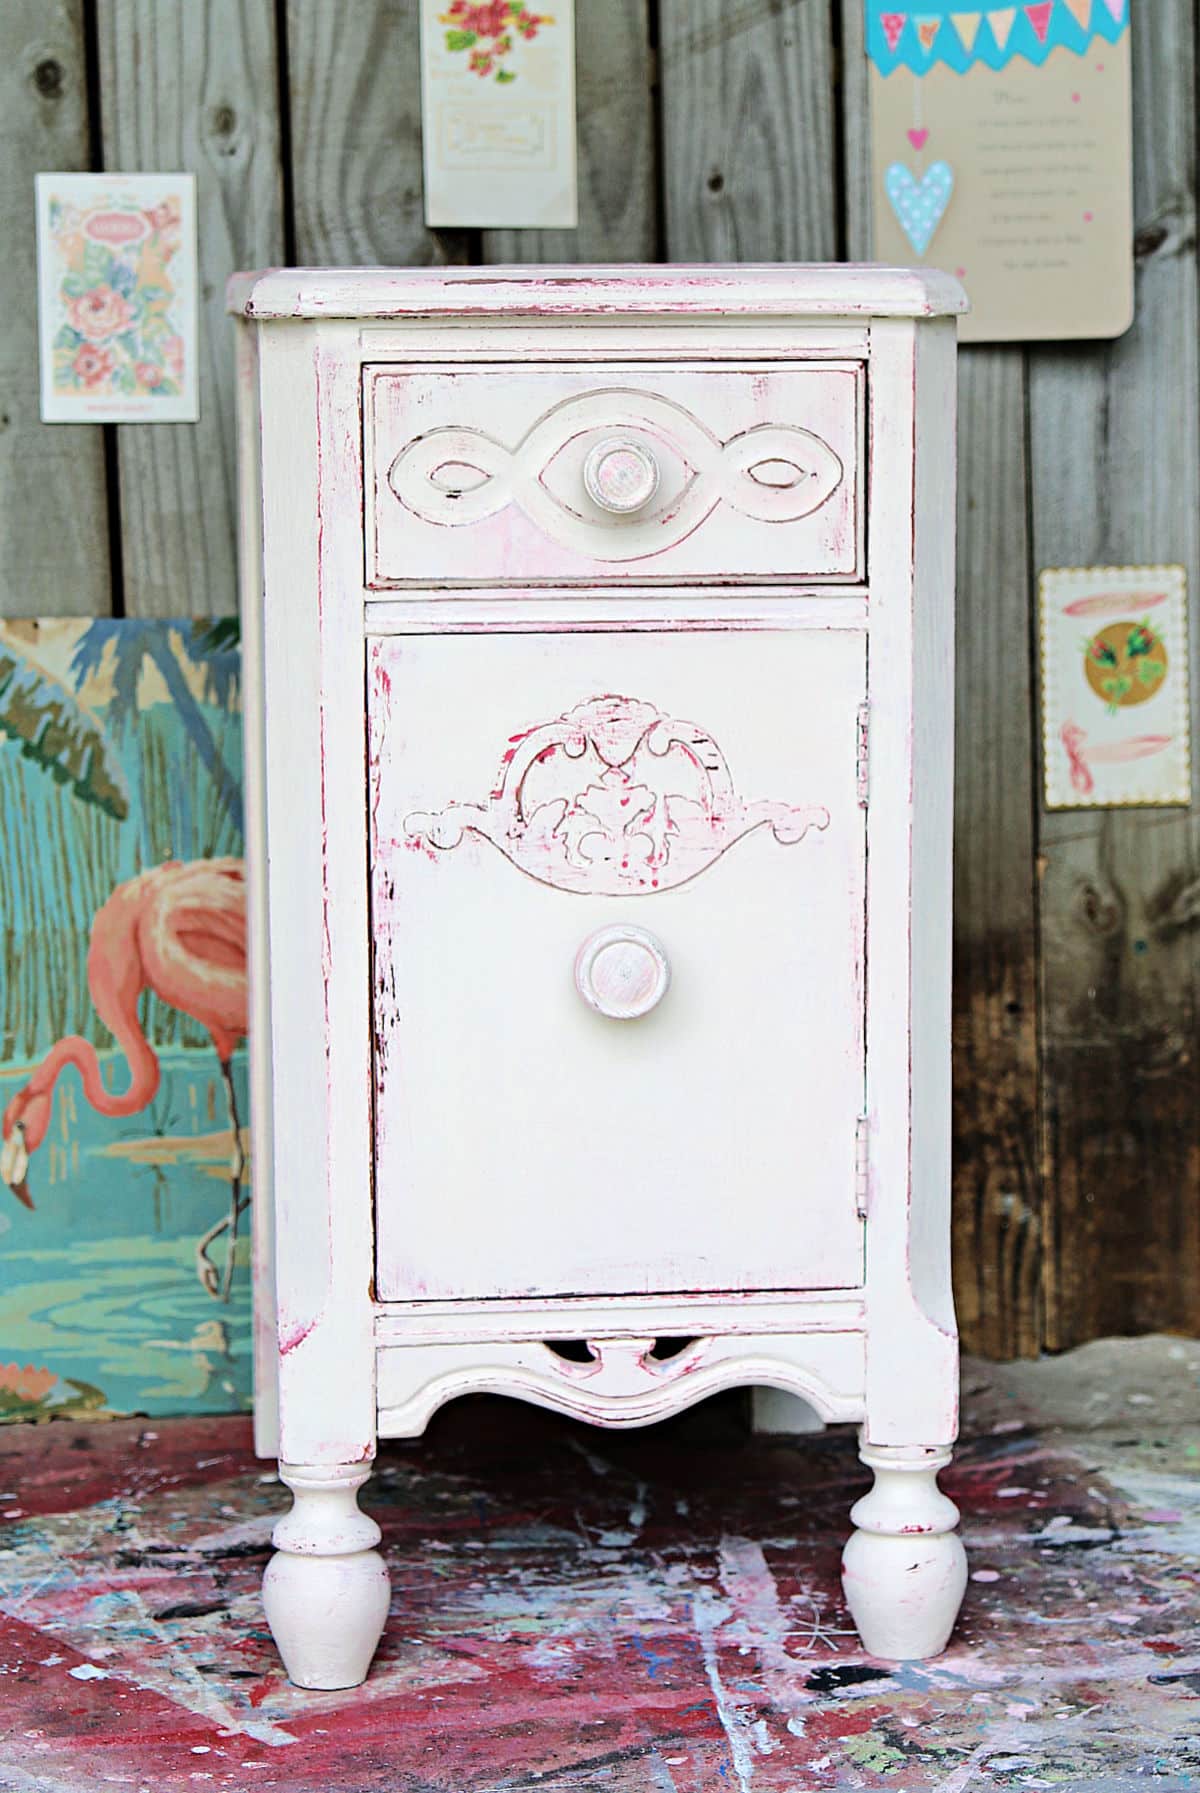
This little nightstand started life as half of an old vanity, complete with missing veneer and worn spots. I painted the base layer a pinkish coral and added an off‑white top coat, using Vaseline on the detailed trim and edges. Light sanding revealed the pink popping through the white, and the finished piece is soft, girly, and perfect for a shabby chic bedroom.
Layered pink and white Vaseline nightstand makeover
-
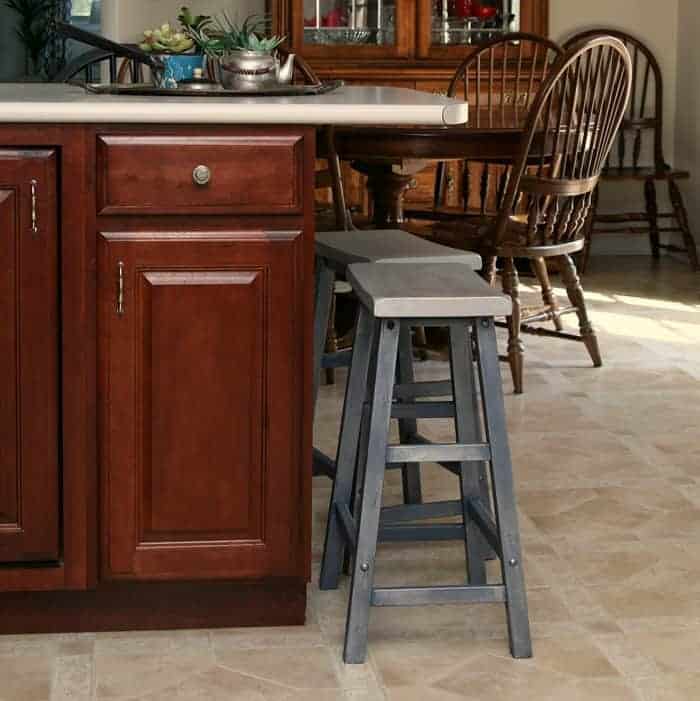
Gray Vaseline Nightstand With Soft Color Peek‑Through
Good for: French country, cottage style

For this nightstand, I wanted a rich, time‑worn look. I painted the base in a pretty color (think soft pink) and then added a cool gray top coat. By rubbing Vaseline on the edges of the nightstand, drawer, and furniture knob before applying the top coat, I was able to sand back just enough paint to let the undercolor peek through. It’s a subtle, romantic finish that works beautifully in a cottage or French country room.
Gray nightstand with Vaseline layered paint
-
Vintage Bed (Headboard And Footboard) With Layered Paint
Good for: statement bed, farmhouse, or cottage bedroom
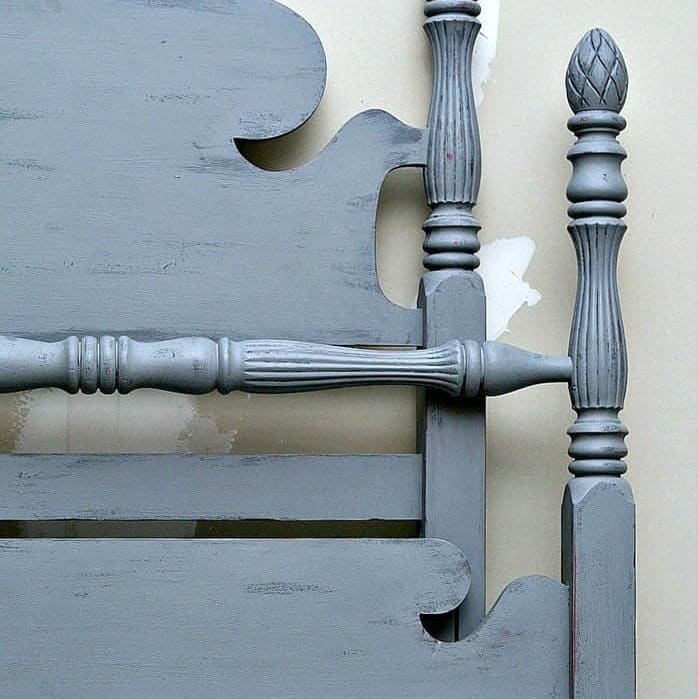
This vintage bed had great lines but needed some love. “Pineapple beds” are so pretty. I used two contrasting paint colors and the Vaseline layering technique to highlight the carved details and edges on the headboard and footboard. The base color shows through in all the right places, giving the bed a well‑loved, farmhouse feel without looking too busy.
Layered paint on a vintage bed using Vaseline
-
Bold Cherry Red And Turquoise Cedar Chest
Good for: bold color lovers, kids’ rooms, fun accent pieces
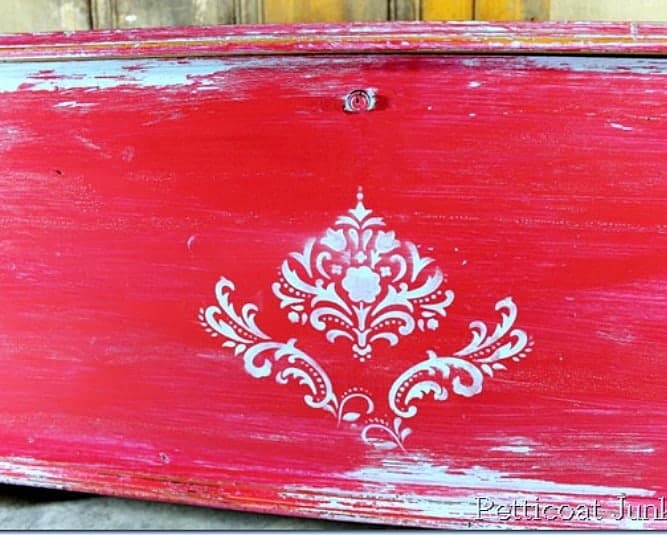
This cedar chest is one of my favorite Vaseline paint layering projects. I started with a bright turquoise base, then added a cherry red top coat. Using Vaseline on the edges and raised panels let the turquoise pop through in a big way once I sanded. The finished chest is bold, fun, and a great example of how dramatic you can go with this technique.
I liked the look so much that I did another cedar chest with the colors reversed. Take a look….
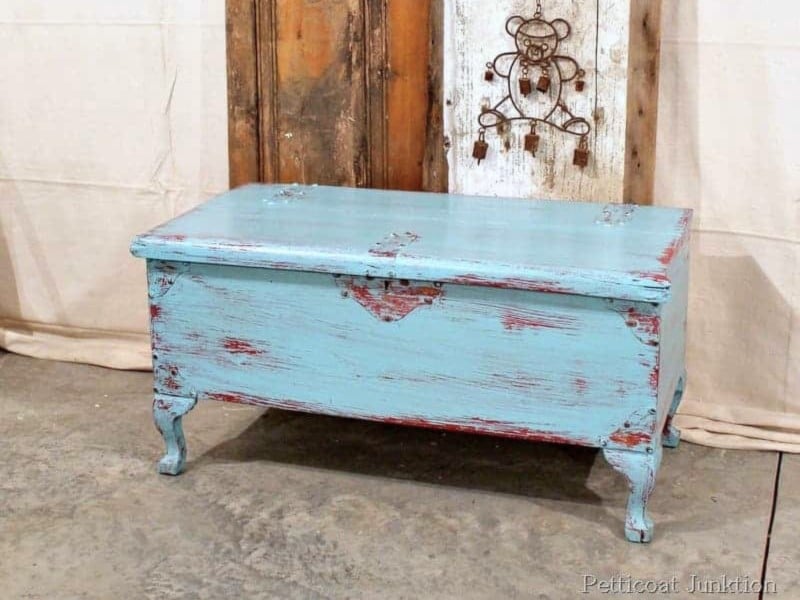
Cherry red and turquoise Vaseline layered cedar chest
- Shabby Chic Cedar Chest With Bold Colors
Good for: living rooms, entryways, foot of bed
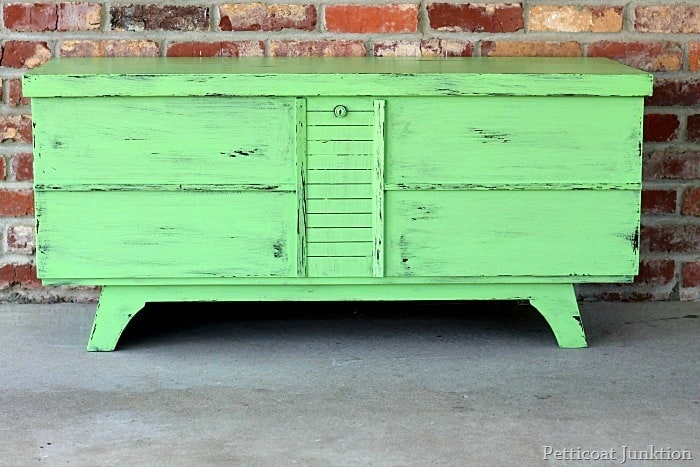
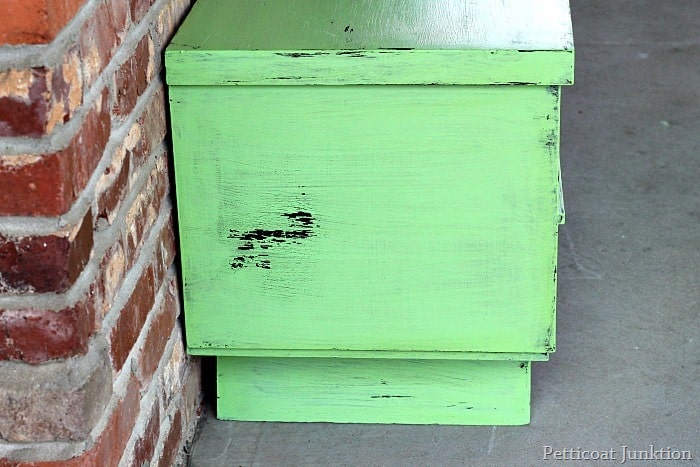
For this cedar chest, I took a big approach with bold colors. A black base, topped with a bright, cheery green, creates a bold look. I applied Vaseline along the edges, corners, and any raised trim, then gently sanded after the top coat dried. The layers show in large chunks, making this a statement piece.
Bold cedar chest with green and black Vaseline layers
- Recycled Sewing Machine Cabinet Turned Accent Table
Good for: entryways, small spaces, unique accent pieces

This recycled sewing machine cabinet was the perfect piece for the Vaseline paint layering technique. The base color highlights all the little details once the top coat is distressed back. Using Vaseline along the edges, panel lines, and trim made it easy to control where the paint wore away. The result is a one‑of‑a‑kind accent table with tons of charm and character.
Recycled sewing machine cabinet with Vaseline layered paint
Are You Ready to Try This Vaseline Paint Layering Technique?
Layering paint on furniture with Vaseline is one of those simple tricks that gives you a big designer look without a lot of work. With just two paint colors, a little petroleum jelly, and some light sanding, you can turn an ordinary piece into a shabby chic, cottage, or farmhouse treasure that looks like it’s been loved for years. I hope this complete guide gives you the confidence to try the Vaseline paint layering technique on your next makeover and create a piece you absolutely love.