How To Make White Furniture Look Distressed And Naturally Worn
As an Amazon Associate, I earn from qualifying purchases.
With this quick technique, you can make white furniture look distressed naturally for a shabby chic look or that oh-so-popular worn look. If you have white furniture, then you just need a piece of sandpaper and a bit of time to get this distressed look.
Distress Furniture For A Natural Worn Look
You guys know I’m all about bringing color into my world but sometimes I see a piece of furniture that screams for the simplicity of white paint. This piece was one of them. Even the hardware wanted to be white.
But the best part of this DIY project is the distressing. I love the look of distressed paint! Distressing is one way to age white paint or to give the furniture an old or antique look like it’s been around for a while.
Select The Right Furniture
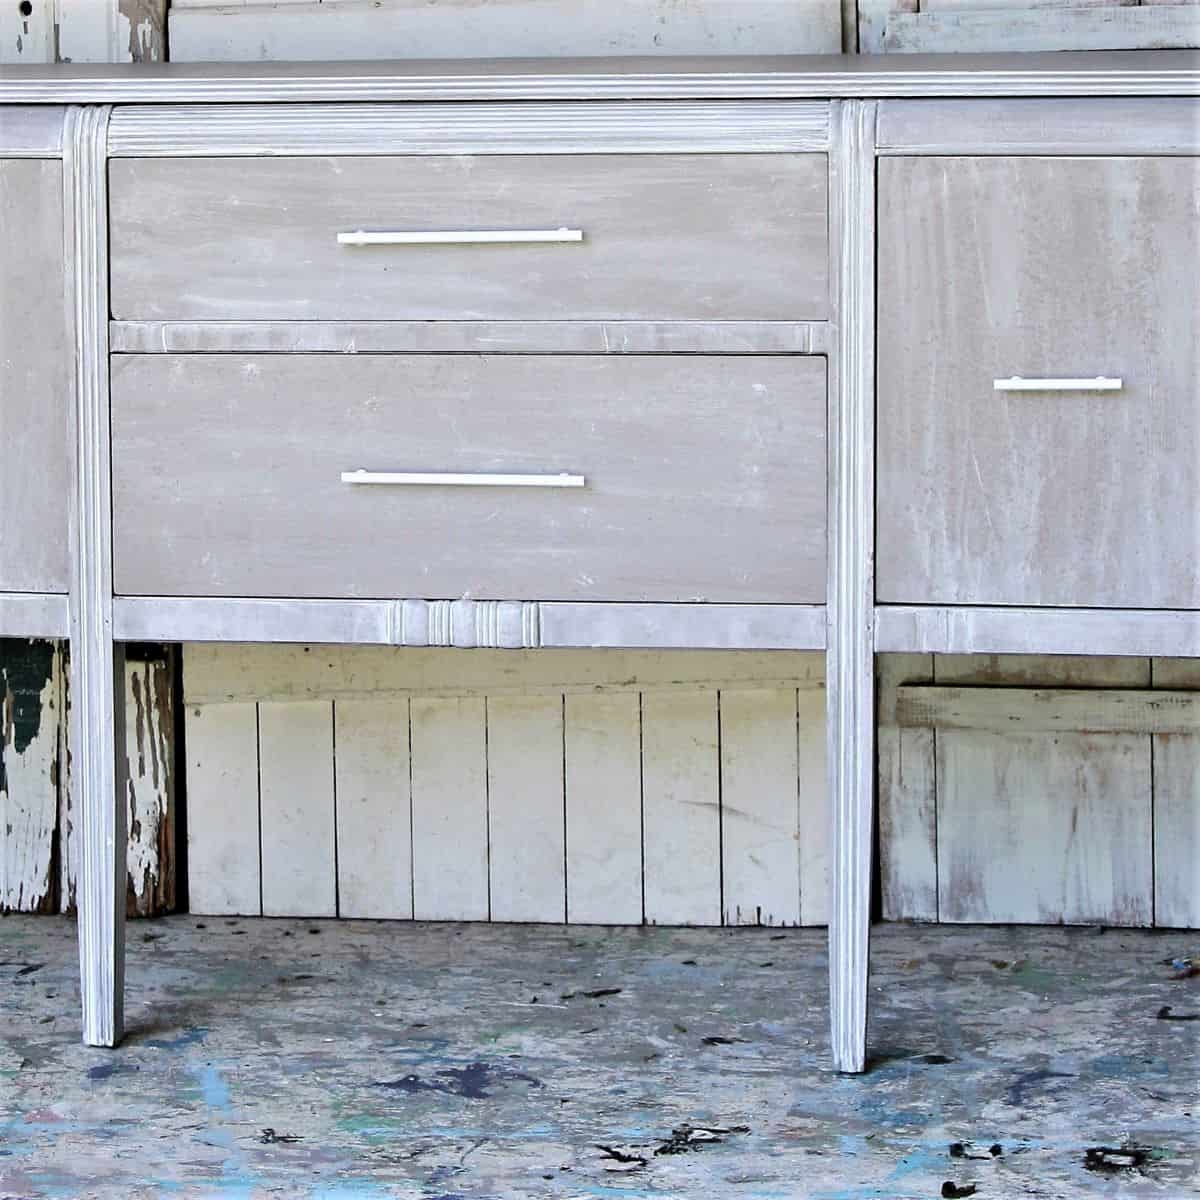
When you distress wood that’s been painted you usually distress along the edges of drawers and the casing of the furniture, so select a piece of furniture with a lot of raised details.

I bought this chest at my favorite junk shop. I believe it was $30. Just looking at the chest makes me think it belongs in a nursery. Perfect size and low enough to use as a diaper changing station. Those raised edges on the drawers are perfect for the distressing technique.
Prep The Furniture For Painting
Painting furniture doesn’t take long it’s the prep work that takes the biggest amount of time. The first thing to do before painting is remove the drawers and the furniture pulls or knobs. I couldn’t get the drawers out. I’ve never had this problem before.

The JTS and I pulled and pulled on them every way we could think of but they wouldn’t come out. We were going to remove the back but look at that. The chest was solid wood and well made. Well, I will just paint with the drawers in place.
Prime The Furniture

My favorite primer is Glidden Gripper, and I always have it tinted Gray because gray works well under any paint color. I do not like using a white primer under red black or any other color.
It is too hard to cover. White primer doesn’t make sense in those instances but it would have been okay for this project since the latex paint is white. I only applied one coat of primer.

After priming, I painted the chest with white latex paint I had on hand. The first coat of paint covered really well but I always apply two coats just in case I missed a spot somewhere.
After the paint had dried, I started distressing it. I was distressing the drawers when I noticed something interesting. Take a look at the before photo above.
The drawer in the middle has divided panels. Now, we all know that drawer should go in the top slot. I pulled the middle drawer, and it came out easily. ????

The chest has these plastic flaps on each end of the drawer slots. That’s why we couldn’t get the drawers out. I called the JTS and he helped me get the other drawers out.
We did have to wiggle and pull sideways and tug and work and work on them for a bit but they eventually came out. I was scared we were going to pull the drawer apart.

It was much easier to do this furniture makeover once we got the drawers out. I used 100-grit sandpaper to sand the layer of white paint by hand.
Distressing the paint by hand takes a little longer, but I have more control than with an electric sander. I like to tear a small piece of sandpaper and fold it at least double. It is easier to handle that way.
Sandpaper comes in various grit sizes from 60 grit up to 7000. I personally have never used anything above 220. Sixty grit is the coarsest, and sometimes, if the paint really adheres to the wood, I will use 60 or 80 grit, but very seldom. One hundred or one hundred fifty are my go-to grit sizes for most projects.
Next, I run the sandpaper over all the edges of the furniture where it would naturally wear. The amount of pressure you apply while sanding will depend on the type of paint and how long the paint has been cured.
Usually, chalk paint is harder to remove than latex paint, but some latex paints are so well made that it takes a while to sand the paint from the furniture. I sanded right through the paint and the primer on this project. When sanding the paint, you can remove a lot or a little, depending on your preference.
After sanding, the wood under the paint may look light or raw. I sometimes run a little dark wax over the raw wood on a rag to darken it. In this case, the wood didn’t look too light so I left it as is. Applying a sealer over distressed furniture is unnecessary, but you can if you like.

Update The Hardware
The drawer pulls needed a fresh look so I spray painted them with RustOleum Spray Paint in Heirloom White (one of my favs). The color is off-white but looks white until you put it up against something that is really white.

Distress The Painted Drawer Pulls
A little distressing for the hardware too. This part takes just a few seconds per drawer pull. I also sanded the drawer pulls by hand.

Aren’t those rain boots cute. I was standing in line at the local thrift store when I spotted them on a shelf by the cashier. I picked them up and almost put them back. The price was $3.89. Kind of high for the thrift store. But I do get a discount (golden oldie). So I bought them.

Do you think I made the right call to distress the paint? You can use the distressing technique to distress any color of paint! I love black distressed paint too. I would call this a moderate amount of distressing. How do you like it?

I have gone all out before and removed a bunch of paint. Heavily distressed paint isn’t for everyone but this piece is one of my favorites diy projects…..Over-The Top Heavily Distressed White Furniture | Love Or Hate

How To Distress Paint Video Tutorial……
Similar Posts For You….
- Twin Headboard Bench Painted With Dixie Belle Paint | Color Peacock
- Furniture Makeover: One Solution For Stain Bleed Through On Painted Dresser
- Grungy Desk Makeover With Distressed White Paint And Metallic Hardware
As always, thanks for being here, Kathy

If you buy a good quality paint with primer you shouldn’t need to prime the piece. I love Behr and Valspar paints. And go for a matte or satin sheen.
So I have a cream colored piece of furniture and I want a white distressed look. I should get a gray primer and then paint it white? Or go with a white primer since I’m painting it white? And then you think latex paint is best?
Gorgeous. I see you changed the drawers around.
Great job, a real beauty
Perfect amount of distressing! Love it.
Loved this… you did a great job!
Thank you!
Good Morning beautiful DIY……I think its perfect what a differences paint and elbow grease can do for. ….. something…..
I didn’t sand the piece at all.
did you sand the entire piece before or just applied the primer?
I think it looks dark because of a combination of things. The gray primer I used is showing in some of the distressed areas and the photos may have made the distressed areas look darker than they are. In order to make raw distressed wood look dark or stained I sometimes go over it with Howard’s Wax in Walnut.
Hi. This little dresser turned out so cute. I was wondering though, where you distressed it the wood underneath is really dark. Did you first paint the areas you planned to distress black? I love the contrast
Wow! Love this. White is the perfect color and the distressing looks great. If I lived closer I’d come and grab this!
🙂
So pretty!
Wow, what a transformation! You made the right call on going white but I love anything distressed white. 🙂 Thanks for sharing this with us at Merry Monday this week!
So pretty! Distressed white is probably my all time favorite for furniture!
I think you made the perfect call. That little dresser painted white is perfect. I agree with you that it would be so cute in a nursery.
I have a chest of drawers that could do with with distressed white. I’m not brave enough to tackle it by myself though.
The white is stunning on this piece! And so funny about the drawers being switched- looks like the hardware was too! Glad you got it straightened out. haha
I totally think you made the right call on painting it white – so pretty! Oh, and far more balanced with the drawers in the right slots – too funny. I could see this as a nursery change table or coffee bar. Pinned
You definitely made the right call with the white paint! I especially like the painted hardware. Perfect.
Hi Lisa! The HomeRight Finish Max is my favorite paint sprayer. I put an Amazon affiliate link with a photo of the Finish Max at the bottom of the post above. You can click the photo to check it out. The affiliate link means if you purchase the paint sprayer I get a commission (very small) for the sale. The price is the same regardless.I use the Amazon affilitate links to help readers who don’t have the products available where they live. The bit of sales commission helps me with website/blog upkeep and expenses. Hope this helps. Thanks
HI Kathy,
Could you please tell me the name of your favorite paint sprayer? With springs arrival, I have some painting projects in mind…
Thank You
Perfection!
Love distressed white painted furniture…..looks great:)
Completely agree white was the perfect choice, it’s a lovely chest now. And the boots- Cute!
Very attractive now!
Why did you use the Glidden Gripper Primer? I use chalk paint and milk paint all of the time and have never used a primer. Just curios.
Same here Pam. We tried everything you said and couldn’t see the problem. Just accidentally when I pulled the middle drawer it came out. On one side the little do-hickey was missing. I guess that helped.
Love the dresser and the white is perfect!!
You are so clever! I love this chest of drawers. I have had the same problem with getting drawers out and also learned to feel around them, underneath, along the sides, and behind them to see if someone has come up with a “clever” idea to keep them from opening too far. I’ve never seen this one before though!!
Looks really great. I love it!
Oh yes, the white looks soooooooooo much better. I like the painted hardware too.
Looks lovely! Now I think I will go and find something to paint:) Thanks for the inspiration…
You certainly made the right choice, at least I think so!! So pretty.
Love the boots and the dresser is gorgeous! TFS!
A perfect paint choice and beautiful results!
Totally agree….Perfect! Thank you!!
The white is a great choice! Absolutely perfect.
Looks great!
The white is perfect!
Looks fantastic!
Love it! This piece has inspired me to do some painting!
Okay, that is perfect!